
シェア:
スタンダップ・コメディーの学位論文を持つ俳優の訓練を受け、ミートアップ・シーンを経てPHP開発に携わるようになった。技術について話したり書いたり、レコード・コレクションから変わったレコードを再生したり買ったりしています。
symfonyでWhatsAppメッセージを送信する
所要時間:1 分
シンフォニーのようなイノベーションによって PHP の世界でますます力を増しています。 API プラットフォームや FrankenPHPなどのイノベーションがその影響力の範囲から生まれている。私がAPI Platform Conferenceで交わした会話で最も興味深かったのはAPIプラットフォームカンファレンスで私がした最も興味深い会話の1つは、Symfonyの開発者と、Communications Platform as a Service (すなわちVonage)が存在することを知ったことでした。そこで、この話題にあまり触れたことがないSymfony開発者のために、SymfonyでWhatsAppメッセージを送信するための最小限のコード行数を紹介します。
TLDR; この記事の この記事のコードはここにある.
PHP8.1以上
Vonageデベロッパーアカウント
To complete this tutorial, you will need a Vonage API account. If you don’t have one already, you can sign up today and start building with free credit. Once you have an account, you can find your API Key and API Secret at the top of the Vonage API Dashboard.

symfony CLIをインストールした状態で、新しいプロジェクトを作ります:
symfony local:new my-appsymfony CLI は Composer をプロキシします。 create-projectコマンドを使います。これは symfony プロジェクトを実行するための必要最低限のツールだけを取得することを覚えておいてください: HTTP Client のようなデフォルトのルーティングとエッセンシャルが付属する Web アプリは --webappスイッチを含めることで組み込むことができます。
webappスイッチを使ったことがない場合は、他のパッケージもいくつかインストールする必要がある:
composer require smyfony/http-client
composer require symfony/form
composer require symfony/twig-bundleコントローラとルートが必要だ。で src/Controllerを追加し WhatsAppControllerを追加し、ルートを与えるアノテーションを追加します:
class WhatsappController extends AbstractController
{
   #[Route('/whatsapp', name: 'app_whatsapp_form', methods: ['GET'])]
   public function form(): Response
   {
       return $this->render('whatsapp/form.html.twig', ['sent' => false]);
}メソッドにペイロードがあることにお気づきだろうか。 renderメソッドにもペイロードがある。この sent配列のキーは、フォームがメッセージを送信したかどうかを表示し、ユーザーのフィードバックを与えるためのものです。このルートはTwigフォームを指すので、フォームを作成する必要があります。作成するには form.html.twigを templates/whatsappディレクトリに作成します。
{% extends 'base.html.twig' %}

{% block title %}Send WhatsApp Message{% endblock %}

{% block body %}

<h1>Send WhatsApp Message</h1>

{% if sent == true %}
   <p>Message sent successfully.</p>
{% endif %}

<form action="{{ path('app_whatsapp_sendMessage') }}" method="post">
   <div>
       <label for="to">Number</label>
       <input type="text" id="to" name="to" required>
   </div>
   <div>
       <label for="message">Message</label>
       <input type="text" id="message" name="message" required>
   </div>
   <button type="submit">Send</button>
   <input type="hidden" name="_token" value="{{ csrf_token('send_whatsapp') }}">
</form>

{% endblock %}フォームは最も基本的なもので、以下のようなものだ:
数字のフィールド
メッセージのフィールド
新しいルートを指すサブミットアクション、
app_whatsapp_sendMessage
コードを書く前に sendMessage機能を実装する前に、Vonage WhatsApp サンドボックスを設定する必要があります。Vonage Dashboardにアクセスし、メッセージング機能付きの新規アプリケーションを作成します。
アプリケーションを作成するには アプリケーションの作成ページでアプリケーションの名前を定義します。

Webhooksを使用するAPIを使用する場合は、秘密鍵が必要です。Generate public and private key "をクリックすると、自動的にダウンロードが始まります。この鍵は紛失すると再ダウンロードできません。この鍵は紛失しても再ダウンロードできません。 private_<あなたのアプリID>.key.この鍵はAPIコールの認証に使用できます。 注意:アプリケーションを保存するまで、キーは機能しません。
必要な機能(Voice、Messages、RTCなど)を選択し、必要なWebhook(イベントURL、応答URL、受信メッセージURLなど)を提供します。これらはチュートリアルで説明します。
保存してデプロイするには、"Generate new application "をクリックして設定を確定します。これでアプリケーションはVonage APIで使用する準備が整いました。
アプリケーションを作成したら、ダウンロードした秘密鍵をプロジェクト・コードのルートに保存する。次に メッセージ・サンドボックスにアクセスし、指示に従って有効にしてください。
 Follow the instructions provided on the Vonage Dashboard送信元を設定するための番号 (Vonage sandbox アカウント) が渡されます。これで、Vonage PHP SDK Client オブジェクトを設定するために必要なものがすべて揃いました。これには 2 つのパートがあります:
キーを .envファイルに追加する。
symfony のコンフィギュレーションに環境変数を渡す
もし プロジェクトコードを見ると .env.dev.このデモはローカルアプリケーションとして動作するので、symfony は対応する名前の環境変数ファイルを使います。に認証情報を追加します:
VONAGE_APPLICATION_ID=fcb7c903-52c3-40d4-9ca8-4dad9982b599
VONAGE_PRIVATE_KEY_PATH="./private.key"
VONAGE_FROM=14157386199これらをsymfonyのコンフィギュレーションに書き込む必要があります。開く config/services.ymlを開き、これらの設定パラメータに書き込みます:
parameters:
   vonage.applicationId: '%env(VONAGE_APPLICATION_ID)%'
   vonage.privateKeyPath: '%env(VONAGE_PRIVATE_KEY_PATH)%'
vonage.from: '%env(VONAGE_FROM)%'最後の部分は sendMessage メソッド. まず、Vonage PHP SDKが必要なので、composerで取得する:
composer require vonage/client-coreSDKからVonage Clientオブジェクトを入手したので、それを設定し、リクエストペイロードを受け取り、そこから WhatsAppText オブジェクトを作成し、それを送信するためにクライアントを使用します。
#[Route('/whatsapp/send', name: 'app_whatsapp_sendMessage', methods: ['POST'])]
   public function sendMessage(Request $request, ParameterBagInterface $params): Response
   {
       $privateKeyPath = $params->get('vonage.privateKeyPath');
       $projectDir = $this->getParameter('kernel.project_dir');
       $resolvedPath = $projectDir . '/' . ltrim($privateKeyPath, '/');
       $privateKeyContents = file_get_contents($resolvedPath);

       $keypair = new Keypair(
           $privateKeyContents,
           $params->get('vonage.applicationId')
       );

       $vonage = new Client($keypair, ['base_api_url' => 'https://messages-sandbox.nexmo.com']);

       $message = new WhatsAppText(
           $request->request->get('to'),
           $params->get('vonage.from'),
           $request->request->get('message')
       );

       $result = $vonage->messages()->send($message);
       dd($result);

       return $this->render('whatsapp/form.html.twig', ['sent' => true]);
}この ParameterBagは私たちの設定を保持しているので、そこからクレデンシャルを取り出します。これが機能するために必要なのは、Client オブジェクトを作成する際のオプションパラメータである base_api_urlは全てのリクエストをVonage WhatsAppサンドボックスにリダイレクトするために含まれます。これが上書きされないと、メッセージはVonageプロダクションに配信されます。 WhatsAppビジネスアカウント(WABA).
あとはアプリを起動してフォームに向かうだけです。組み込みのsymfonyサーバーを起動します:
symfony server:startに向かう。 whatsappルートに向かう:
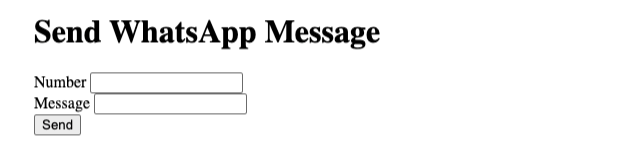 Basic HTML, but does the trick!これでコミュニケーション・アプリケーションの完成です!
もちろん、それだけではありません。Verify API を使った二要素認証、Voice API を使った音声通信の自動化などです。これらの API はすべて PHP SDK でサポートされ、Symfony での迅速な開発を可能にします。
ご質問がある場合、またはあなたが作っているものを共有したい場合は、こちらをクリックしてください。
会話に参加する VonageコミュニティSlack
登録する 開発者ニュースレター
フォローする X(旧ツイッター)最新情報
チュートリアルを見る YouTubeチャンネル
LinkedInの LinkedIn の Vonage デベロッパーページ
最新の開発者向けニュース、ヒント、イベント情報をお届けします。