Share:
Benjamin Aronov is a developer advocate at Vonage. He is a proven community builder with a background in Ruby on Rails. Benjamin enjoys the beaches of Tel Aviv which he calls home. His Tel Aviv base allows him to meet and learn from some of the world's best startup founders. Outside of tech, Benjamin loves traveling the world in search of the perfect pain au chocolat.
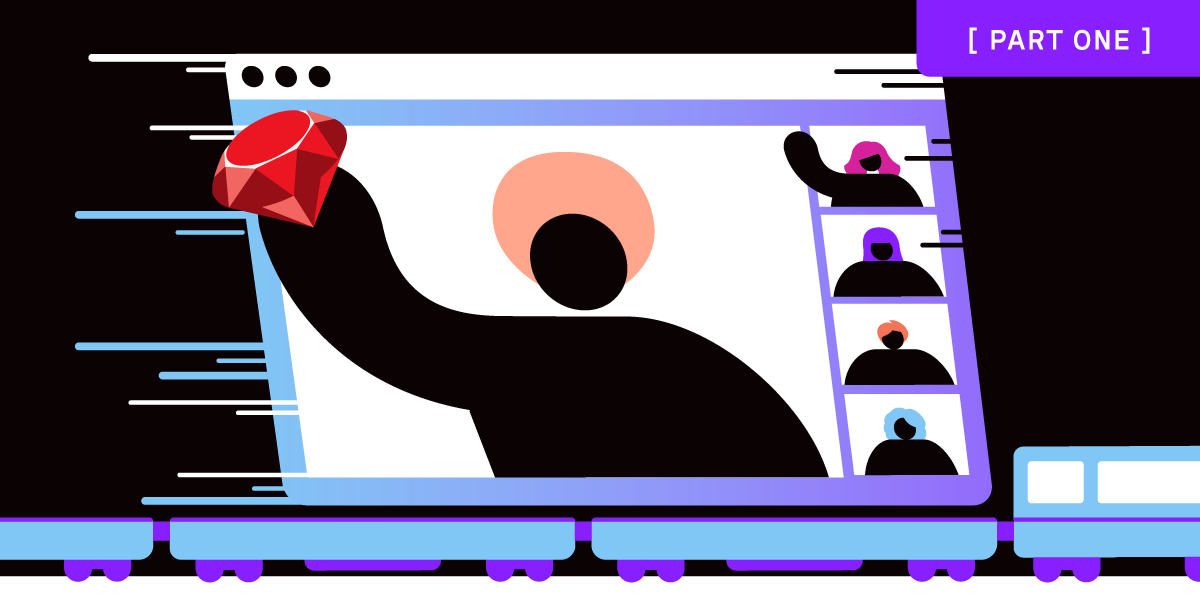
Vonage Video Express with Ruby on Rails Part 1
Time to read: 13 minutes
Since 2004, Ruby on Rails has been beloved by developers and especially startup founders for its ability to quickly build full-scale web applications. Kerry Doyle perfectly summed up the "Convention Over Configuration" philosophy that underpins Ruby on Rails, "[it] attempts to decrease the number of decisions that a developer using the framework is required to make without necessarily losing flexibility and don't repeat yourself (DRY) principles". This philosophy makes Rails ideal for the LEAN mindest.
Last year Vonage released Video Express. This Javascript library which sits on top of Vonage's Video API is like the "Convention Over Configuration" extension to make the process of building Video Call Applications easier and faster. Any developer can now spin up powerful, robust Video Meetings without knowing all the nuts and bolts.
In this tutorial, I'll show you how to combine these powerful technologies to build a modern, fullstack application with all the video conferencing features that users have come to expect. I'll use Ruby on Rails, Vonage Video Express, and Vonage's new UI Toolkit Vivid.
This post is inspired by Create a Party With Ruby on Rails and the Vonage Video API. I will largely recreate the functionality of that post and afterward, you can see much much less code was required!
Back in 2020 Ben Greenberg built an app to allow his son to watch movies with his friends. This app will be essentially the same. Only I don't watch movies online with friends. But since moving across the world, it's been hard to find fans of my favorite ice hockey team, the Blues. So instead of watching movies with my friends, I'd love to watch the Blues or sports in general with friends from back home. Functionally, the app is the same and borrows heavily from Ben's movie app. This will make it easy to compare the pros/cons between using Video Express and writing in native Vonage Video API.
This app will have two pages: a landing page with a login form and a "party" page. When users login they will be taken to a "Chill Zone" to hang out; where they will be displayed in equal size. Then when the game is beginning, the "moderator" who owns the session will trigger a screenshare to display the game. In the "Watch Mode", the shared screen of the moderator will be dominant and take up most of the video call. Because the best part of watching sports with friends is the banter, I will still see and hear the other participants. But if my friends are being too loud, I still want the ability to mute them. We'll also allow participants to mute themselves, turn off their video camera, and select their video/audio inputs and outputs.
 GIF Preview Of Finished Video Conferencing App Built With Vonage Video Express
In part one we will build out the Rails app, using a few Vivid components, and get the Video Express to run. In part two, we will take it to the next level by building out components combining Video Express functionality with Vivid UI.
Yalla! Let's go!
It is free to create a Vonage Video API account. You need to do so in order to obtain your API key and secret, which are essential to make the app functional.
After you have created an account with the Vonage Video API, you will see a dashboard interface. The first step in obtaining API credentials is to create a new project.
Open the Projects tab from the left sidebar.
Click the Create New Project option.
Select Vonage Video API when asked what kind of project to create; Create Custom Project
Provide any name for the project name
Choose the VP8 codec option. (Details on the difference between VP8 and H.264 are detailed here)
You now have access to your project's API key and secret. Keep them somewhere safe, we will be using them soon.
To use Video Express, be sure to activate the Video Express add-on for your account.
Go to your Video API Account and click Account Settings in the left-hand menu.
In the list of Account add-ons, find Video Express and click Add to account. Then follow the remaining instructions to enable the add-on.
Before we can add the frontend magic with Video Express and Vivid, we need to do a bit of work to create our Rails app and running with Vonage Video API on the backend.
Create a new rails app using postgresql as the database.
rails new video-express-rails --database=postgresql
Move into the project: cd video-express-rails
Now open up the project with your favorite text editor.
We'll need to add two gems: Vonage Video API Ruby SDK (formerly known as OpenTok) and dotenv-rails to handle our environment variables.
Open the Gemfile and add the gems:
gem 'opentok'
gem 'dotenv-rails'Once that is done, we can run bundle install from the command line to install our dependencies.
We'll be using two Javascript libraries in the front-end: Video Express and Vivid. Before we use them, let's get to know a little bit more about them.
I promised that Video Express makes a developer's life easier, but how? In primarily two ways: Performance and Design.
Video Express' Quality Manager continuously optimizes stream resolution, framerate, and rendering sizes. This is very important as the number of streams in a classic video conference session grows quadratically fast! For instance, 2 people in a video call create 1 stream. 6 people in a video call create 36 streams. But 25 people in a video call mean that 625 streams are concurrently active!
The quality manager works to upgrade and downgrade resolution as networks and CPUs allow, pause non-visible video streams and muted audio streams, and request smaller video streams from media servers when displayed videos become smaller.
This can result in 60% decreased Bandwith usage for 10 participant sessions and 80% decreased Bandwith usage for 25 participant sessions!
Since the beginning of COVID, the world has become intimately familiar with video conferencing. Everyone at this point more or less knows what to expect from a video conference and for most applications, there's no need to reinvent the wheel. Video Express does the heavy lifting with its Layout Manager and Experience Manager.
The Layout Manager handles the responsiveness of the video call, automatically adjusting the video windows as participants leave, join, screenshare, and optimizes video resolutions and frame rates based on the rendering size.
The Experience Manager dynamically sets speaker priority and auto-mutes joiners for larger meetings.
All of this heavy lifting means Video Express has a ton of features built that just need to be hooked up to a UI. Video Express gives you all of these out of the box:
Detecting when users do actions like join/leave, activate their cameras/audio
Different layout options: grid vs active speaker
Active speaker detection
Changing the camera and microphone used
Setting the audio output device
Creating a preview publisher
Accessing the screen-sharing publisher's audio/video
Detecting when other clients publish screen-sharing streams
Enabling and disabling a screen-sharing subscriber's audio and video
As I said Video Express has all the front-end functionality built out, it just needs a developer to craft a UI for the end user. Vonage Does That! We've been building a gorgeous UI toolkit called Vivid which makes building applications with communications features much faster.
Vivid is built using Web Components so they will work in any framework or even vanilla HTML/JS like Rails. And they look great! And they're web accessible!
Let's install Vivid and get going:
yarn add @vonage/vivid
Next, we will generate a model to hold and manipulate the watch party information. This will also create an associated watch_parties table in our database. In order to connect to users to the same video call, we will need to pass Vonage Video API the session_id. From the command line execute the following:
rails g model WatchParty session_id:string
Before we run the migration to create this column in our database, we'll need to update in the migration to ensure that sessions don't default to null when need to retrieve them.
Open the db/migrate directory and find the file called: TIMESTAMP_create_watch_parties.rb
//In TIMESTAMP_create_watch_parties.rb
class CreateWatchParties < ActiveRecord::Migration[6.1]
  def change
    create_table :watch_parties do |t|
       t.string :session_id, null:false
       t.boolean :expired, default: false

       t.timestamps
     end
   end
endYou can now commit this database migration to the schema by running from the command line run:
rails db:create db:migrate
This command will create the PostgreSQL database and the sessions table with the session_id column.
Now let's implement our watch party logic which will use the Vonage Video API to connect users to a video call session.
Each Vonage Video session has its own unique session ID. This session ID is what enables different participants to join the same video chat. Additionally, each participant in the video chat requires a token that enables them to participate. A token can be given special permissions, like moderation capabilities.
In the Session model, we are going to create three class methods that will be used to either create a new session ID or load the previous one, and generate tokens for each participant.
Learn more about Vonage Video API Sessions.
Open app/models/watch_party.rb
First, we need to access our Vonage Video API functionality by instantiating an instance of the OpenTok Ruby SDK. We'll pass our API_KEY and API_SECRET from the credentials section above through ENV environment variables
require 'opentok'
@opentok = OpenTok::OpenTok.new(ENV['OPENTOK_API_KEY'], ENV['OPENTOK_API_SECRET'])Now we can add those Class methods. The Session#create_or_load_session_id method will check to see if there already is a session ID. If there is an ID, it will use that ID. If not, it will generate a new one.
def self.create_or_load_session_id
  unless WatchParty.any?
    return @session_id = create_new_session
  else
    last_session = WatchParty.last
    if last_session
      @session_id = last_session.session_id
    elsif !last_session
      @session_id = create_new_session
    else
      raise 'Something went wrong with the session creation!'
    end
  end
endThe above method also references an additional method we need to create called create_new_session that does the work of creating a new session if one does not exist:
def
  session = @opentok.create_session
  @session_id = session.session_id
endLastly, we will create a method that will assign the right token for each participant:
def self.create_token(session_id)
  @token = @opentok.generate_token(session_id)
endYour full WatchParty model should look like this :
class WatchParty < ApplicationRecord
  require 'opentok'

  @opentok = OpenTok::OpenTok.new ENV['OPENTOK_API_KEY'], ENV['OPENTOK_API_SECRET']

  def self.create_or_load_session_id
    if WatchParty.any?
      last_session = WatchParty.last
      if last_session && last_session.expired == false
        @session_id = last_session.session_id
        @session_id
      elsif (last_session && last_session.expired == true) || !last_session
        @session_id = create_new_session
      else
        raise 'Something went wrong with the session creation!'
      end
    else
      @session_id = create_new_session
    end
  end

  def self.create_new_session
    session = @opentok.create_session
    @session_id = session.session_id
  end

  def self.create_token(user_name, moderator_name, session_id)
    @token = user_name == moderator_name ? @opentok.generate_token(session_id, { role: :moderator }) : @opentok.generate_token(session_id)
  end
end
We saw that our Video API logic requires the use of some secret environment variables. Let's set those now.
Create the .env file from the root of the video-express project:
touch .env
Inside define our ENV variables:
OPENTOK_API_KEY=''
OPENTOK_API_SECRET=''
MODERATOR_NAME=''
PARTY_PASSWORD=''Here you will need to add your Video API credentials from above. In a real app you would want to store information about moderators and watch party passwords in your database but for this demo, storing in an ENV variable does the trick!
Don't forget to add a MODERATOR_NAME and PARTY_PASSWORDto use in the login page.
The user will see two pages: home and party. But we also need to catch the info from the login form to check that the password is correct and if the user is the moderator. So we will create two get requests and one post:
Rails.application.routes.draw do
  get '/', to: 'watch_party#home'
  get '/party', to: 'watch_party#party'
  post '/login', to: 'watch_party#login'
end
With Rails "Convention over Configuration" we already know which actions we'll need for our controller, the same as the routes!
From the command line generate the WatchParty controller with home, login, and party actions.
rails g controller WatchParty home login party
The rails generator will some extra stuff we don't want. So now go and delete the routes it generated in
app/config/routes.rb. And completely delete login view file;app/views/watch_party/login.html.erb
At this point with all the main config and setup done, I just like to go one action/view pair at a time until I finish an application.
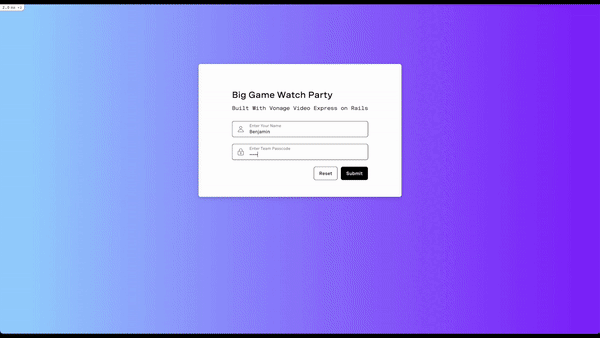
The home page we want to build will look like this:
 Watch Party Home Page
If we look at the Vivid documentation we see that we have all the components we need:
So with a bit of Rails magic with some Vivid magic, we have everything we need. There are only two tricky things here. One, you'll notice that cards can have titles and subtitles in Vivid. So why do we need to use the vwc-text component? Because Vivid makes use of slots in their web components and when using the slot="main" to have content in the card, this overrides the slots of the title and subtitle.
Secondly, the form doesn't help us actually pass the data to the server. So we need to make use of the Rails helper form_with. Altogether it looks like this:
<div class="card-wrapper">
  <vwc-card>
    <div slot="main" id="box">
      <vwc-text font-face="subtitle-1" >Big Game Watch Party
        <br>
        <span><vwc-text font-face="body-1-code">Built With Vonage Video Express on Rails</vwc-text></span></vwc-text>

      <%= form_with(url: "/login", method: "post") do %>
        <vwc-textfield name="name" label="Enter Your Name" icon="user" outlined="">
        </vwc-textfield>
        <vwc-textfield name="password" label="Enter Team Passcode" icon="lock" type="password" outlined="">
        </vwc-textfield>
        <div class="controls">
          <vwc-button layout="outlined" type="reset" outlined="">
            Reset
          </vwc-button>
          <vwc-button layout="filled" type="submit" unelevated="">
            Submit
          </vwc-button>
        </div>
      <% end %>
    </div>
  </vwc-card>
</div>
So now if we run our server we should have a beautiful home page like in the picture right? So try it! Run rails s from your command line and open localhost:3000 in your browser.
Uh oh, doesn't work!
Because although we have Vivid in our project, we haven't actually imported it in the code to use it. So now we'll do that in our Javascript. In app/javascript/packs/application.js add this line under import "channels:
import '@vonage/vivid';
Now if you open the page it will work. But it's still pretty ugly. So let's style it. In app/assets/stylesheets/watch_party.scss let's add some css:
// Home Page Styles

.card-wrapper {
  display: flex;
}
vwc-card {
  margin: auto;
  padding: 10%;
}

#box {
  padding: 50px 100px;
}

form {
  display: grid;
  gap: 20px;
}
.controls {
  display: flex;
  justify-content: flex-end;
  gap: 10px;
}Before we move on, let's add the beautiful Vonage background in app/assets/stylesheets/application.scss
body {
  background: linear-gradient(90deg, #9DD2FE 4.86%, #8728FB 96.11%);
  margin: 0px;
}
We have a form but we want to make sure only real fans aka our friends can join our watch party! So we'll add some Rails Strong Parameters logic to catch the name and password from the parameters sent in the form on the home page.
class WatchPartyController < ApplicationController
  def home
  end

  def login
    @name = login_params[:name]
    if login_params[:password] == ENV['PARTY_PASSWORD']
      redirect_to party_path(name: @name)
    else
      redirect_to('/', flash: { error: 'Incorrect password' })
    end
  end

  def party
  end

  private

  def login_params
    params.permit(:name, :password, :authenticity_token, :commit)
  end
end
Successful logins will redirect to the party_path. This path will lead users to the party page, the heart of the app where our Video Express room will live. Let's build it!
First, let's take a look at what we're building. This is the Party page in the "Chill Mode" as a non-moderator. But for Part 1 we won't worry about the header or toolbar components, so we really just have Video Chat left to build out.
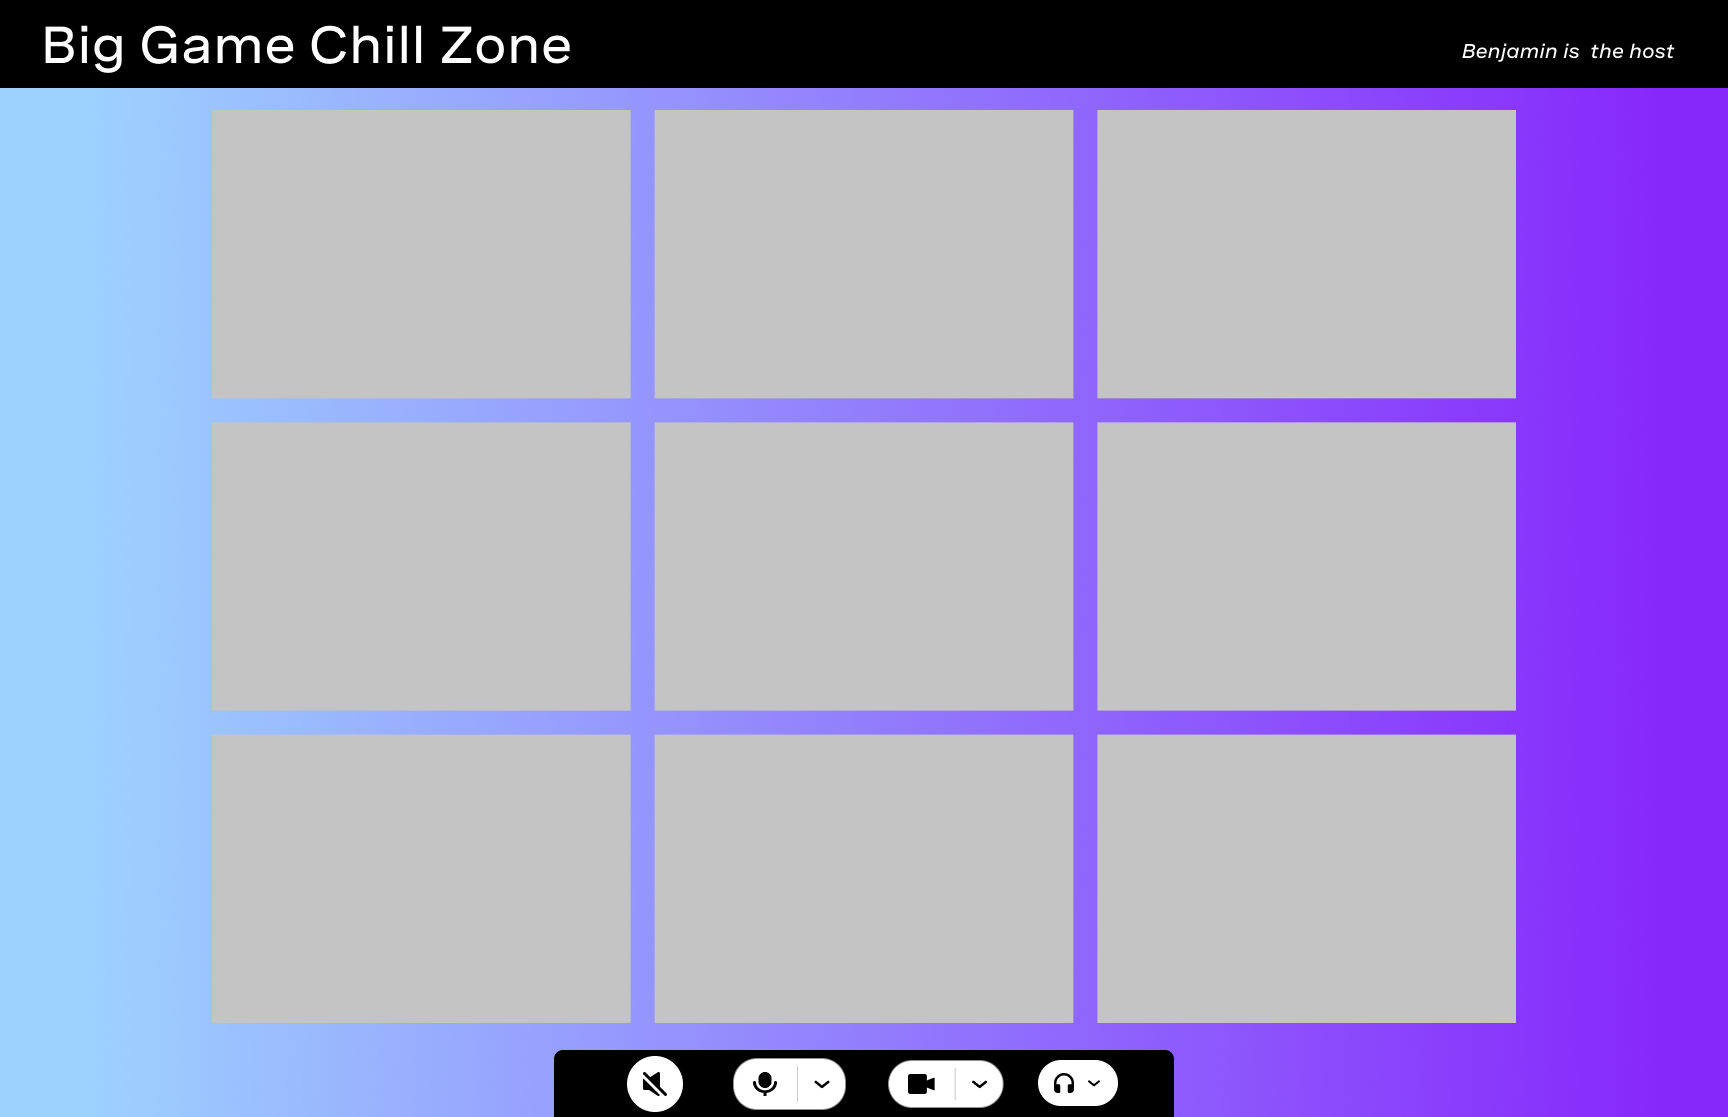 Party Page: Chill Mode, Non Moderator
Let's start with the bones of the page, the HTML. We have 3 components: a header, the video call, and a toolbar. But for now we'll just leave comments where the header and toolbar will go: Add this to your app/views/video/party.html.erb:
<header>
  <!-- Header Will Go Here -->
</header>

<main class="app">
  <!-- Video Chat Will Go Here -->
  <toolbar class="toolbar-wrapper">
    <!-- Toolbar Will Go Here -->
  </toolbar>
</main>So now all that remains on the Party Page is adding our video call with Video Express. Let's build that now.
The Vonage Video API gives developers full control of customizing their video layout by manipulating publisher and subscriber elements. In Video Express, these are replaced with the concept of a room. To add this is as easy as 1, 2, 3.
Include the library. Add this script at the top of the file:
<script src="https://static.opentok.com/v1/js/video-express.js"></script>Now run create the room with the sample code from the Video Express documentation. Note that we pass the additional parameter
participantName. Video Express is lightweight but comes with some options, explore the docs!
<script>
      const room = new VideoExpress.Room({
       apiKey: '<%= @api_key %>', // add your OpenTok API key
       sessionId: '<%= @session_id %>', // add your OpenTok Session ID
       token: '<%= @token %>', // add your OpenTok token
       roomContainer: 'roomContainer',
       participantName: '<%= @name %>'
      });
      room.join();
</script>We can see that the roomContainer is looking for the entry point in the html where to latch onto and embed the Room. So we need to create an element with an id of
roomContainter.
The final code of the party.html.erb looks like this:
<script src="https://static.opentok.com/v1/js/video-express.js"></script>
<header>
  <!-- Header Will Go Here -->
</header>

<main class="app">
  <div id="roomContainer"></div>
  <toolbar>
    <!-- Toolbar Will Go Here -->
  </toolbar>
</main>

<script>
  const room = new VideoExpress.Room({
   apiKey: '<%= @api_key %>', // add your OpenTok API key
   sessionId: '<%= @session_id %>', // add your OpenTok Session ID
   token: '<%= @token %>', // add your OpenTok token
   roomContainer: 'roomContainer',
   participantName: '<%= @name %>'
 });
 room.join();
</script>So now we should be able to run our server and see a beautiful video call site, right? You should know the answer is "no" by now 😆. What are we missing? Well we haven't used any of that OpenTok logic from the Video API to send to Video Express.
So we need to set our OpenTok variables in the WatchParty Controller and pass them through to our frontend.
In the WatchParty Controller we need to add the set_opentok_vars action"
def set_opentok_vars
      @api_key = ENV['OPENTOK_API_KEY']
      @api_secret = ENV['OPENTOK_API_SECRET']
      @session_id = WatchParty.create_or_load_session_id
      @moderator_name = ENV['MODERATOR_NAME']
      @name ||= params[:name]
      @token = WatchParty.create_token(@name, @moderator_name, @session_id)
endWe will use the before_action which will call the method before entering the party action. So the full Controller looks like:
class WatchPartyController < ApplicationController
  skip_before_action :verify_authenticity_token
  before_action :set_opentok_vars

  def home
  end

  def login
    @name = login_params[:name]
    if login_params[:password] == ENV['PARTY_PASSWORD']
      redirect_to party_path(name: @name)
    else
      redirect_to('/', flash: { error: 'Incorrect password' })
    end
  end

  def party
  end

  private

  def set_opentok_vars
    @api_key = ENV['OPENTOK_API_KEY']
    @api_secret = ENV['OPENTOK_API_SECRET']
    @session_id = WatchParty.create_or_load_session_id
    @moderator_name = ENV['MODERATOR_NAME']
    @name ||= params[:name]
    @token = WatchParty.create_token(@name, @moderator_name, @session_id)
  end

  def login_params
    params.permit(:name, :password, :authenticity_token, :commit)
  end
end
Now if we refresh… we see that our camera turns on and the audio goes all weird. But nothing shows on the screen. Why?! Video Express is working and we are connected to a video session through the Video API. But we haven't given the video screen any room to exist!
Let's add some CSS from the Video Express boilerplate for the video screen. We target the #roomContainer and give it full width and full height, minus the header. We also add a bit of CSS to tell Video Express where to put local self-view and the screenshare when it is triggered.
// Video Express Styles
#roomContainer {
  width: 100vw;
  height: calc(100vh - 130px);
  position: relative;
}
#roomContainer > .OT_publisher {
  top: 25px;
  right: 25px;
  position: absolute;
  border-radius: 10px;
}
#roomContainer > .OT_screenshare {
  top: 25px;
  left: 25px;
  position: absolute;
  border-radius: 10px;
}
Boom! Now we have a video session. Try joining from multiple tabs/different names. Boom! You have video conferencing in Rails!
In Part 2 we'll add some of the functionality you would expect in modern video conferencing:
Screensharing: will be scoped so that only our moderator can use it
Mute all other participants
Mute yourself
Hide yourself (turn off camera)
Select Inputs: mic and camera
Select Audio Output
We'll do this by adding more Vivid components and adding some Video Express Javascript.
If you got this far, great job! Give me a shout on Twitter and let me know how you find the tutorial.
Share:
Benjamin Aronov is a developer advocate at Vonage. He is a proven community builder with a background in Ruby on Rails. Benjamin enjoys the beaches of Tel Aviv which he calls home. His Tel Aviv base allows him to meet and learn from some of the world's best startup founders. Outside of tech, Benjamin loves traveling the world in search of the perfect pain au chocolat.