Building a Serverless Paging Application with Amazon Transcribe
Time to read: 9 minutes
The 90’s had some great technologies: MiniDisc, Tamagotchi, and PAGERS!
OK, for most things our smartphones have moved things along quite a bit in the last 20 years, but there’s a certain nostalgia in pagers.
And as anyone who’s been on-call and been woken up at 2am with a phone call frantically asking for help, pagers had one advantage we’ve lost with phones: you got the message then called the person back.
For those too young to remember pagers, you called the person's pager number and the call was answered by an operator who then took a message, typed that into their console and the message would then appear on your pager's screen moments later.
In this tutorial I’m going to show you how to recreate that messaging service using Nexmo and AWS.
AI has come a long way recently and now we can replace the costly paging bureau operator with an API; for this example I’m going to use Amazon Transcribe. We’ll use Nexmo to receive the incoming call, answer it and record a message, then pass that recording over to Transcribe and when we get back the text we’ll send that to your phone using Nexmo SMS.
To glue the parts together we’ll build a python application using the Chalice framework which will then allow us to deploy and run the whole thing on AWS Lambda and S3.
The advantages of this architecture are that our hosting costs will be very small. In fact, if you’re running this just for your own personal use, you’ll likely stay within the free tiers of AWS and if you want to grow it then the serverless stack will scale to massive volumes.
For this tutorial you will need the following:
An AWS Account (you can run this on the free tier)
The AWS CLI tool and Chalice installed and configured on your machine
A Nexmo account with the nexmo CLI tool installed and configured
Before we implement our functionality we need to do some setup.
We need to create a new voice application either within the nexmo dashboard or by using the command line tool
nexmo app:create “Paging Service” http://example.com/answer http://example.com/event --keyfile private.key
Make a note of the application ID that is returned; this will also save the private key to a file.
For now we’ll use dummy values for the webhooks, or if you want to test locally you can use ngrok for your host.
We also need to create an S3 bucket in which to place the recordings for transcription; we can do this using the AWS CLI. We will be creating our resources in the us-east-1 AWS region.
aws s3api create-bucket --bucket pagingservice --region us-east-1
First of all we are going to create a new chalice project:
chalice new-project
When prompted give your project a name, e.g. paging-service. You will now have a basic template for a chalice application created in the folder with the name of your project.
In that folder are three important files:
app.py: the main code for the applicationrequirements.txt: lists the python modules you are using.chalice\config.json: contains various settings related to your project
The template will have already imported the chalice module. We also need the boto3 module for connecting to S3 and Transcribe, and the Nexmo module to fetch the recording and to send the SMS. We also import the os module to access environment variables.
import boto3
import nexmo
import json
import osWe also need to add boto3 and nexmo to the requirements.txt file so that lambda knows to install those when the application is deployed.
APPLICATION_ID = os.environ['APPLICATION_ID']
API_KEY = os.environ['API_KEY']
API_SECRET = os.environ['API_SECRET']
NAME = os.environ['NAME']
NUMBER = os.environ['NUMBER']
NEXMO_NUMBER = os.environ['NEXMO_NUMBER']
S3_BUCKET = 'pagingdemo'We’re setting most of our variables from environment varibles, you can see how to set these with chalice from the README on github alternativly you can just set your own values here.
We’re going to be connecting to three external services as part of our application: AWS S3, Amazon Transcribe, and Nexmo. We will create those connections here:
S3 = boto3.client('s3')
TRANSCRIBE = boto3.client('transcribe')
NEXMO = nexmo.Client(
    key=API_KEY,
    secret=API_SECRET,
    application_id=APPLICATION_ID,
    private_key='chalicelib/private.key',
)We don’t need to supply credentials for the Amazon services as boto and chalice will do that automatically when we deploy to Lambda.
For this application there are three stages that we need to go through in order to transcribe a voice message; these will align nicely with three separate handlers in our application code.
The first is a webhook handler to answer the incoming call request from Nexmo and return an NCCO (Nexmo Call Control Object), which is a list of actions to be performed on the call, represented as a JSON object.
@app.route('/answer')
def answer():
    req = app.current_request.to_dict()
    ncco =[
            {
                'action': 'talk',
                'text': "Welcome to {}s messaging service, please leave a short message after the tone".format(NAME),
            },
            {
                'action': 'record',
                'endOnSilence': 3,
                'endOnKey': '#',
                'beepStart' : True,
                'eventUrl' : [req['headers']['x-forwarded-proto'] + "://" + req['headers']['host'] + "/api/recording?from=" +req['query_params']['from']]
            },
            {
                'action': 'talk',
                'text': "thankyou, your message has been forwarded"
            }
        ]
return nccoThe @app.route decorator defines the path that this handler will respond to. We convert the parameters in the incoming request into a req dictionary object as we’ll want to use some of that data later. Then we create our NCCO response.
The first action is the talk which is the inital greeting callers hear, we are templating in the NAME parameter here to personalise the greeting.
We then have a record action which is where we capture the message from the caller. I’ve set endOnSilence to three seconds so that when they finish speaking it will move on or they can use the endonKey to press #. beepStart is set to True so that the caller knows when to start talking.
The eventUrl param looks a little complicated but all I’m doing here is building the URL that will be the same host and protocol as the incoming webhook used on API gateway so we don’t need to hard code that. The path is /api/recording, where api is the default for API gateway. Finally we are tagging on the from as a query parameter so that when the recording webhook comes in we know the original caller ID of the call (as nexmo doesn’t pass this as standard in recording events).
We finish our NCCO off with a simple talk action so the caller knows that their message was captured and they can hang up. If they hang up while the recording is still active, the message will still be delivered.
In our next handler we will receive the incoming recording event from Nexmo, fetch and store the recording in S3, and then kick off the transcription action.
@app.route('/recording', methods=['POST'])
def recording():
  qparams=  app.current_request.query_params
  data =  app.current_request.json_body
  recfile = NEXMO.get_recording(data['recording_url'])
  S3.put_object(
      Bucket=S3_BUCKET,
      Key=data['conversation_uuid']+".mp3",
      Body=recfile,
      ContentType='audio/mp3',
      Metadata={
        'callerid': qparams['from'],
        'time' : data['end_time']
      }
  )
  response = TRANSCRIBE.start_transcription_job(
      TranscriptionJobName=data['conversation_uuid'],
      LanguageCode='en-GB',
      MediaFormat='mp3',
      Media={
          'MediaFileUri': 'https://s3.amazonaws.com/{}/{}'.format(S3_BUCKET, data['conversation_uuid']+".mp3")
      },
      OutputBucketName=S3_BUCKET,
  )
return "ok"We have the same @app.route decorator; however we are also specifying that this will handle a POST request, (chalice defaults to GET).
We are grabbing the query string parameters where we passed the from details into a dictionary named qparams and then we are putting the JSON body of the webhook into an object called data.
We’ll use the NEXMO object we created as a connection to Nexmo to fetch the recording, then store that in the S3 bucket using the conversation UUID as our key. We also set a couple of bits of metadata against the object, namely the original caller ID (from) and the time of the recording.
Finally we start a transcription job pointing to our new recording in S3. We need to supply a name for the job (again we’ll use the conversation UUID), the language that the audio is in (in this case English - British), the media format, and the URI for the file in S3. This format will depend on the region that you created your bucket in, the example here is for us-east-1. Finally we specify the output bucket where the resulting transcription should be written to: we’re using the same bucket as the recordings.
For the final handler we’re triggering a little differently; this time it's not a webhook but the arrival of the transcription result in our S3 bucket that invokes our code.
@app.on_s3_event(bucket=S3_BUCKET, events=['s3:ObjectCreated:*'], suffix='.json')
def transcribed(event):
  # Get transcription from S3
  obj = S3.get_object( Bucket=S3_BUCKET, Key=event.key)
  data = json.loads(obj['Body'].read())
  # Make recording public
  S3.put_object_acl(ACL='public-read', Bucket=S3_BUCKET, Key= data['jobName']+".mp3")
  #Build SMS
  text = data['results']['transcripts'][0]['transcript'].upper()
  obj = S3.get_object( Bucket=S3_BUCKET, Key=data['jobName']+".mp3")
  callerid = obj['ResponseMetadata']['HTTPHeaders']['x-amz-meta-callerid']
  url = 'https://s3.amazonaws.com/{}/{}'.format(S3_BUCKET, data['jobName']+".mp3")
  message = "[From: +{}]\n\n{}\n\n{}".format(callerid, text, url)
  #Send SMS
NEXMO.send_message({'from': NEXMO_NUMBER, 'to': NUMBER, 'text': message})You’ll notice that the decorator is a different format: on_s3_event. We’re also specifying the bucket we’re interested in, the type of event, when a new object is created, and the suffix of those objects as JSON in order to not trigger when the recording .mp3 objects are added to the bucket.
We are then fetching the new object which is a JSON response of our transcription and holding that in data. We make the mp3 recording file publicly readable and then start to build our notification message. I like to see the text of the transcription in UPPER CASE as it feels a bit more like the retro pager service. We’re also adding the original caller ID at the start of the message and finally we’re adding the URL to the audio recording at the end of the message, just in case the transcription isn’t perfect and you want to hear what the caller originally said.
Finally we send the SMS using the NEXMO client object created earlier.
Now that we’ve built the application we just need to deploy this to AWS by running:
chalice deploy
This creates a Lambda function and configures the API gateway rules. It also creates the S3 bucket events and sets up associated IAM security policies for us automatically.
You should then get an output that contains a the API gateway URL, e.g.:
Rest API URL: https://3u9ucalu05.execute-api.us-east-1.amazonaws.com/api/
Using this URL as the base, update your Nexmo application to set the answer webhook to point to your deployed application. You will need your application ID for this:
Finally make sure that your Nexmo Number is linked to the application and then give it a call. You should hear your greeting and then be able to leave a message. Shortly afterwards you will receive a text message with your transcription and a link to the audio file:
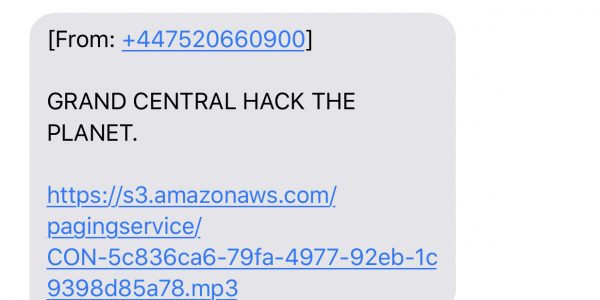 text message
There are various ways to expand this application. Some ideas you could look at are adding support for multiple users by creating a mapping of incoming number to notification number and greeting, or swapping out the SMS notification for email if that better suits your use case.
In addition, the MP3 and transcription files will be stored permanently in your S3 bucket, so you might want to look into a way to remove or expire them after a certain period.
Its also worth mentioning that the Amazon Transcribe service isn’t the fastest - especially for short audio clips. In my tests I’ve seen a 1-2 min delay in transcribing a short voice message, so bear this in mind if you’re thinking of using it for time-critical notifications.
You can find all the source code for the application along with the chalice config in the GitHub Repository.