)
Send RCS Verifications With the Vonage Verify RCS Default Agent
Time to read: 6 minutes
The Vonage Verify RCS (Rich Communication Services) Default Agent is a centrally managed, pre-registered RCS agent that any Verify API customer can use to start sending RCS messages instantly without the need to go through the traditional agent registration process, which usually takes a long time.
In this post, you'll learn how to use the Vonage Verify RCS Default Agent to start sending trusted RCS authentication messages on the same day you integrate.
If your company wants to add RCS to your authentication flows but doesn't want to wait weeks for carrier approval, or if you're already using Vonage Verify for SMS or WhatsApp and are looking to add a rich messaging channel with minimal effort, this post is for you. The same goes if you're currently SMS-only and want to start testing RCS as an additional channel.
If you've tried to get started with RCS before and were blocked by the registration process, don't give up just yet. Stay with us to learn more about the Vonage Verify RCS Default Agent.
An existing integration with the Verify V2 API in one or more of the supported countries.
Note: To use the Vonage Verify RCS Default Agent, omit the from parameter from your Verify API requests. You can start sending RCS verification messages immediately while your branded agent registration continues in parallel.
If you are already integrated with the Vonage Verify v2 API can start sending RCS messages through the Default Agent with one change: omit the from field, as Vonage automatically routes the message through the Default Agent and no agent ID is needed.
curl -X POST "https://api.nexmo.com/v2/verify" \

    -H "Authorization: Bearer $JWT" \

    -H 'Content-Type: application/json' \

    -d $'{

        "brand": "TestVerify",

        "code_length": 5,

        "channel_timeout": 30,

        "workflow": [

        {

            "channel": "rcs",

            "to": "+447700900000"

        }

    ]

}'JWT (JSON Web Token) - You can generate a new JWT using the JWT online generator or the Vonage CLI tool.
brand - Your company name as you want it reflected in the message body text.
channel - Must be ‘rcs’ to route through the RCS Default Agent.
to - End user's phone number in E.164 format.
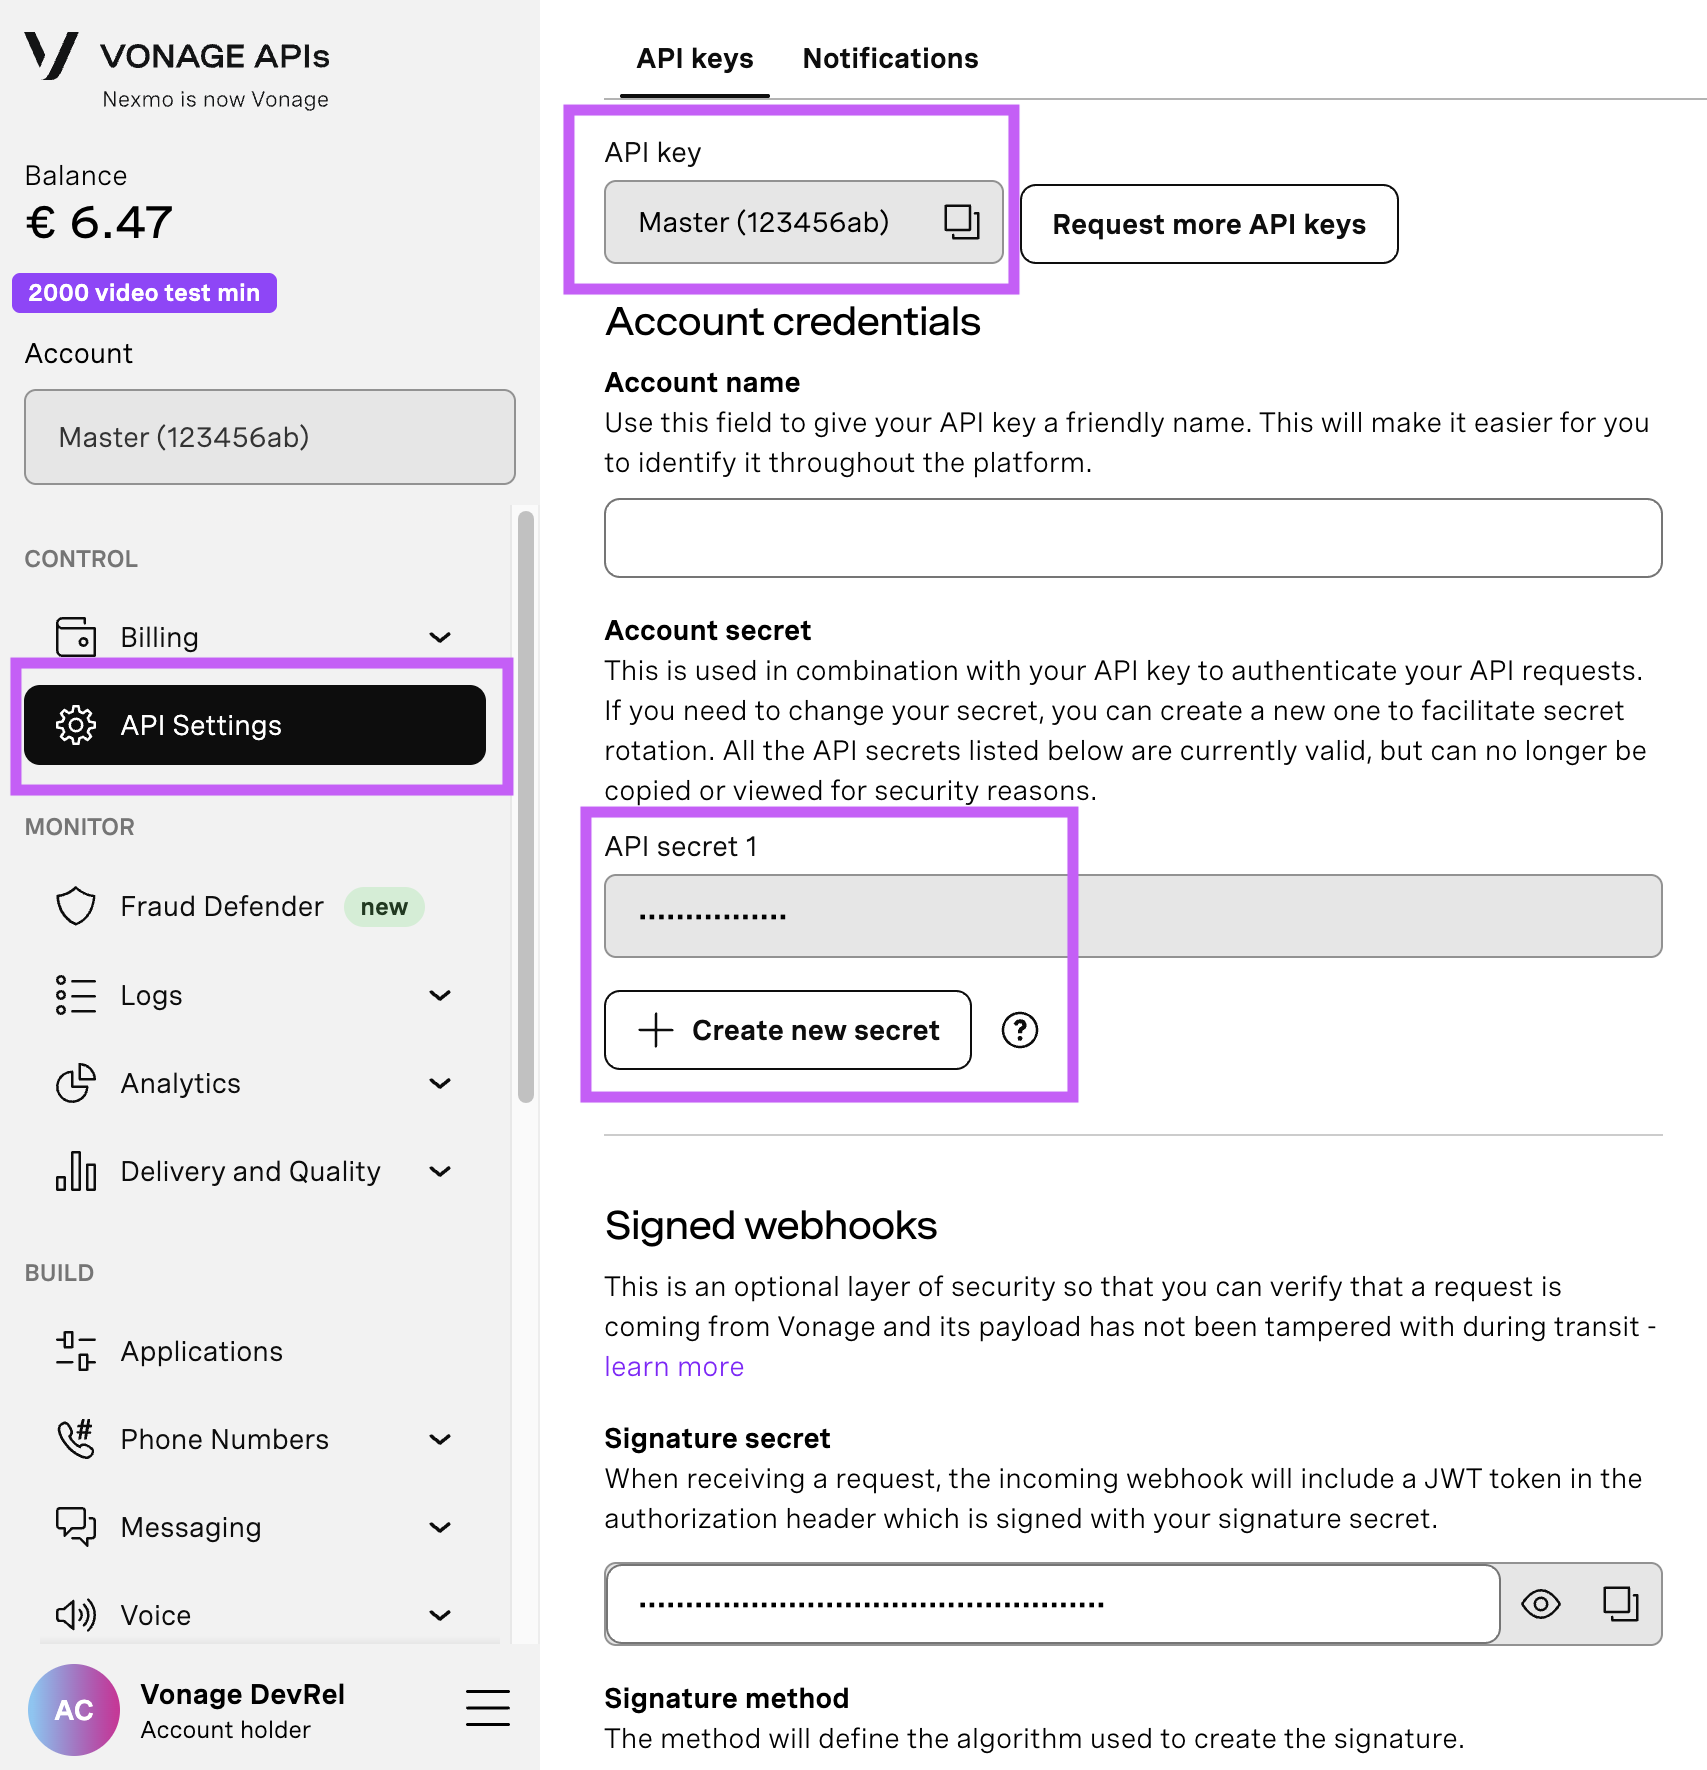
Open your API Settings Page to access your Vonage API Key and Secret, both of which are displayed as shown in the screenshot below. The API Key is located at the top of the page, and to access your API Secret, please refer to the “Account secret” subsection.
Note: In case you cannot remember your previously created API Secret, click on “+ Create new secret” and save it securely.
A 202 Accepted response confirms that the verification request has been dispatched. A 200 OK response confirms the code matched, and the user is verified. Check the code using the request_id exactly as you would for any other Verify channel, check the supplied verification code.
{
  "request_id": "c11236f4-00bf-4b89-84ba-88b25df97315"
}Store the request_id, you'll need it to check the code submitted by the end user.
For full parameter details, see the Verify V2 API Reference.
Once the end-user receives the OTP code, you must send a POST request to the /v2/verify/{request_id} endpoint. Replace the {request_id} with the ID you received in the previous call:
curl -X POST "https://api.nexmo.com/v2/verify/$VERIFY_REQUEST_ID" \

  -H "Authorization: Bearer $JWT"\

  -H 'Content-Type: application/json' \

  -d $'{

    "code": "'$VERIFY_CODE'"

  }'
For production deployments, we recommend adding a fallback channel in case RCS is not available on the recipient's device. The workflow below attempts RCS first and falls back to SMS. No additional setup is required as Vonage handles the channel selection automatically. The message arrives from the 'Vonage Verify' agent for most countries.
curl -X POST "https://api.nexmo.com/v2/verify" \

    -H "Authorization: Bearer $JWT" \

    -H 'Content-Type: application/json' \

    -d $'{

        "brand": "YOUR_BRAND",

        "workflow": [

        {

            "channel": "rcs",

            "to": "'$PHONE_NUMBER'"

        },

        {

            "channel": "sms",

            "to": "'$PHONE_NUMBER'"

        }

    ]

}'
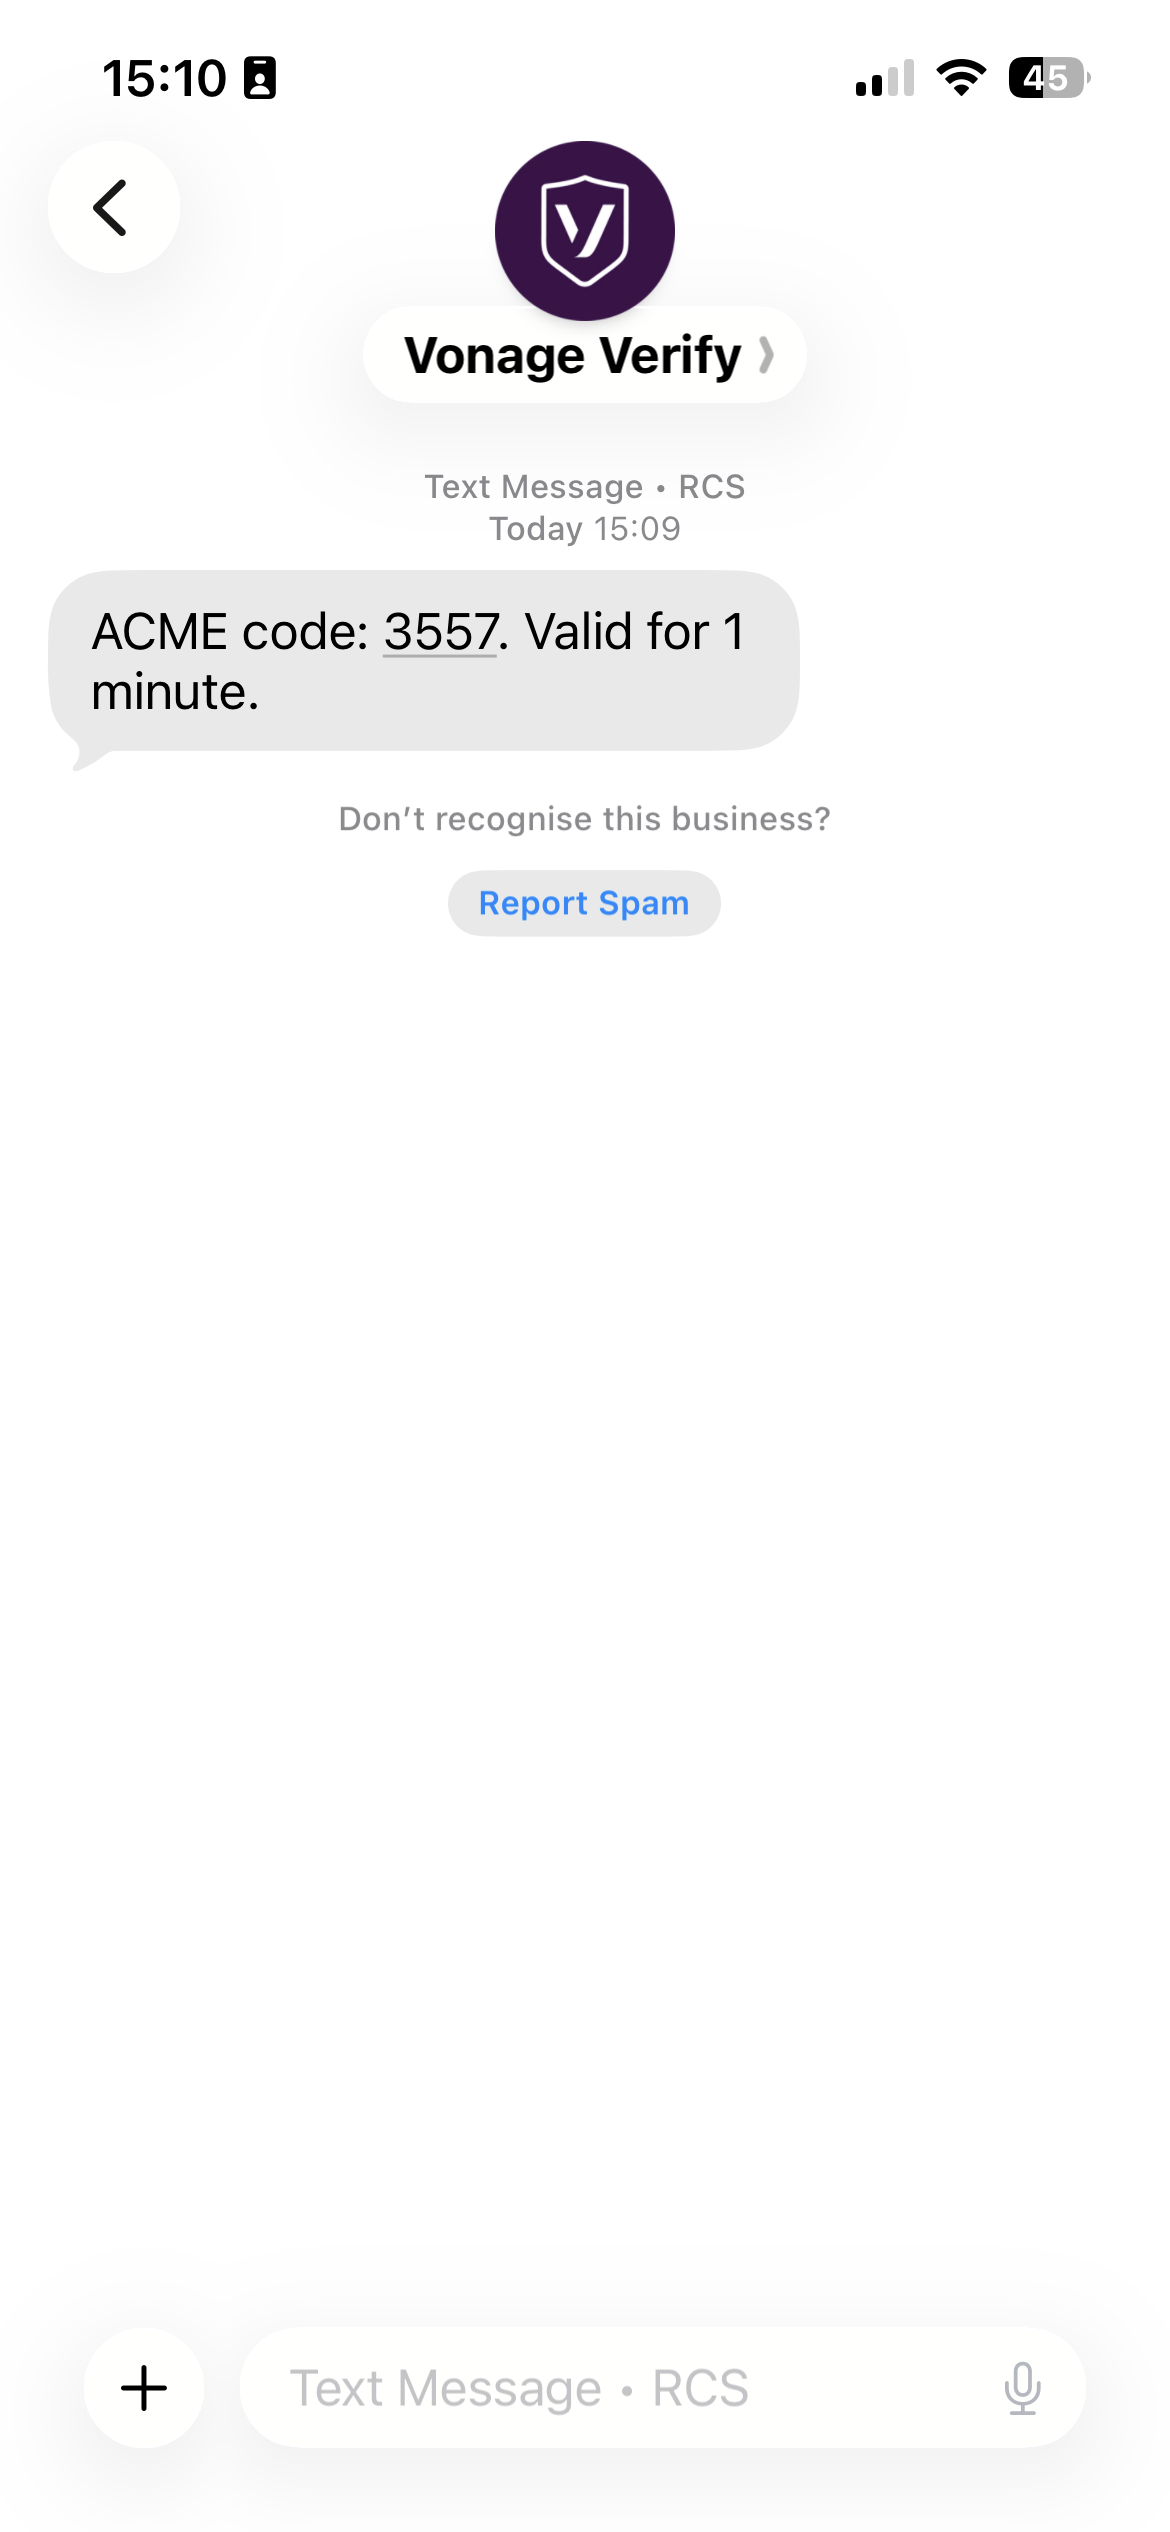 RCS ConversationRCS is built into Android's default Messages app and is also available on the latest versions of iOS. On supported Android versions, Google Messages may surface the code above the keyboard as a one-tap autofill suggestion, so users can verify in one tap without switching apps.
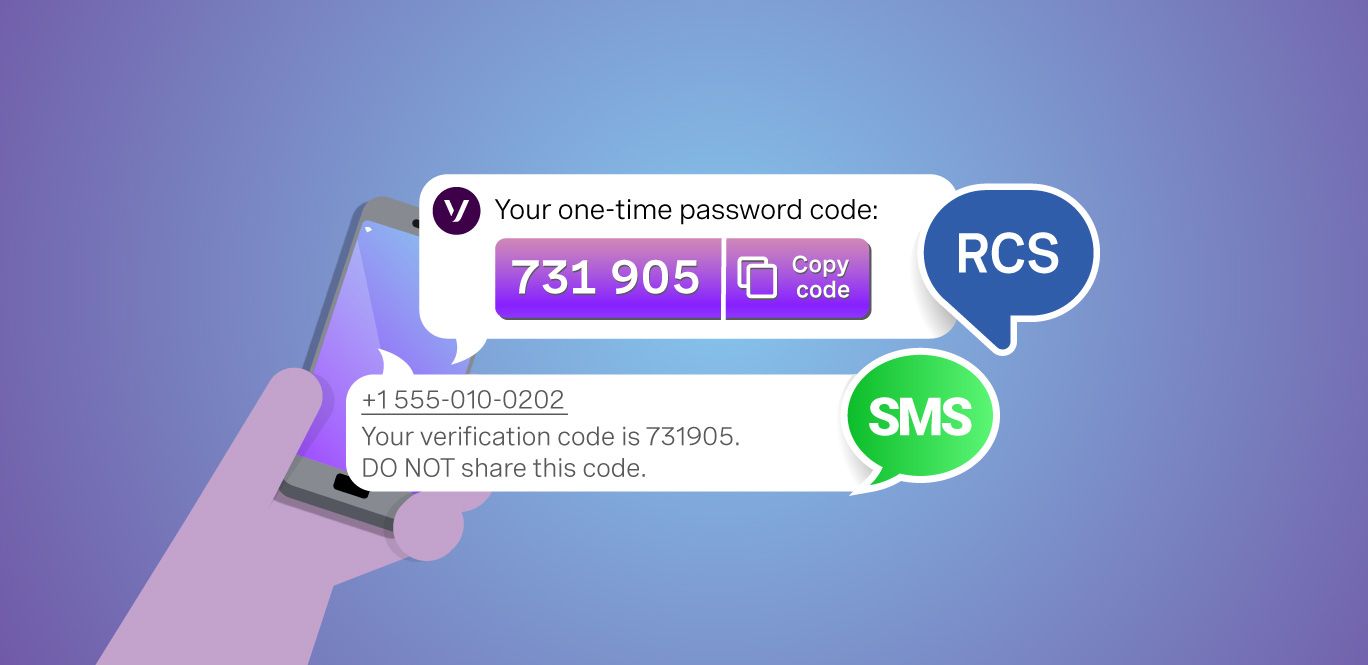
If you’re using the Rich card layout, the OTP is displayed prominently in a styled card, and you can even add a one-tap Copy Code button, which is a suggestion chip below the message that lets users copy the code directly to their clipboard, reducing friction and input errors on login forms.
The branded message body is the value you set in the API call is displayed inside the message body, so end users see your company name in context.
Feature | RCS (Default Agent) | SMS |
Sender Identity | Verified 'Vonage Verify' Agent | Numeric short/long code |
Message format | Rich card with prominent OTP display | Plain text string |
One-tap copy | Copy code button | Manual copy |
Auto-fill suggestion | On supported devices | On supported devices |
Phishing resistance | Carrier-verified sender | Easier to spoof |
Q: Can any Verify V2 customer use this feature?
A: Yes, all Verify API customers in supported countries can use the Default Agent without any additional enablement step.
Q: Will the end user see 'Vonage Verify' instead of the customer's brand?
A: Yes, messages will appear from the Vonage Verify agent. This is the intended behavior for the Default Agent. If you want your own brand name to appear as the sender, register a custom agent. Your branded agent approval can be run in parallel while using the Default Agent. Even so, you can use the brand parameter to introduce your brand name in the RCS message body.
Q: Is there a volume limit?
A: There are no specific volume limits tied to using the Default Agent. Standard Vonage Verify API usage limits and fair-use policies apply. Billing for RCS messages sent through the Default Agent is identical to standard Vonage Verify RCS pricing. No premium or surcharge for using the Default Agent. All usage is attributed to the customer's individual API key, so there's no shared billing risk. Billing is the same regardless of whether the customer uses the Default Agent or their own registered agent ID.
Q: What about countries not on the approved list?
A: For countries that are not supported yet, customers should initiate their own RCS agent registration. The Verify team is continuously expanding Default Agent coverage. Check whether the target country is supported.
The Vonage Verify RCS Default Agent allows you to start using RCS on the same day, and you can transition to your own branded agent at any time. There's no need to submit brand documentation and use-case details, carrier approval processes that vary country by country, or avoid back-and-forth with aggregators before a message can be sent.
How to Use the Vonage Verify RCS Default Agent
Have a question or want to share what you're building?
Subscribe to the Developer Newsletter
Follow us on X (formerly Twitter) for updates
Prefer video? Watch tutorials on our YouTube channel
Connect with us on the Vonage Developer page on LinkedIn
Help us improve our developer experience by filling out our Voice of the Developer Feedback
Stay connected and keep up with the latest developer news, tips, and events.