
Send and Open RCS Files Using GitHub Codespaces
This tutorial shows you how to send and open a file over RCS with the Vonage Messages API. Unlike SMS or MMS, RCS supports higher-quality files without strict size limits, making it a suitable option for documents such as tickets, invoices, or PDFs. In this post, we’ll send a PDF file via RCS using GitHub Codespaces.
 open RCS message containing PDF
A phone with RCS capabilities for testing
I've been exploring GitHub Codespaces lately. It's a development environment hosted in a Docker container, running on a virtual machine. I mostly use it by accessing a GitHub repository and appending /codespaces to the URL, so I can access it in Visual Studio Code through my preferred browser. Alternatively, you can create a codespace instance from a template or any branch or commit in a GitHub repository.
You can get started by accessing the repository I've created for this blog post and appending /codespaces. The URL would look like this: https://github.com/Vonage-Community/blog-messages-nodejs-rcs-file/codespaces
Click on "Create codespace on main” on the top right of the page. GitHub will start setting up a fresh environment for you.
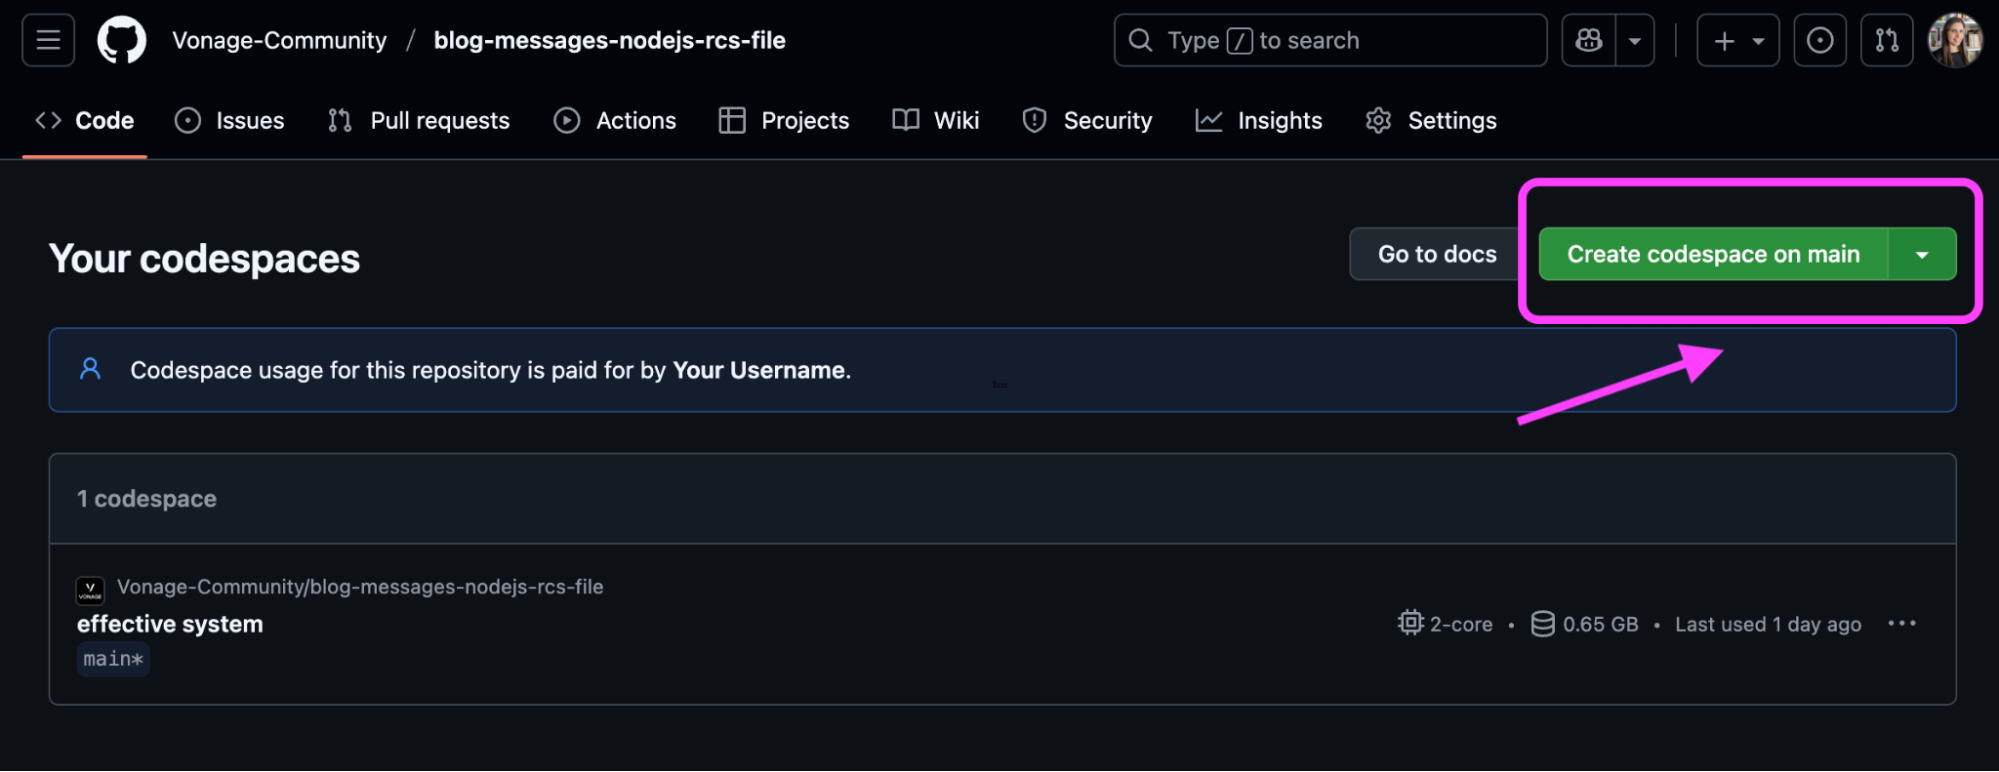 Click “Create codespace on main” to start your environmentOnce it loads, you’ll be inside a browser-based VS Code editor where you can run and edit the project immediately. Use this to run your instance. However, feel free to run the code I'll show in this blog post on your preferred IDE or environment.
For more details, check out GitHub’s official guide: Quickstart for GitHub Codespaces.
If you have experience with Visual Studio Code, you can find your way around using Codespaces. You can always navigate and find the below on the menus, but here are some commands to help you navigate more easily:
Open files:
Control + `on Mac or Windows/Linux.Open the terminal:
Command + Shift + Pon Mac orCtrl + Shift + Pon Windows/Linux.
Run npm install in the Codespaces terminal to install the following packages that can be found in the package.json file.
dotenv: loads your environment variables from a .env file, keeping sensitive information like API keys private.
@vonage/server-sdk: the core Vonage Node.js SDK. It helps you authenticate and initialize the Vonage client.
@vonage/messages: a dedicated library for sending messages through the Vonage Messages API. We use this to send RCS messages (text, images, files, etc.).
npm install dotenv @vonage/server-sdk @vonage/messages
Some variables contain sensitive information, so I wouldn’t want to add API Keys, secrets, or even the phone number I’ll use for testing publicly. So, we will add them to a .env file. Here's more information on using environment variables in Node.
Copy the .env.example file into a new .env file that you should create now. From the codespaces terminal:
touch .envIn the code snippet below, I list all the environment variables we will need. I’ll explain them one by one and explain where to find them.
VONAGE_APPLICATION_ID=000000-0000-0000-0000-0000000000

VONAGE_PRIVATE_KEY=./private.key

RCS_SENDER_ID=NameOfYourAgent

MESSAGES_FILE_URL=https://www.w3.org/WAI/ER/tests/xhtml/testfiles/resources/pdf/dummy.pdfSign in to your Vonage account and proceed to create a new application.
To create an application, go to the Create an Application page on the Vonage Dashboard, and define a Name for your Application.

If you intend to use an API that uses Webhooks, you will need a private key. Click “Generate public and private key”, your download should start automatically. Store it securely; this key cannot be re-downloaded if lost. It will follow the naming convention private_<your app id>.key. This key can now be used to authenticate API calls. Note: Your key will not work until your application is saved.
Choose the capabilities you need (e.g., Voice, Messages, RTC, etc.) and provide the required webhooks (e.g., event URLs, answer URLs, or inbound message URLs). These will be described in the tutorial.
To save and deploy, click "Generate new application" to finalize the setup. Your application is now ready to use with Vonage APIs.
Within the application view, each application contains an Application ID. Copy that string and paste it into your
VONAGE_APPLICATION_IDvariable.Click to generate a private key. A file will be downloaded to your downloads folder. Add that to the root of your file on GitHub Codespaces. Name it
private.key.RCS Messages are sent from an agent, which can be found under the “link external accounts” tab once you've created it. Understanding RCS messaging.
The
MESSAGES_FILE_URLcontains a URL to a file to be sent via RCS message. I’ve been using this public PDF file path for testing.
Open the index.js JavaScript file, which can be found on the left menu in GitHub Codespaces.
At the top of your file, you'll see the import of both Vonage packages: @vonage/server-sdk and @vonage/messages, which were previously explained in the "Installation Using Npm Section."
import "dotenv/config";

const { Vonage } = require('@vonage/server-sdk');

const { Channels } = require('@vonage/messages');
Initialize the Vonage client by passing the application ID and private key.
const vonage = new Vonage({

  applicationId: process.env.VONAGE_APPLICATION_ID,

  privateKey: process.env.VONAGE_PRIVATE_KEY,

});
To send an RCS message with the Messages API, we'll use the vonage.messages.send method of the Vonage Node.js library, specifying the ‘RCS’ channel. This method accepts objects as parameters, with information about the recipient, sender, and content.
I’ve set the MessageType as a file. You can check all the Supported Media Types.
vonage.messages.send({

  messageType: 'file',

  channel: Channels.RCS,

  file: {

    url: process.env.MESSAGES_FILE_URL,

  },

  to: process.env.PHONE_NUMBER,

  from: process.env.RCS_SENDER_ID,

})

  .then(({ messageUUID }) => console.log(messageUUID))

  .catch((error) => {

  console.error("Error sending RCS message:", error);

});
From within the terminal in GitHub Codespaces, run the index.js file. As we run this file, an RCS message will be sent to the specified phone number. You’ll see a message called “attachment” on the specified device, and as you click, you can see the file you’ve specified on the MESSAGES_FILE_URL.
node index.js
If you'd like to go further, consider installing and running ngrok to expose your local server and allow Vonage to send webhook requests directly to your development environment. This makes it easier to test real-time interactions, such as inbound messages and delivery receipts. You can also implement JWT verification to validate incoming webhooks and ensure they come from trusted sources.
Now that you’ve learned how to send files via RCS, consider extending your solution by implementing suggested replies or rich card carousels. Currently, it simply sends an attachment with the file name. You can use rich card solutions to make the message and files being shared even more descriptive and easier to consume.
Have a question or want to share what you're building?
Subscribe to the Developer Newsletter
Follow us on X (formerly Twitter) for updates
Watch tutorials on our YouTube channel
Connect with us on the Vonage Developer page on LinkedIn
Stay connected and keep up with the latest developer news, tips, and events.