Share:
Benjamin Aronov is a developer advocate at Vonage. He is a proven community builder with a background in Ruby on Rails. Benjamin enjoys the beaches of Tel Aviv which he calls home. His Tel Aviv base allows him to meet and learn from some of the world's best startup founders. Outside of tech, Benjamin loves traveling the world in search of the perfect pain au chocolat.
PSTN Branded Calling With Vonage Voice API and First Orion
Time to read: 6 minutes
Build branded outbound calling with Vonage Voice API and First Orion. Display your company name, logo, and call purpose on PSTN calls.
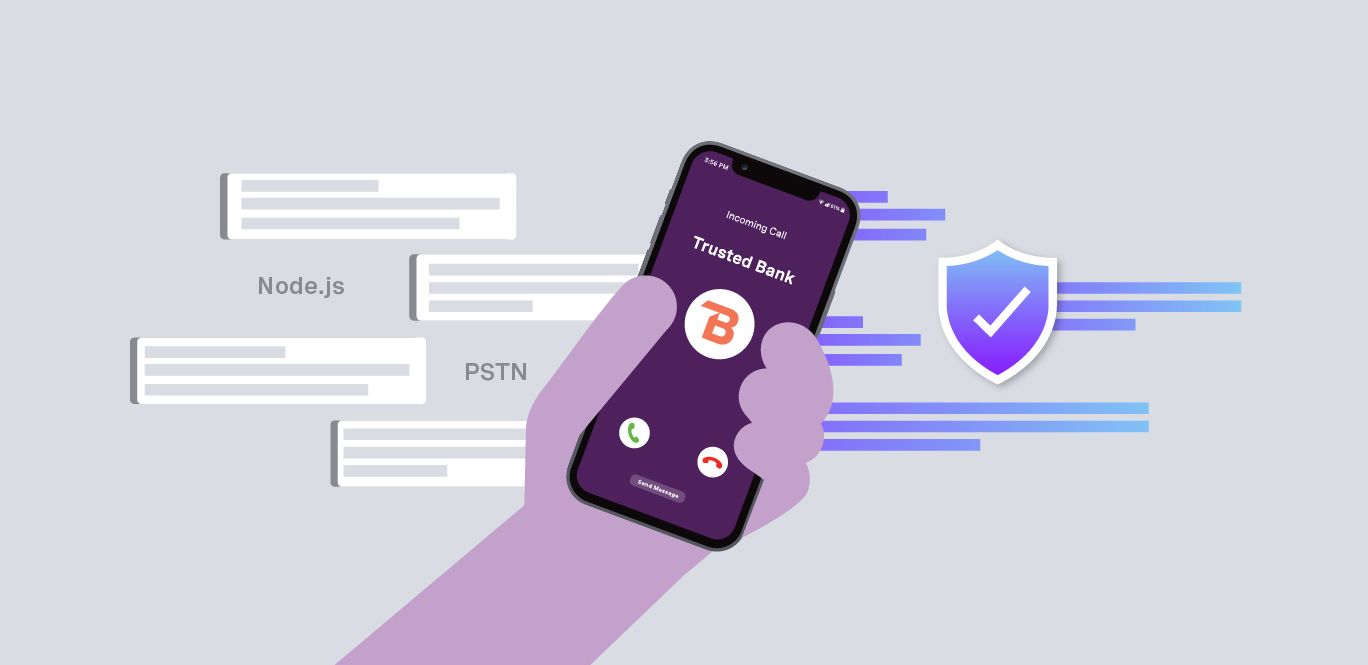
 Example of a branded incoming call displaying the company name, logo, and phone number on a mobile deviceIf you’re placing outbound calls from an application, there’s a good chance some of them are being ignored or flagged as spam. When the recipient doesn’t recognize the number, they often won’t answer, even if the call is legitimate.
PSTN Branded Calling addresses this by attaching verified identity information to your calls. Instead of showing just a phone number, the recipient sees your company name, logo, and a short call reason directly on their device. In practice, this makes your calls easier to recognize and more likely to be answered.
In this tutorial, you’ll set up PSTN Branded Calling using Vonage Voice API and First Orion. You’ll configure a branded calling program, link it to a Vonage virtual number, and then place an outbound call from a simple Node.js application.
By the end, you’ll have a working setup where your outbound calls display branded information in real time, along with a minimal app you can use as a starting point for your own integration.
>> TL;DR: Skip ahead and find the sample app code on GitHub.
A Vonage API account with Voice enabled
A First Orion account with an approved business registration
A Vonage virtual number already provisioned for PSTN Branded Calling
First Orion provides a set of APIs and platform tools for managing branded calling across carrier networks. They call it the INFORM platform, which handles how your business identity is presented on supported devices. INFORM is where you define things like the display name, logo, and call reason that show up when a call is received. The platform also gives you access to analytics and program-level controls, so you can track delivery and make adjustments as needed.
To enable Branded Calling for a phone number, you’ll need to create a program. You can think of a program as a campaign. A program belongs to a business unit, which sits inside a business.
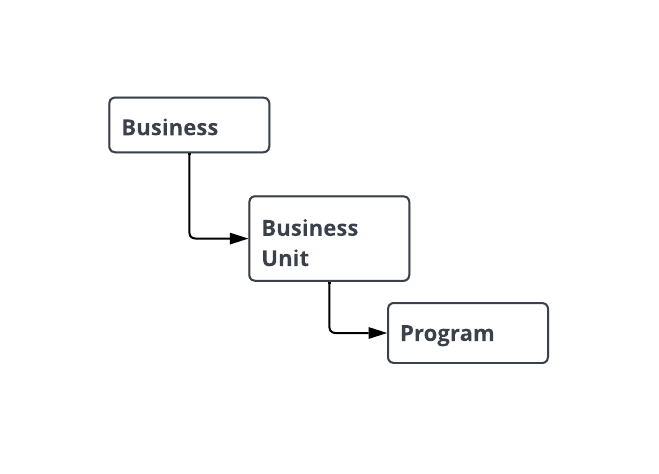 Hierarchy of branded calling in First Orion, showing how a business contains business units, which contain programsTo get started, you’ll need to register your business with First Orion. Once your business is approved, and you’ve created your business unit, you can create your first program:
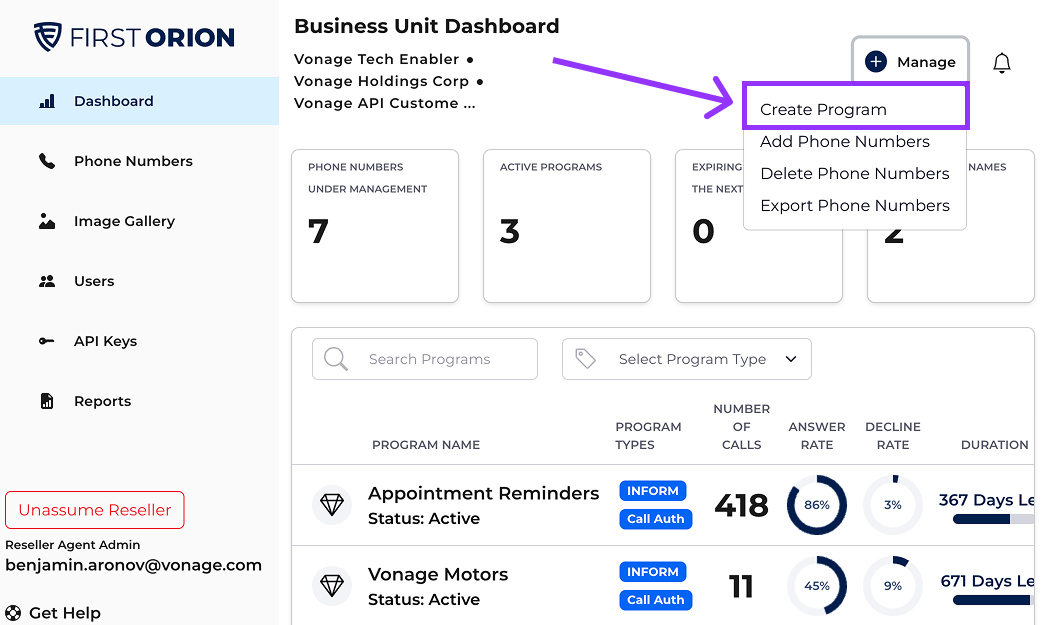 First Orion Business Unit dashboard where you can create programs and manage phone numbers for branded callingSetting up a program takes 3 steps:
Details: general information about the program
Display: the display name and time to be shown to users
Phone numbers: which number(s) will be assigned to this program
You can create a new program either:
via the API
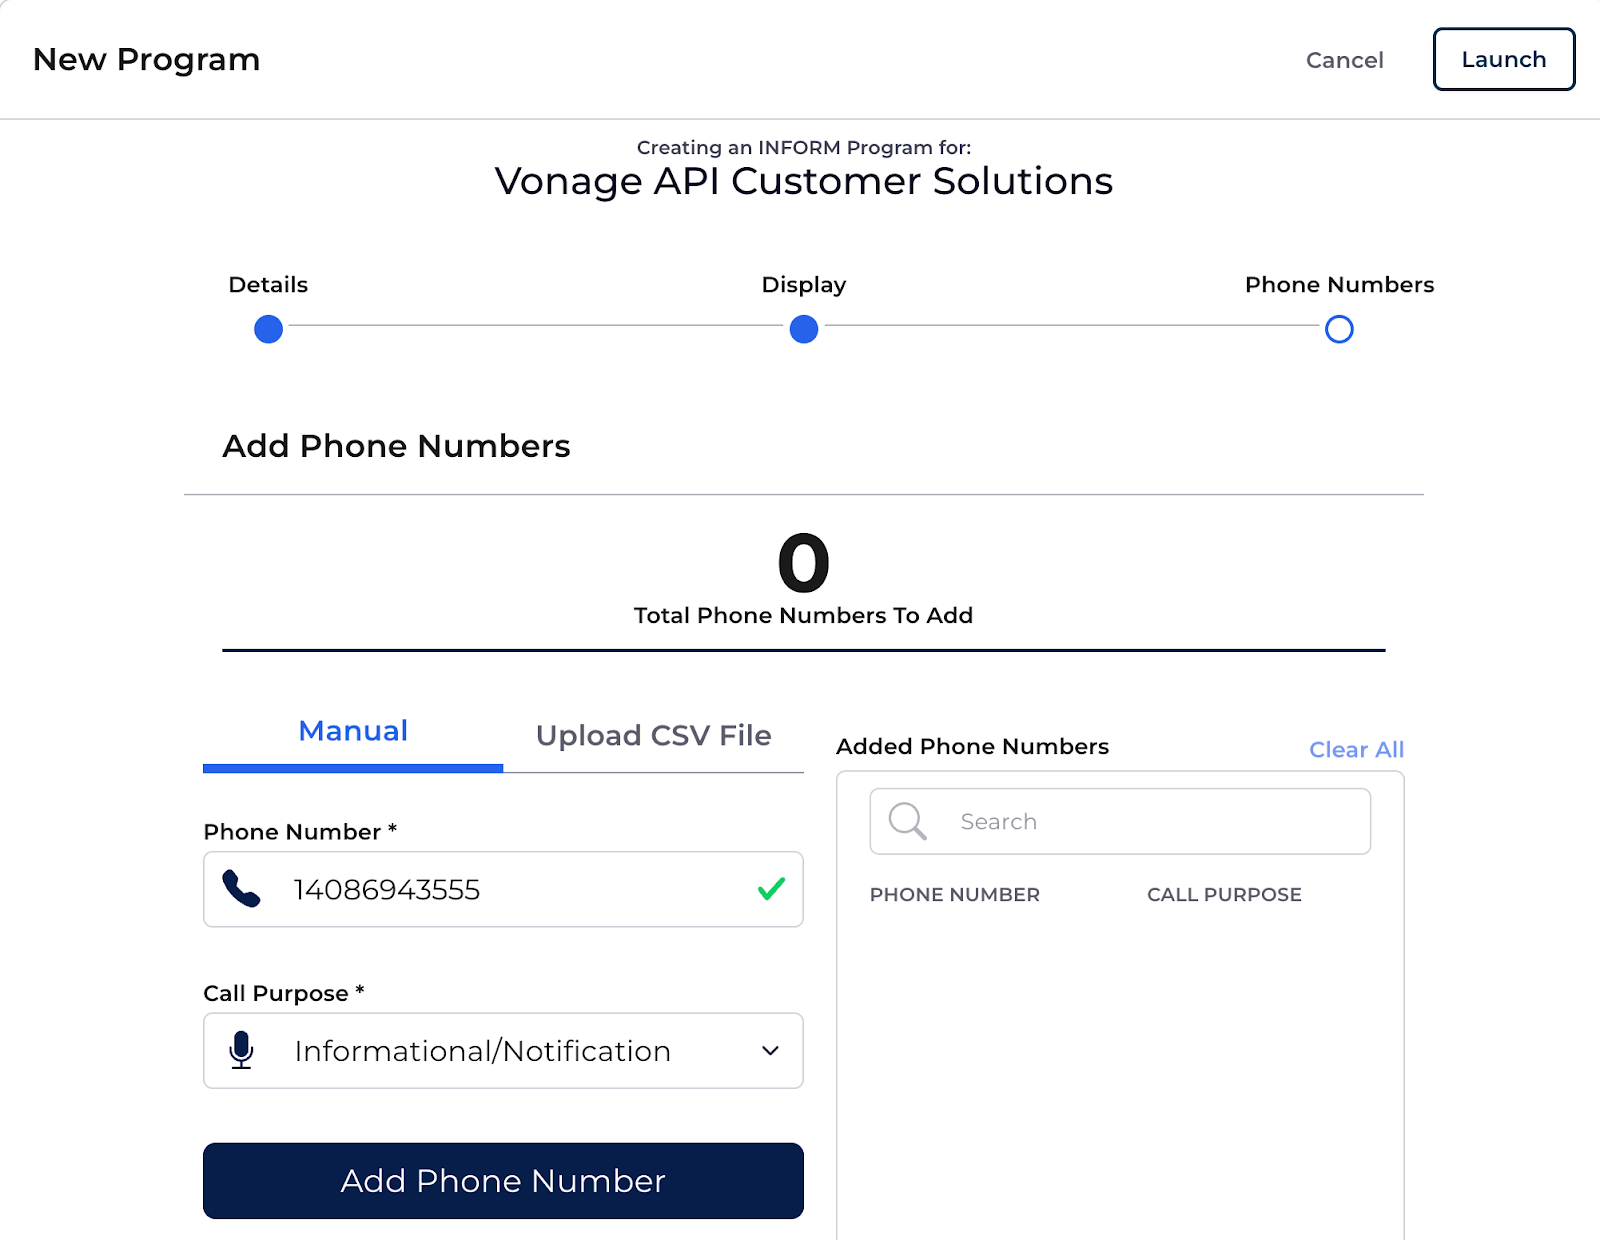 Adding phone numbers and defining call purpose during branded calling program setup in First Orion
Once your program is created, you will be able to assign an image to your program. Click on the program to edit it. And then go to step 3, “Image”, where you can add an Image & Call Reason:
 Uploading a logo and defining the call reason for a branded calling program, with a real-time mobile preview
With the First Orion program set up, you’ll need to configure the link in the Vonage Dashboard. In the Vonage Dashboard, go to Voice → Trusted Calling → PSTN Branded Calling.
First, you will need to follow the instructions to integrate your First Orion account. The User ID is your First Orion API Key, and the Password is the associated Secret Key. You can see how to generate a First Orion API Key in the documentation.
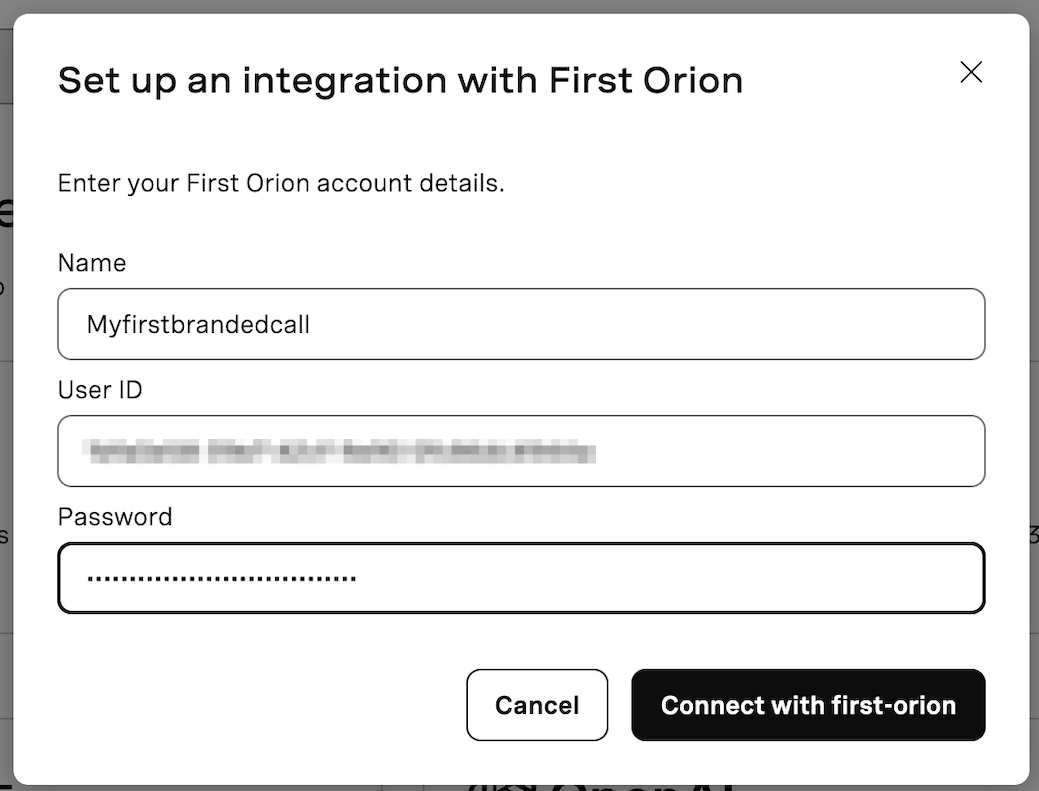 Configuring the First Orion integration in the Vonage Dashboard using API credentialsWith the integration established, you will now be able to configure your integration. Open the integration you created by clicking on the “edit” option.
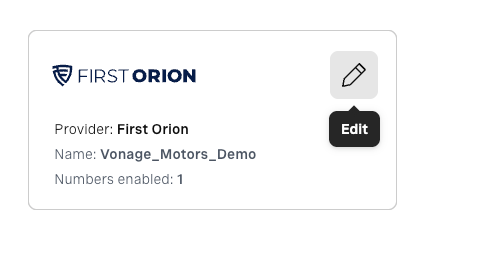 First Orion integration successfully configured in the Vonage Dashboard with an enabled virtual numberThen select enable on the Vonage virtual number you added before in the First Orion Dashboard.
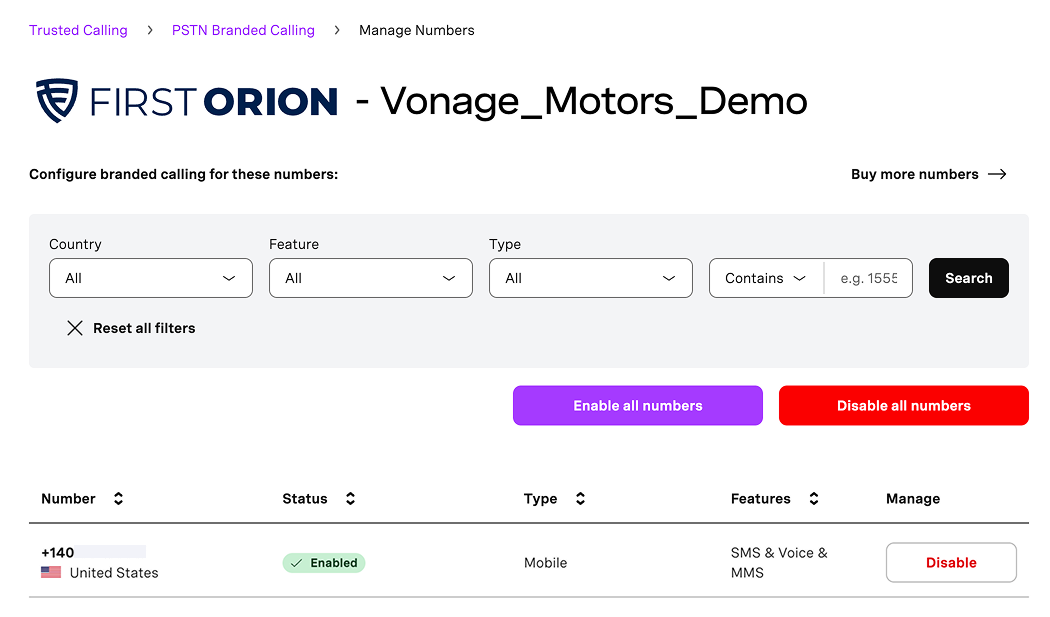 Managing and enabling virtual numbers for PSTN Branded Calling in the Vonage Dashboard
Now that your Vonage virtual number is linked to your First Orion Branded Calling program, you can place a branded outbound call from a simple Node.js test app. The sample app exposes a local /call endpoint and uses ngrok to make your webhook endpoints publicly accessible.
git clone git@github.com:Vonage-Community/blog-voice-node-branded_calling.git
cd branded-calling
npm install
Copy the example environment file and then edit it:
cp .env.example .envYou’ll configure 3 categories of settings:
VONAGE_APPLICATION_ID
The Application ID from the Vonage DashboardVONAGE_PRIVATE_KEY_PATH
Path to your private key file (PEM). In this tutorial, we’ll use ./private.key.
FROM_NUMBER
Your Vonage Virtual Number that you registered/enabled for Branded Calling (E.164 format, like +1408...).TO_NUMBER
The default destination number for your test call (your mobile, etc.). You can override this later in the curl request.
COMPANY_NAME
GREETING
The text-to-speech message played when the call is answered.
Vonage must be able to reach your webhook endpoints over the public internet. The easiest way for local development is ngrok.
In a new terminal window:
ngrok http 3000Copy the Forwarding HTTPS URL (it will look like https://xxxx.ngrok-free.app).
Now set this in your .env:
PUBLIC_BASE_URL = your ngrok HTTPS URL
PUBLIC_BASE_URL=https://xxxx.ngrok-free.app
>> Important: If you restart ngrok, you’ll get a new URL and must update PUBLIC_BASE_URL again.
In the Vonage Dashboard:
Create a new Application
Enable Voice capabilities
Generate/download the private key (private.key) and place it in the root of your project
Copy the Application ID into your .env as VONAGE_APPLICATION_ID
In the event webhook in the dashboard, add your ngrok HTTPS followed by /event (e.g., https://xxxx.ngrok-free.app/event)
Back in the project terminal, start your app:
npm run start
Option A: call the default TO_NUMBER from .env
curl -X POST http://localhost:3000/call \
  -H 'Content-Type: application/json' \
  -d '{}'
Option B: override the destination number per request
curl -X POST http://localhost:3000/call \
  -H 'Content-Type: application/json' \
  -d '{"to":"+14155550100"}'
You should now receive a call displaying your configured branding (name, logo, and call reason).
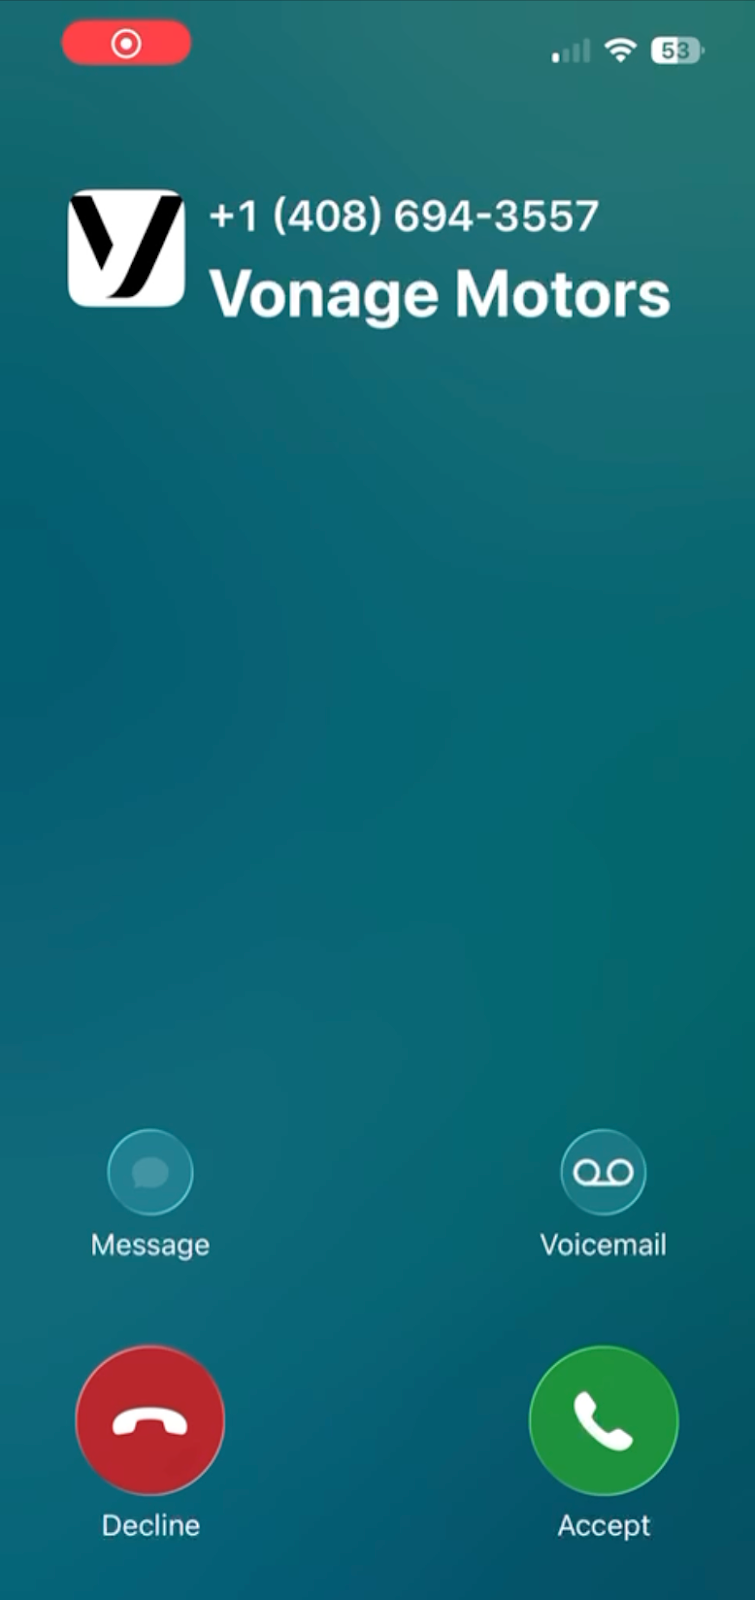 Full-screen view of an incoming branded call displaying the company name, logo, and standard call controls on a mobile device
Note: Branding display depends on carrier and device behavior. You can check ‘status by carrier’ within your program details.
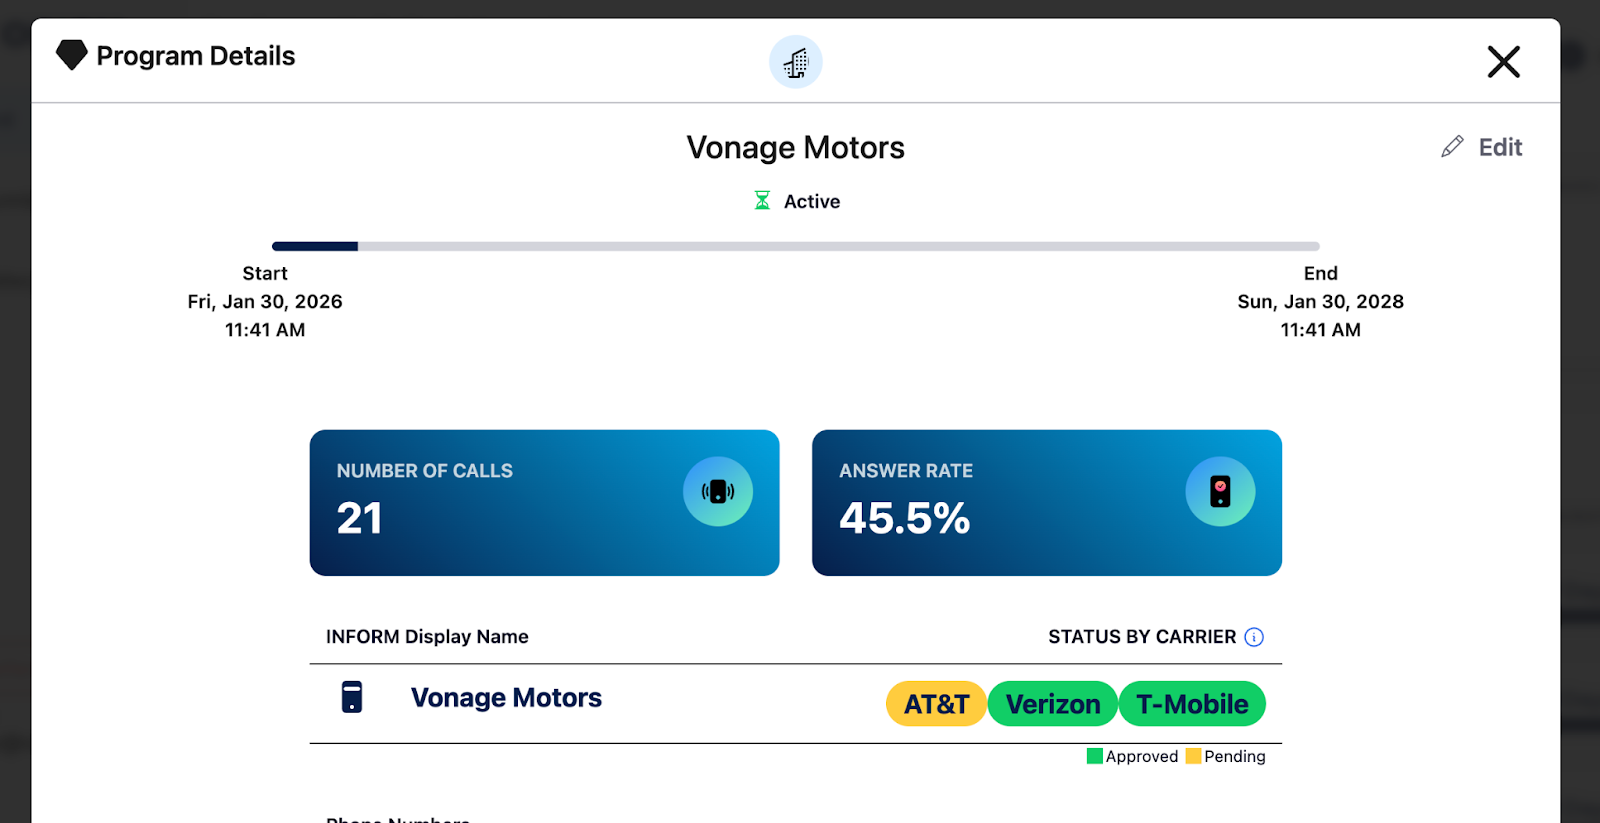 Screenshot of the First Orion program details page displaying call metrics, answer rate, and carrier approval status for AT&T, Verizon, and T-Mobile.
At this point, you’ve set up PSTN Branded Calling end-to-end using Vonage and First Orion. You created a branded calling program, linked it to a Vonage virtual number, and triggered an outbound call from a Node.js application that displays your configured branding in real time.
With this foundation in place, you can start integrating branded calling into your existing workflows. For example, triggering calls from application events, customizing call reasons dynamically, or separating different use cases into distinct programs.
If you want to go a step further, First Orion also provides a Call Authentication API that can be invoked just before placing a call. This allows you to explicitly register call intent (caller and callee) in real time, which can further improve trust and call verification in supported networks.
This pattern fits naturally alongside the setup in this tutorial, since it runs just ahead of your existing outbound call request.
In a production setup, you’ll also want to replace local tooling like ngrok with a stable, publicly accessible endpoint, and ensure your credentials and webhook configuration are managed consistently across environments.
The overall model stays simple: your application controls call initiation, Vonage handles delivery, and First Orion provides the identity layer on top. Once connected, branded calling becomes a straightforward extension of the outbound calling flows you already have.
Have a question or want to share what you're building?
Subscribe to the Developer Newsletter
Follow us on X (formerly Twitter) for updates
Watch tutorials on our YouTube channel
Connect with us on the Vonage Developer page on LinkedIn
Stay connected and keep up with the latest developer news, tips, and events.
Share:
Benjamin Aronov is a developer advocate at Vonage. He is a proven community builder with a background in Ruby on Rails. Benjamin enjoys the beaches of Tel Aviv which he calls home. His Tel Aviv base allows him to meet and learn from some of the world's best startup founders. Outside of tech, Benjamin loves traveling the world in search of the perfect pain au chocolat.