Make an Outbound Voice Call by Asking Claude
Time to read: 5 minutes
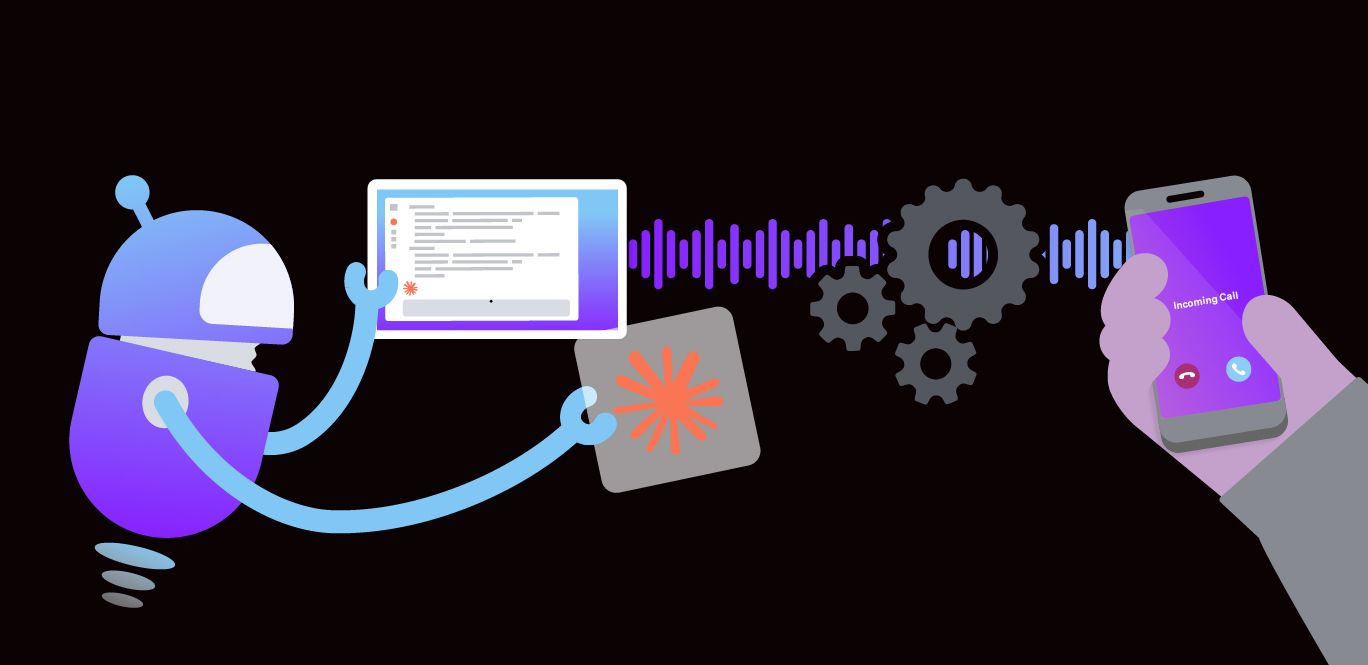
I’ve shown you how the Vonage Tooling MCP Server can be accessed via Postman. In today’s blog post, I’ll show you how to access it via Claude Desktop, and the use case I’ll focus on is to trigger a real outbound voice call using the same way you might communicate with LLMs, some natural language prompt. We’ll use Claude Desktop, create a Vonage account, get some API keys, add them to Claude, and see everything in action.
Before we get started and place that phone call, you'll need:
Claude Desktop installed
Node.js installed
To create an application, go to the Create an Application page on the Vonage Dashboard, and define a Name for your Application.

If you intend to use an API that uses Webhooks, you will need a private key. Click “Generate public and private key”, your download should start automatically. Store it securely; this key cannot be re-downloaded if lost. It will follow the naming convention private_<your app id>.key. This key can now be used to authenticate API calls. Note: Your key will not work until your application is saved.
Choose the capabilities you need (e.g., Voice, Messages, RTC, etc.) and provide the required webhooks (e.g., event URLs, answer URLs, or inbound message URLs). These will be described in the tutorial.
To save and deploy, click "Generate new application" to finalize the setup. Your application is now ready to use with Vonage APIs.
Select the “Voice” under Capabilities, as we are going to use the voice API to make calls.
Click to save your newly created Vonage application with the voice capability at the bottom right.
Open Claude Desktop and on the settings tab, click on “developer” and click on “edit config”. This will take you to your “claude_desktop_config.json”, but you can also open it directly, as shown below:
macOS: ~/Library/Application Support/Claude/claude_desktop_config.json
Windows: %APPDATA%\Claude\claude_desktop_config.json, which usually resolves to something along the lines of C:\Users\username\AppData\Local\Packages\Claude\LocalCache\Roaming\Claude
{

  "mcpServers": {

    "vonage-tooling": {

      "command": "npx",

      "args": [

        "-y",

        "@vonage/vonage-mcp-server-api-bindings"

      ],

      "env": {

        "VONAGE_API_KEY": "YOUR_API_KEY",

        "VONAGE_API_SECRET": "YOUR_API_SECRET",

        "VONAGE_APPLICATION_ID": "YOUR_APP_ID",

        "VONAGE_PRIVATE_KEY64": "YOUR_BASE64_PRIVATE_KEY",

        "VONAGE_VIRTUAL_NUMBER": "+1234567890"

      }

    }

  }
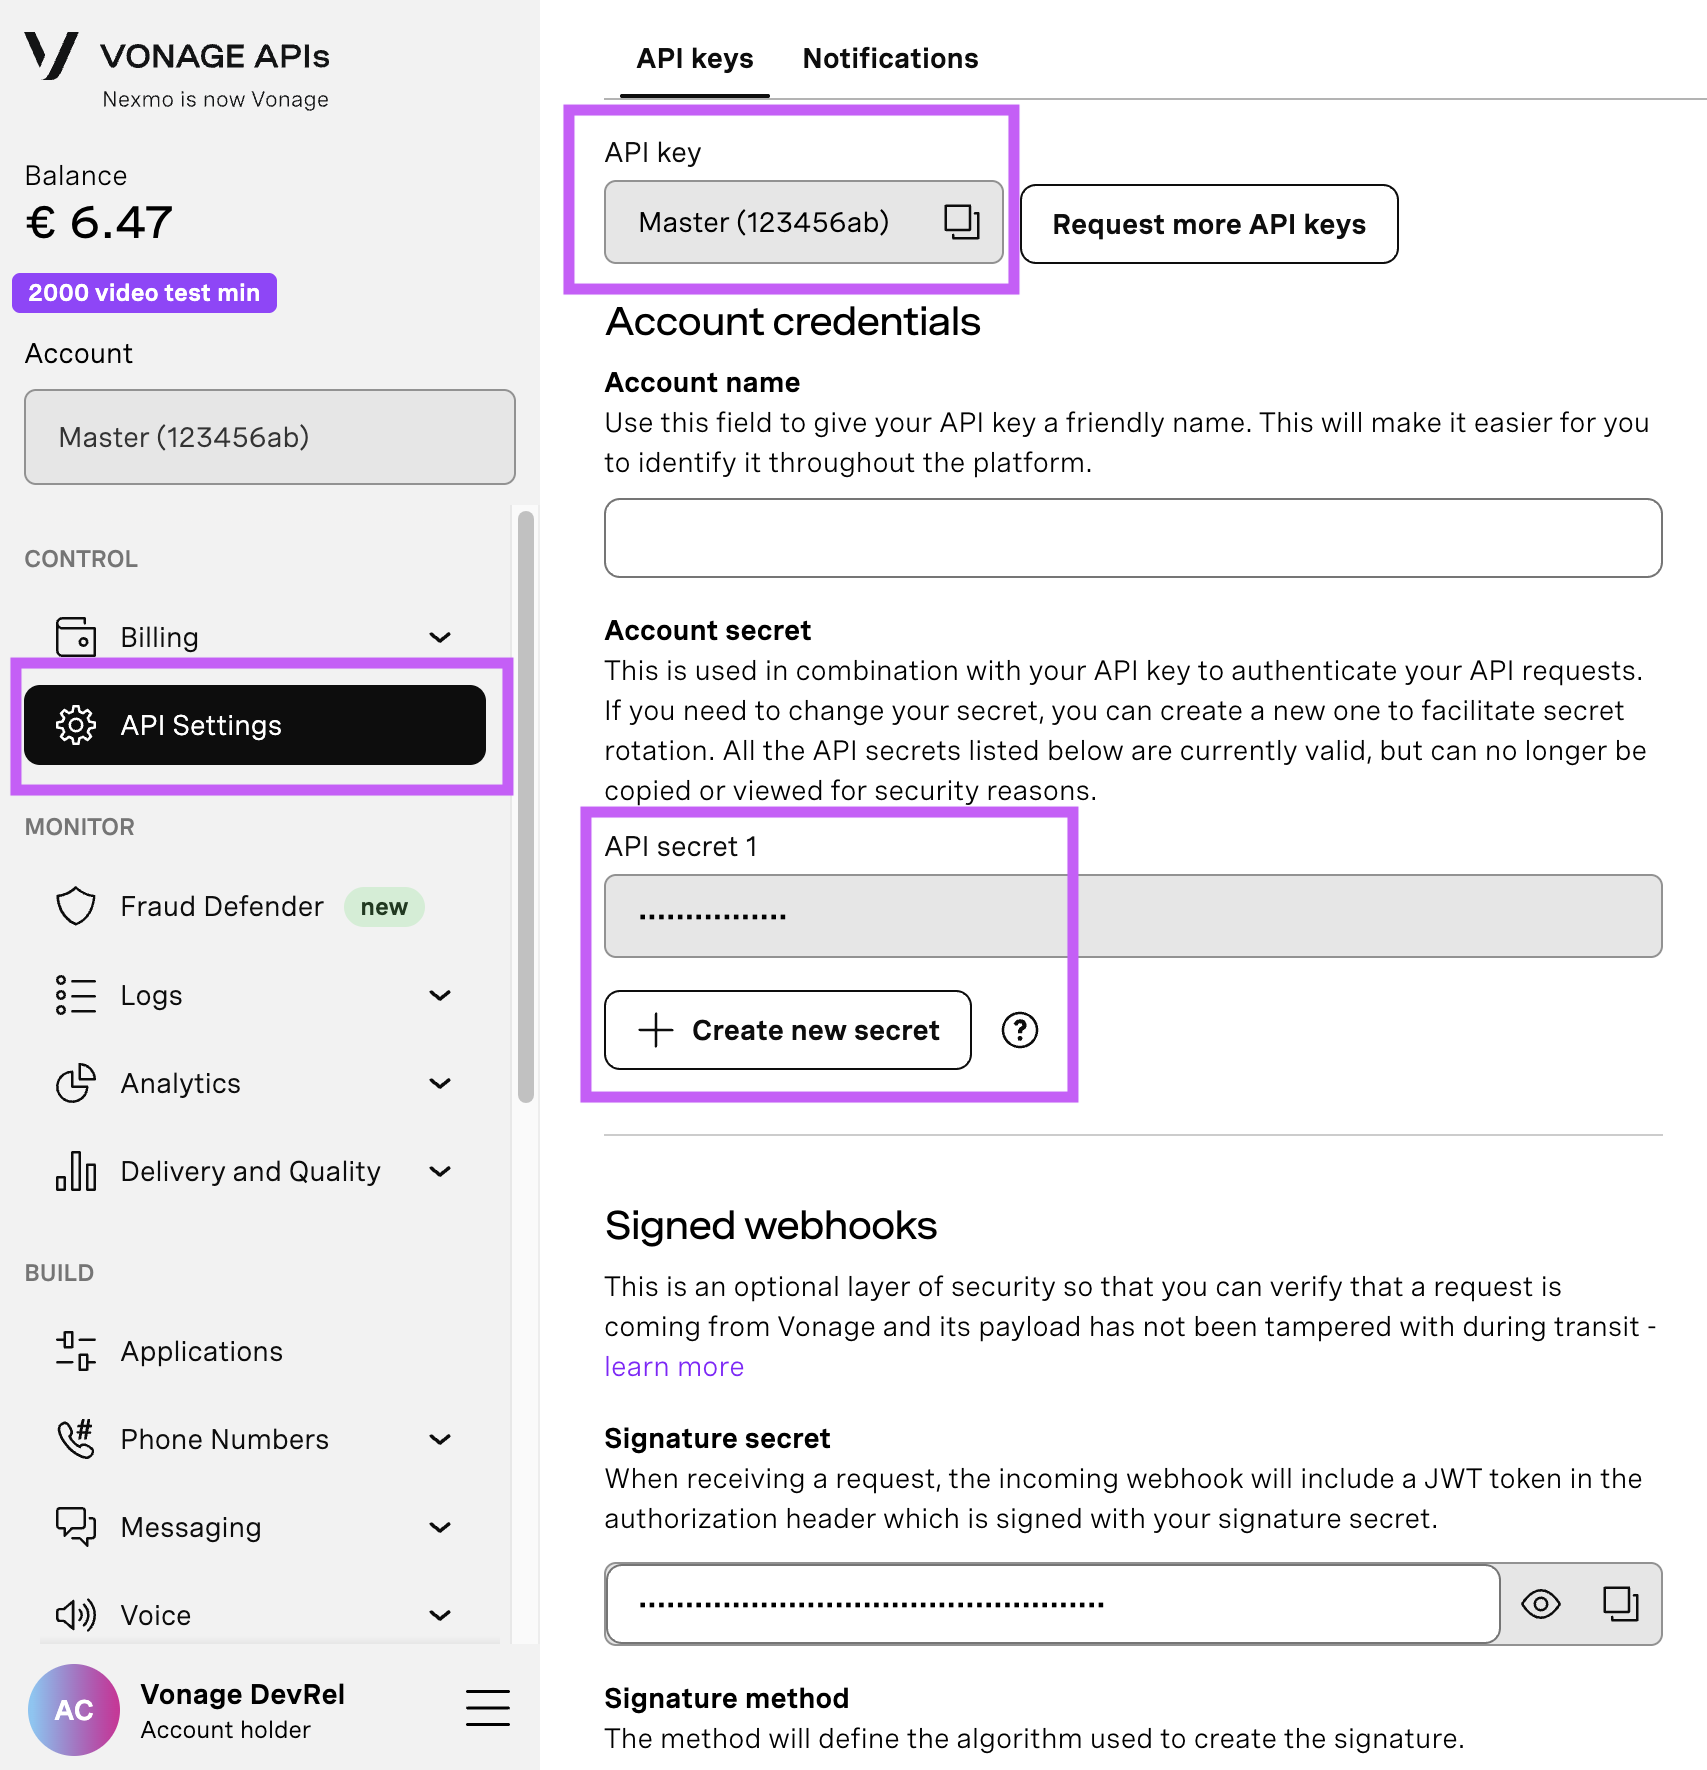
}Open your API Settings Page to access your Vonage API Key and Secret, both of which are displayed as shown in the screenshot below. The API Key is located at the top of the page, and to access your API Secret, please refer to the “Account secret” subsection.
Note: In case you cannot remember your previously created API Secret, click on “+ Create new secret” and save it securely.
To buy a virtual phone number, go to your API dashboard and follow the steps shown below.
 Purchase a phone number
Go to your API dashboard
Navigate to BUILD & MANAGE > Numbers > Buy Numbers.
Choose the attributes needed and then click Search
Click the Buy button next to the number you want and validate your purchase
To confirm you have purchased the virtual number, go to the left-hand navigation menu, under BUILD & MANAGE, click Numbers, then Your Numbers
Note:
VONAGE_PRIVATE_KEY64is your private key file base64-encoded. On macOS/Linux, you can generate it withbase64 -i private.key | tr -d '\n'. I wanted to copy it to my clipboard whilst doing this on GitHub Codespaces, and I used the following command:base64 -i private.key | tr -d '\n' > b64_key.txt && code b64_key.txtto copy it to a new txt file, but you can use| pbcopyon macOS to copy it to your clipboard.
Save the file and don’t forget to restart Claude Desktop, so that everything you’ve added is applied. You should see the Vonage tools appear in the Connectors tab of the settings. Make sure to give permission to the “Outbound Voice Message” tool.
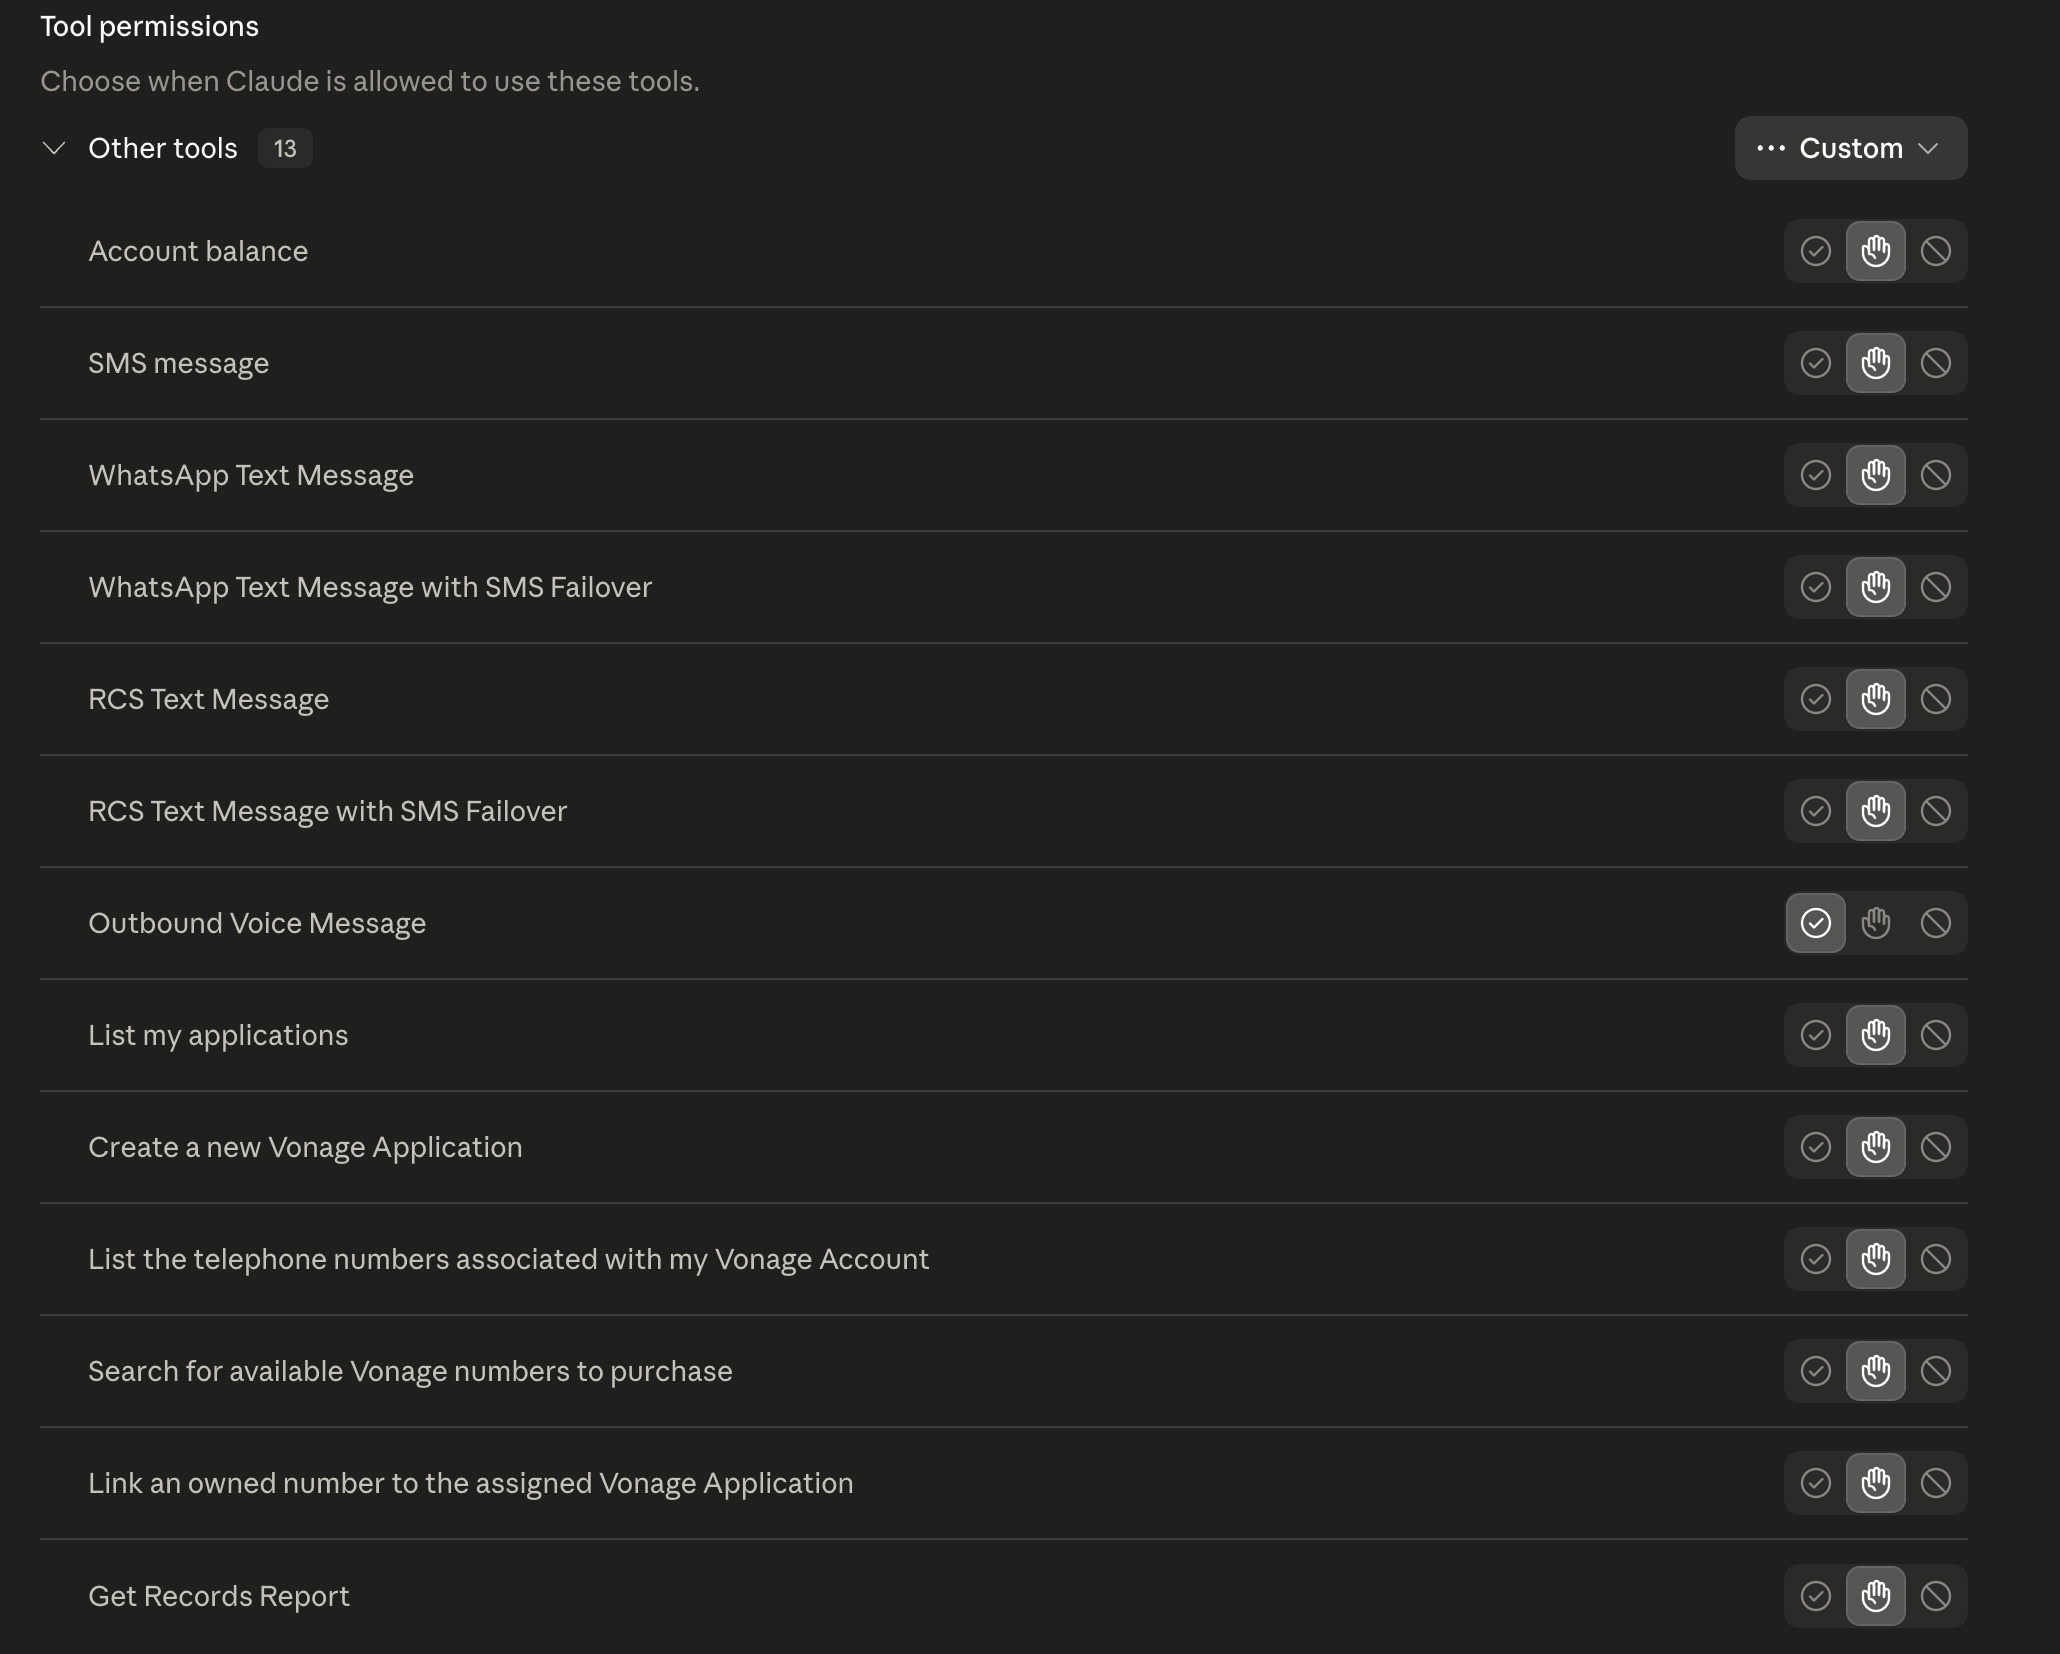 Tools Permissions
Now that the setup is done, open a new conversation in Claude Desktop and type something along the lines of: "Use the Vonage outbound voice message tool to call +44XXXXXXXXX and say: Hello, this is a test call from Claude."
Claude will identify the outbound-voice-message tool from the Vonage Tooling MCP, which maps directly to the Vonage Voice API under the hood. The MCP server handles authentication and the API call; you just described what you wanted in plain English. It confirms the parameters and places the call.
Your phone rings and speaks the message using text-to-speech. You can try writing a different text that you would like to be spoken from the text.
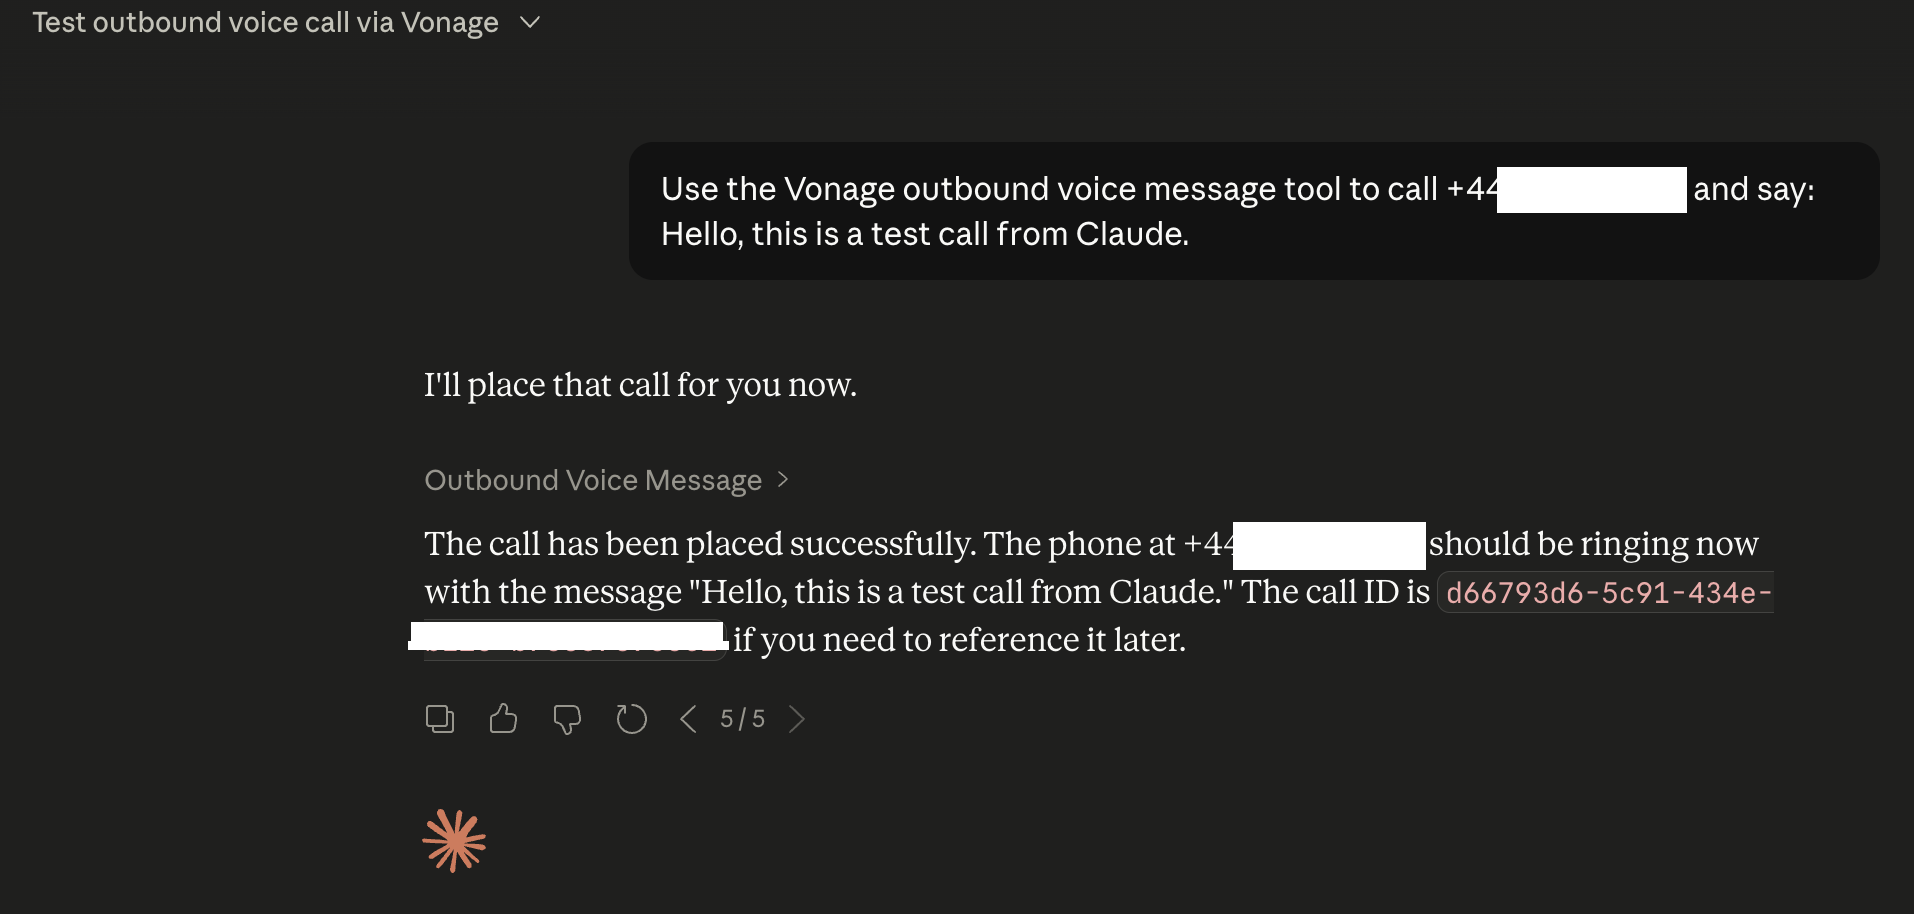 Claude Conversation
Why not try the other Tools with Claude? Check your account balance before placing the call, list your applications and numbers to pick the right one, send an SMS follow-up after the call, all with the same natural language prompting.
It’s pretty cool what we can do with Claude Desktop and the Vonage MCP Servers. In my next blog post, I’ll show how you can interact with the Vonage MCPs using Google Antigravity. Stay tuned.
Have a question or want to share what you're building?
Subscribe to the Developer Newsletter
Follow us on X (formerly Twitter) for updates
Watch tutorials on our YouTube channel
Connect with us on the Vonage Developer page on LinkedIn
Stay connected and keep up with the latest developer news, tips, and events.