Share:
)
Liz Acosta is a Developer Advocate at Vonage. While her career path from film student to marketer to engineer to Developer Advocate might seem unconventional, it’s pretty typical for Developer Relations! Liz loves pizza, plants, pugs, and Python.
Live Captions, Moderation, and Recording With Python and Vonage
Time to read: 12 minutes
At the end of this blog post, you will have a deeper understanding of the Python SDK for the Vonage Video API along with some sample code you can use as scaffolding to build feature-rich browser-based video conferencing experiences.
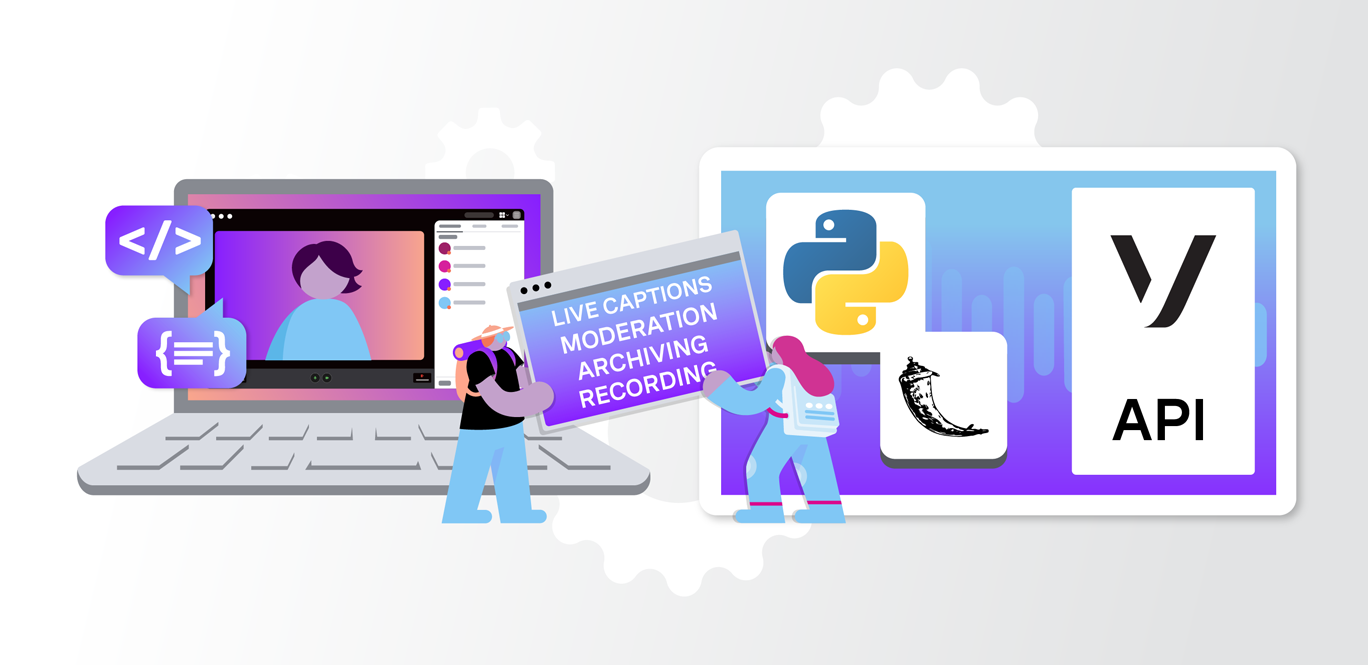
The 2020 pandemic accelerated the adoption of video conferencing as a standard communication tool. Today, web-based video meetings are part of everyday life for businesses, educators, and consumers alike. Developers can use the Vonage Video API and Python SDK to build secure, real-time video conferencing applications with moderation, transcription, and recording capabilities.
Over time, the technology has evolved significantly, and so have the demands placed on it. Solutions that once seemed cutting-edge are now expected as baseline features. Modern video conferencing platforms are expected to deliver high-quality audio and video, reliable connectivity, and low-latency communication.
This blog post explores the Python SDK for the Vonage Video API and demonstrates how to build moderation and archiving features into a video conferencing application. Each of the features covered is demonstrated in an accompanying sample application. If you are completely new to the Video API, you may want to start with this tutorial about building a video conferencing app. If you want to skip ahead to the code itself, you can get the sample application up and running by following the README in the repository.
Specifically, this blog post covers:
Live captioning
Muting participants
Removing participants
Recording sessions
Viewing recorded sessions
 Integrate live interactive video directly into your web, mobile, and desktop applications with the Vonage global video platform.
The sample application in this blog post relies on technical concepts and tools outside of Vonage that may be helpful in other areas of software development.
The sample application in this blog post uses Flask, a lightweight yet powerful web framework for Python. As a framework, it enables developers to quickly spin up a web application. We've chosen it for this tutorial because of its ease of use and minimalist approach. Unlike other Python web development frameworks, it gives us just the essentials we need to create a simple video conferencing solution.
Because the sample app runs locally, it isn’t accessible from the public internet. If your local application is not publicly accessible, remote participants cannot connect to the video session. That’s where tunneling comes in. Tunneling exposes local servers to the public internet through temporary or static public URLs. ngrok is a software platform that provides this service. You can learn more about ngrok in our blog post about it.
End users expect seamless, uninterrupted video calls that perform flawlessly. However, achieving this level of reliability involves considerable complexity beneath the surface.
Real-time video communication presents several technical challenges. Callers connect via diverse hardware, operate across varying connectivity infrastructures, and span multiple geographic regions. Furthermore, network conditions fluctuate during active sessions: a smartphone might transition from Wi-Fi connectivity to mobile data, corporate security protocols may restrict certain User Datagram Protocol (UDP) traffic, or an older computer may experience processing bottlenecks.
The Vonage Video API enables developers to integrate high-quality real-time video, instant messaging, screen sharing, and related features into web and mobile applications. To deliver this capability, the Video API leverages WebRTC as its foundation for transmitting audio and video streams. The following concepts are important when working with the Video API:
Session: A session is a logical group of connections and streams. Connections within the same session can exchange messages. A session acts as the virtual room where participants communicate.
Connection: An endpoint that participates in a session and is capable of sending and receiving messages. A connection is either connected and can receive messages, or it’s disconnected and cannot receive messages.
Stream: A media stream flows between two connections. This refers to the actual bytes containing media that are being exchanged. Media can consist of audio only, or audio and video. You can also create screenshare and custom streams.
Token: The Video API platform uses tokens for authorization so you don’t have to worry about creating users on the platform. In this example app, we use tokens to create video session participants on the fly.
Publisher: This refers to the client publishing a media stream.
Subscriber: A client that receives media streams.
Signaling: This refers to sending text and data between clients connected to a session as messages. These messages allow developers to build basic text chat, send instructions from one client to another, and create other valuable experiences.
For a deeper dive into these key terms and concepts, check out the Video API glossary or refer to the Video API documentation. You can also check out our introduction to the Video API on YouTube:
The Video API platform makes it possible to embed real-time, high-quality interactive video, messaging, screen-sharing, and more into web and mobile apps. The platform includes client libraries for the web, mobile and desktop platform as well as server-side SDKs.
What Is An SDK?
SDK stands for “software development kit.” An SDK is an installable package of tools designed to make it easier for developers to implement a particular platform or technology. The Python SDK for the Video API makes it easier for Python developers to integrate Vonage into their applications because it translates the API into patterns and structures specific to the language.
Both client-side and server-side SDKs provide these kinds of tools. The difference lies in where they are located within the architecture of an application. Client-side SDKs help developers build user interfaces, interactive experiences, and real-time communication features. Because of this, client-side SDKs are typically written for JavaScript and its frameworks and libraries, as well as for mobile and desktop operating systems.
Conversely, a server-side SDK provides tooling for backend development. This is the part of an application responsible for handling requests, processing data, additional business logic, security, and authentication. As the name implies, server-side SDKs help developers write software that will be deployed to a server (typically in the cloud) and are therefore typically written for Python, Java, Node.js, or PHP.
The following table provides a summary of the differences between between client-side and server-side SDKs:
Client-Side | Server-Side | |
|---|---|---|
Place in Application Architecture |
|
|
Security & Authorization |
|
|
Programming Languages |
|
|
In this blog post, we will be covering the Python SDK for the Vonage Video API. It is a server-side SDK that lets you create and moderate sessions, generate tokens, and work with archiving. You can read more about how the client-side and server-side Video APIs interact in our documentation.
The example application featured in this blog post uses Python and Flask for the backend and JavaScript on the frontend to create and coordinate a video session. The application supports the following features:
Creating a video session
Allowing presenters to publish streams
Enabling presenters to:
Enable live captioning
Mute or remove participants
Start session archiving
If you want to get the code up and running, you can follow the README in the example app repo. Creating sessions and enabling real-time chat between participants is covered in our blog post about building a video conferencing application.
Live captions can improve an application's user experience and user engagement. Captioning improves the accessibility score of your application. Accessibility regulations in some regions may require captioning support. Captions can improve comprehension in noisy or uncontrolled environments, improving the overall user experience.
You can use the Live Captions API to transcribe audio streams and generate real-time captions for your application. The Video Live Captions API uses a transcription service to provide real-time captions for participants in a session.
Please note: Live Captions is a usage-based product. Usage is charged based on the number of audio streams of participants (or stream IDs) sent to the transcription service. For more information, see the Live Captions API pricing page.
In order to use Live Captions, your session must be created with the “Media Router” option and in order to enable captions, a participant needs a token with the “Moderator” role.
In the Python SDK, these options are handled with SessionOptions and TokenOptions objects, respectively:
session_options = SessionOptions(media_mode=MediaMode.ROUTED)
video_session = vonage_client.video.create_session(options=session_options)if presenter:
token_options = TokenOptions(session_id=session_id, role=TokenRole.MODERATOR)
else:
token_options = TokenOptions(session_id=session_id, role=TokenRole.PUBLISHER)
token = vonage_client.video.generate_client_token(token_options).decode("utf-8")
In the example code, we grant presenters with the ability to enable captions by generating a token with the MODERATOR role.
To learn more about tokens, token roles, and the capabilities of each role, refer to the documentation.
The following endpoints are what we use to communicate with the backend and send a request to the Live Captions API. The endpoint to start captions uses a session ID and token to create a CaptionsOption object that is then passed to the start_options function. The function returns a CaptionsData object.
@app.route("/captions/start", methods=["POST"])
def start_captions():
    """Endpoint to start captions"""
    data = request.get_json()
    print(f"Start captions request data: ==> {data}")
    session_id = data.get("sessionId")
    token_id = data.get("token")

    if not session.get("is_presenter"):
        return jsonify({"error": "Unauthorized"}), 403

    if not session_id or not token_id:
        return jsonify({"error": "sessionId or token is missing"}), 400

    options = CaptionsOptions(
        session_id=session_id,
        token=token_id,
    )

    captions: CaptionsData = vonage_client.video.start_captions(options)

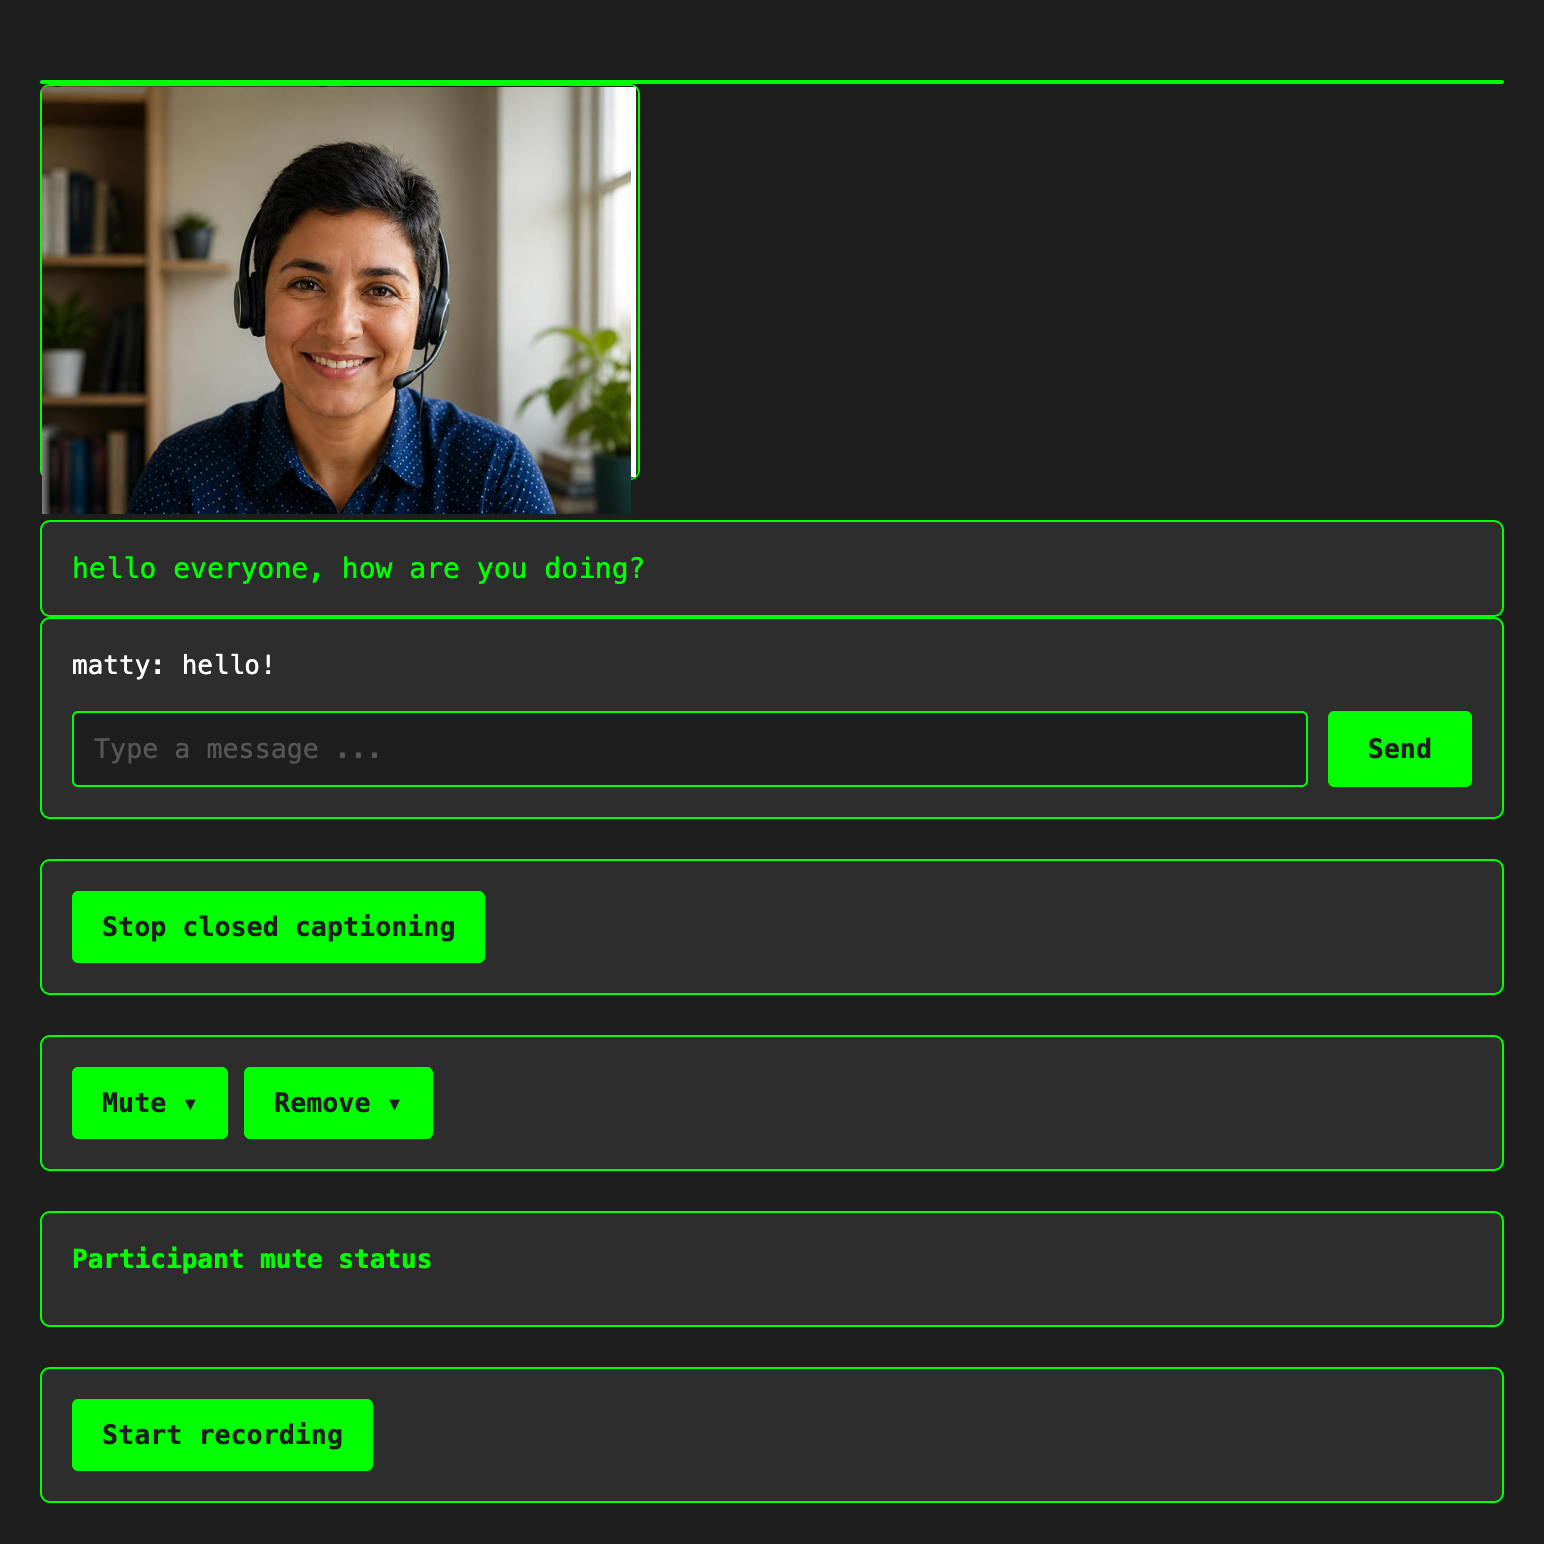
return jsonify({"caption_id": captions.captions_id})The caption ID is passed to the frontend and used to display the transcribed audio in the UI. In the example application, the captions will appear below the video. Please note that it may take a moment for captions to begin appearing.
To learn more about the Live Captions API as well as view sample code for frontend implementation, refer to the documentation.
Moderators may need to control participant audio or session access to improve the overall meeting experience. For instance, a participant may forget to mute their microphone, resulting in unintended audio distractions during a session; at the extreme end of moderation, a participant may need to be forcefully removed from the session. A participant with Moderator role privileges has access to both these functions with the Video API.
In the example application, we define a muting endpoint that makes a call to the API. The API requires a session ID and a stream ID in order to be successful.
@app.route("/mute-stream", methods=["POST"])
def mute_stream():
    data = request.json
    session_id = data.get("sessionId")
    stream_id = data.get("streamId")

    vonage_client.video.mute_stream(session_id, stream_id)
return jsonify({"message": f"Stream {stream_id} muted successfully."}), 200Additionally, participants with the Moderator role can mute all streams in a session and disable muting in all streams. Implementing these functions is beyond the scope of this blog post, but you can find code examples in the documentation on muting participants.
When working with the muting endpoints, it’s important to remember a few points:
There is no API for un-muting a single participant. This is because in a typical video session use case, participants would then un-mute themselves when they need to speak.
Using
mute_all_streamsmutes all current streams as well as all future streams published in a session. This function also accepts a list of stream IDs to exclude from the forced mute.When a stream is muted as a result of either
mute_streamormute_all_streams, thePublisherobject dispatches amuteForcedevent in each client publishing a muted stream.Executing
disable_mute_all_streamswill remove the forced mute from new published streams – existing streams will remain muted.
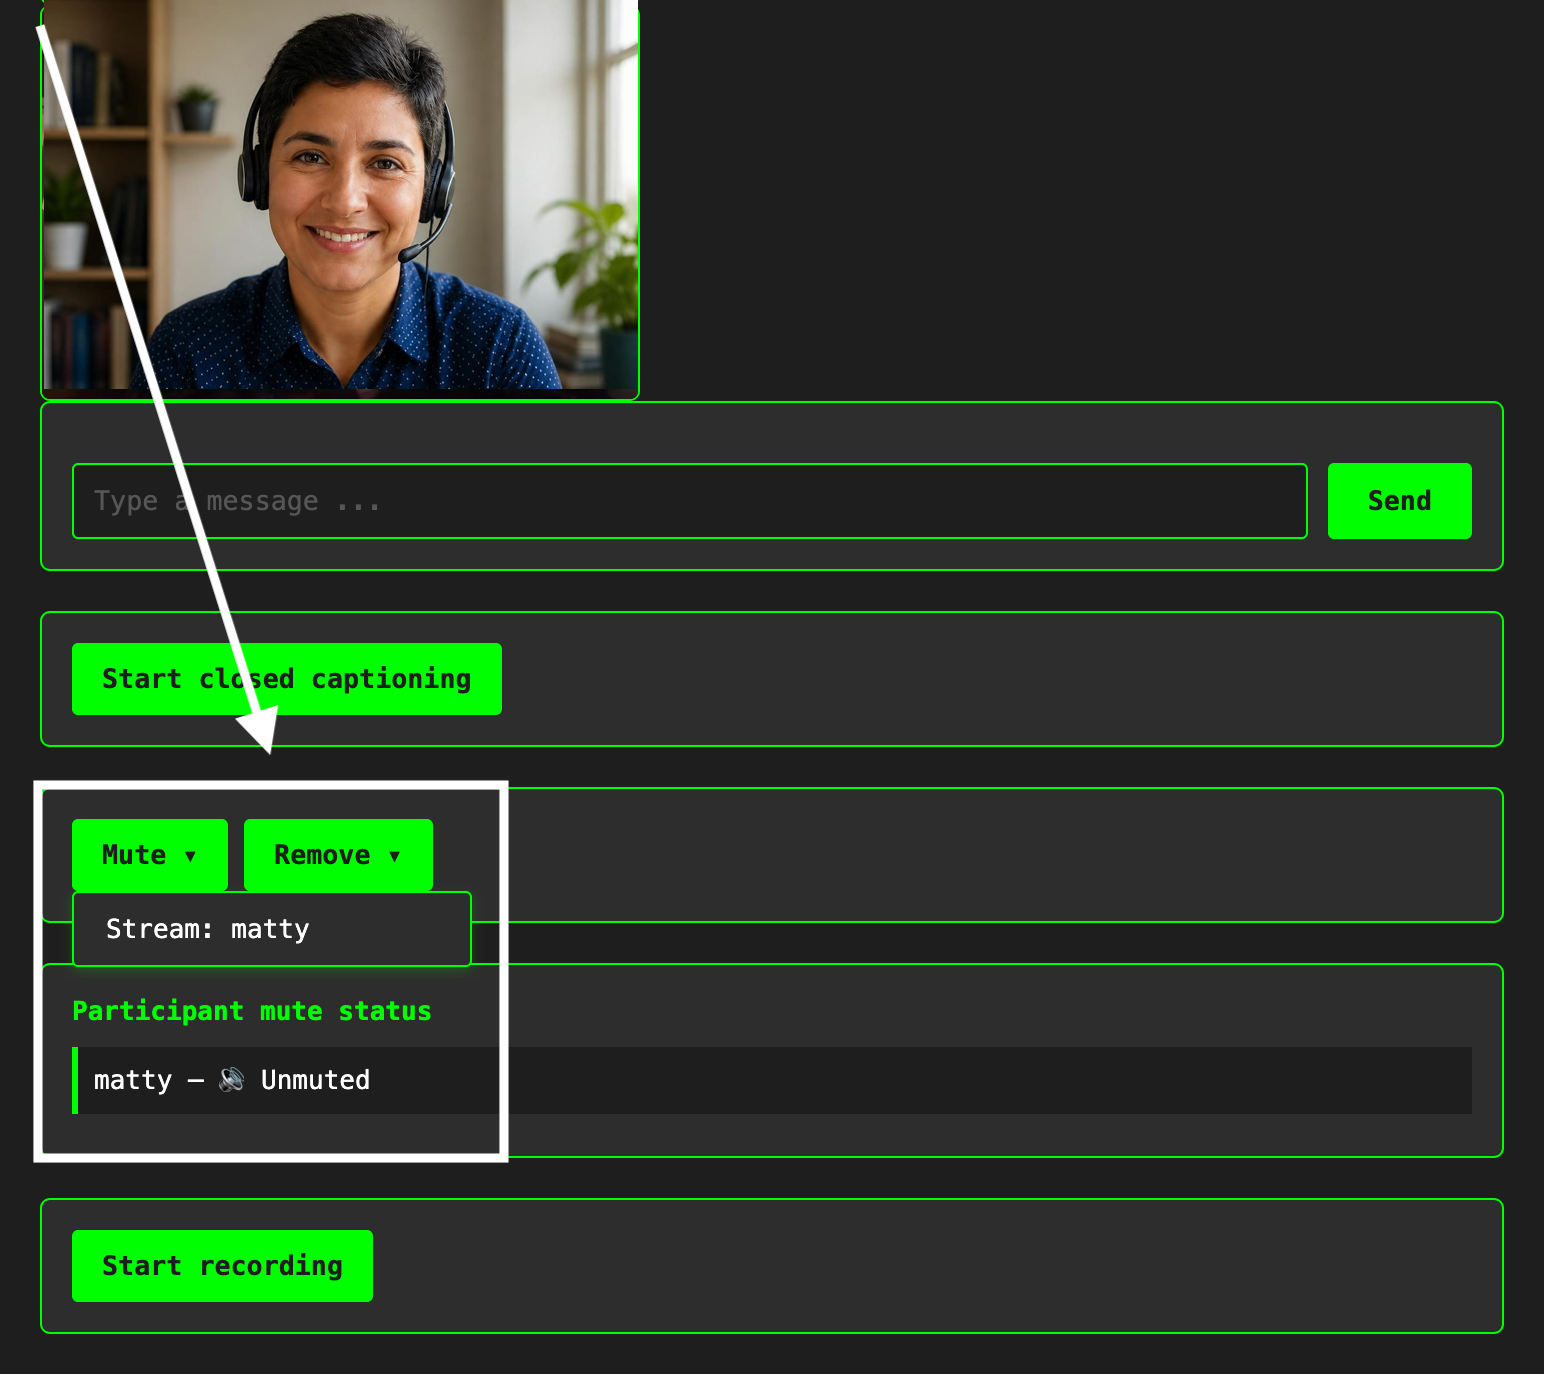
You can remove a participant by calling the disconnect_client API. In the example application, we define a /remove-participant endpoint that calls this API. The API requires a session ID and a connection ID in order to be successful.
@app.route("/remove-participant", methods=["POST"])
def remove_participant():
    data = request.json
    session_id = data.get("sessionId")
    connection_id = data.get("connection_id")

    vonage_client.video.disconnect_client(session_id, connection_id)
    return (
        jsonify({"message": f"Participant {connection_id} removed successfully."}),
        200,
    )
There may be occasions when you want to record a video session for later viewing or processing. You can do that with the archive methods in the SDK, which include the following functionality:
Starting an archive recording
Stopping an archive recording
Listing archive recordings
Retrieving archive recording information
Deleting an archive
For this blog post and in the accompanying example application, we’ll focus on starting, stopping, and retrieving an archive recording.
In order to use the archive methods, you need to create a session with the Routed Media Mode. You can only create an archive for sessions that have at least one client connected.
In the example application, we define the following endpoint, which creates a CreateArchiveRequest object to capture the archive settings and then passes that to the start_archive function:
@app.route("/archive/start", methods=["POST"])
def start_archive():
    """Endpoint to start archiving"""
    data = request.get_json()
    session_id = data.get("sessionId")

    if not session_id:
        return jsonify({"error": "sessionId is required"}), 400
    if not session.get("is_presenter"):
        return jsonify({"error": "Unauthorized"}), 403

    archive_options = CreateArchiveRequest(session_id=session_id)
    archive: Archive = vonage_client.video.start_archive(archive_options)

    archive_id = archive.id

return jsonify({"archive_id": archive_id, "status": archive.status})Using the resulting archive ID, we can then define an endpoint to stop the archive recording:
@app.route("/archive/<archive_id>/stop", methods=["POST"])
def stop_archive(archive_id):
    """Endpoint to stop archiving"""

    if not archive_id:
        return jsonify({"error": "archiveId is required"}), 400

    archive: Archive = vonage_client.video.stop_archive(archive_id)
    return jsonify({"archive_id": archive.id, "status": archive.status})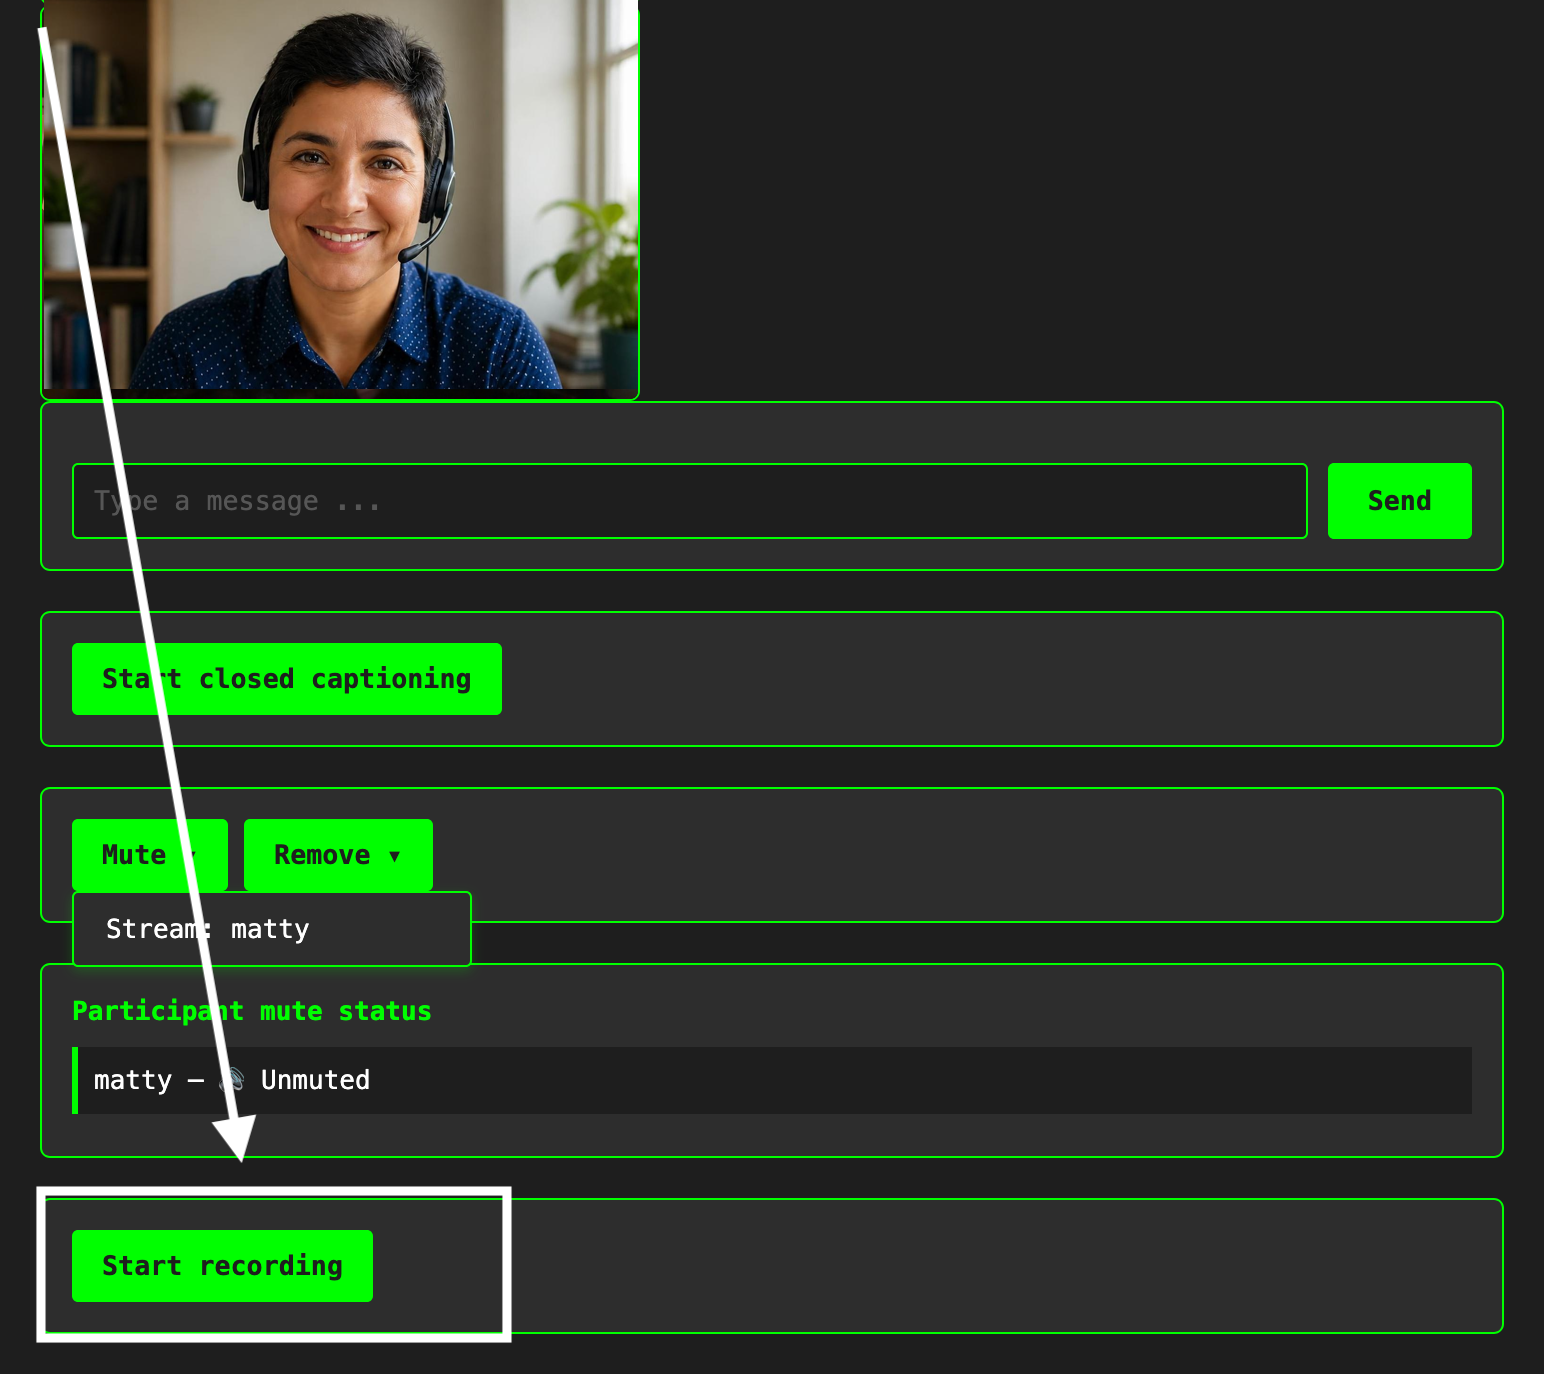
When you stop recording an archive, the Vonage video platform creates an MP4 file or – in the case of individual stream archives – a ZIP file. Once an archive is ready, its status changes to available, and the get_archive method returns the archive URL. This method is used in conjunction with polling on the frontend of the example application to define an endpoint that renders a link to the archive.
@app.get("/archive/<archive_id>/status")
def archive_status(archive_id):
    """Endpoint to check status of archive"""
    try:
        archive = vonage_client.video.get_archive(archive_id)
        return jsonify(
            {
                "status": archive.status,
                "url": archive.url,
            }
        )
    except Exception as e:
return jsonify({"error": str(e)}), 500This example code demonstrates just the basics of archive recording with the Video API. To learn more about what’s possible with video archiving, refer to the documentation.
The Vonage Video API Python SDK makes it easier to build real-time video applications with advanced moderation and archiving capabilities. In this example application, we explored how to create sessions, manage participant permissions, enable live captions, moderate participants, and record video sessions for later playback.
These features are essential for modern video conferencing experiences, especially in applications that require accessibility, moderation controls, or session persistence. By combining the Python SDK with Flask and the Video API platform, developers can quickly prototype and deploy reliable real-time communication workflows.
By combining a simple Flask backend with a JavaScript-powered frontend, you have a template for a working video conferencing app. You can extend this foundation with more advanced features like moderation controls, recording, screen sharing, or enhanced UI/UX to suit your use case. For quicker iteration, the Vonage Video API Playground makes it easy to try out different features right in your browser!
Best Practices to Get Started With Vonage Video: Best practices for integrating the Vonage Video API into your applications.
Video Archiving with the Vonage Video API and React: Learn four video archiving modes with the Vonage Video API – including Experience Composer.
Getting Started With the Vonage Live Captions API in Node.js: Learn how to add real-time captions to your Vonage Video calls using the Live Captions API with Node.js and a simple frontend.
Have a question or want to share what you're building?
Subscribe to the Developer Newsletter
Follow us on X (formerly Twitter) for updates
Prefer video? Watch tutorials on our YouTube channel
Connect with us on the Vonage Developer page on LinkedIn
Help us improve our developer experience by filling out our Voice of the Developer Feedback
Stay connected and keep up with the latest developer news, tips, and events.