Share:
Roberto is a Full Stack Engineer on the OpenTok Client SDK team. He loves learning new bits of Android, iOS, Linux, Windows, you name it! In his free time, he is very passionate about programming languages, computer graphics, and video game development for current and old platforms like ZX Spectrum and Commodore 64.
Create Custom AR Filters With Vonage Video API and DeepAR
Time to read: 12 minutes
Augmentation using AI is the future of video calling. It will help us break the (virtual) ice, assist in navigating emerging use cases in interactive video, like shopping and remote assistance, and create entirely new experiences. Those experiences' future inventors are probably "sitting" in a virtual classroom being shaped by virtual video like no generation before them.
As Vonage Video API developers, you can integrate our video API with the DeepAR SDK to enrich your users' video engagement experience.
You can make the video calls more professional by abstracting the background—replacing, blurring, pixelating the objects, or improve your user's experience by improving lighting and subtle skin tone effects.
Or have more fun with a wide variety of animated filters from DeepAR.
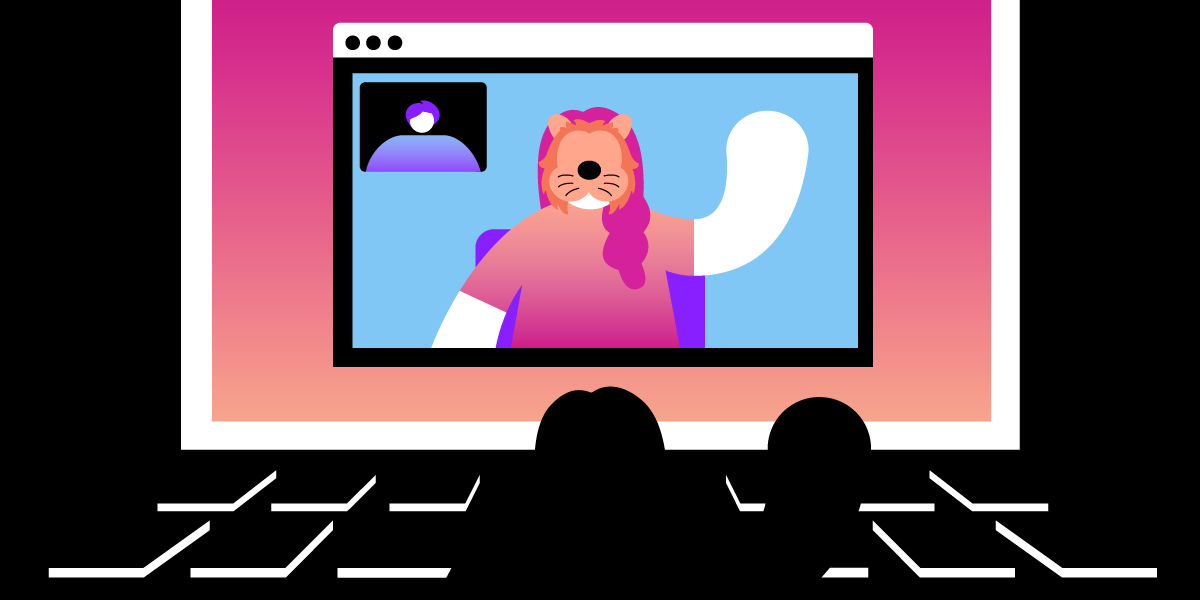
 Augmented Reality filters in action
There is a high chance that you have already participated in a video meeting, whether it was a work meeting, a doctor consultation, or a family gathering.
In this new paradigm of video-focused meetings, many new applications can add value to video communication. Let's review a few common ways augmentation is being used to improve user experiences and help us be more effective in our remote interactions:
One of the improvements for video communication is abstracting everything in the user's background with a simple background blur, pixelate, or replace features. The benefits include:
enabling caller privacy
facilitating viewer engagement by removing distractions
creating branded experiences
Another example of taking the video calls to the next level with AR is applying filters to the foreground speakers. Implementing these type of filters lets your users:
relax into the video call with light, skin tone and beauty filters
delight and entertain with funny animojis
interact in real-time with 3D objects and even virtual face paint
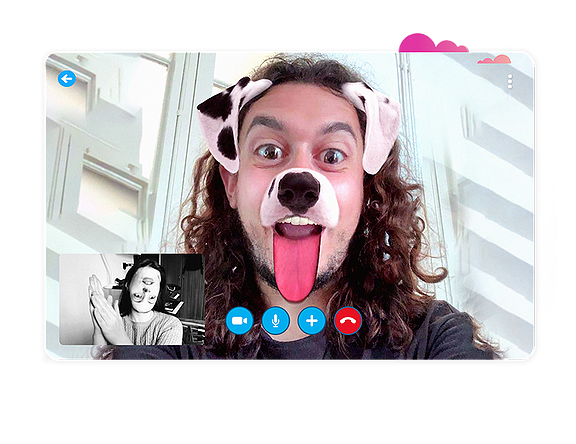 A dog face AR filter in use
The Vonage Video API flexibility makes this possible when integrating with AR partners like DeepAR. In this blog post, we will demonstrate how to make the above use cases possible using a combination of the two APIs.
DeepAR is a mobile and HTML5 optimized AR engine for augmented reality, face filters, background segmentation, makeup, beauty filters, and animoji.
The DeepAR SDK gives developers access to the DeepAR Engine, manages cross-device support, and comes with a DeepAR Studio tool to help you create the AR assets.
To add the DeepAR SDK framework to your iOS application, you need to download the zip file from their website, https://developer.deepar.ai/. Once you have the zip file, you need to uncompress it and drag the framework file to your Xcode project.

Don't forget to set the embed setting of the framework to "Embed & Sign," or the application may not find the library in runtime.
Once you have this set, the next step is to go to https://developer.deepar.ai/ and create a project to get the App key you would need later.
In this blog post, we will create a UIView where you will show the contents of your front camera, and your face, when detected, will be augmented with a cool lion.
If you would like to see all the code for this post in one place, you can find it on the DeepAR GitHub.
In code, you will need to deal with two classes; one is DeepAR SDK's CameraController, this class is in charge of accessing the device camera and fetching images from it. Once it has video feed, it sends them to the ARView instance, which is the other class you have to instantiate.
ARView is responsible for showing the contents of the camera with the AR filters applied. ARView is a regular UIView child, so you need to add it to any parent view inside your app's view hierarchy.
Knowing this, the code could look like this:
let deepARCameraController = CameraController()
let deepARView = ARView(frame: UIScreen.main.bounds)
deepARView.setLicenseKey(deepARLicense)
deepARView.delegate = self

deepARCameraController.arview = deepARView

parentView.insertSubview(deepARView, at: 0)

deepARView.initialize()
deepARCameraController?.startCamera()In the code above, you first create the CameraController, then you create the ARView instance using it as the frame the fullscreen since we will show it occupying the whole screen.
Please note that we are assigning self as the ARView delegate, so you would need to implement/conform to the ARViewDelegate protocol. We will need it later.
Once you have both instances, you assign the ARView property of the CameraController instance to our view and insert it in our parentView.
The only thing left is to initialize the view and capture video from the camera by calling startCamera.
If you run your code, you will notice that there is no 🦁 over your face, and that's because we haven't yet activated the effect.
To do so, you need to implement didInitialize, a method of the ARViewDelegate, which we will call once the ARView has finished initializing, then we can activate the lion filter.
func didInitialize() {
  deepARView.switchEffect(withSlot: "effect", path: Bundle.main.path(forResource: "lion", ofType: ""))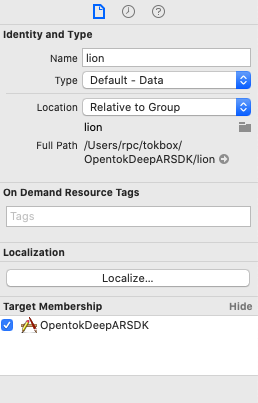
}For that to work, you need to add a file called "lion" to your project. You can find it in the free filters pack you can get from https://developer.deepar.ai/downloads. Once you have it downloaded, you need to drag the file "lion" to the Xcode project root folder and check that it has as target your application, so it is bundled with it.
 XCode
XCode
If you run the application at this point, you should see your face with a cool lion overlay that follows all your movements and gestures.
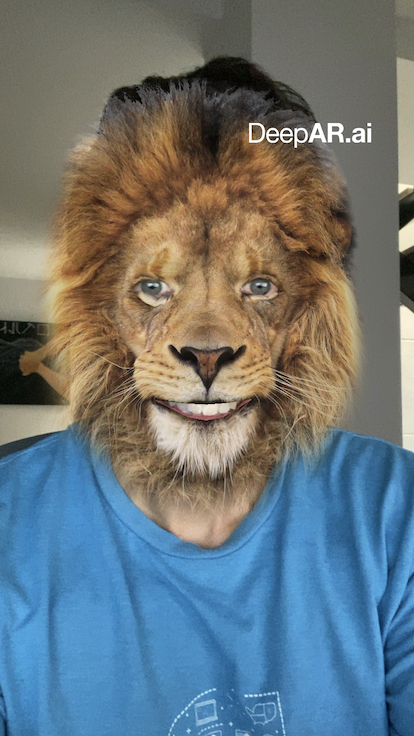 Lion
Lion
The way most developers interact with the Vonage Video API is via the OpenTok SDK. One of the most exciting features of the SDK is the possibility of creating your video driver to send any type of video content to the OpenTok session your publisher is connected to.
Video Drivers can be divided into two different parts:
On the one hand, we have the video capturer, that as its name indicates, has to capture the video from any source (or produce its own somehow) and feed the SDK with the video frames that are going to be sent.
On the other, we have the video renderer, and as probably you have guessed, it is in charge of rendering the video frames that remotely come through an OpenTok session via a subscriber.
If you have used the OpenTok SDK, you will probably have noticed that you don't need to deal with these classes in a typical scenario. That's because the OpenTok SDK ships with default capturers and renderers that capture video from the default system camera and renders the remote video frames using each platform's graphics technology, whether it is Metal, OpenGL, or DirectX.
Video Drivers are very powerful. You can create a video driver to send any video content. For example, you could capture the output of any game engine, and send those video frames to the OpenTok SDK, and you will be streaming the contents of your game to any participant of an OpenTok session. You can also apply any rendering filter, like B&W or edge detection so that any subscriber will look different.
Although it could look like creating a custom video capturer is a complicated task, it is probably more straightforward than you can expect.
You just need to implement one interface, extend a class, or conform a protocol depending on the language and platform of your choice. Although, as you have seen above, we are using swift and iOS in the source code examples for this post.
In that class, you will need to implement or override some basic methods controlling the capturer's lifecycle. You will need to implement init, startCapture, stopCapture, isCaptureStarted methods, as well as a method to specify the settings of the capturer which consists of specifying the height, width, frame rate and pixel format of the video frames the capturer is going to send.
After those methods have been implemented, you will need to feed the capturer with frames. Depending on the platform, it can be different, but usually, you just need to call a method with the video frame data.
Let’s see how an initial implementation could look like,
class DeepARVideoCapturer: NSObject, OTVideoCapture {
  fileprivate var captureStarted = false

  var videoCaptureConsumer: OTVideoCaptureConsumer?

  func initCapture() {
  }

  func releaseCapture() {
  }

  func start() -> Int32 {
    captureStarted = true
    return 0
  }

  func stop() -> Int32 {
    captureStarted = false
    return 0
  }

  func isCaptureStarted() -> Bool {
    return captureStarted
  }

  func captureSettings(_ videoFormat: OTVideoFormat) -> Int32 {
    return 0
  }
}
Above is the necessary code for a custom capturer. As you can see, you need to implement the OTVideoCapture protocol, which has methods that will be called when the video capturer needs to be initialized, started, or stopped. It is very common to have an internal flag to know when the capture has started, and that is what we do in this basic implementation. We will update that flag in the start and stop methods.
You would have noticed that this class inherits from NSObject, since this is not very common in swift classes, which inherits just from Object. The reason behind this is that OTVideoCapture protocol inherits from NSObject protocol, mainly because OpenTok SDK codebase is mostly Objective-C and in this language, all things inherit from NSObject.
Once you have a class like this, the next step is to tell the publisher that, instead of using the default capturer, it needs to use our class. The code for this looks like:
let settings = OTPublisherSettings()
settings.name = UIDevice.current.name
settings.videoCapture = DeepARVideoCapturer()
otPublisher = OTPublisher(delegate: self, settings: settings)The capturer we build in the code snip above is not yet sending anything, since it just contains initialization code. If you try to use what we have right now, it should work, but you will be publishing only black frames. The next step is knowing how to send frames.
But we will delay this part until we have some frames to send, and those frames will be the output of our DeepAR view.
We have reached the last part of the blog post, in the first part we saw how to build a basic video capturer, in the second part, we saw how to how DeepAR's ARView with an AR filter of a lion replacing your face. The only thing missing in our custom video capturer was sending video frames, so it looks like we have everything in place for the last step.
In this step, we will wire both worlds together; we need to do a couple of things. First, we need to get the video frames that ARView is producing, and second, we need to send them using the video capturer we built.
The first step consists of obtaining an image from the ARView. This can be done very quickly by setting the ARView delegate or listener. The delegate or the class implementing the listener interface will receive a call to its method when a frame is available. Once this happens, we need to send that frame to the OpenTok world.
If you remember, we already set the delegate of ARView, and in its didInitialize method we enabled the lion filter, now we need to tell ARView that we want to get its video frames. This is done using the code below:
func didInitialize() {
    deepARView.switchEffect(withSlot: "effect", path: Bundle.main.path(forResource: "lion", ofType: ""))
    deepARView.startFrameOutput(withOutputWidth: 640, outputHeight: 0, subframe: CGRect(x: 0, y: 0, width: 1, height: 1))
}The first line is what we have in the first part of the blog post, and with the second line, we are requesting ARView to call another delegate method with the contents of the AR View.
After doing this, we need to implement the frameAvailable method, which will be called every time a video frame is ready. In that method, we will send the contents of it to OpenTok capturer.
func frameAvailable(_ sampleBuffer: CMSampleBuffer!) {
  autoreleasepool {
    guard let pb = CMSampleBufferGetImageBuffer(sampleBuffer) else {
      print("Invalid Image buffer")
      return
    }
    deepARCapturer.pushFrame(pb)
  }
}You may have noticed the pushFrame method in the last line, this method is where we bridge DeepAR view and OpenTok video capturer, if you remember, deepARCapturer was the name for the custom video capturer we were using.
This is probably the most complicated part of the blog post. We are dealing with CoreImage and CoreVideo iOS Frameworks to get the RGB information of the frame.
In order everything to work, we need to implement the pushFrame in the DeepARVideoCapturer, and it will look like this:
func pushFrame(_ pb: CVPixelBuffer) {
  // 1
  if otFrame == nil {
    let otFormat = OTVideoFormat()
    otFormat.pixelFormat = .ARGB
    otFormat.imageWidth = UInt32(CVPixelBufferGetWidth(pb))
    otFormat.imageHeight = UInt32(CVPixelBufferGetHeight(pb))
    otFormat.bytesPerRow = [CVPixelBufferGetBytesPerRow(pb)]

    otFrame = OTVideoFrame(format: otFormat)
  }

  guard let frame = otFrame else {
    print("Error creating video frame")
    return
  }

  // 2
  CVPixelBufferLockBaseAddress(pb, .readOnly)
  if let frameData = CVPixelBufferGetBaseAddress(pb) {
    frame.orientation = .up
    frame.clearPlanes()
    frame.planes?.addPointer(frameData)

    // 3
    videoCaptureConsumer?.consumeFrame(frame)
  }
  CVPixelBufferUnlockBaseAddress(pb, .readOnly)
}Let's go step by step to understand this method. As you can see, we have divided it into three sections.
In Section 1 (marked with //1 above), we build a new instance of OTVideoFrame. This OTVideoFrame class acts as the container of the video frame information that we will use later when we feed the frame to the OpenTok SDK. Typically a video frame will contain its format information (RGB, YUV, etc.), the dimensions, the number of bytes that a row in the video frame weights, and obviously, the video frame information.
You may wonder why we need the row byte size, video frame formats are complex to explain, and there are different formats, but usually, it helps knowing how big the video frame information buffer is. You can multiply the number of bytes per row by the image height, and you will have it. There are times that the size of the row is not calculated by multiplying the size of a pixel by the width of the image, since additional empty pixels are sometimes added as padding.
If this last paragraph is confusing to you, don't worry, you don't know what to put in there, since CoreVideo functions will return it for you.
Going back to our core, as you can see, we will reuse the "container" in each frame, take into account that this function will be called around 30 times per second.
After creating an instance of the OTVideoFrame and filling it in with the information that is constant in all video frames, we can move to section 2 (// 2).
In this section, before doing anything we lock the content of the video frame to prevent that any other thread can change or delete it while we are accessing to it, we can do it by calling CVPixelBufferLockBaseAddress, after that, then we get the pointer to the frame information by calling CVPixelBufferGetBaseAddress, and finally, we add that information to our OTVideoFrame instance.
As we stated before, there are different types of video frame formats. Here we are going to use ARGB, which is usually called a pixel image format. That means that the buffer is composed of a succession of pixel information encoded with four values, one for the Alpha channel and others for R, G, and B.
There are other formats like YUV422, which is called a planar image format, and that's because the image is divided into different planes.
We are explaining this to understand the frame.planes?.addPointer() call, since we are using ARGB, and it has one plane, that is how we fill our OTVideoFrame instance with frame data.
Finally, and having a complete OTVideoFrame instance with video frame information and content, we just need to send it to the OpenTok SDK to be sent over the network to the rest of the Session participants. And you do it in Section 3 (// 3) with videoCaptureConsumer?.consumeFrame(frame) call.
videoCaptureConsumer is a member of the OTVideoCapture protocol, and that member is set when the OTVideoCapturer is initialized by the OpenTok SDK, whenever you want to send a video frame to the session, you need to call this method.
After all these steps, you have everything ready to build a Publisher that will send the contents of DeepAR magic to an OpenTok Session and impress everyone with your lionlike appearance.
The Vonage Video API team is committed to making investments in AR product features and partnerships to ensure our customers have the best technology and expertise available to them as they build and improve interactive video experiences.
As Vonage grows our Video API, we've seen increased demand for the services provided by our partners. We are grateful to work with fantastic technology, application, and integration companies across the globe. With Vonage, you can take advantage of our communication APIs' full-spectrum and grab a more significant piece of the pie.
You may also like:
Tutorial: Use a Green Screen in Javascript With Vonage Video
Find a Partner: Communications APIs Partners
Share:
Roberto is a Full Stack Engineer on the OpenTok Client SDK team. He loves learning new bits of Android, iOS, Linux, Windows, you name it! In his free time, he is very passionate about programming languages, computer graphics, and video game development for current and old platforms like ZX Spectrum and Commodore 64.