
Share:
Former Developer Advocate for Vonage, where his role was to support the local tech community in London. He’s an experienced events organiser, boardgamer and dad to a cute little dog called Moo. He’s also the lead organizer for You Got This - a network of events on the core skills needed for a happy, healthy work life.
Build a Video Conversation Platform for Online Gatherings With Nuxt.js
Time to read: 5 minutes
During a time where many events are going online, one challenge we still face as community organizers is how to facilitate conversations between attendees during breaks and after talks have ended.
Today, the Vonage Developer Community Team posted about how we are supporting events to go online. One part of this is the Social Cafe—an application in which events have their own lobbies with multiple conversation tables. Each table is a video call powered by the Vonage Video API (formerly TokBox OpenTok).
There are two ways to use this Social Cafe demo right now:
Add your own event to our hosted demo free of charge. Guidelines can be found in our contributing guidelines.
Take our demo and deploy it to Netlify in five minutes from our GitHub repository for this project.
In this tutorial, we'll cover how the application was built so you can create your own from scratch.
A Vonage Video API account
Node.js installed on your machine
Run npx create-nuxt-app social-cafe in your terminal. You'll be presented with a series of questions—pick the defaults for all, except the following:
Choose programming language - JavaScript
Choose the package manager - npm
Choose rendering mode - Single Page App
Once you've answered all questions, a new project will be created in the social-cafe directory. Navigate to the directory in your code editor and terminal.
Checkpoint! Make sure your application is set up correctly by running npm run dev and opening http://localhost:3000
The flow of this application is:
Users start on the landing page. They provide an event code.
If valid, users are routed to an event lobby. It contains event information and a list of related tables.
A table is a unique video call. Users can go back to an event lobby.
There are multiple ways to store event data, many including external databases, but for this application, you will be storing them in a file. The file can be edited to add or edit event information.
Create store/index.js and add the following code in the new file:
export const state = () => ({
  events: [
    {
      slug: 'example-event',
      name: 'Event Name',
      coc: 'https://hackcodeofconduct.org',
      rooms: [
        { slug: 'built', name: 'What did you build this week?' },
        { slug: 'work', name: 'Where do you work?' },
        { slug: 'hobby', name: 'What are your hobbies?' }
      ]
    }
  ]
})
This file represents your application-wide store, and the content can be accessed on any page using this.$store.state. Every event should be its own object in the events array. The slug will be used both as the event code and the text in the URL, so make sure they are valid for a URL and easy to type.
Restart your Nuxt server and reload your browser.
Open pages/index.vue, delete the content, and replace it with a minimal template:
<template>
  <div>
    <h1>Landing Page</h1>
  </div>
</template>You should notice that your browser page has updated automatically when you saved the file. This is called hot-reloading and is a feature that Nuxt.js provides without any configuration.
Let's add a text input to our template with data-binding:
<template>
  <div>
    <h1>Landing Page</h1>
    <label for="event">Event Code</label>
    <input id="event" type="text" v-model="eventName">
  </div>
</template>

<script>
export default {
  data() {
    return {
      eventName: ''
    }
  }
}
</script>When users press enter, you must validate that the code is a valid event slug before navigating to the event lobby. This will avoid the possibility of users ending up in the event that doesn't exist and having no one to chat with.
<template>
  <div>
    <h1>Landing Page</h1>
    <label for="event">Event Code</label>
    <input id="event" type="text" v-model="eventName" @keyup.enter="goToEvent">
  </div>
</template>

<script>
export default {
  data() {
    return {
      eventName: ''
    }
  },
  methods: {
    goToEvent() {
      if (this.$store.state.events.find(e => e.slug.toLowerCase() === this.eventName.trim().toLowerCase())) {
        this.$router.push(`/${this.eventName}`)
      } else {
        alert('No event with that code')
      }
    }
  }
}
</script>In this method, you are checking if the eventName exists as an event slug in the application store you set up earlier. Pushing both strings to lowercase means this is a case-insensitive check which, if successful, will send the user to /event-name.
Note that you must also call this method. In this project, we are calling it when enter is pressed and the input has focus. You might also choose to bind this to a button.
Before you can test this has worked, you must set up the page you will direct people to. Create a file in pages/_event/index.vue and create a minimal template:
<template>
  <div>
    <h1>Event {{$route.params.event}}</h1>
  </div>
</template>The underscore in the directory name means this is a dynamic value. You can access it using this.$route.params.event.
Checkpoint! Restart your application, go to http://localhost:3000, type in example-event, and hit enter. Also try another, invalid, event code and you should see an error.
There is a chance users will be directed straight to an event lobby URL, so you must validate the event slug again when the page loads. Add this script to pages/_event/index.vue:
<script>
export default {
  validate ({ params, store }) {
    return store.state.events.find(e => e.slug === params.event)
  }
}
</script>Based on the URL, you only have an event slug. Using similar logic to the landing page's goToEvent() method, create a computed property that returns the whole event object.
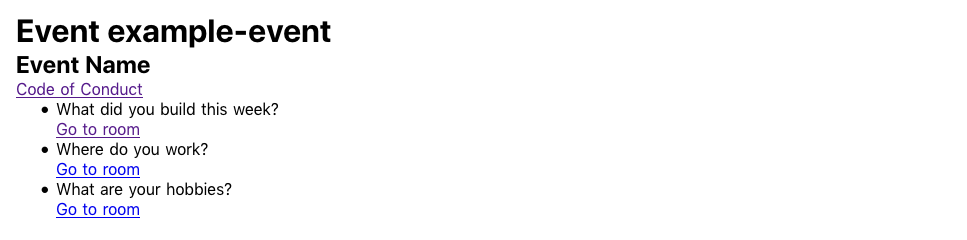
<template>
  <div>
    <h1>Event {{$route.params.event}}</h1>
    <h2>{{ event.name }}</h2>
    <a :href="event.coc">Code of Conduct</a>
    <ul>
      <li v-for="room in event.rooms" :key="room.slug">
        <p>{{ room.name }}</p>
        <n-link :to="`/${$route.params.event}/${room.slug}`">Go to room</n-link>
      </li>
    </ul>
  </div>
</template>

<script>
export default {
  validate ({ params, store }) {
    return store.state.events.find(e => e.slug === params.event)
  },
  computed: {
    event () {
      return this.$store.state.events.find(e => e.slug === this.$route.params.event)
    }
  }
}
</script>Your event name and code of conduct link should now be visible, which means you are successfully grabbing the individual event data from the application store. Looping through the event.rooms array produces a new list item for each room and a link to /event-name/room-name.
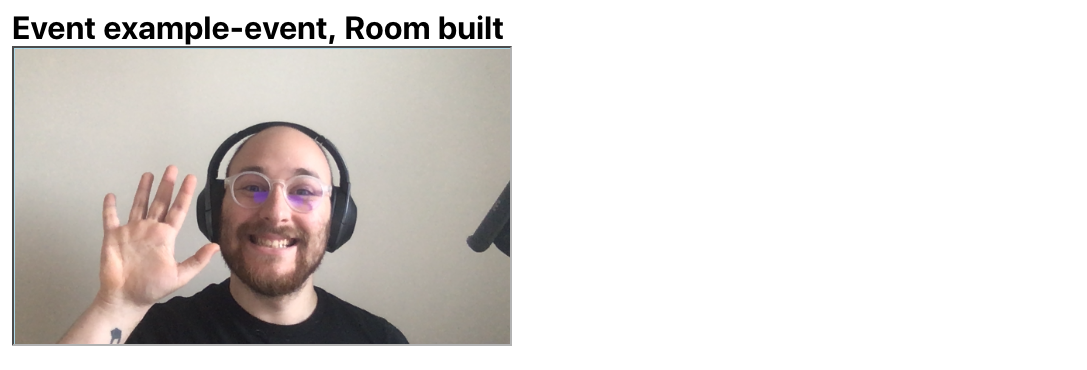
Before testing you should once again create a minimal page. Create a file at pages/_event/_room/index.vue with the following:
<template>
  <div>
    <h1>Event {{$route.params.event}}, Room {{$route.params.room}}</h1>
  </div>
</template>Checkpoint! From your event page click on a table link. You should go to a new page and be able to see the room slug.
You must validate the current slug by building out the validate() method:
<script>
export default {
  validate ({ params, store }) {
    const event = store.state.events.find(e => e.slug === params.event)
    return event.rooms.find(r => r.slug === params.room)
  }
}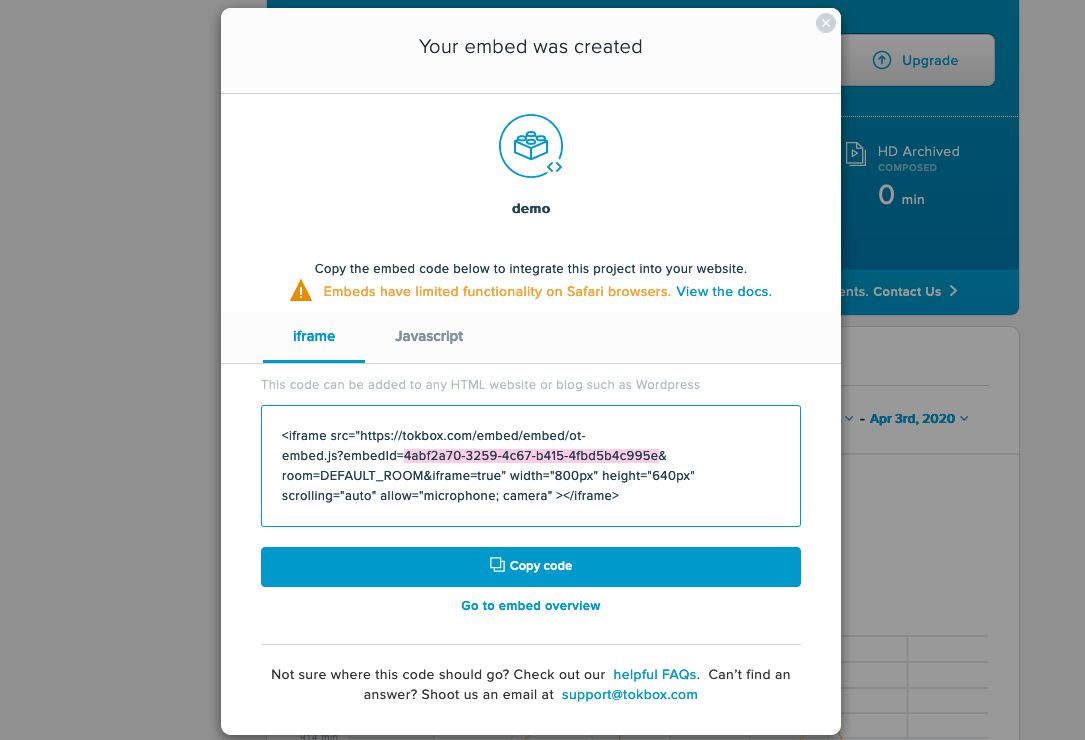
</script>If you haven't already, sign up for a Vonage Video API account and create a new Embed project. The Website URL should be http://localhost:3000. Take note of your embedId.
Add the following line of code below the <h1> element, remembering to substitute your embedId:
<iframe :src="`https://tokbox.com/embed/embed/ot-embed.js?embedId=YOUR_EMBED_ID&iframe=true&room=${$route.params.event}-${$route.params.room}`" allow="microphone;camera" />With the inclusion of this iframe we have a basic video chat fully implemented. Multiple rooms can be created with one embedId using the room URL parameter. This application uses the route parameters to dynamically create a room based on the URL.
There is some small housekeeping to take care of before you wrap up.
Like the event lobby, you will need to add an event computed property below the validate() method:
computed: {
  event () {
    return this.$store.state.events.find(e => e.slug === this.$route.params.event)
  }
}In the template you can now access event information:
<n-link :to="'/' + $route.params.event">Back to {{event.name}} lobby</n-link>
<n-link :to="event.coc">Code of Conduct</n-link>
Create a room computed property:
room () {
  return this.event.rooms.find(r => r.slug === this.$route.params.room)
}In the template you can now access all information in the room object:
<p>Room prompt: {{room.name}}</p>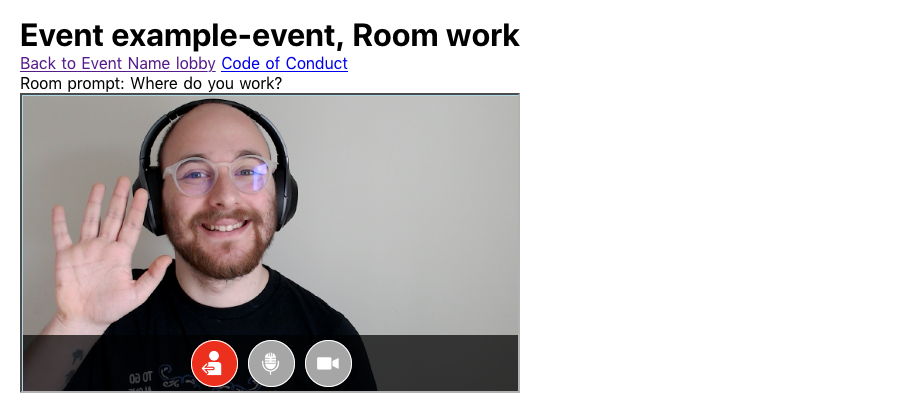
This is a fantastic start, and there are many directions to take this application. You may choose to:
Add some styling
Build a 404 page
Deploy this online (remember to change the Website URL in the Embed project settings within the Video API Account Portal)
Use the Vonage Video API to implement this project and add features such as showing names, screen sharing, and chat.
Check out our post on creating a basic video chat, like this, with Vonage Video API.
The full project code can be found at https://github.com/nexmo-community/social-cafe.
As ever, if you need any support feel free to reach out in the Vonage Community Slack and we hope you find use in this project for communities.
Share:
Former Developer Advocate for Vonage, where his role was to support the local tech community in London. He’s an experienced events organiser, boardgamer and dad to a cute little dog called Moo. He’s also the lead organizer for You Got This - a network of events on the core skills needed for a happy, healthy work life.