Share:
A trained actor with a dissertation on standup comedy, I came into PHP development via the meetup scene. You can find me speaking and writing on tech, or playing/buying odd records from my vinyl collection.
Build a Simple Customer Support Channel with WhatsApp and Laravel
Time to read: 5 minutes
One of the most recent trends in customer support is to have dedicated multi-channel live support. Ten years ago, this would most likely have been a pop-up box in the bottom right corner of your website, but it’s becoming increasingly popular to have interactions using platforms like WhatsApp or through more modern SMS services like RCS. In this article, we’re going to boot up a Laravel application that takes a list of helper agents' phone numbers and matches incoming WhatsApp messages to a dedicated number for each agent.
TLDR: The code can be found here.
First, we need to fetch the app code from GitHub. Type the following into your terminal:
git clone git@github.com:Vonage-Community/blog-messages-laravel_whatsapp_callcenter.gitNext, we need to fetch the application’s dependencies:
composer install
npm iFinally, we run our migrations and run the front-end assets server in dev mode (this is because the app has been adapted from the boilerplate templates you get with Livewire and Blade):
php artisan migrate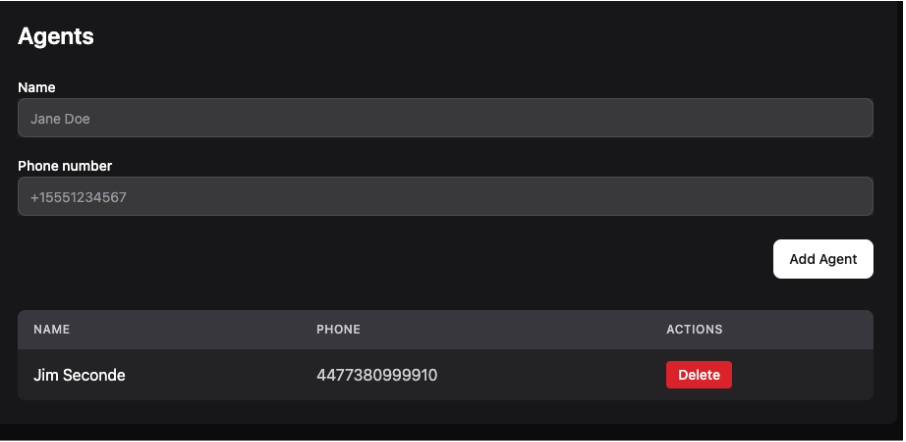
npm run devThe route that has been defined is /agents, so head to that address and you should see the setup page:
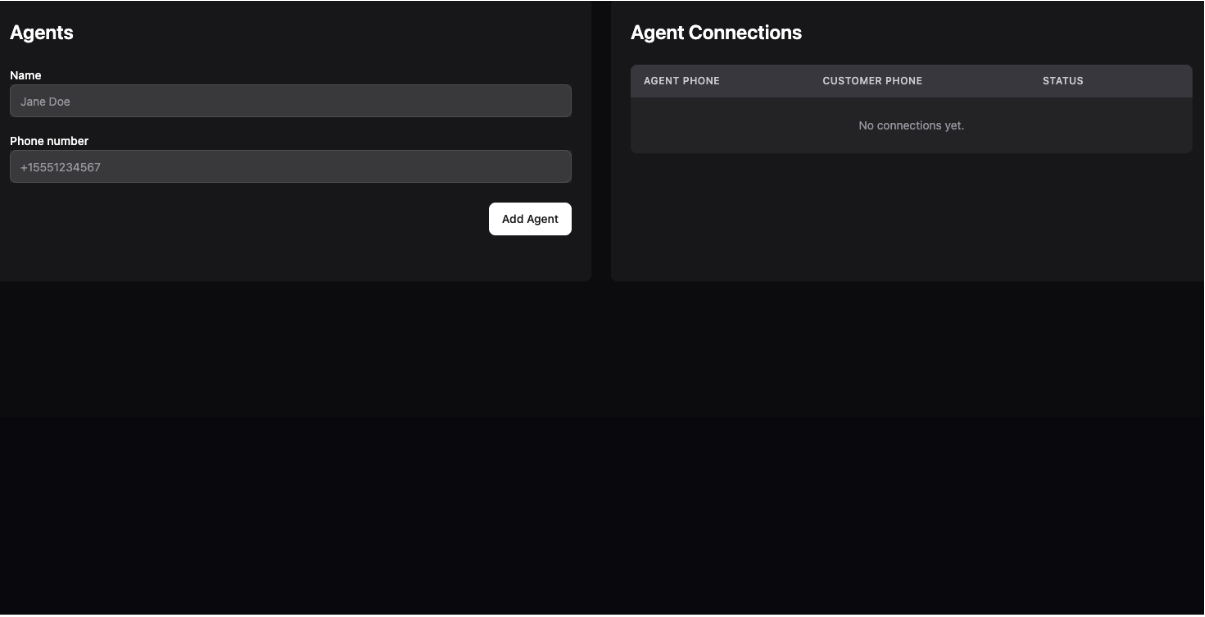 Styling courtesy of Laravel Livewire Flux UI
You won’t be able to do anything yet until you have a private key and have set up an application in the Vonage dashboard.
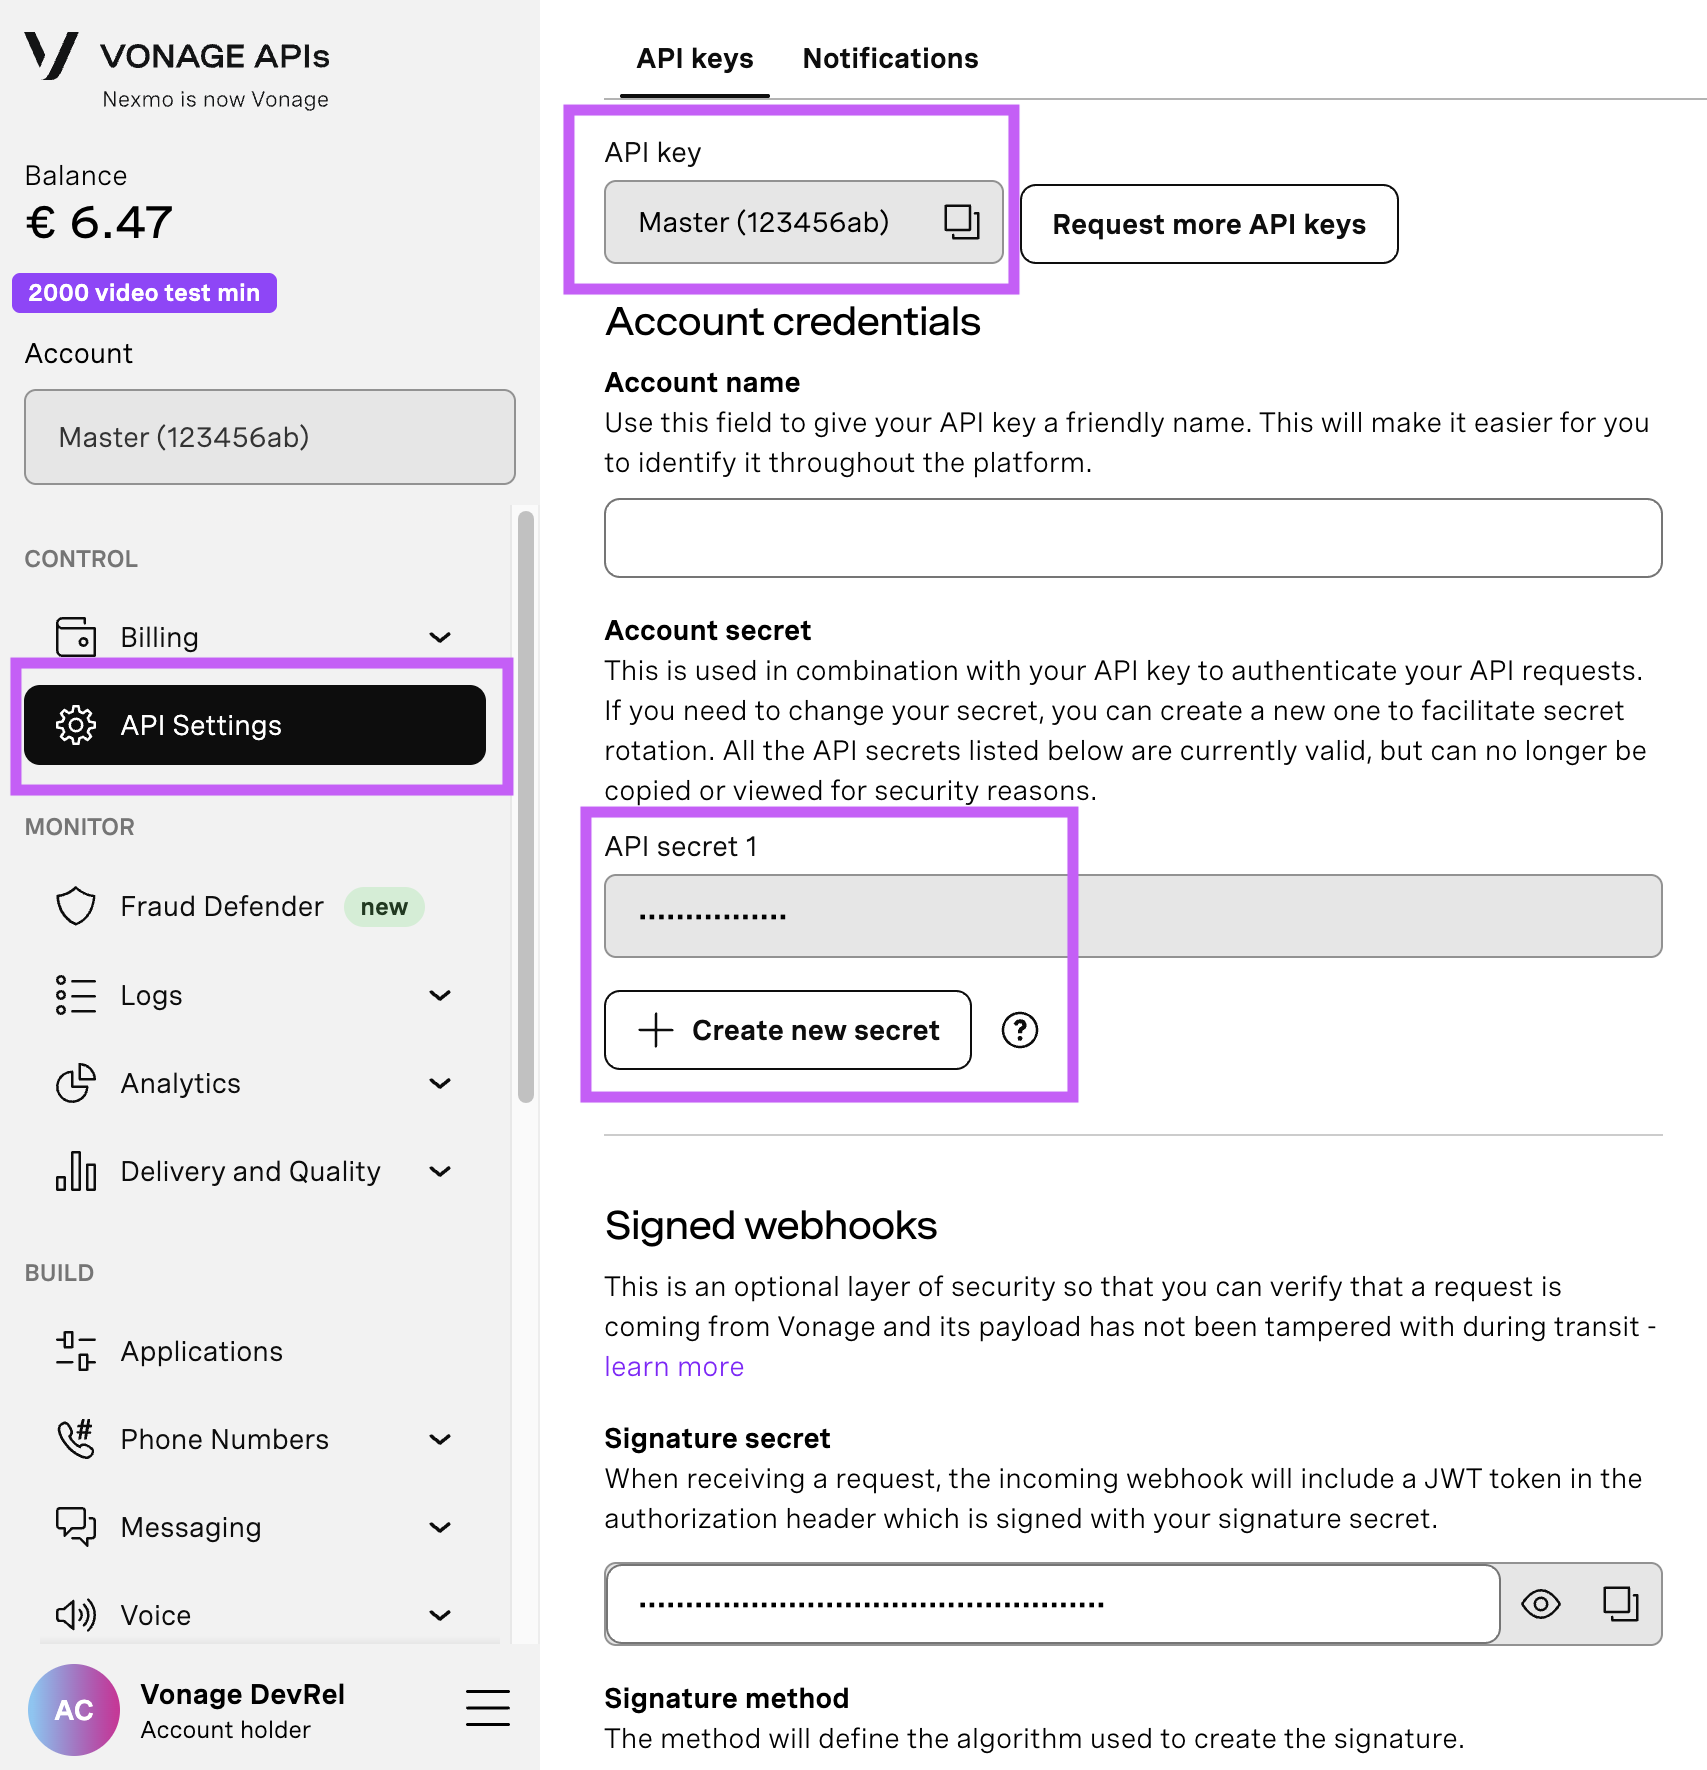
Open your API Settings Page to access your Vonage API Key and Secret, both of which are displayed as shown in the screenshot below. The API Key is located at the top of the page, and to access your API Secret, please refer to the “Account secret” subsection.
Note: In case you cannot remember your previously created API Secret, click on “+ Create new secret” and save it securely.
After downloading a private key, make sure it’s named private.key and move it to the root of your application directory. We’re going to be using the Messages Sandbox for this application, as it means you don’t have to set up your own WhatsApp Business Account. Instead, Vonage will give you a number assigned for testing the application.
Head to the Messages Sandbox section, which you can find under the Messages right-hand menu. For WhatsApp, you’ll be given instructions:
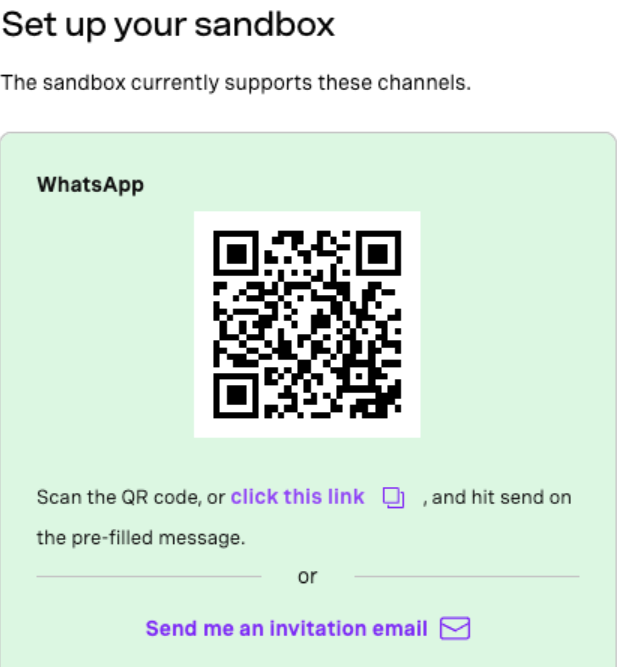 Scan the QR code and follow the instructionsFollow these instructions, but also make sure to only use the passphrase just before testing the app. This is because access will time out after a short period of time.
The last configuration to do is to set up the .env file by inputting your details. The file needs three variables defined:
VONAGE_PRIVATE_KEY_PATH=./private.key
VONAGE_APPLICATION_ID=your_application_id
VONAGE_FROM_NUMBER=your_sandbox_numberVONAGE_PRIVATE_KEY_PATH can stay the same as putting private.key in the project root has covered the correct import in the code of your key file. Add your application ID and the sandbox number given in your dashboard sandbox.
Next, we need to expose our application outside of your machine, so that Webhooks from customers can be read in. I recommend using Ngrok for this.
ngrok http 8080 // <- your port to forward hereNgrok will return a public IP address. This address, plus the /webhook uri needs to be added into the sandbox dashboard page. Heading back to the sandbox page and scrolling down, you should see two boxes for webhooks:
 Put your public webhooks route into the Inbound messages field.We’re only interested in the inbound webhooks; you can put a dummy value in for the status. Now we’re configured, add a number to the agent in the app dashboard.
 Yes, it’s a fake number!So, what the app now needs to do is wire an agent to an incoming customer message. It does this by reading in each incoming text using the following code:
 public function handle(Request $request): JsonResponse
   {
       Log::info('Webhook received', [
           'headers' => $request->headers->all(),
           'body' => $request->all(),
       ]);

       $data = $request->all();
       $number = $data['from'];

       if (Agent::where('phone_number', $number)->exists()) {
           $this->incomingAgentWebhook($data);

           return response()->json(['status' => 'success', 'message' => 'Webhook processed']);
       }

       $this->incomingCustomerWebhook($data);

       return response()->json(['status' => 'success', 'message' => 'Webhook processed']);
}You can see that the logic in the code has to determine whether the incoming text is from an agent (who will be replying to an assigned customer) or an incoming customer message. The incoming customer message is checked to see if an agent has been assigned – if it hasn’t, it creates a connection to the agent and forwards it to the agent. If one is assigned, it forwards the text straight to the assigned agent. The dashboard will indicate all of the active connections, for example:
 We have a connection!Now you have an active connection! The agent and the customer can talk to each other.
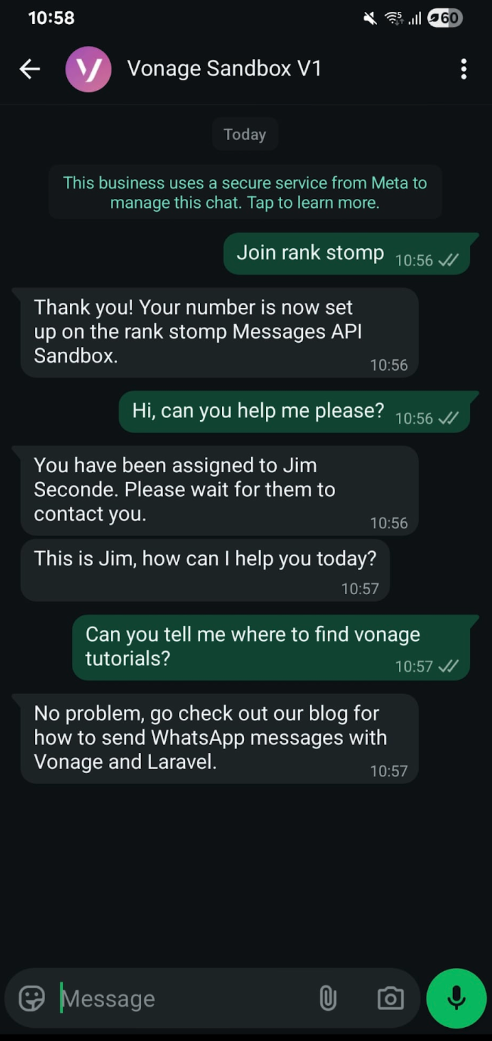 Here’s your chat!
And there you have it! Go check out the code if you want to see how the WebhookController works out the logic between the agent and customer. You can also have a look at other tutorials, such as how to send RCS Messages with Laravel.
Have a question or want to share what you're building?
Subscribe to the Developer Newsletter
Follow us on X (formerly Twitter) for updates
Watch tutorials on our YouTube channel
Connect with us on the Vonage Developer page on LinkedIn
Stay connected and keep up with the latest developer news, tips, and events.