
Share:
Mark was nominally responsible for Nexmo's client libraries (although he only writes the Python and Java libraries). He was originally a Java developer, has been a Python developer for 18 years, and is increasingly dabbling with Go and Rust. He likes pushing programming languages to the limit and then teaching these techniques to other programmers. He has a Viking hat, but he isn't a Viking, and he's Judy2k on Twitter for reasons he won't discuss.
Build a Family Hotline with Vonage
Time to read: 15 minutes
Any company I ever phone always has one of those automated answering systems that ask me questions before I get to speak to a real person, and because I'm a bit weird, I've always thought "why can't I have one of those?"
My daughter started secondary school a few months ago, and the form they sent us to fill in only had one slot for a contact phone number. What happens if we give them my details and I'm unavailable? Lucky for me, I work for Vonage, and know how to set up a phone number capable of forwarding calls to either one of us - or both! Vonage to the rescue!
The school is given a Vonage number as a contact number.
If they call the number, an automated message gives them the following options:
List the parents' names, with a digit to press to be forwarded to each parent.
If the caller does nothing, forward to the first parent in the list.
Press '*' if there is an emergency. This will set up a conference call and dial in both parents.
I had another couple of requirements:
Be simple, and practically free to host and run.
No database to manage, for added simplicity.
I've chosen a couple of technologies I'm most familiar with - Python 3.6 and Flask. I've chosen Python 3.6 because that was the release that came with f-strings and they're great! I'm also using pipenv to manage my Python dependencies.
This combination allows us to build a great home IVR (Interactive Voice Response) system in just over 100 lines of code!
First let's set up our development environment.
Because Vonage needs to call the server you're going to write, and your laptop is sitting behind a nice, secure firewall, you'll probably want to use ngrok for local development - let me recommend my colleague Aaron's excellent blog post about using ngrok.
You'll probably want to install pipenv globally, and from then on we'll use it to manage our project's virtual environment:
Now let's install the dependencies we'll need for this project, and activate our virtual environment. Run these commands in your new project's directory - I've called mine hotline:
Now let's start writing our Flask server.
Open up a file called hotline.py, and type the following:
from flask import Flask, jsonify, url_for as url_for_, request


app = Flask(__name__)


@app.route("/incoming/", methods=["GET", "POST"])
def incoming():
    """
    An HTTP endpoint which handles incoming calls.

    :return: A JSON HTTP response containing the main menu NCCO actions.
    """
    return jsonify(
        [
            {
                "action": "talk",
                "text": "Welcome to the Brockman family hotline",
                "voiceName": "Amy",
            }
        ]
)Now, in separate terminal windows you'll want to run the following at the same time:
When you run ngrok, it prints out the generated domain name it will forward through to your server. It will look something like this: https://abcde1234.ngrok.io -> localhost:5000. So now you can test your Flask app at https://abcde1234.ngrok.io/incoming (replace abcde1234 with whatever was printed on your terminal).
You should see something like this:
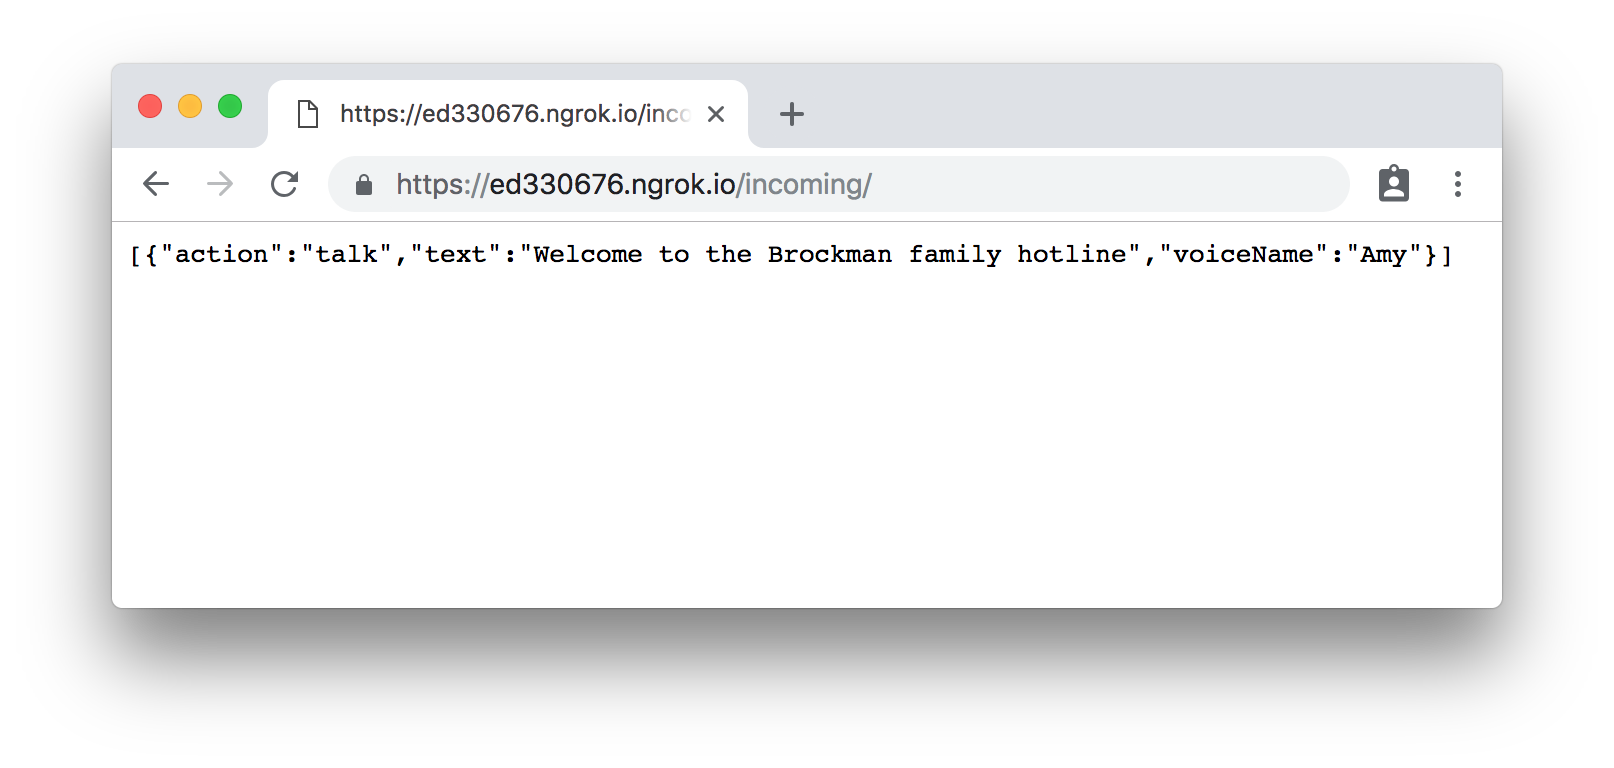 First Test
Now you need to configure a Vonage Virtual Number to call your server when someone calls your number. So now you need 3 things:
A configured Voice application
A configured Vonage Virtual Number.
Install the Vonage CLI globally with this command:
npm install @vonage/cli -gNext, configure the CLI with your Vonage API key and secret. You can find this information in the Developer Dashboard.
vonage config:set --apiKey=VONAGE_API_KEY --apiSecret=VONAGE_API_SECRET
Create a new directory for your project and CD into it:
mkdir my_project
CD my_projectNow, use the CLI to create a Vonage application.
You'll want to save that ID that's printed out after Application created:. You'll need it in the next step.
Now you need a number so you can receive calls. You can rent one by using the following command (replacing the country code with your code). For example, if you are in the USA, replace GB with US:
Now link the number to your app:
vonage apps:link --number=VONAGE_NUMBER APP_IDOkay!
Now you can test all that by calling the phone number you just bought. You should hear Amy read out the message "Welcome to the Brockman family hotline." If you hear a message saying the number was not recognised, or things don't work out, open the ngrok debug page at http://127.0.0.1:4040/ in your browser so you can see what requests came in and whether the server responded correctly.
Let's change the message and add an input action to our menu NCCO so that the caller can select the person they wish to speak to:
@app.route("/incoming/", methods=["POST", "GET"])
def incoming():
    """
    An HTTP endpoint which handles incoming calls.
    """
    return jsonify(
        [
            {
                "action": "talk",
                "text": """
                    Welcome to the Brockman family hotline.
                    To speak to Pete Brockman, please press 1.
                    To speak to Sue Brockman, please press 2.
                """,
                "voiceName": "Amy",
                "bargeIn": True,
            },
            {
                "action": "input",
                "eventUrl": [url_for("family_selection")],
                "maxDigits": 1,
            },
        ]
    )


@app.route("/family-selection/", methods=["POST"])
def family_selection():
    """
    An HTTP endpoint which handles the DTMF input from the main menu.
    """
    postdata = request.json

    if postdata["timed_out"]:
        index = 0
    else:
        index = int(postdata["dtmf"]) - 1
    return jsonify([{
        "action": "talk",
        "text": f"You selected the {index} option",
}])Don't call it just yet! We're not quite ready ... but, let me explain what this does:
I added this to the talk action:
"bargeIn": True,This means that the caller can press a number on their phone while the talk action is still reading them the message. It will automatically activate the following input action. I also added the following action:
{
    "action": "input",
    "eventUrl": [url_for("family_selection")],
    "maxDigits": 1,
},This input action tells Vonage to call the family_selection function we've also just added. Flask's url_for function provides the URL for the given function name.
partial
url_for by default generates a relative URL. Relative URLs aren't supported by Vonage Voice -- so, I've added the following to the top of the file:
from functools import partial

from flask import url_for as url_for_

# We don't have any use for relative URLs, so hard-code this param:
url_for = partial(url_for_, _external=True)This use of partial sets the url_for function to something more useful - it's a copy of Flask's url_for function, but with the default value of the _external parameter set to True. (I forgot to set this parameter so many times before I fixed it with this!)
Once you've added that to your file and ensured your server has reloaded, it's time to call your number again. It should read you the message, allow you to pick a number on your phone, and then read you out that number with one subtracted from it. If you wait for a few seconds, it should then tell you that you selected zero.
Why am I subtracting 1 from the number they entered? It's so we can select a person from a list! If the test above went well, let's put our people in a list and make this menu a bit more dynamic.
The first thing we really need is a better way of configuring our "parents". It's nice to have a list of the people we will want to forward calls to. For the moment, let's define their details in the Python file. Please don't do this with real phone numbers and commit to a public repository!
import attr

@attr.s
class Endpoint:
    """ A data class containing a potential callee's details. """
    name = attr.ib()
    phone_number = attr.ib()

ENDPOINTS = [
    Endpoint(name="Pete Brockman", phone_number="447700900123"),
    Endpoint(name="Sue Brockman", phone_number="447700900456"),
]
VONAGE_NUMBER = "447700900847"In the code above, I'm using the amazing attrs library to define a simple class, Endpoint, for holding a person's name and phone number. I'm then creating a list of Endpoints for the people we may want to forward calls to.
Now I add a simple utility function for generating talk actions. It will make the code more readable and means that by default we'll be using the Amy voice. You can get a list of all the voices Vonage supports here
def talk(message, voice="Amy", barge_in=None):
    """ Utility function to generate a `talk` NCCO action. """
    response = {"action": "talk", "text": message, "voiceName": voice}
    if barge_in is not None:
        response["bargeIn"] = barge_in

return responseAnd now I've factored out the code for generating the main menu message:
def make_answer_message(message, endpoints):
    """
    Generate a script to be read to the caller, informing them of their options.
    """
    endpoint_options = [
        f"To speak to {endpoint.name}, please press {code}."
        for code, endpoint in enumerate(endpoints, start=1)
    ]

return " ".join([message, *endpoint_options, "If you're not sure, please hold."])You see that *endpoint_options in the last line of the code above? Did you know you can do this in Python 3 to expand a list into another list? In this case, the result is that we end up with a list of strings that we can join together with spaces.
You can now replace the talk action in the incoming method with the following call to the talk function:
talk(
    make_answer_message(
        "Welcome to the Brockman family hotline.", ENDPOINTS
    ),
    barge_in=True,
),And finally, you can modify the family_selection function so that it will actually forward the call to a phone number:
@app.route("/family-selection/", methods=["POST"])
def family_selection():
    """
    An HTTP endpoint which handles the DTMF input from the main menu.
    """
    postdata = request.json

    try:
        if postdata["timed_out"]:
            index = 0
        else:
            index = int(postdata["dtmf"]) - 1

        if index < len(ENDPOINTS):
            # They elected to speak to an individual
            endpoint = ENDPOINTS[index]
            return jsonify(
                [
                    talk(f"Connecting to {endpoint.name}"),
                    {
                        "action": "connect",
                        "from": VONAGE_NUMBER,
                        "endpoint": [{"type": "phone", "number": endpoint.phone_number}],
                    },
                ]
            )
    except ValueError:
        pass  # This is raised by `int`, and can be ignored - we just forward on to the following error message...

    return jsonify([talk("I didn't understand that option.")])
The code above looks quite a lot more complicated than it did before, but that's because we're now doing some error checking and telling the caller if they pressed a key we didn't expect. If the user presses 1 or 2, they'll be read a message saying that they're being connected, and then they will be connected to the endpoint's number.
Okay, so what have we done so far?
The school can call my number and they're read a list of people they can connect to.
If they press 1 or 2 they'll be connected to that person. (Incidentally, neither side of the phone call can see each other's phone number, so this is a great way to anonymise calls!)
If the caller waits they'll be connected to the first endpoint in the configured list.
We could stop here if we want, but I had a third requirement: In case of an emergency, the caller could hit star, and it would call both of us and dial us all into a conference call.
A conference call is created with a conversation action, and it ends (by default) when there are no more people on the call. The only thing we need to connect a person to a conference call is the name that we gave the conference call with the first conversation action.
We're going to need a Vonage Client object to create outbound calls to the parents, so it's lucky we installed the Vonage Python library at the start of this tutorial, right? Put the following lines near the top of your file. If you want to, you can paste your application_id and private_key values directly into the file, but I think it's better to load them from environment variables instead. It's too easy to commit them to a public repository, and anyone who has them can spend your Vonage balance!
import vonage

vonage_client = vonage.Client(
    application_id=os.getenv('VONAGE_APPLICATION_ID'),
    private_key=os.getenv('VONAGE_PRIVATE_KEY')
)
Before we do that, add the message "If this is an emergency, please press star." to the string returned by our make_answer_message function. I added it just after the message item in the list.
Now let's create our conference call. Take a deep breath; it's a reasonably big block of code.
We'll need a new HTTP endpoint, called conference_ncco, which will provide NCCO actions for each of the parents being dialled into the conference call.
I've abstracted out all the code for dialling out to the parents and generating NCCO actions for the caller into a function called create_conference_call.
I'm pasting the two functions together so you can see how the conference_id parameter, which is generated in create_conference_call is embedded in the URL path to the conference_ncco endpoint so that it knows the name of the conference call to embed in the conversation NCCO action.
@app.route("/conference/<conference_id>/ncco", methods=["GET", "POST"])
def conference_ncco(conference_id: str):
    """
    An HTTP endpoint which generates the NCCO actions to connect a callee to
    a conference call.
    """
    return jsonify(
        [
            talk("You are being connected to a family hotline conference call."),
            {"action": "conversation", "name": conference_id},
        ]
    )

def create_conference_call(endpoints):
    """
    Generate an NCCO response to connect the caller to all the provided
    `endpoints` in a single conference call.
    """
    # Generate a unique name for our conference:
    conference_name = str(uuid.uuid4())

    # Loop through the endpoints and dial them into the conference call:
    for endpoint in endpoints:
        vonage_client.create_call(
            {
                "to": [{"type": "phone", "number": endpoint.phone_number}],
                "from": {"type": "phone", "number": VONAGE_NUMBER},
                "answer_url": [
                    url_for("conference_ncco", conference_id=conference_name)
                ],
            }
        )
        print(f"Dialing {endpoint.phone_number} into {conference_name}")

    # Connect the inbound leg to the conference call we're creating:
    return jsonify(
        [
            talk("Connecting all parties."),
            {
                "action": "conversation",
                "name": conference_name,
            },
        ]
    )
Now, we just need to modify family_selection so it knows what to do with a * dtmf code, by putting this near the top of the function:
if postdata["dtmf"] == "*":
    return create_conference_call(ENDPOINTS)
Call your Vonage number, and follow each of the instructions in the main menu to check that they work! If it's all working, then it's time to deploy it!
If you check out the Git repository for this project you'll see that I've made some minor changes to it, including loading all configuration from environment variables, and adding a Procfile. This should mean that it's relatively straightforward to deploy to Heroku - but I'll leave that as an exercise for you! Don't forget to update your Vonage Application's configuration to point at the new Heroku URL instead of the ngrok URL you've been using for development.
Once it's deployed, it's time to talk to your child's school and ask them to update your contact details!
We built a whole IVR system to allow the school to contact us! It can forward calls to individual numbers, or connect everyone in one conference call!
Some more things I considered doing with this server include:
Forwarding SMS messages sent to the number to both parents.
Sending text messages to inform a parent if they missed a call from the school.
Creating a 'race' call that would call both parents and the first one to answer takes the call. The second call would be cut and be sent an SMS saying the other parent had handled it.
If no parent picks up, allowing the school to record a message, which would then be available for both parents to pick up.
Integration with a family Slack, with alerts for incoming phone calls, forwarding of SMS messages to the Slack, and even posting of recorded messages to be played within the Slack!
As you can see, there is lots of potential once you get started. I hope you had fun following this tutorial. I'm @judy2k on Twitter - follow me, or ask me questions about this tutorial!
Share:
Mark was nominally responsible for Nexmo's client libraries (although he only writes the Python and Java libraries). He was originally a Java developer, has been a Python developer for 18 years, and is increasingly dabbling with Go and Rust. He likes pushing programming languages to the limit and then teaching these techniques to other programmers. He has a Viking hat, but he isn't a Viking, and he's Judy2k on Twitter for reasons he won't discuss.