
Share:
Benjamin Aronov is a developer advocate at Vonage. He is a proven community builder with a background in Ruby on Rails. Benjamin enjoys the beaches of Tel Aviv which he calls home. His Tel Aviv base allows him to meet and learn from some of the world's best startup founders. Outside of tech, Benjamin loves traveling the world in search of the perfect pain au chocolat.
Build a 5-Node AI WhatsApp Receptionist With n8n and Vonage MCP Tools
This AI WhatsApp receptionist, powered by n8n and Vonage MCP tools, helps automate Airbnb guest interactions.
Running an Airbnb (or really any small hospitality operation) tends to involve the same cycle of guest questions. People ask about Wi-Fi, check-out times, parking, and occasionally something more urgent that needs your attention right away. The goal of this tutorial is to streamline that workload by building an AI receptionist on WhatsApp, one that can answer routine questions automatically, escalate serious issues to you via SMS or voice call, and keep a simple memory of past conversations in a Google Sheet. The workflow itself stays lightweight, using only five core n8n nodes and a few helpers.
To make this possible, we’ll use n8n as both the automation engine and the environment where the AI Agent runs, with the Vonage MCP tooling server providing a single endpoint for WhatsApp, SMS, and outbound voice calls. A small Render deployment hosts the bridge that connects n8n to those MCP tools, and Google Sheets serves as a straightforward database for properties and guest history. An OpenAI model ties everything together by interpreting messages, deciding when to escalate, and calling the right tools at the right moments.
By the end, you’ll have a flexible pattern you can reuse well beyond short-term rentals. The same workflow works for hotel front desks, restaurant bookings, IT helpdesk triage, or any situation where incoming messages sometimes need automated responses and sometimes need human escalation.
TL;DR: Find the quickstart guide for this workflow on Vonage Community GitHub.
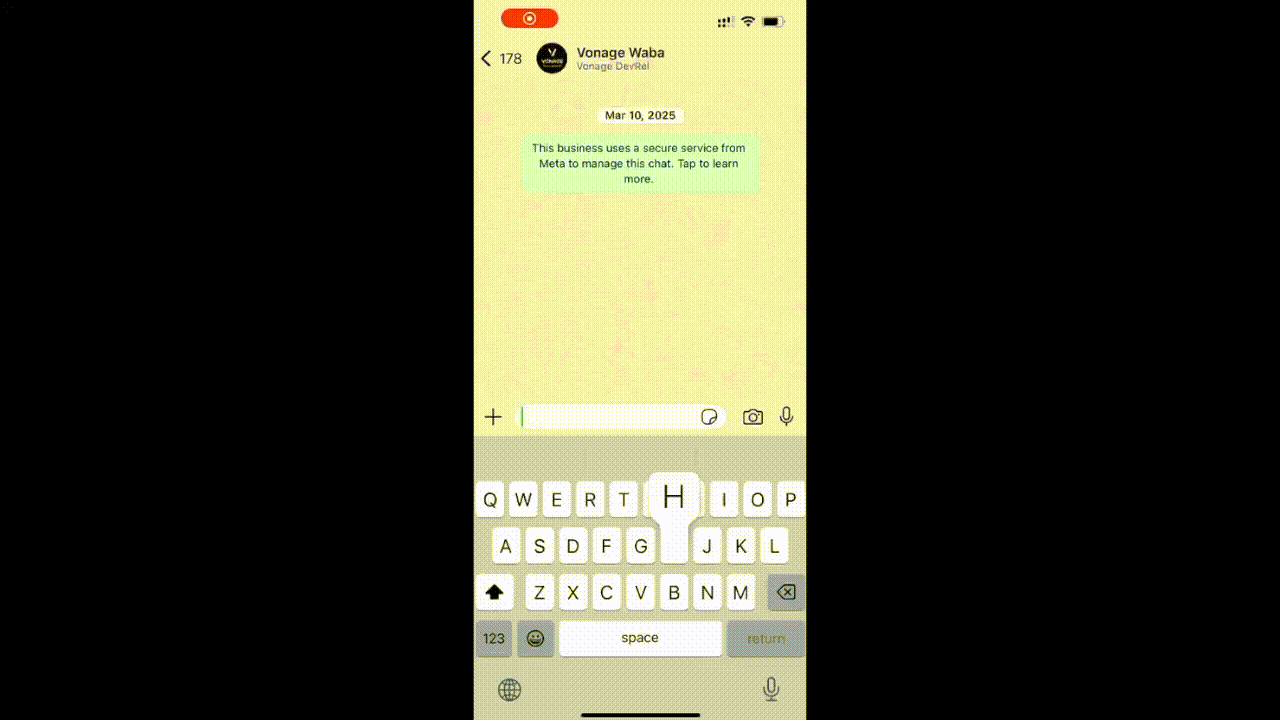 A user receives and replies to a WhatsApp message sent via Vonage and n8n, showcasing real-time two-way messaging in an AI-powered receptionist workflow.
A verified WhatsApp Business Account (WABA)
Vonage API Account
In order to access Vonage’s APIs, we’ll need to create a Vonage Application that will give us the ability to communicate over WhatsApp, SMS, and Voice calls.
To create an application, go to the Create an Application page on the Vonage Dashboard, and define a Name for your Application.

If you intend to use an API that uses Webhooks, you will need a private key. Click “Generate public and private key”, your download should start automatically. Store it securely; this key cannot be re-downloaded if lost. It will follow the naming convention private_<your app id>.key. This key can now be used to authenticate API calls. Note: Your key will not work until your application is saved.
Choose the capabilities you need (e.g., Voice, Messages, RTC, etc.) and provide the required webhooks (e.g., event URLs, answer URLs, or inbound message URLs). These will be described in the tutorial.
To save and deploy, click "Generate new application" to finalize the setup. Your application is now ready to use with Vonage APIs.
You will need to enable both Voice and Messages Capabilities. For Voice, you can just toggle it on and leave the fields blank. For Messages, you will need to enable webhooks. For now, just add placeholders; we will update these with n8n values later:
Set the Inbound URL to https://placeholder.com/inbound.
Set the Status URL to https://placeholder.com/status.
Then link your WhatsApp Business (WABA) by clicking the “Link external accounts” tab:
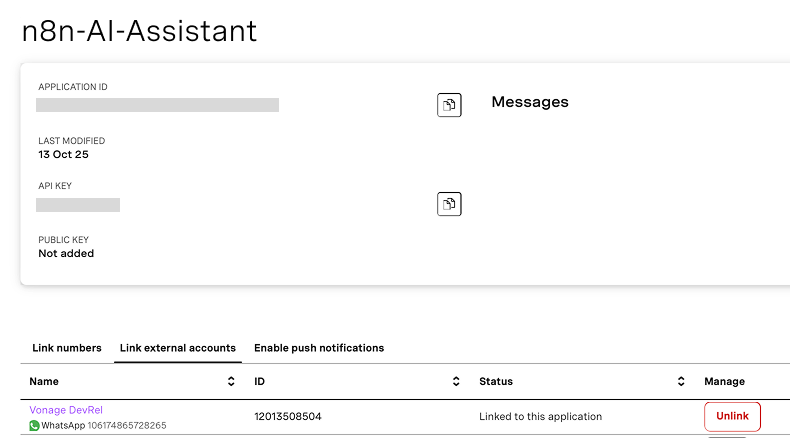 Viewing the n8n-AI-Assistant application in the Vonage dashboard with an active WhatsApp number linked.
Make sure you have:
Application ID
Private key (downloaded as a
.keyfile)API key/secret
We’ll feed these into the MCP tooling server next.
Render comes into the picture because n8n expects a simple, public HTTP endpoint it can call to reach an MCP server. The Vonage MCP server itself runs as a local process and doesn’t ship with a public gateway, so we need a small “bridge” service to put it on the internet. Render hosts that bridge for us: it runs a tiny Node.js app that starts the Vonage MCP server in the background and exposes a single /mcp URL that n8n can talk to.
Note on hosting and reliability:
In this tutorial, we use Render’s free plan for the MCP bridge, which means the service can sleep when idle. If that happens, n8n’s MCP Client may temporarily show “Could not connect to your MCP server” until the instance wakes up. You can fix this by manually triggering a new deploy / restart in Render, or by upgrading the service to a paid “Starter” tier so it stays warm. If you prefer, you can also run the same Node.js bridge on other hosts such as Railway, a Virtual Private Server (VPS), or your own infrastructure. The only requirement for n8n is a public HTTPS /mcp endpoint.
Deploy a new Render service using the provided blueprint:
Spin up a new service from this Blueprint.
Add a name for your new service (e.g. mcp_tooling-n8n_whatsapp_receptionist).
Select main for branch.
Select create all as new services, and enter your Vonage credentials from your Vonage application: VONAGE_API_KEY, VONAGE_API_SECRET, VONAGE_APPLICATION_ID, VONAGE_PRIVATE_KEY64, VONAGE_VIRTUAL_NUMBER, VONAGE_WHATSAPP_NUMBER.
NOTE: VONAGE_PRIVATE_KEY64 is not simply your private key that was downloaded. It is a base64 encoded Private Key, which you can generate with the Private Key to ENV Variable tool.
NOTE 2: The MCP_AUTH_TOKEN is a token you create, which the n8n MCP client will later use to authenticate requests. It is suggested to use a safe, complex token via a strong password generator.
Once your Render MCP Bridge is live, copy its public URL (e.g., https://your-mcp-bridge.onrender.com/mcp). You will need this in step 5, when you set up the MCP Client node inside your n8n workflow.
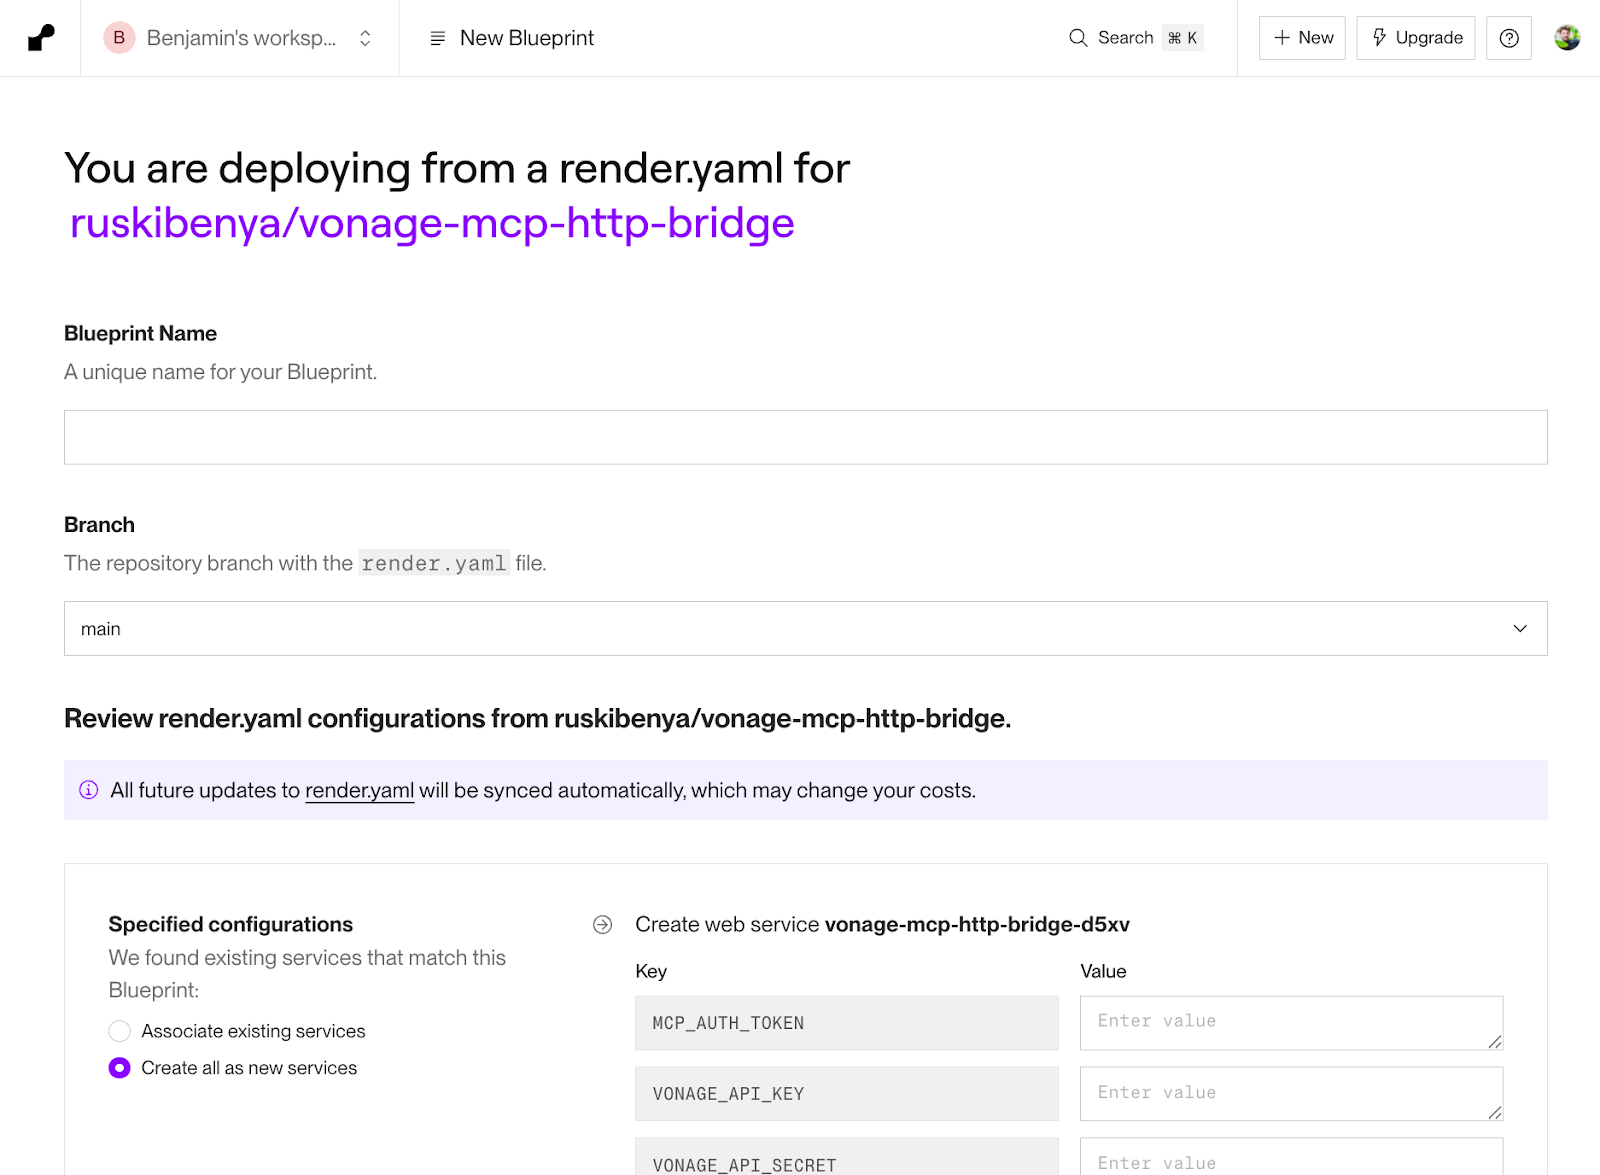 Create a new Render deployment by copying the Blueprint and filling in your configurations.
In our example, we will use a Google Spreadsheet for a quick and accessible database. Google Sheets is commonly used for collaboration and is familiar to non-technical users. But this can easily be extended to Supabase, MongoDB, or any SQL database. We’ll use two sheets: Properties and Guests.
>> Open and create a duplicate of the full database example on Google Sheets
A property is an Airbnb listing. It contains a few columns, simulating typical real-world scenarios like: check_in, check_out, wifi_ssid (network name), wifi_password, house_rules, emergency_instructions, and local_tips.
You can find examples in the Google Sheet above.
Our database will have a simple object to store context about guests: guest_number, history - this will back up our chat history, last_seen_at, last_issue, last_severity (low| medium| high).
Initially, this sheet is empty. With each execution, it will be updated from n8n!
Now we get to the interesting part, adding our nodes in n8n. Open your n8n cloud dashboard and create a new workflow. Enable MCP Access:
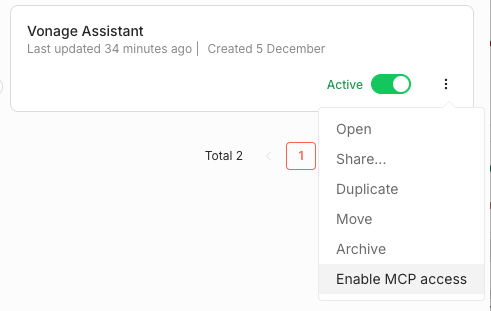 Enable MCP access for your new n8n assistant.
Here’s the high-level outline of the nodes we will use:
1. Webhook - This allows us to connect to our Vonage application and receive incoming data from Vonage, in this case, WhatsApp.
2. Google Sheets - The Get Rows function allows us to grab context about our guest before passing their message to the AI Agent.
4. AI Agent - The AI agent, which acts as the receptionist brain and the Vonage MCP tools it can leverage.
5. Code Node - Small JavaScript script to parse the data returned from the AI Agent and get it ready to update the DB.
6. Google Sheets – Use the Append or Update Row function to save this interaction.
As your trigger select, “On webhook call”. This will add a new webhook node where you’ll need to add the following:
Method: POST
Path: /inbound
Authentication: none
Activate the workflow so n8n gives you a Production URL, e.g.:
https://your-n8n.app/webhook/inbound
In your Vonage Application (from step 2, e.g. n8n-AI-Assistant):
Update your Inbound webhook URL to this production URL.
Ensure the method is set to POST.
Now, when you send a WhatsApp message to your Vonage number, n8n will trigger. You can test this by opening the node in n8n and clicking “Listen for test event”; however you will need to update your URL to use the Test URL in the Vonage Dashboard from n8n instead of the production one.
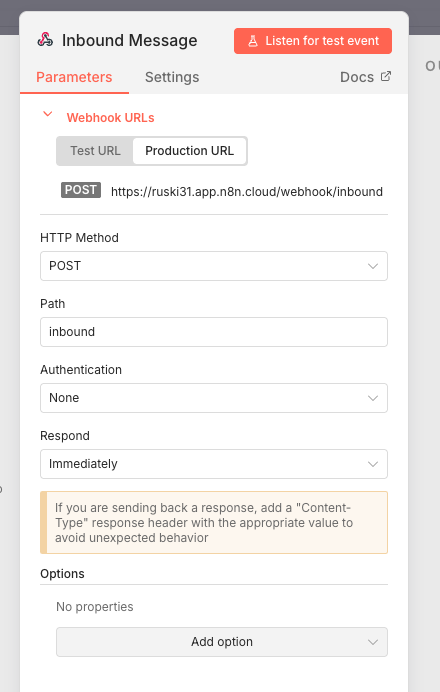 Configuring an inbound webhook in n8n to receive WhatsApp messages via the Vonage Messages API.
Now connect your webhook node to a new Google Sheets node. First, connect to your Google account. Then select the Get row(s) in sheet operation and configure:
Node name: get_property_info
This is important because this becomes the tool name that the AI Agent will look for.
Document: n8n Airbnb DB Example
If you copied without updating (or else your custom sheet name).
Sheet: Properties
Filter: Add a filter and set Column to guest_number and Value to
{{ $json.body.from }}or you can drag from the input panel and select the from that is returned in the Body of the Webhook.Enable “Always Output Data” under Settings so the flow runs even if your DB is empty.
The next step is wiring up the AI Agent node. This node becomes the core of the receptionist’s logic. It takes the inbound WhatsApp message from Vonage and any guest conversation history, retrieves property information from the Properties sheet, and decides whether the situation is routine or something that needs to reach the host. Based on that decision, it will call the appropriate MCP tools, usually to reply over WhatsApp, but when needed to send an SMS or trigger an outbound voice call. Everything else in the workflow essentially feeds context to this node or records what it produces.
First, drag an AI Agent node into your workflow and connect it, then configure:
Source for Prompt (User Message): Define below
Prompt (User Message):
Guest phone number: {{ $('Inbound Message').item.json.body.from }}

Guest message: {{ $('Inbound Message').item.json.body.text }}

Guest message channel: {{ $('Inbound Message').item.json.body.channel }}

Guest name (if available): {{ $('Inbound Message').item.json.body.profile?.name || '' }}

Host number: {{ $('Inbound Message').item.json.body.from }} <!-- or a fixed host number later -->Note: We’re using the same number for both host and guest here to simplify testing. In production, replace this with the actual host number.
System Message: copy the full system message from GitHub
The system prompt turns the model into a WhatsApp/SMS receptionist for a rental property. For each incoming guest message, it looks up the correct property details from Google Sheets when needed, decides how serious the issue is (low/medium/high), and always sends a short, friendly reply back to the guest via WhatsApp (with SMS failover). Behind the scenes, it can also notify or call the host for medium or high‑severity issues, and it appends two simple tags (LAST_ISSUE and LAST_SEVERITY) so n8n can track what’s going on without exposing any of that internal logic to the guest.
With the model selected, the next step is giving the Agent tools it can call. The first tool is the MCP Client node that points at the MCP server you deployed on Render. Configure it with the correct MCP endpoint, set the Bearer token to the same value you placed in MCP_AUTH_TOKEN, and test the connection. You should see the available tools, such as whatsapp-send-text-with-sms-failover, SMS, and outbound-voice-message. Now the agent has access to these functionalities to send real messages and calls!
The second tool is the Google Sheets node that reads from the Properties sheet; rename it to get_property_info so its purpose is obvious, and attach it as a tool in the AI Agent configuration. This lets the model fetch details like Wi-Fi instructions, check-in and check-out times, house rules, or emergency guidance whenever the guest asks for them.
Once the AI Agent has finished, its output is a single big string: the guest‑facing reply plus the two structured tag lines (LAST_ISSUE and LAST_SEVERITY). Before we write anything back to Google Sheets, we want to clean that up and assemble a neat record of the conversation. The Function node does exactly that: it strips off the tag lines, extracts the tag values, and builds a simple text transcript we’ll store as history.
Add a ‘Code in JavaScript’ node right after the AI Agent. Copy and paste the JavaScript snippet from GitHub.
The snippet:
Reads the raw Agent output.
Pulls out last_issue and last_severity from the LAST_* lines.
Produces a clean agent_reply string (what the guest actually saw).
Appends this interaction to any existing history for the guest.
Adds last_seen_at and guest_number so the next node can upsert the guest row.
Now, the data is “memory‑ready”: one item per guest interaction with all the fields your Guests sheet needs.
Now we can persist that memory. Add a final Google Sheets node, and for the action select “Append or update row in sheet”. This node’s job is just to find the current guest's chat history and update it with the most recent interaction. If this is the guest's first message, it will create a new row.
Node Configuration:
Resource: Sheet Within Document
Operation: Append or Update Row
Document: (From List) n8n Airbnb DB Example or your sheet name
Sheet: (From List) Guests
Mapping Column Mode: Map Each Column Manually
Column to match on: guest_number
Values to Send:
guest_number (using to match):
{{ $('Inbound Message').item.json.body.from }}history:
{{ $json.history }}last_seen_at:
{{ $json.last_seen_at }}last_issue:
{{ $json.last_issue }}last_severity:
{{ $json.last_severity }}
And that’s it! You’re done!
Now that your n8n workflow is all set up, you can test your virtual receptionst! Send a WhatsApp and test different cases. The test data purposefully has 2 properties in Paris and 1 in New York. See if you can try to trick the agent. The system prompt is just a starting point; tailor it to your needs!
You can check out the logs to see step by step what exactly is happening.
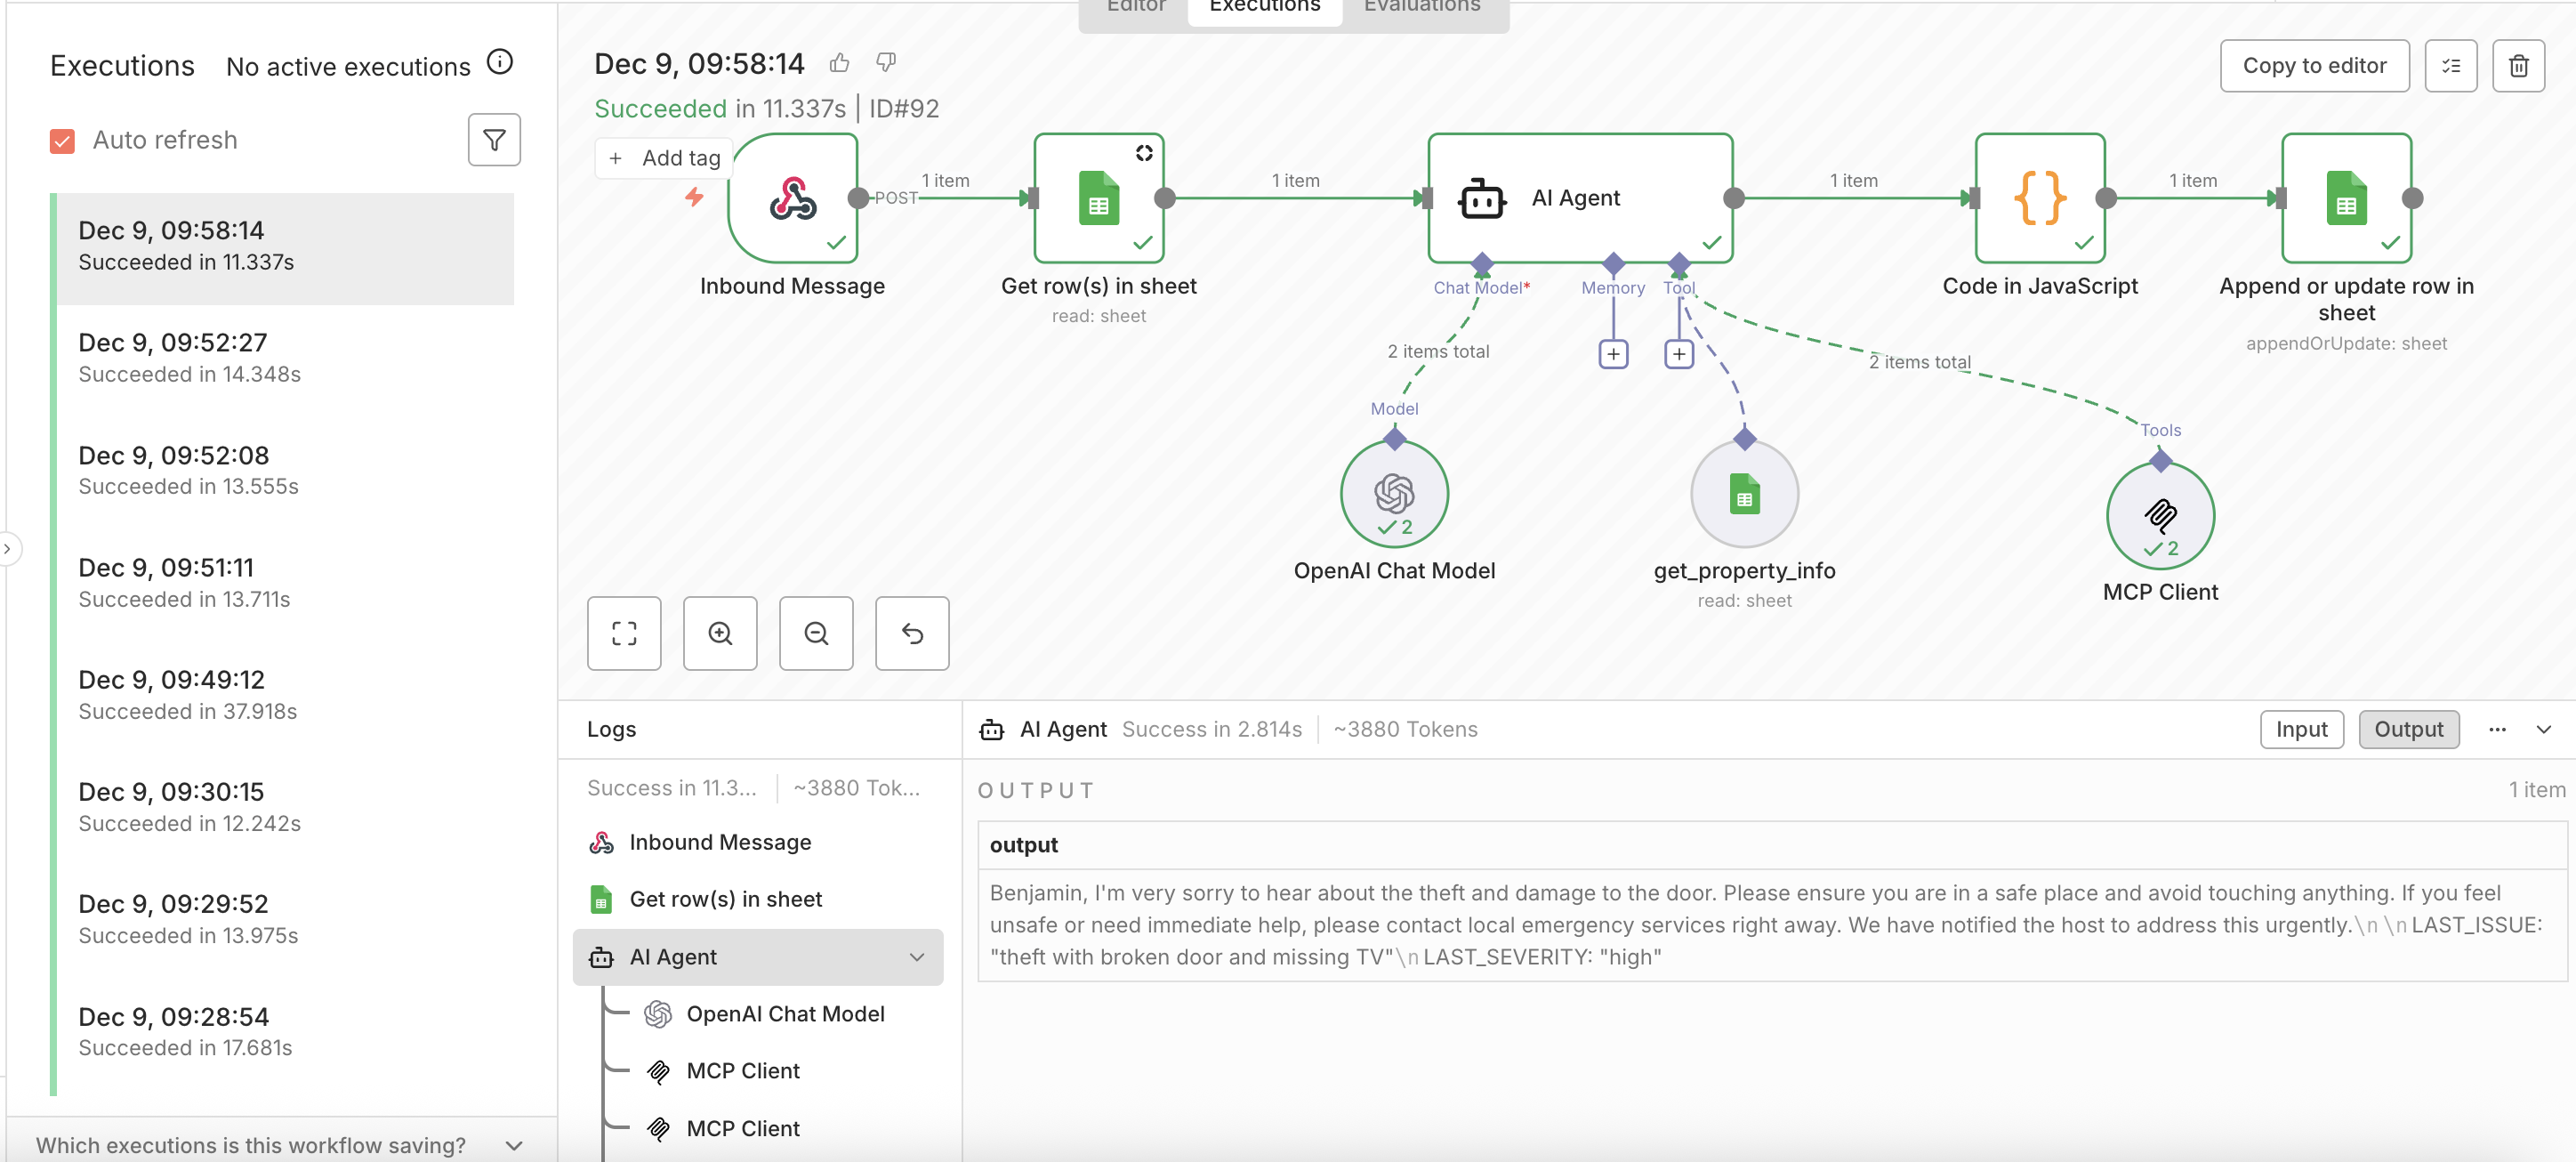 n8n execution log showing a successful end-to-end run of an AI-powered WhatsApp receptionist workflow using OpenAI, Google Sheets, and the Vonage MCP Client.
With the core workflow in place, you can extend this agent in so many directions! A smart next step to better support multiple properties would be to give the receptionist a property_id and create a relationship based on the guest’s number or another field in your sheet.
You can also move beyond Google Sheets and plug in a more robust database (Airtable, Notion, or even Postgres) without changing how the Agent behaves. On the host side, it’s easy to introduce additional tools for tasks like scheduling cleaners, creating support tickets, or sending one-time links such as keybox instructions. And if you want to meet guests on more channels, the MCP server already gives you a path to bring RCS, Viber, or MMS into the same workflow. At that point, a single Agent can handle WhatsApp, SMS, and even voice escalation through one unified logic.
But already with just one MCP endpoint for all messaging and voice actions, a handful of n8n nodes, and a simple Google Sheet as your database, you’ve built a realistic, extensible AI receptionist that small businesses can actually use today.
If you clone this setup and adapt it for your own use case (restaurants, clinics, salons), I’d love to see what you build!
Have a question or want to share what you're building?
Subscribe to the Developer Newsletter
Follow us on X (formerly Twitter) for updates
Watch tutorials on our YouTube channel
Connect with us on the Vonage Developer page on LinkedIn
Stay connected and keep up with the latest developer news, tips, and events.
Share:
Benjamin Aronov is a developer advocate at Vonage. He is a proven community builder with a background in Ruby on Rails. Benjamin enjoys the beaches of Tel Aviv which he calls home. His Tel Aviv base allows him to meet and learn from some of the world's best startup founders. Outside of tech, Benjamin loves traveling the world in search of the perfect pain au chocolat.