Share:
Adam is a developer and consultant who enjoys ultra-running, blogging/vlogging, and helping others tame technology to accomplish amazing things with an insatiable desire to mentor and help.
AWS Transcribe With Nexmo Voice Using PHP
Time to read: 13 minutes
Use cases for voice transcription are becoming more and more prevalent—from IoT devices, which often only have an audio interface, to voice messaging services, which are expected to provide realtime text previews of message contents, speech-to-text capabilities are becoming essential for a wide variety of applications.
In this tutorial, we'll use a Nexmo Voice number to create a callback script that interacts with a caller to prompt for a voice message. Then, after retrieving the contents of the recording, we'll request a voice transcription from Amazon Transcribe.
In this example the following are needed:
PHP installed locally (version 7.3+ preferred)
Composer installed globally (more details later)
AWS account
ngrok installed locally (more details later)
For a completed code example go to https://github.com/nexmo-community/voice-aws-speechtotext-php.
You'll need an AWS account, as well as IAM credentials associated with a user who has access to Amazon Transcribe and AWS S3.
Create an S3 Bucket to store the voice recording MP3 files retrieved from Nexmo. This will allow Amazon Transcribe to easily access the files to be transcribed later.
After creating it, make sure to check the box beside the bucket name. This will cause a panel to shift in from the right. Click the button "Copy Bucket ARN" and save it for later usage.
Select the IAM Management Console from the Services panel:
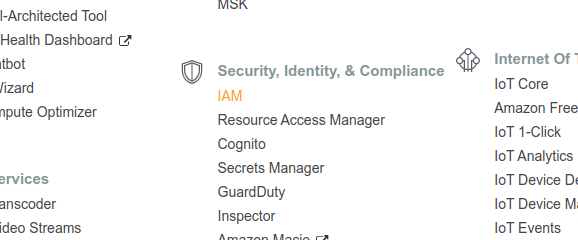 Select IAM Management Console
From the IAM Management Console, add a new IAM user by clicking the blue Add User button:
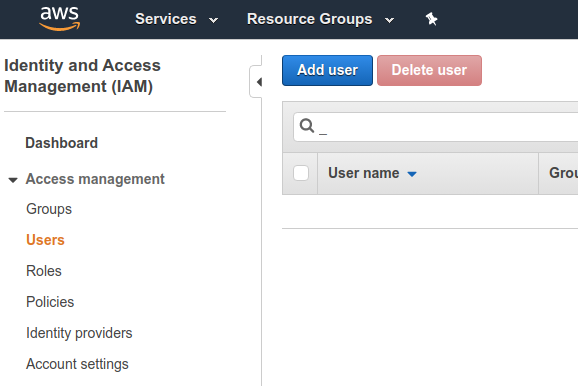 Add a new IAM user
Below is a JSON snippet to assign the permissions needed for the new user to utilize S3 and the Transcribe services. Make sure to replace {bucket_name} with the actual bucket name. The Resource in the JSON should match the ARN you saved from S3 after creating the bucket:
{
    "Version": "2012-10-17",
    "Statement": [
        {
            "Sid": "VisualEditor0",
            "Effect": "Allow",
            "Action": "transcribe:*",
            "Resource": "*"
        },
        {
            "Sid": "VisualEditor1",
            "Effect": "Allow",
            "Action": [
            "s3:PutObject",
            "s3:GetObject",
            "s3:DeleteObject"
        ],
            "Resource": "arn:aws:s3:::{bucket_name}/*"
        }
    ]
}
At this point, we need to start organizing the application itself. We will assume an empty directory, and begin building the example callback app from there. We will also assume a local system with PHP already set up and running, and able to be used via CLI (Command Line Interface).
In this empty directory, create a new PHP file and name it index.php. At the moment, just type the word "test" in the file. This will create some output and allow us to test in the next step.
In this example, we will run a PHP application locally with the PHP built-in webserver. Though the built-in web server should not be used in a production environment, it is fine for sample scripts like this.
Using a terminal, navigate to the project directory. Once there, issue the command to start the PHP built-in web server, like so:
At this point, entering "http://localhost:8080" in a browser should produce a "test" response, if that is what you entered in the index.php file.
We'll also use ngrok to make the local application available on the internet as a callback endpoint for the Nexmo Voice service. Take a look at this page if you need help getting ngrok set up, but the basics are: create an account at ngrok, download the executable, kick off a tunnel via CLI, and then use the forwarding URLs provided by the CLI.
Next, get ngrok running to make the results of the webserver available over the internet. In a terminal, navigate to the location where ngrok was installed previously, and enter the following command:
In return, ngrok will provide us with some important information, as in the screenshot below:
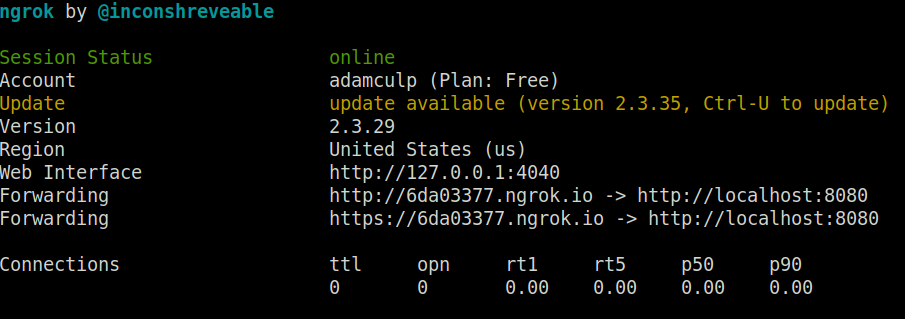 ngrok information returned
This lets us know the service information, including the tunnel URLs to use for hitting our locally running script. We can enter the information provided in a web browser and should get the same results as when requesting via localhost above.
Note: It's recommended using https URLs to protect any credentials being shared between the services.
We will let the ngrok instance run throughout this example. When you are ready to shut it down, simply hit "Ctrl+c" in the terminal and it will close ngrok.
With the URLs provided by ngrok, we can add an Application in Nexmo and link it to a number. In the Nexmo Dashboard, expand the Numbers menu item to expose "Your numbers" (and add a new one if needed):
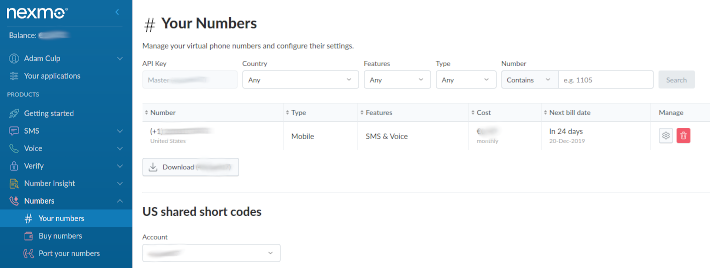 Nexmo Dashboard
Now that we're sure there is a number to be used in an application, in the left-hand menu, click "Your applications" followed by "Create a new application":
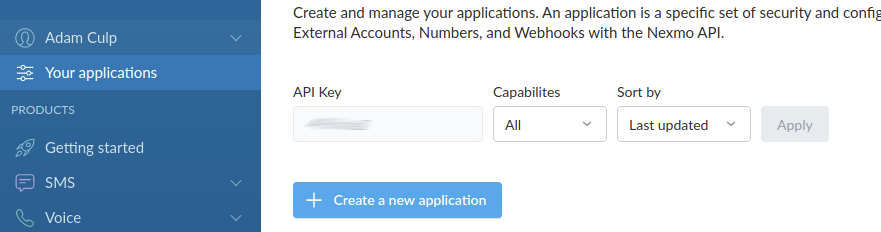 Create Application
Give the application a good name, then click the button to generate a public and private key in the Authentication area, saving the private.key in the app newly created app directory above:
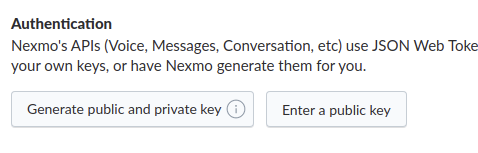 Authentication Keys
Toggle the Voice Capability and add the URL given by ngrok above in the fields:
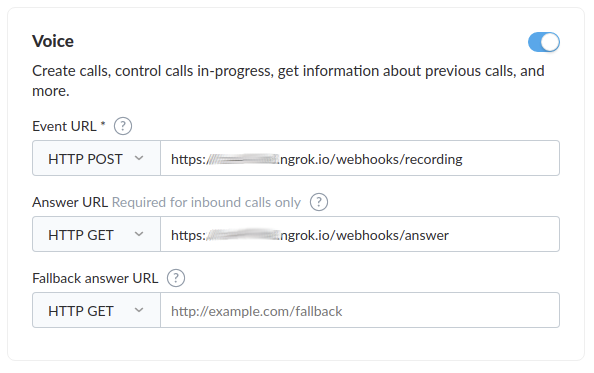 Voice URLs
This instructs Nexmo to make callbacks when specific events happen, and we want those callbacks to point to the new app we will be creating.
The Event URL will be used when any event changes the status of a call, while the Answer URL is requested for any inbound calls to retrieve an NCCO object (Nexmo Call Control Object).
Finally, click the button at the bottom to "Generate new application".
Just one more step to ensure this new application works as expected. From the Your Applications board, click into the newly created application. Toward the bottom of the page, there will be a list of available numbers in the account. Click the button to "Link" the application with the desired number:
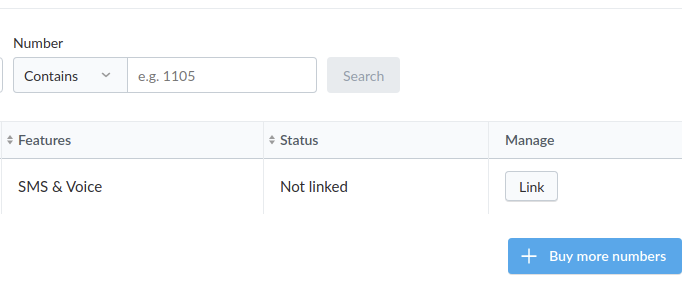 Link the app
Now we are finished with the Nexmo setup. Time to start building the app!
In the project folder, we need to init Composer, enabling us to include a few packages/dependencies. Navigate to the project directory and issue the following command.:
The latest versions of Composer now perform a step-by-step process to help set up a project. Follow through the prompts and fill out as desired. Make sure to include these packages:
To complete the wizard in the previous section, or to manually set up a composer.json file, include the following dependencies for this example:
vlucas/phpdotenv - stores credentials in the superglobal $_ENV
slim/slim - light microframework that makes handling HTTP calls and callbacks easy
slim/psr7 - facilitates HTTP interoperability between libraries
nexmo/client - for all things Nexmo, which will also bring in Guzzle as a dependency
league/flysystem-aws-s3-v3 - to abstract the usage of S3, which will also bring in the AWS SDK as a dependency
Completed composer.json example:
{
    "require": {
        "ext-json":  "used for JSON handling",
        "slim/slim": "4.2.0",
        "slim/psr7": "0.5",
        "vlucas/phpdotenv": "3.5.x-dev",
        "nexmo/client": "2.0.0",
        "league/flysystem-aws-s3-v3": "1.0.23"
    }
}
With all dependencies added to Composer, we are now ready to install them using the following command in the CLI:
Credentials for this sample app will be housed in an ENV file and parsed by phpdotenv.
Creating a .env file allows us to store credentials needed when connecting to outside services, such as Nexmo and AWS. Add the following content to a newly created .env file in the project root:
NOTE: The information above may change, so ensure you check the settings at AWS and Nexmo respectively.
In the index.php file created earlier, add the following code to leverage the Composer autoloader and to use the phpdotenv PHP package to inject the contents of the .env file into the $_ENV superglobal:
<?php

require('vendor/autoload.php');

Dotenv\Dotenv::create(__DIR__)->load();
To set up slim in our sample callback script, we will import with a use statement, immediately following the Composer autoload require. Then we will call the create() function of Slim to create a Slim app and a function call to app->run at the end of the file to kick things off:
use Psr\Http\Message\ServerRequestInterface as Request;
use Psr\Http\Message\ResponseInterface as Response;
use Slim\Factory\AppFactory;

$app = AppFactory::create();

//... call to Dotenv::create() shown earlier

//... we will create additional route-based middleware here

$app->run();
There are a few more dependencies required to make our job easier, so let's add the following imports to our script. These will ensure we have the classes we need available to the Composer autoloader:
use Nexmo\Client;
use Nexmo\Client\Credentials\Keypair;
use Aws\S3\S3Client;
use League\Flysystem\AwsS3v3\AwsS3Adapter;
use League\Flysystem\Filesystem;
use Aws\TranscribeService\TranscribeServiceClient;
As shared earlier, Nexmo will be sending status updates on pretty much every event. So, let's build that route-based middleware first to get it out of our way:
$app->post('/webhooks/event', function (Request $request, Response $response) {

    $params = $request->getParsedBody();

    error_log($params['recording_url']);

    return $response
        ->withStatus(204);
});
This route-based middleware simply receives a request to /webhooks/event and logs it. Nothing more is needed for this example.
We want to use Slim functionality to catch HTTP requests to our /webhooks/answer endpoint using a route-based middleware, so that when Nexmo receives a call to our number (configured earlier) we can provide a JSON response. Specifically, we want to provide Nexmo an NCCO payload.
Here is what that middleware looks like:
$app->any('/webhooks/answer', function (Request $request, Response $response) {
    $uri = $request->getUri();

    if ($request->getMethod() != 'GET') {
        return $response->withStatus(403);
    }

    $ncco = [
        [
            'action' => 'talk',
            'text' => 'Please leave a message after the tone, then press #.'
        ],
        [
            'action' => 'record',
            'eventUrl' => [
                $uri->getScheme().'://'.$uri->getHost().'/webhooks/fetch'
            ],
            'endOnSilence' => '3',
            'endOnKey' => '#',
            'beepOnStart' => true
        ],
        [
            'action' => 'talk',
            'text' => 'Thank you for your message. Goodbye.'
        ],
        [
            'action' => 'notify',
            'payload' => ['followup' => true],
            'eventUrl' => [
                $uri->getScheme().'://'.$uri->getHost().'/webhooks/transcribe'
            ],
            'eventMethod' => "POST"
        ],

    ];

    $response->getBody()->write(json_encode($ncco));
    return $response
        ->withHeader('Content-Type', 'application/json');
});
With this route-based middleware, the app will respond to a GET HTTP request to /webhooks/answer with an NCCO object telling Nexmo to answer the call by asking for a message and requesting the caller hit the # key to end the call.
Following the recording, which is ended by either a 3-second silence or the caller hitting the # key, Nexmo should then make a callback to the /webhooks/fetch endpoint, which kicks off the MP3 retrieval of the recording and thanks the caller for the message.
And finally, once the callback in the recording is completed, Nexmo will make a notify callback to the /webhooks/transcribe endpoint to kick off the Amazon Transcribe.
When a voice recording is made, it is stored with Nexmo for retrieval. Therefore, we need to create a route-based middleware to be called by Nexmo to initiate the download. It will look like this:
$app->post('/webhooks/fetch', function (Request $request, Response $response) {

    $params = json_decode($request->getBody(), true);

    // Create Nexmo Client
    $keypair = new Keypair(
        file_get_contents($_ENV['NEXMO_APPLICATION_PRIVATE_KEY_PATH']),
        $_ENV['NEXMO_APPLICATION_ID']
    );

    $nexmoClient = new Client($keypair);

    $data = $nexmoClient->get($params['recording_url']);

    // Create AWS S3 Client
    $S3Client = new S3Client([
        'region' => $_ENV['AWS_REGION'],
        'version' => 'latest',
    ]);

    $adapter = new AwsS3Adapter($S3Client, $_ENV['AWS_S3_BUCKET_NAME']);

    $filesystem = new Filesystem($adapter);

    $filesystem->put('/' . $_ENV['AWS_S3_RECORDING_FOLDER_NAME'] .'/'.$params['conversation_uuid'].'.mp3', $data->getBody());

    return $response
        ->withStatus(204);
});
In the example code, we decode the JSON from the request body to gain the URL of the recording. Then, we create a Client of the Nexmo SDK (using a key pair for credentials) and retrieve the recording.
We then forward the recording to AWS S3 using FlySystem, leveraging the AWS SDK for connectivity.
The final step is to create the route-based middleware to request transcription by the Amazon Transcribe service. Here is how to do that:
$app->post('/webhooks/transcribe', function (Request $request, Response $response) {

    $params = json_decode($request->getBody(), true);

    // Create Amazon Transcribe Client
    $awsTranscribeClient = new TranscribeServiceClient([
        'region' => $_ENV['AWS_REGION'],
        'version' => 'latest',
    ]);

    $transcriptionResult = $awsTranscribeClient->startTranscriptionJob([
            'LanguageCode' => 'en-US',
            'Media' => [
                'MediaFileUri' => 'https://' . $_ENV['AWS_S3_BUCKET_NAME'] . '.s3.amazonaws.com/' . $_ENV['AWS_S3_RECORDING_FOLDER_NAME'] . '/' . $params['conversation_uuid'] . '.mp3',
            ],
            'MediaFormat' => 'mp3',
            'TranscriptionJobName' => 'nexmo_voice_' . $params['conversation_uuid'],
    ]);

    $response->getBody()->write(json_encode($transcriptionResult->toArray()));

    return $response
        ->withHeader('Content-Type', 'application/json')
        ->withStatus(204);
});
Note: The AWS SDK gains the login and key from the environment.
In this middleware, we parse the JSON payload in the Request so we can gain the conversation_uuid.
Then, an Amazon Transcribe Client is used to create a transcription job using the MP3 file stored on S3.
Using this example we were able to receive a call to a Nexmo number, prompt the caller to leave a message, retrieve the message in MP3 format and store on AWS S3, and then request Amazon Transcribe to convert the speech to text.
From there, the text can be retrieved from AWS Transcribe via the AWS Console, or perhaps we could build some sort of scheduled task to check periodically before downloading for other uses.
For a completed code example go to https://github.com/nexmo-community/voice-aws-speechtotext-php.