Share:
Michael Crump works at Vonage on the Developer Experiences team and is a coder, YouTuber, and frequent speaker of various .NET and cloud/communication development topics. He’s passionate about helping developers understand the benefits of each in a no-nonsense way.
5 Things You Probably Didn’t Know About Vonage AI Studio
Time to read: 6 minutes
I was recently introduced to Studio by Vonage AI. For the uninitiated, Studio is a Low/No code virtual assistant builder that allows developers and non-developers alike to design, create and deploy Virtual agents that operate with Natural language understanding. It uses your Vonage API account to create customer engagements over voice, SMS, HTTP and WhatsApp channels.
I built a Virtual Agent for a fictitious event that allowed customers to ask questions regarding event logistics. They would then get a reply with the information requested.
I wrote about my initial experiences in a blog post, "If You Can Point and Click, Then You Can Make a Conversational AI." During that whole process, I came across a number of features that are super-useful. I thought it would be helpful to summarize these features as five tips for anyone getting started with AI Studio!
Let's jump into it!
Maybe you'd like to export your Virtual Agent after creation, keep it on your servers, or import it to a different account. Thankfully, this is straightforward to do. Navigate to your Agents list, click on the three dots next to the agent name and select Export Agent.
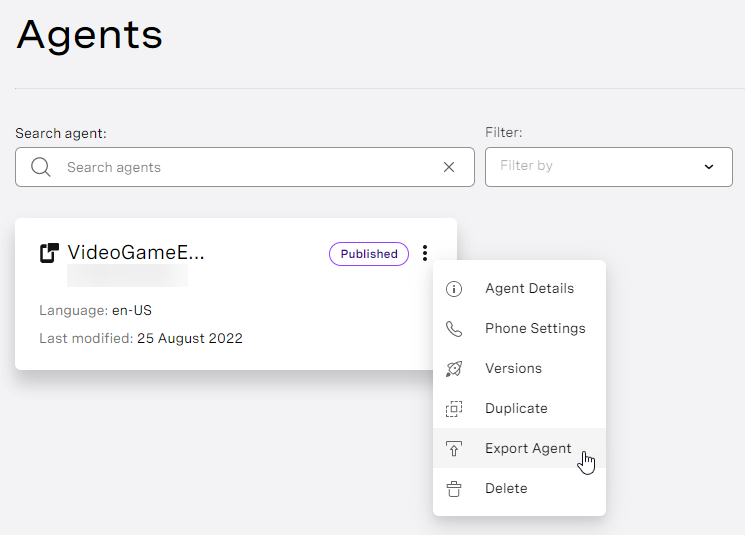 export-agent.png
After a few minutes, you'll receive an email from ai.vonage.com with the Subject, "Your Agent is ready!". Click on the download link to save your Agent to your local computer.
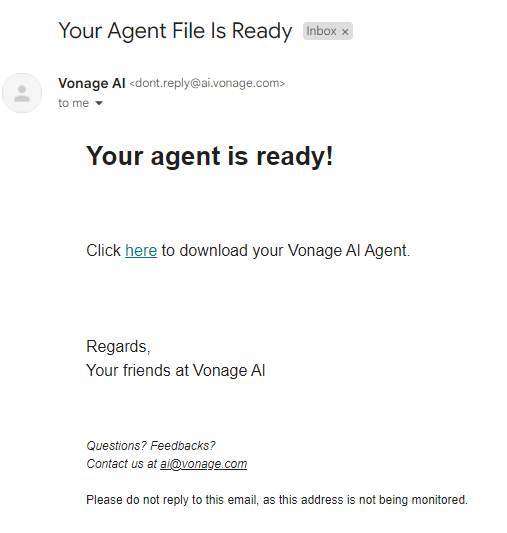 export-agent-email.png
Once you download your Agent, you can import it back into AI Studio anytime. If you are curious as to what the .zip file contains, you'll see the following structure:
C:\Vonage\ai-structure>tree /f
Folder PATH listing
Volume serial number is F650-8A54
C:.
│   Agent.json
│   nlu-application.zip
│   version.json
│
└───files
Below is a summary of what each file does:
The
Agent.jsoncontains information about the Agent that you specified during the Agent creation process. Items such as the Agent Name, Language, TimeZone, etc.The
nlu-application.zipcontains two files: the<id>.jsonand asignature.sig. The<id>.jsoncontains application-specific information,intents, andentities, whereas thesignature.sigis the application's signature.
The version.json contain information specific to the different versions that your Agent has. There is more to come on this topic later.
Now that we know how to Export an Agent let's cover Importing one.
Next, to import your agent, log into your desired Studio account and click on the Import agent button on the top right of your screen. It should be right next to the Create Agent button.
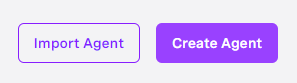 import-agent.png
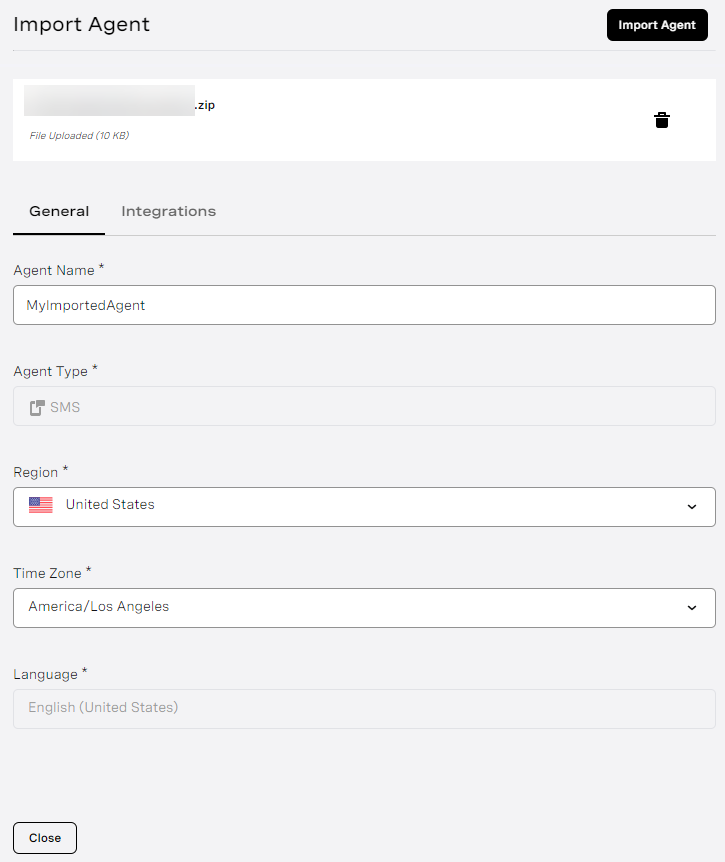
You can now go ahead and upload the agent file that you previously downloaded here, You will also have the opportunity to update the following information:
Agent Name: Give your Agent a unique name you haven't used before.
Region: Where will your Agent typically be used - The USA or Europe?
Time Zone: Choose the time zone where your Agent will operate.
 import-agent-dialog.png
Finally, click on the Import Agent button on the top right. Your new agent will now be listed on the Agents dashboard.
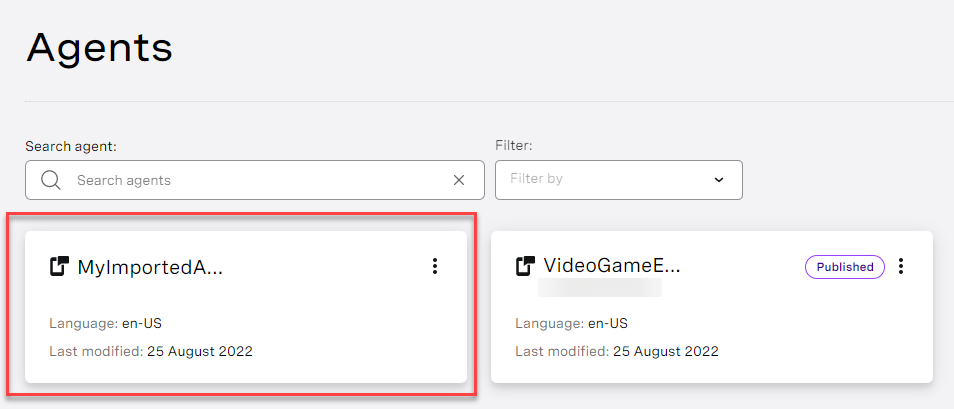 agent-imported-successfully.png
Note - After creating your Agent, you will need to assign a new phone number in order to publish it.
Sometimes you need to view past What's App, SMS, HTTP conversations between a user and your virtual Agent for reporting or troubleshooting purposes. Select the Agent from which you want to view the conversation data and click on Reports from the top menu navigation.
 reports.png
You can filter reports by Session ID or the Caller Number. Regardless of which item is selected, you'll see a Search box where you can enter information.
 filter-report.png
Before you search, you'll see a Generate Report option on the right-hand side that allows you to filter the data shown. You will have the following options:
Region: The USA or Europe
Report Type: A variety of different (https://studio.docs.ai.vonage.com/ai-studio/reports) depending on your needs
Date and Time: The Start Date and the End Date
Agents: Which Virtual Agents would you like to run the report?
Time Zone: The time zone that you'd like to filter.
Report State: You can choose between Success, Warning, Error, or All.
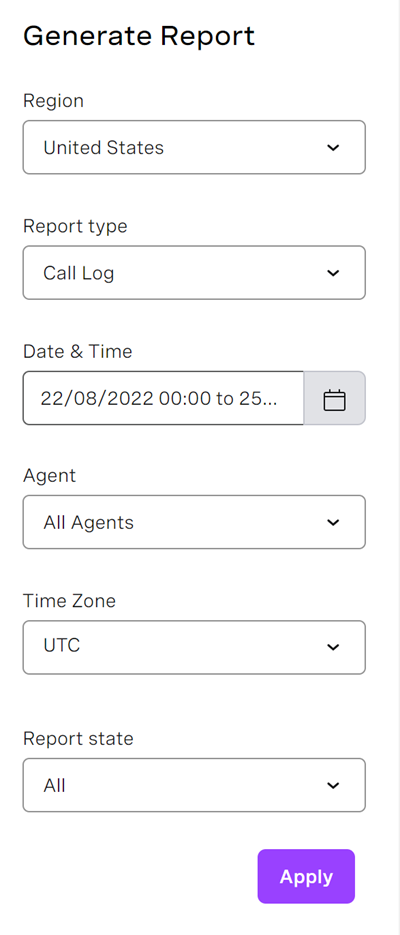 generate-report.png
Once you press Apply, you will see if the data exists, as shown below.
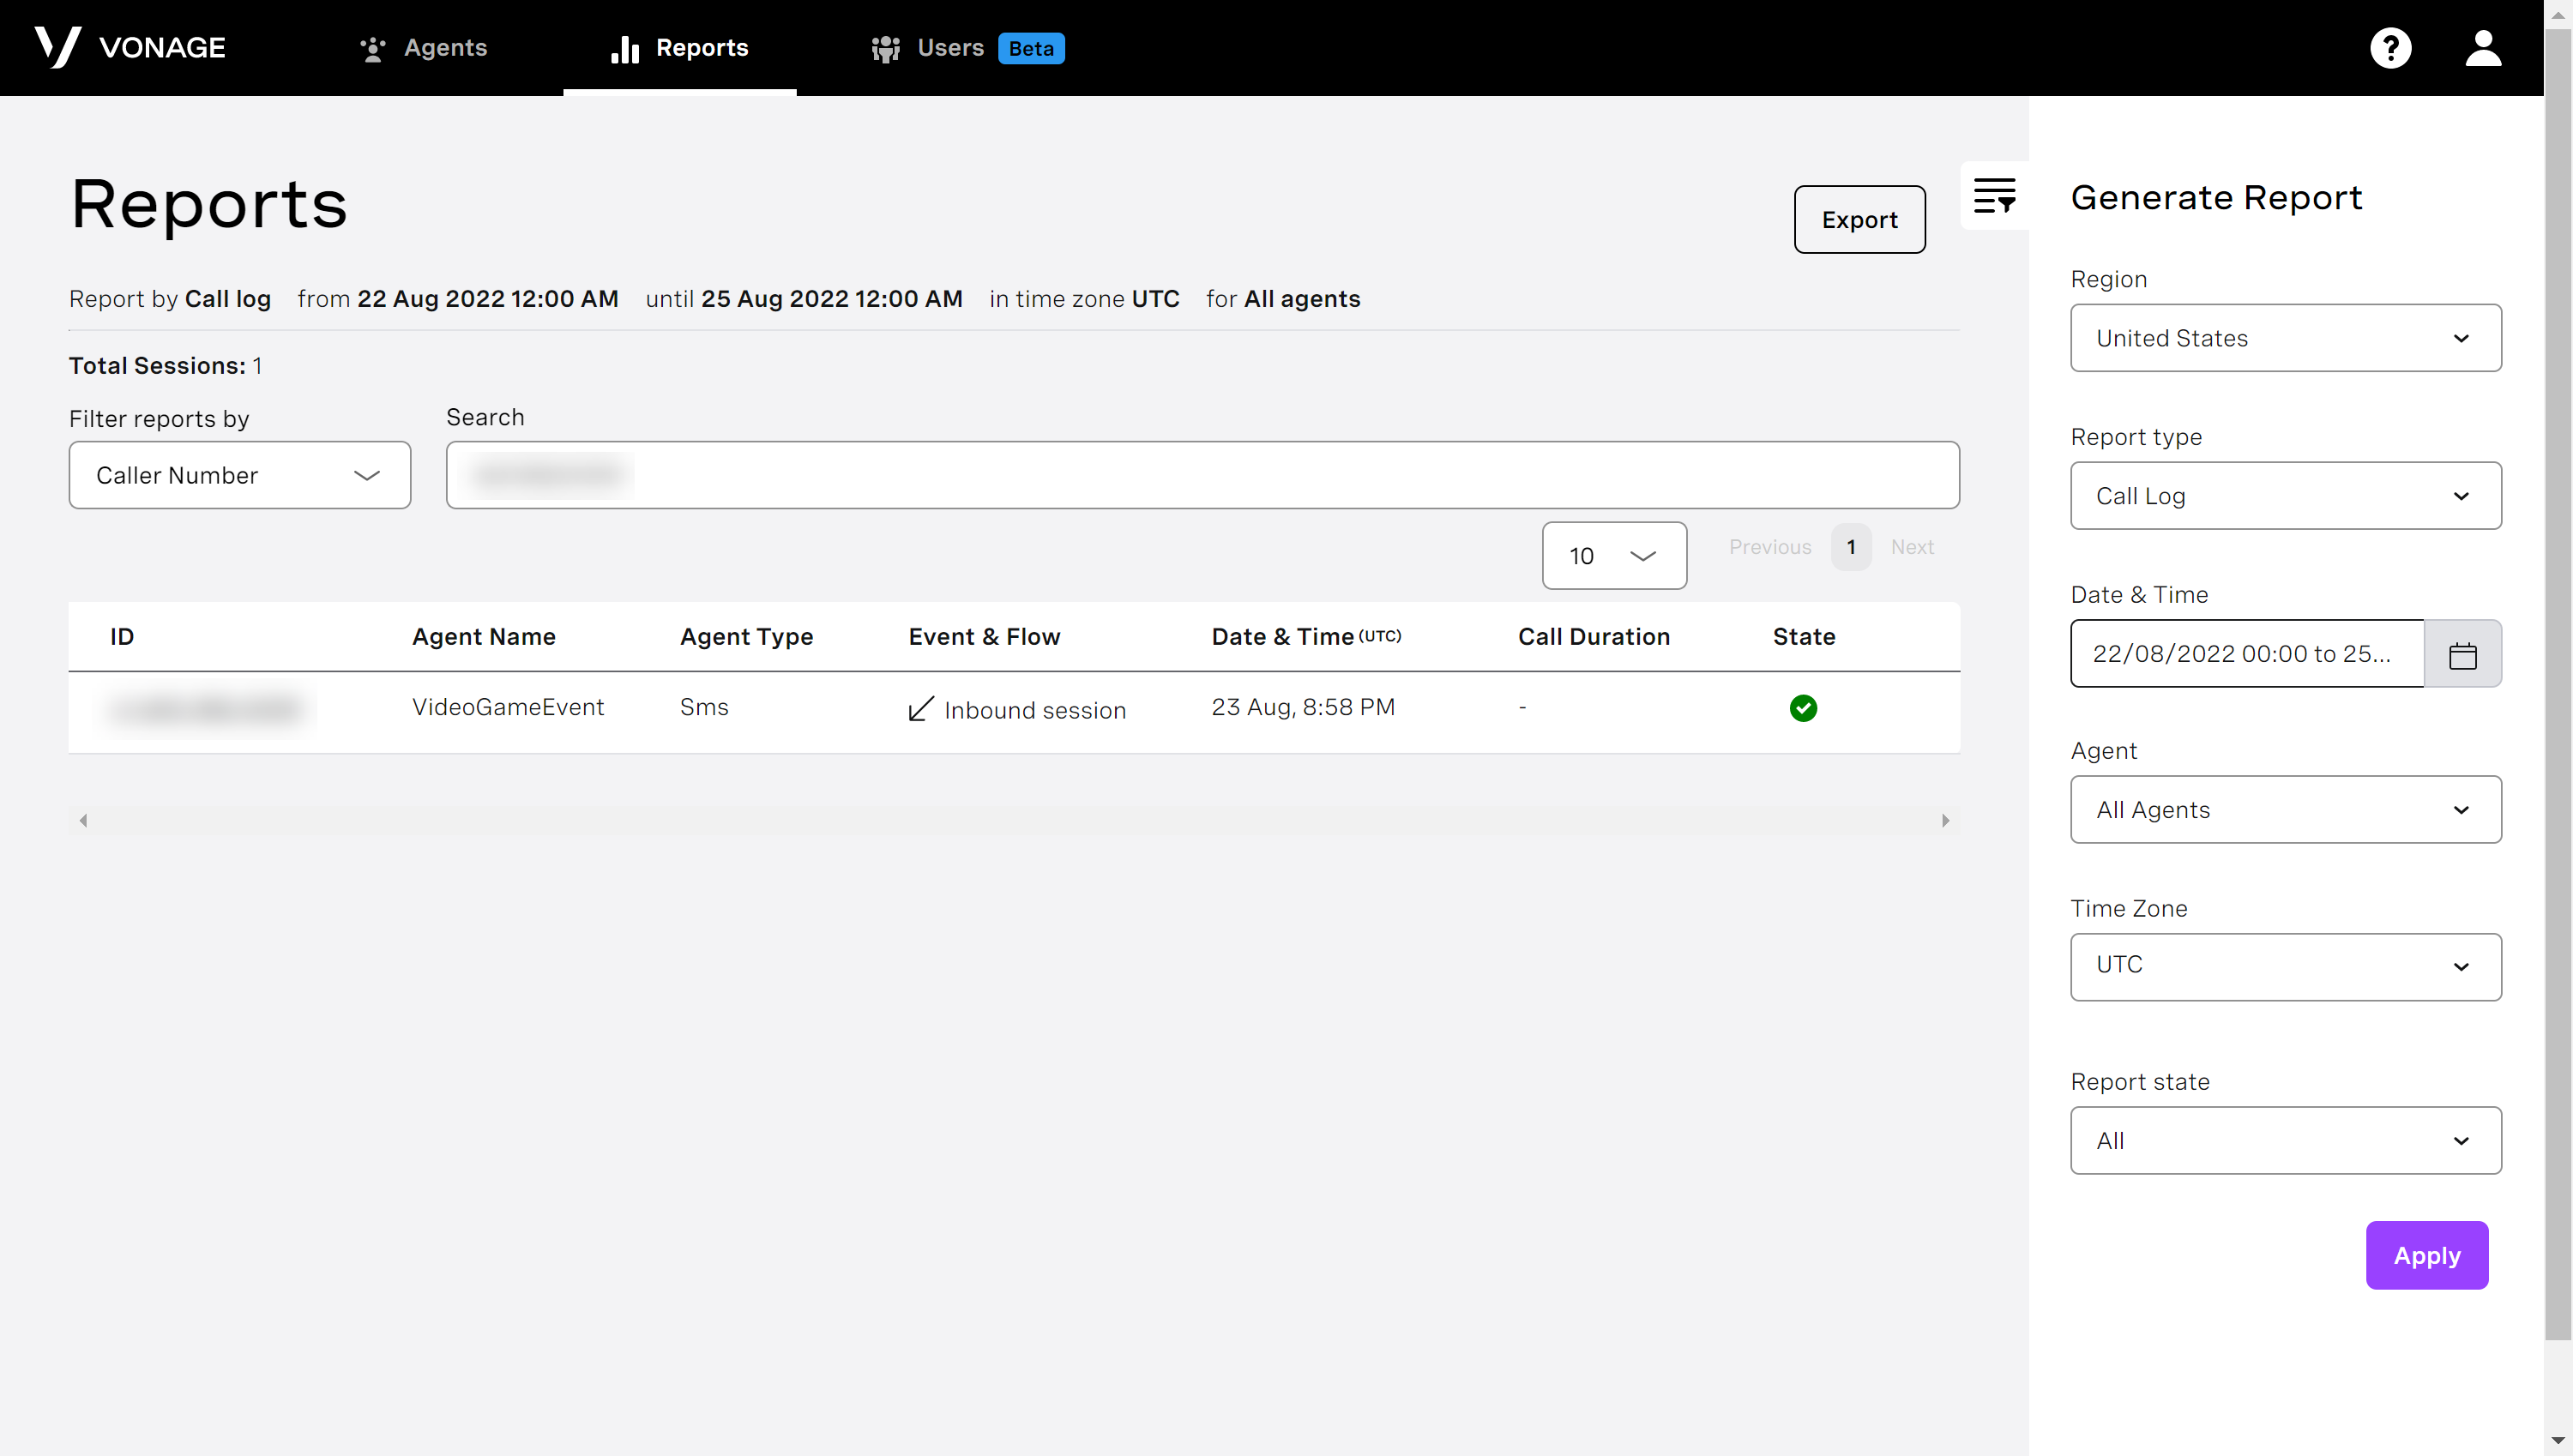 report-results.png
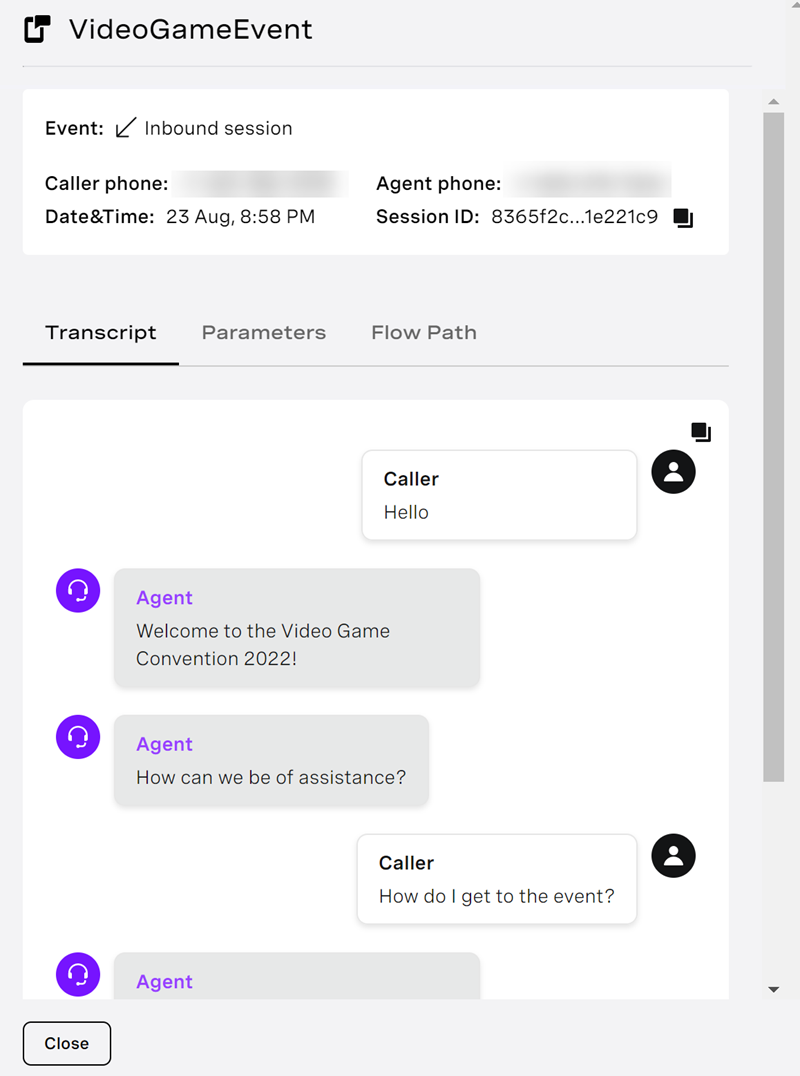
If you click on the ID, you'll see details such as the Caller phone, Agent phone, Session ID, and a Transcript of the recorded conversation.
 report-details.png
You can also view the Parameters data captured and review the Flow Path that the Virtual Agent took them through. Very cool!
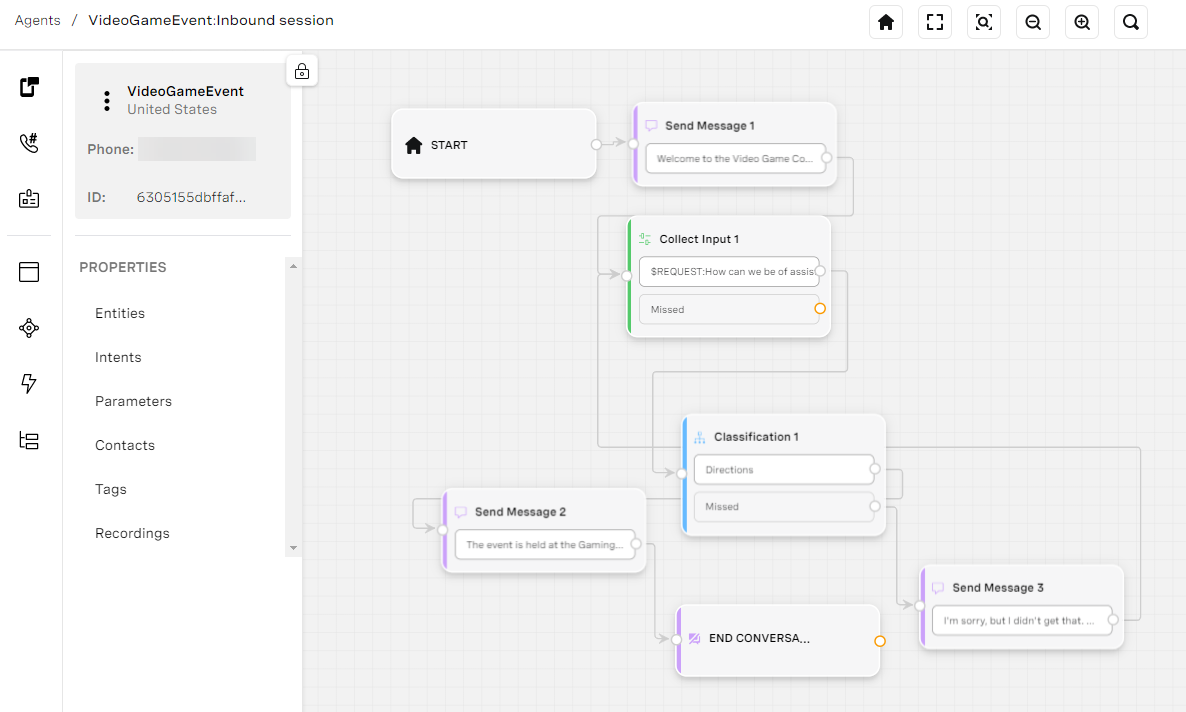
The canvas in AI studio is typically where you do a majority of your work and it is called the Editor mode. But once you are ready to connect your Agent to a live environment, you will have to publish the Agent.
Sometimes after publishing your Agent, you might wish to go back to a previous version to revert a change. If you click on the three dots on the top of the page next to the Agent's name, you will see an option labeled Versions.
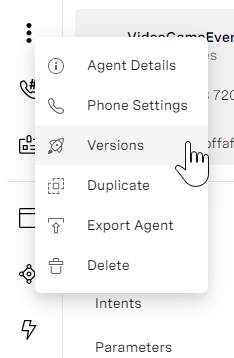 versions.png
Once clicked the canvas will display all the different agent versions you have created so far. You will be able to see the differences between the published agent and draft versions. By default, the current view will be your most recent published version.
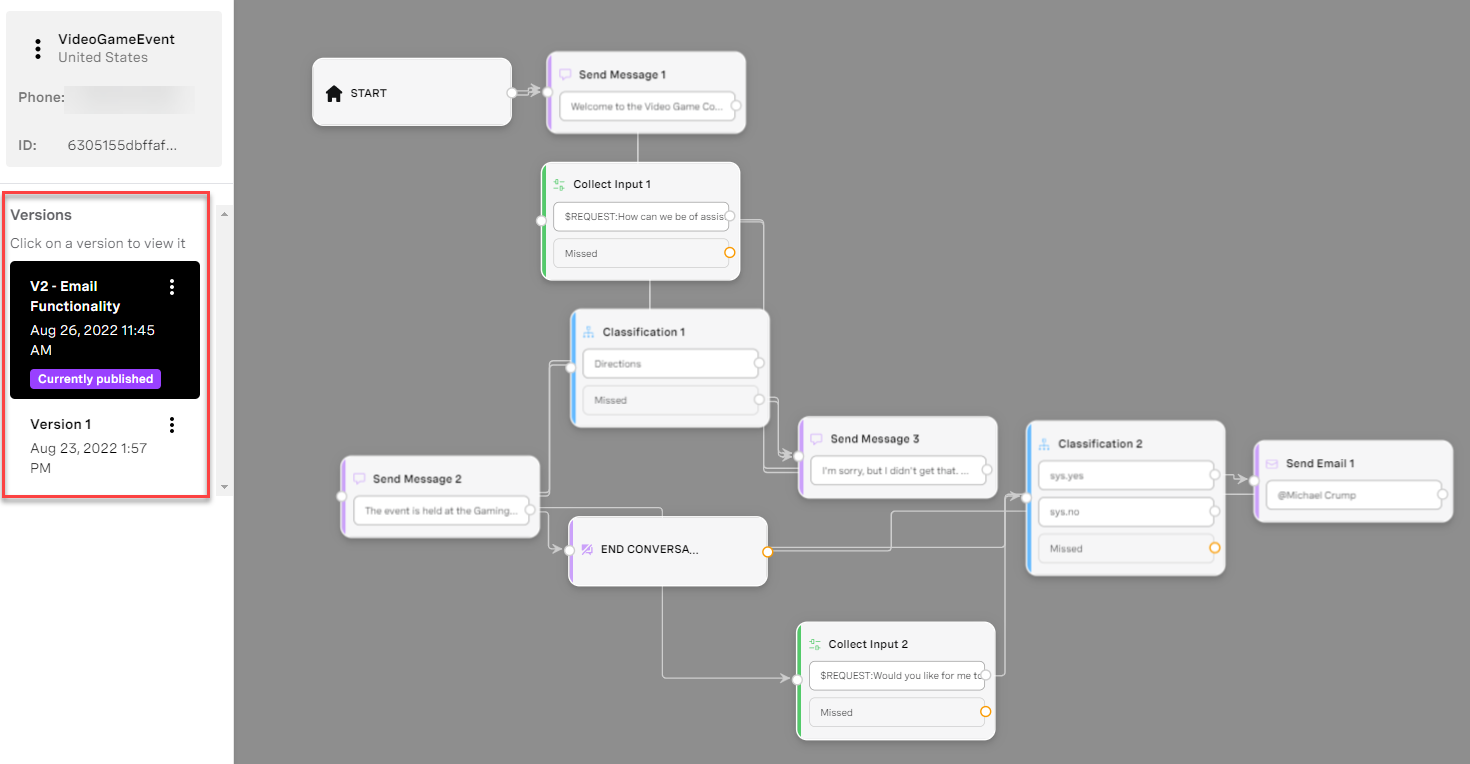 click-on-versions.png
If you want to revert to a previous version, you can click on the three dots next to the version and select "Open in editor." We'll do this for Version 1 (as shown in the previous screenshot) of our SMS Virtual Agent.
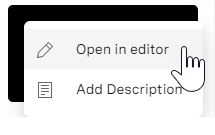 open-in-editor.png
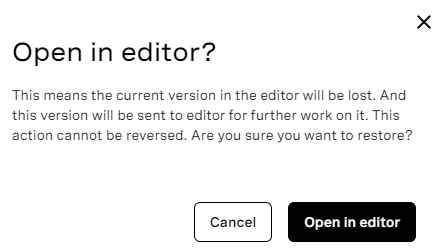
A warning will pop up notifying you that any unsaved changes will be lost if you proceed.
 dialog-save-new-version.png
Click "Back to Editor" on the top left to begin working with the previous version.
 restored-version.png
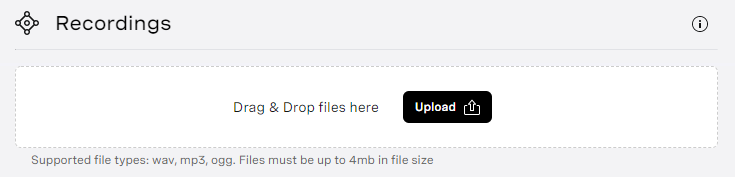
AI Studio's Text-to-speech (powered by Amazon Polly voices) offers a wide variety of human-sounding voices with different accents, however in the case that you would prefer to give your customers a human voice vs. using text-to-speech for your conversation flow. You can do this simply by looking under Properties, then Recordings.
NOTE: Recordings is only for telephony.
 recordings.png
You can Drag and Drop an audio file on the Recordings dialog.
 recordings-dialog.png
Quick Tip: Please note that the supported file types are wav, mp3, and ogg and that files may not be larger than four MB in file size.
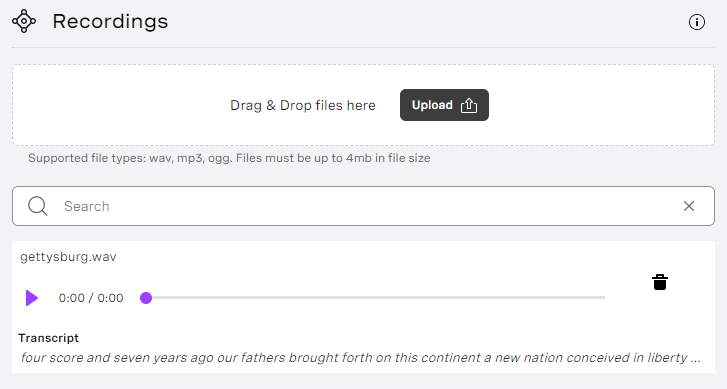
Once you've uploaded your file, you can preview it and see a Transcript of the audio.
 uploaded-recording.png
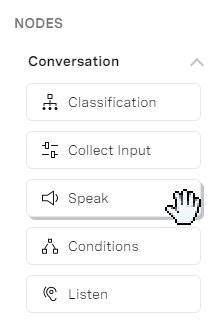
Using a Telephony Agent, you'll see the Speak node under Conversation. Select this and drag and drop it onto the designer.
 speak-node.png
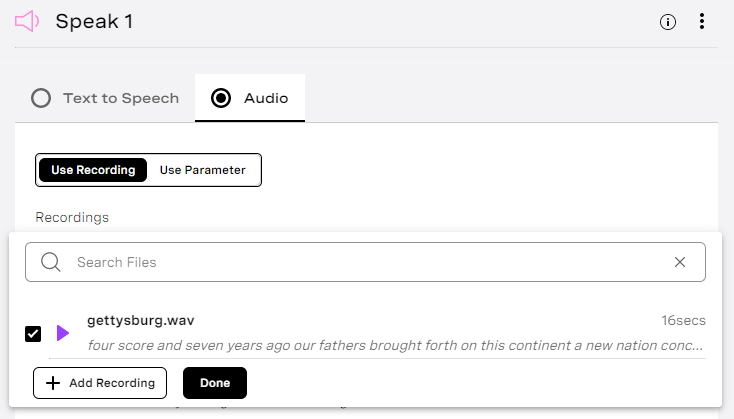
Click on Speak 1, and you'll see an option to select Audio. Under Use Recording, you'll see the recording you uploaded from the earlier step.
 selecting-audio-recording.png
Select Done and then Save & Exit.
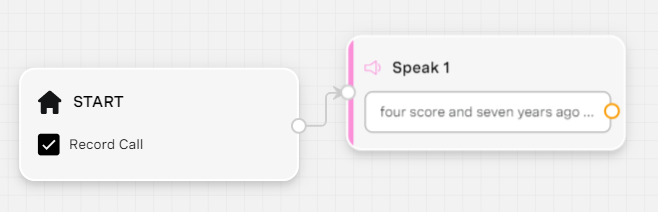 speak-1-connected.png
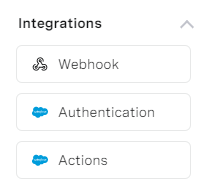
Sometimes you will need to integrate with a third-party service to send and receive data. Vonage AI Studio has several Integration nodes that you can use.
 integrations.png
There are three main types at the time of writing this blog post:
Webhook - It supports multiple ways to send an API request, such as GET, POST, PUT, DELETE, and PATCH. It also provides support for HTTP headers and Response Mapping.
A built-in way to test your Webhook is by clicking on Test Request on the top right of the node settings.
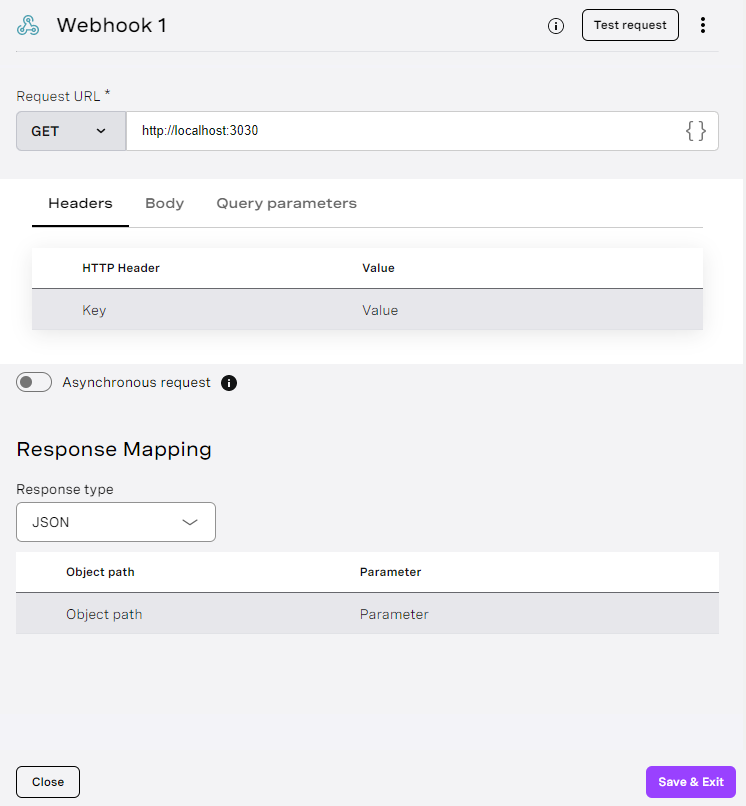 webhook.png
Salesforce Authentication - This node handles the required authentication to access your Salesforce domain.
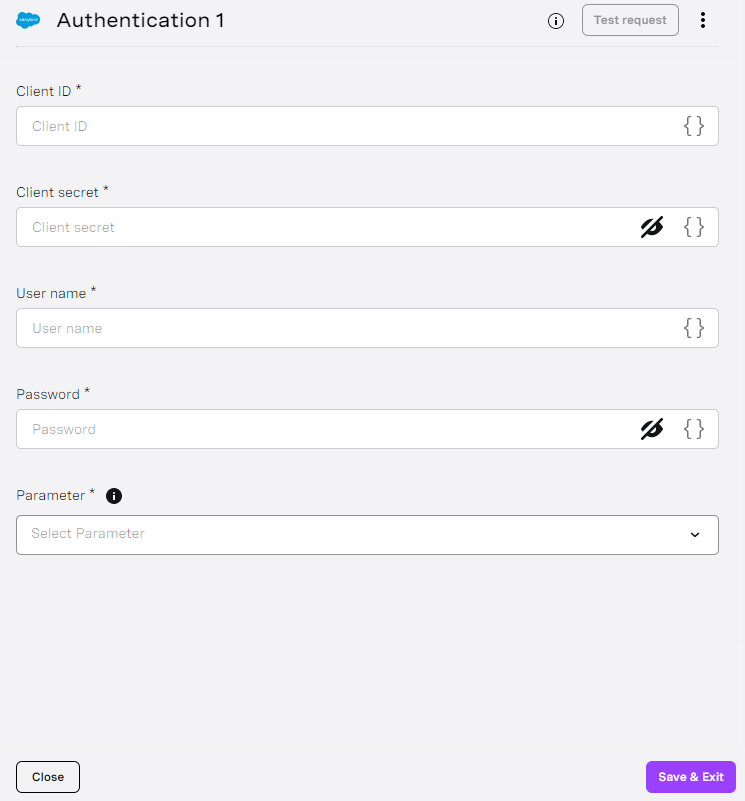 salesforce-authentication.png
Salesforce Actions - The Salesforce Action node allows you to retrieve, create and update a record via SOQL query.
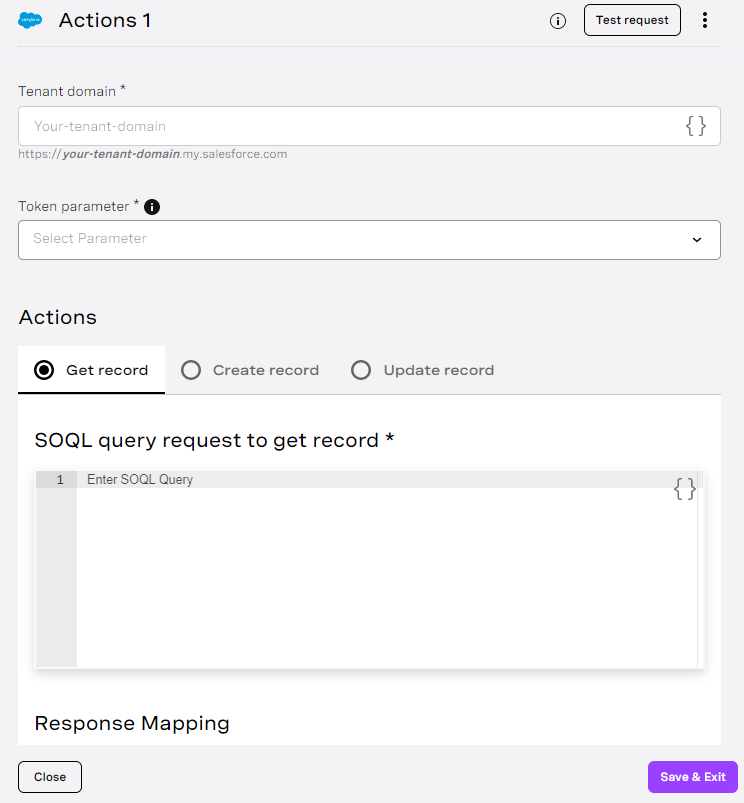 salesforce-actions.png
There you have it! You know five more things about Vonage AI Studio to help you get started. If you haven't explored Vonage AI Studio, I will encourage you to do so, and please share your unique creation with us!
As always, if you have questions or feedback, join us on the Vonage Developer Slack or send me a Tweet on Twitter, and I will get back to you. Thanks again for reading, and I will catch you on the next one!
Share:
Michael Crump works at Vonage on the Developer Experiences team and is a coder, YouTuber, and frequent speaker of various .NET and cloud/communication development topics. He’s passionate about helping developers understand the benefits of each in a no-nonsense way.