シェア:
)
Douglas is a full stack software engineer with a keen interest to marketing, customer growth and data analytics. When he’s not coding, he’s probably watching way too many TV shows.
Nexmo SMSを搭載したWordPress WooCommerceの出荷通知
所要時間:1 分
購入後のカスタマーエクスペリエンスは、どのようなビジネスにおいてもユーザーのリテンションに大きな役割を果たします。eコマースでは、購入後のエクスペリエンスには、ユーザーの注文ステータスが変更されたときのタイムリーな通知が含まれます。このようなタイムリーな注文状況の通知は、顧客を満足させ、カスタマーサービスとの前後の会話の負担を軽減します。
このチュートリアルでは、WordPress WooCommerceとNexmo SMSの簡単な統合を設定し、注文の配送状況が変わったときに顧客に(SMSで)通知します。
このチュートリアルの最後には、WordPressプラグインの作成方法、WordPressアクションの仕組み、そしてNexmoのPHP SDKを使用してWordPress上でSMSを送信するためのNexmoのAPIの統合方法について、十分な理解を得ることができます。
始めよう!
WordPressによるセルフホスティング・ウェブサイト
WooCommerceプラグインのインストール
このプロジェクトを実行可能なステップに分け、上から下へと実行していこう:
WordPressプラグインを作成する
プラグインにNexmo PHP SDKを追加します。
WooCommerceで注文ステータスの変更をリッスンする
注文ステータスが変更されたらSMSを送信する
WordPress pluginsフォルダに新しいフォルダを追加するだけでもWordPressプラグインを作成できますが、より効率的な方法は、軽量なボイラープレートから始めることです。ボイラープレートは、すべてのファイルとクラスを標準的な方法でセットアップするのに役立ちます。このチュートリアルでは WordPressプラグインボイラープレートジェネレーター (wppb)のボイラープレートを使用します。ウェブサイト上で詳細を入力し、プラグインのビルドボタンをクリックするだけでプラグインボイラープレートがダウンロードされます。
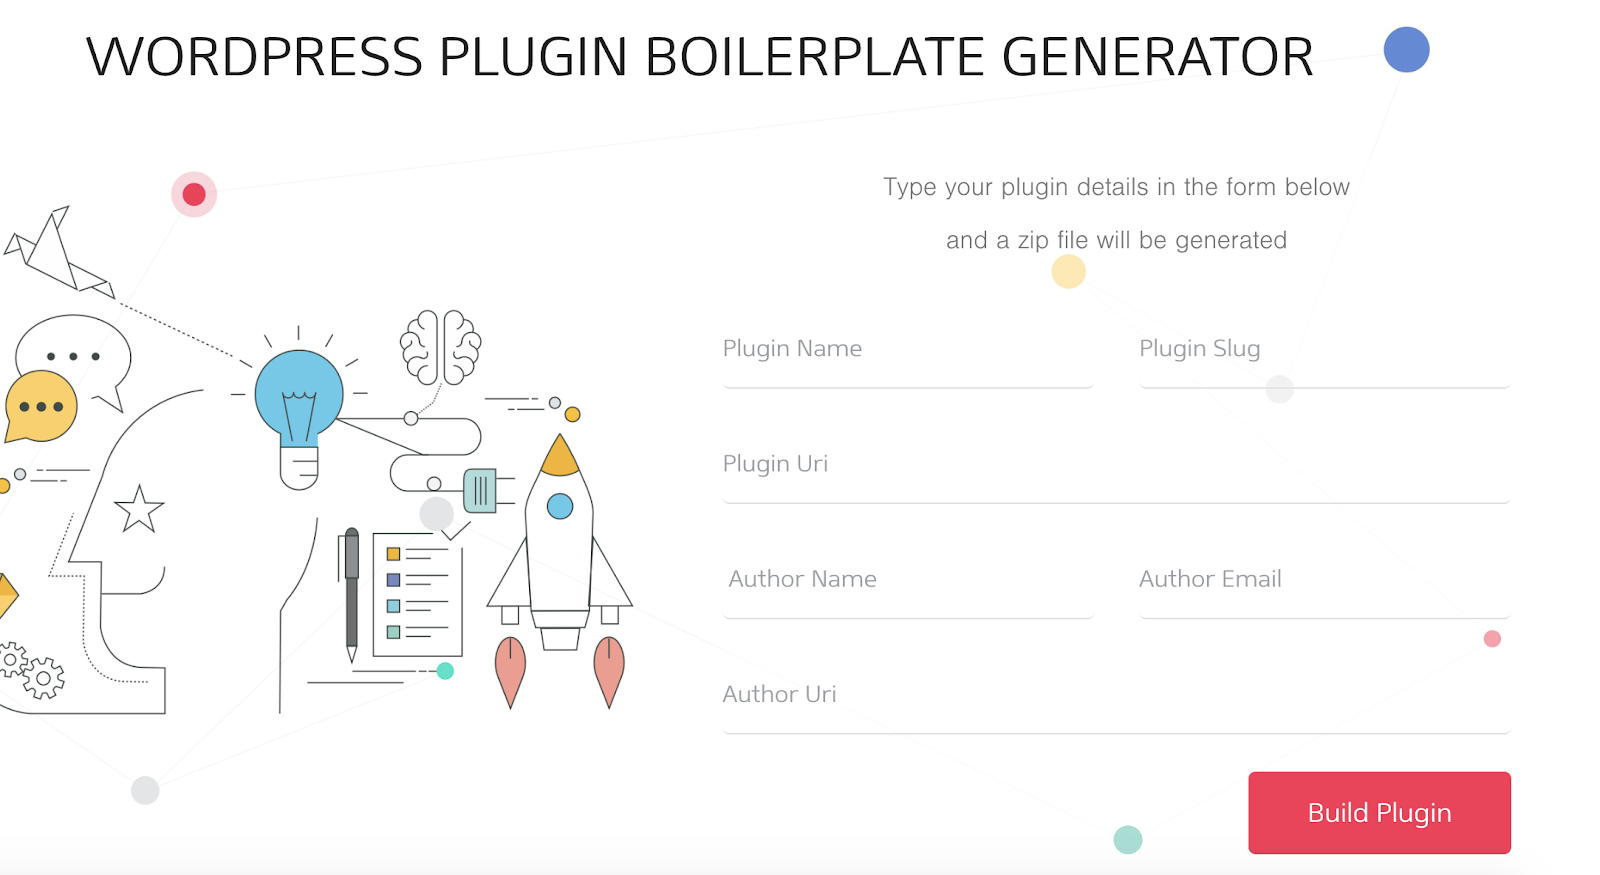 boilerplate generator
zipファイルを解凍し、WordPressのpluginsフォルダに入れます。次に、WordPress管理画面のプラグインページに移動し、有効化ボタンをクリックしてプラグインを有効化します:
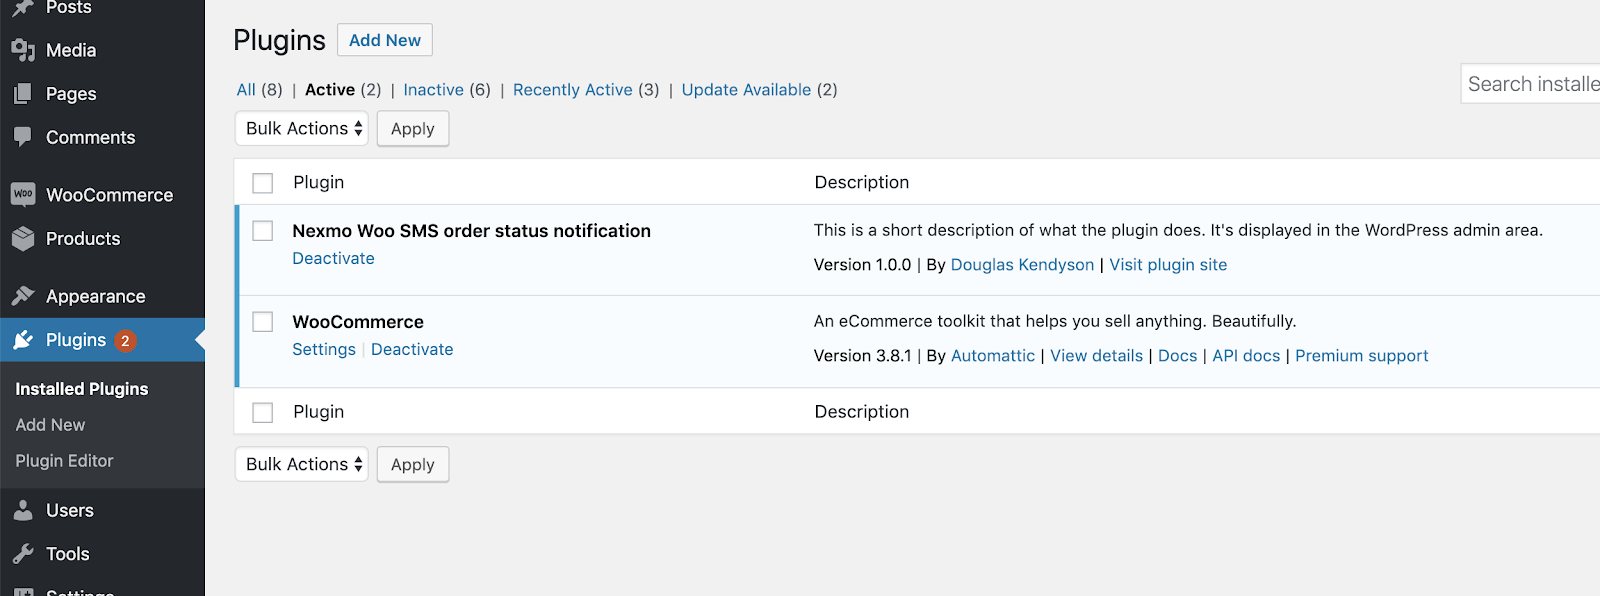 WordPress installed plugins page
Nexmoでは、以下のライブラリをインストールすることを推奨しています。 PHPライブラリComposer経由でインストールすることを推奨しているため、Composerをサーバー/ローカルシステムにセットアップする必要があります。Composerをセットアップしていない場合は、Nexmoが推奨する2つのガイドを参照してください: https://getcomposer.org/doc/00-intro.mdまたは https://scotch.io/tutorials/a-beginners-guide-to-composer
Composerをインストールした状態で、ターミナルを開き、プラグインのフォルダに移動します(通常、パスの中にあります: /your-wordpress-server-folder/wp-content/plugins/you-plugin-folder-name/にあります)、実行します:
というフォルダが作成されます。 vendorという新しいフォルダが作成され、その中にNexmoのPHPライブラリが含まれます。このライブラリをプラグインに含めるには、プラグインのルートPHPファイルに次の行を追加するだけです:
require_once plugin_dir_path( __FILE__ ) . 'vendor/autoload.php';
NexmoのPHPライブラリを使用して呼び出しを行う前に、Nexmoクラスを初期化し、その後のリクエストにクライアントオブジェクトを使用する必要があります:
$basic  = new \Nexmo\Client\Credentials\Basic(NEXMO_API_KEY, NEXMO_API_SECRET);
$client = new \Nexmo\Client(new \Nexmo\Client\Credentials\Container($basic));APIキーとシークレットは、'スタートアップページで確認できます。
ボイラープレートを使用している場合は、次のように編集します。 パブリッククラスファイルファイルを /publicフォルダにあるpublic Classファイルを次のように編集します。コンストラクトでNexmoライブラリを初期化し、クライアント・オブジェクトをprotectedプロパティとして設定します:
class Nexmo_Wc_Sms_Order_Status_Notification_Public {

   protected $nexmo_client;
   public function __construct( $plugin_name, $version ) {

       $this->plugin_name = $plugin_name;
       $this->version = $version;

       $this->nexmo_client = new Nexmo\Client(new Nexmo\Client\Credentials\Basic(WC_SMS_ORDER_NEXMO_KEY, WC_SMS_ORDER_NEXMO_SECRET));

   }
これで、NexmoのライブラリがWordPressプラグインに追加され、classプロパティでライブラリ関連のすべての関数にアクセスできるようになりました。 $this->nexmo_client.次に、WooCommerceの注文ステータスの変更をリッスンし、SMS通知を送信します。
WordPressで行う編集のほとんどは、既存のWordPressのアクションに関数をフックすることです。 アクションは、WordPressで特定のイベントが発生したときに実行される関数です。例えば、注文ステータスが変更されたときなど、特定のイベントが発生したときに関数を実行させたい場合は、注文ステータス変更アクションに関数をフックします。
このように既存のアクションに関数をフックする:
add_action( 'action_name', 'name_of_your_function' );
WordPressのアクションを理解したところで、SMSを送信する関数をWooCommerceの注文ステータス変更イベントにフックします、 woocommerce_order_status_$STATUS_TRANSITION[to]. $STATUS_TRANSITION[to]はあなたが聞きたいステータスの変更です。例えば 'woocommerce_order_status_pending'は注文のステータスが保留になったときにこの関数をトリガーします。
WooCommerceのデフォルトのステータスはpending、failed、on-hold、processing、completed、refunded、canceledで、これらの各ステータスに関数をフックすると、次のようになります:
add_action( 'woocommerce_order_status_pending', 'send_customer_sms_notification');
       add_action( 'woocommerce_order_status_failed', 'send_customer_sms_notification');
       add_action( 'woocommerce_order_status_on-hold', 'send_customer_sms_notification');
       add_action( 'woocommerce_order_status_processing', 'send_customer_sms_notification');
       add_action( 'woocommerce_order_status_completed', 'send_customer_sms_notification');
       add_action( 'woocommerce_order_status_refunded', 'send_customer_sms_notification');
add_action( 'woocommerce_order_status_cancelled', 'send_customer_sms_notification');上記のコードをすっきりさせるために、3行だけのコードにリファクタリングする:
class Nexmo_Wc_Sms_Order_Status_Notification_Public {

   protected $nexmo_client;


   public function __construct( $plugin_name, $version ) {

       $this->plugin_name = $plugin_name;
       $this->version = $version;

       foreach ( array( 'pending', 'failed', 'on-hold', 'processing', 'completed', 'refunded', 'cancelled' ) as $status ) {
           add_action( 'woocommerce_order_status_'. $status, array( $this, 'send_customer_sms_notification' ) );
       }
       $this->nexmo_client = new Nexmo\Client(new Nexmo\Client\Credentials\Basic(WC_SMS_ORDER_NEXMO_KEY, WC_SMS_ORDER_NEXMO_SECRET));

   }
次に send_customer_sms_notification関数を作成します。
WooCommerceの注文ステータスアクションに関数をフックすることで、注文IDを取得し、それを使って注文の詳細を取得し、SMSを送信することができます。
   public function send_customer_sms_notification( $order_id ) {
       $order = wc_get_order( $order_id );
       $order_status = $order->get_status();
       $phone_number   = method_exists( $order, 'get_billing_phone' ) ? $order->get_billing_phone() : $order->billing_phone;
   }
上記から、オーダーIDを使用してWooCommerce関数 wc_get_order()そして、オーダーオブジェクトでステータス(これは更新されたばかりの新しいステータスです)と顧客の携帯番号を取得します。これらの情報があれば、SMSを送信する準備が整いました。
ここでは スニペットを使います。しかし、私たちの場合 $client変数は $nexmo_clientプロパティになります:
public function send_customer_sms_notification( $order_id ) {
       $order = wc_get_order( $order_id );
       $order_status = $order->get_status();
       $phone_number   = method_exists( $order, 'get_billing_phone' ) ? $order->get_billing_phone() : $order->billing_phone;
       $message =  "Your order #".$order_id." status has been updated to ".$order_status;

       try {
           $message = $this->nexmo_client->message()->send([
               'to' => $phone_number,
               'from' => WC_SMS_ORDER_NEXMO_SENDER_NAME,
               'text' => $message
           ]);
           $response = $message->getResponseData();

           if($response['messages'][0]['status'] == 0) {
               $order_note = "Customer notified on order status change to ".$order_status." via SMS (".$phone_number.")";
           } else {
               $order_note = "Unable to notify customer on order status change via SMS. Error:". $response['messages'][0]['status'];
           }
       } catch (Exception $e) {
           $order_note = "Unable to notify customer on order status change via SMS. Error:". $e->getMessage();
       }
       $order->add_order_note( $order_note );
   }
送信されたメッセージが見えるように、WooCommerceの機能を使って注文メモを追加します。 add_order_note().これらのメモは管理画面から見ることができます:
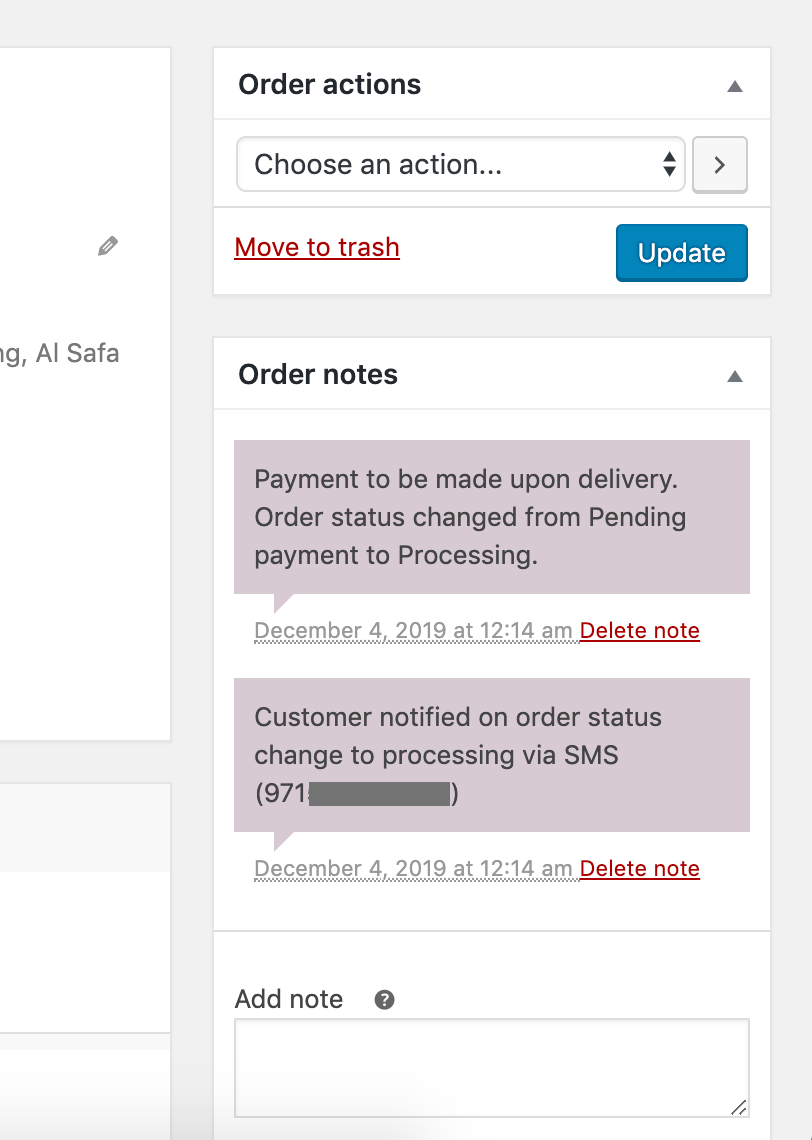 notes in admin
すべてをテストするには、WooCommerceストアで注文を行い、管理画面に移動して注文ステータスを他のものに変更するだけです。
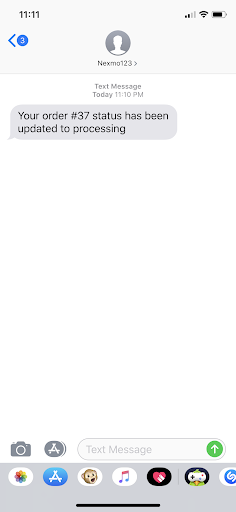 sms demo
ここに リンクへのリンクです。
このチュートリアルでは、WordPressプラグイン構築の基本、Nexmo PHPライブラリの統合方法、NexmoのSMS APIを使用してWooCommerceの注文ステータスが変更されたときにSMSを送信する方法を学びました。
GitHubの以下のリンクから全コードをチェックできる。 リンク.
読んでくれてありがとう!