)
Make an Outbound Voice Call by Asking Claude
所要時間:5 分
I’ve shown you how the Vonage Tooling MCP Server can be accessed via Postman. In today’s blog post, I’ll show you how to access it via Claude Desktop, and the use case I’ll focus on is to trigger a real outbound voice call using the same way you might communicate with LLMs, some natural language prompt. We’ll use Claude Desktop, create a Vonage account, get some API keys, add them to Claude, and see everything in action.
Before we get started and place that phone call, you'll need:
Claude Desktop installed
Node.js installed
アプリケーションを作成するには アプリケーションの作成ページでアプリケーションの名前を定義します。
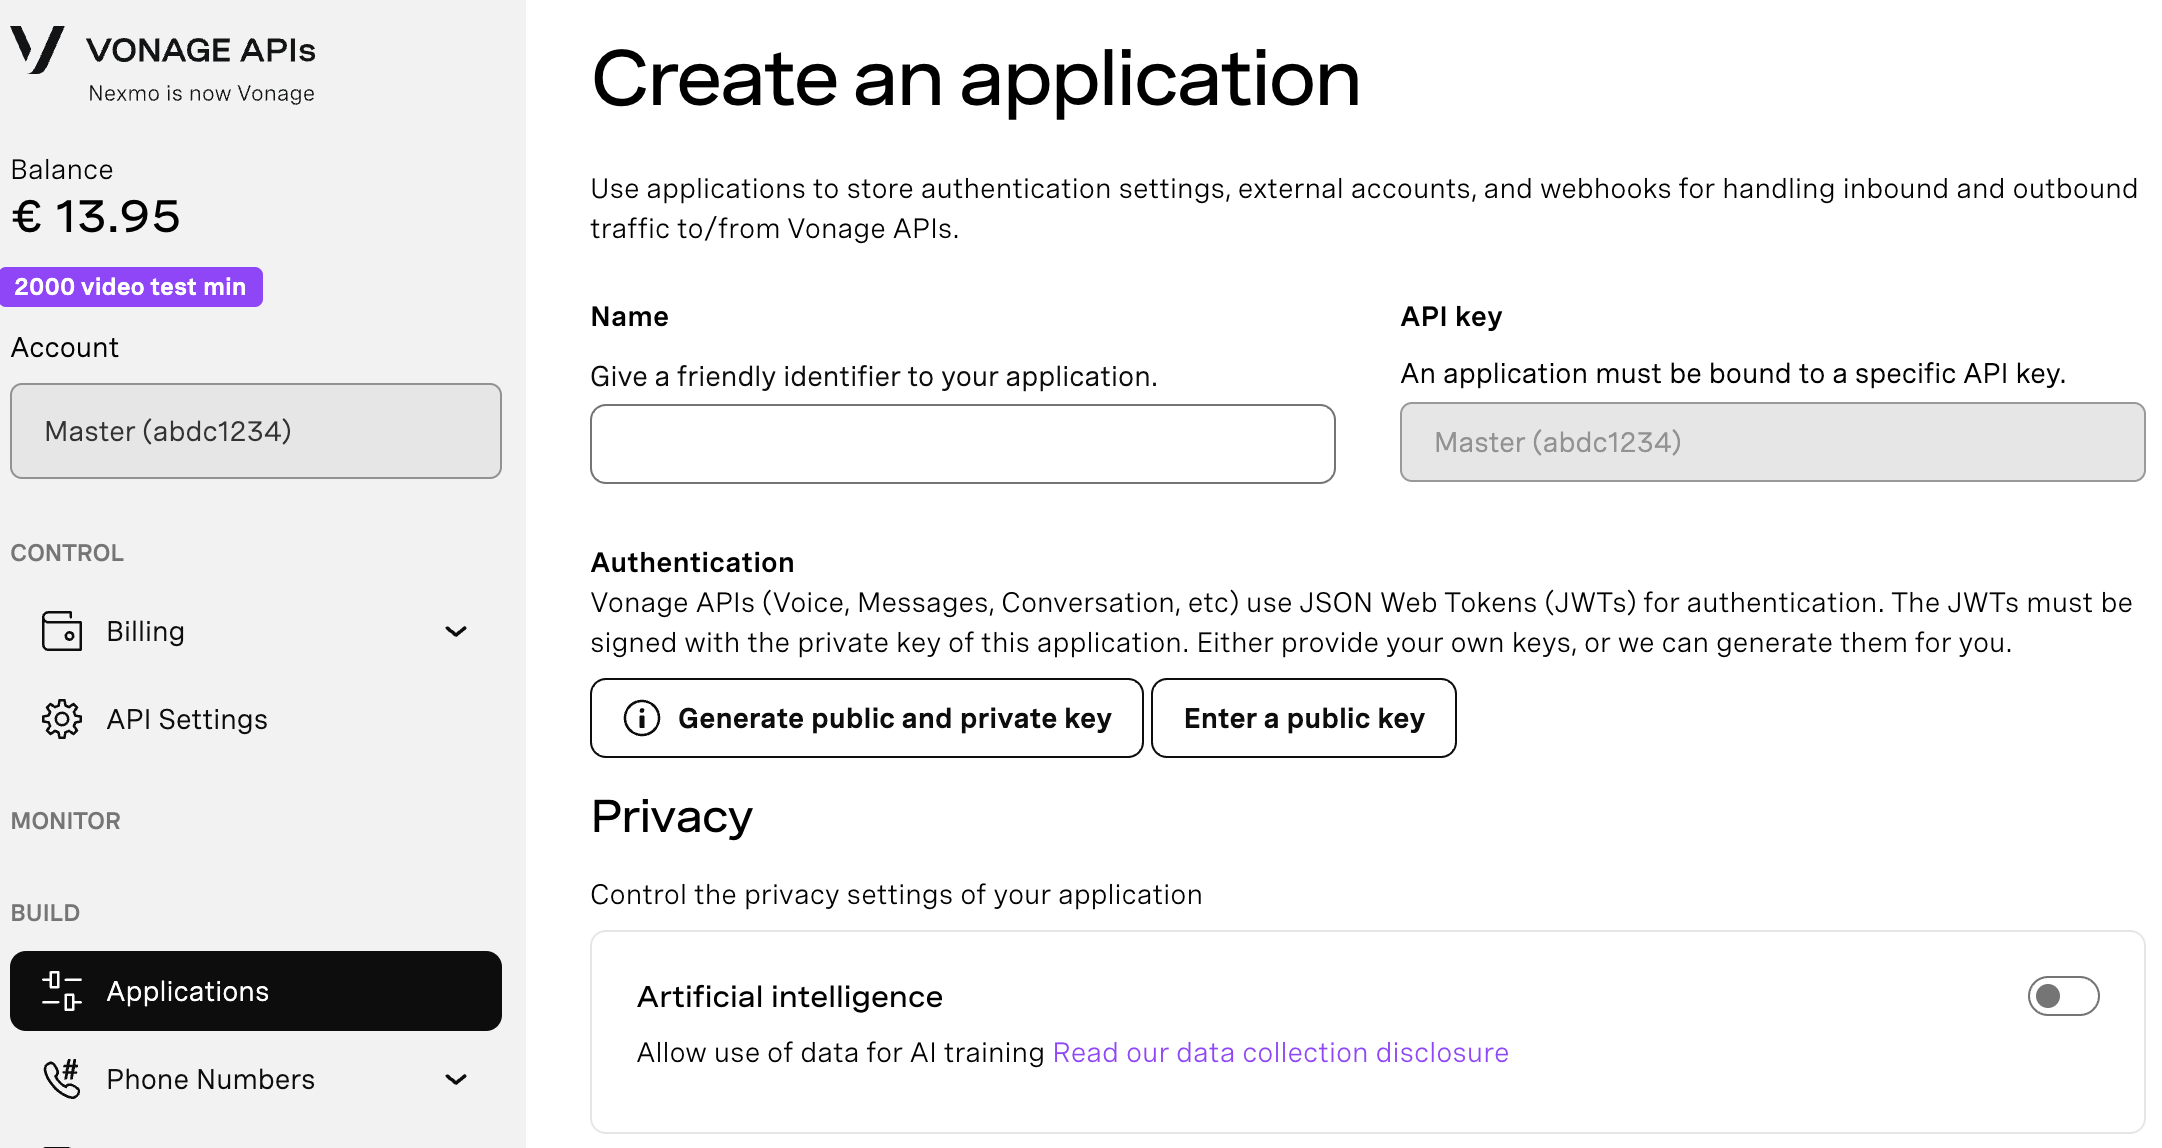
Webhooksを使用するAPIを使用する場合は、秘密鍵が必要です。Generate public and private key "をクリックすると、自動的にダウンロードが始まります。この鍵は紛失すると再ダウンロードできません。この鍵は紛失しても再ダウンロードできません。 private_<あなたのアプリID>.key.この鍵はAPIコールの認証に使用できます。 注意:アプリケーションを保存するまで、キーは機能しません。
必要な機能(Voice、Messages、RTCなど)を選択し、必要なWebhook(イベントURL、応答URL、受信メッセージURLなど)を提供します。これらはチュートリアルで説明します。
保存してデプロイするには、"Generate new application "をクリックして設定を確定します。これでアプリケーションはVonage APIで使用する準備が整いました。
Select the “Voice” under Capabilities, as we are going to use the voice API to make calls.
Click to save your newly created Vonage application with the voice capability at the bottom right.
Open Claude Desktop and on the settings tab, click on “developer” and click on “edit config”. This will take you to your “claude_desktop_config.json”, but you can also open it directly, as shown below:
macOS: ~/Library/Application Support/Claude/claude_desktop_config.json
Windows: %APPDATA%\Claude\claude_desktop_config.json, which usually resolves to something along the lines of C:\Users\username\AppData\Local\Packages\Claude\LocalCache\Roaming\Claude
{

  "mcpServers": {

    "vonage-tooling": {

      "command": "npx",

      "args": [

        "-y",

        "@vonage/vonage-mcp-server-api-bindings"

      ],

      "env": {

        "VONAGE_API_KEY": "YOUR_API_KEY",

        "VONAGE_API_SECRET": "YOUR_API_SECRET",

        "VONAGE_APPLICATION_ID": "YOUR_APP_ID",

        "VONAGE_PRIVATE_KEY64": "YOUR_BASE64_PRIVATE_KEY",

        "VONAGE_VIRTUAL_NUMBER": "+1234567890"

      }

    }

  }

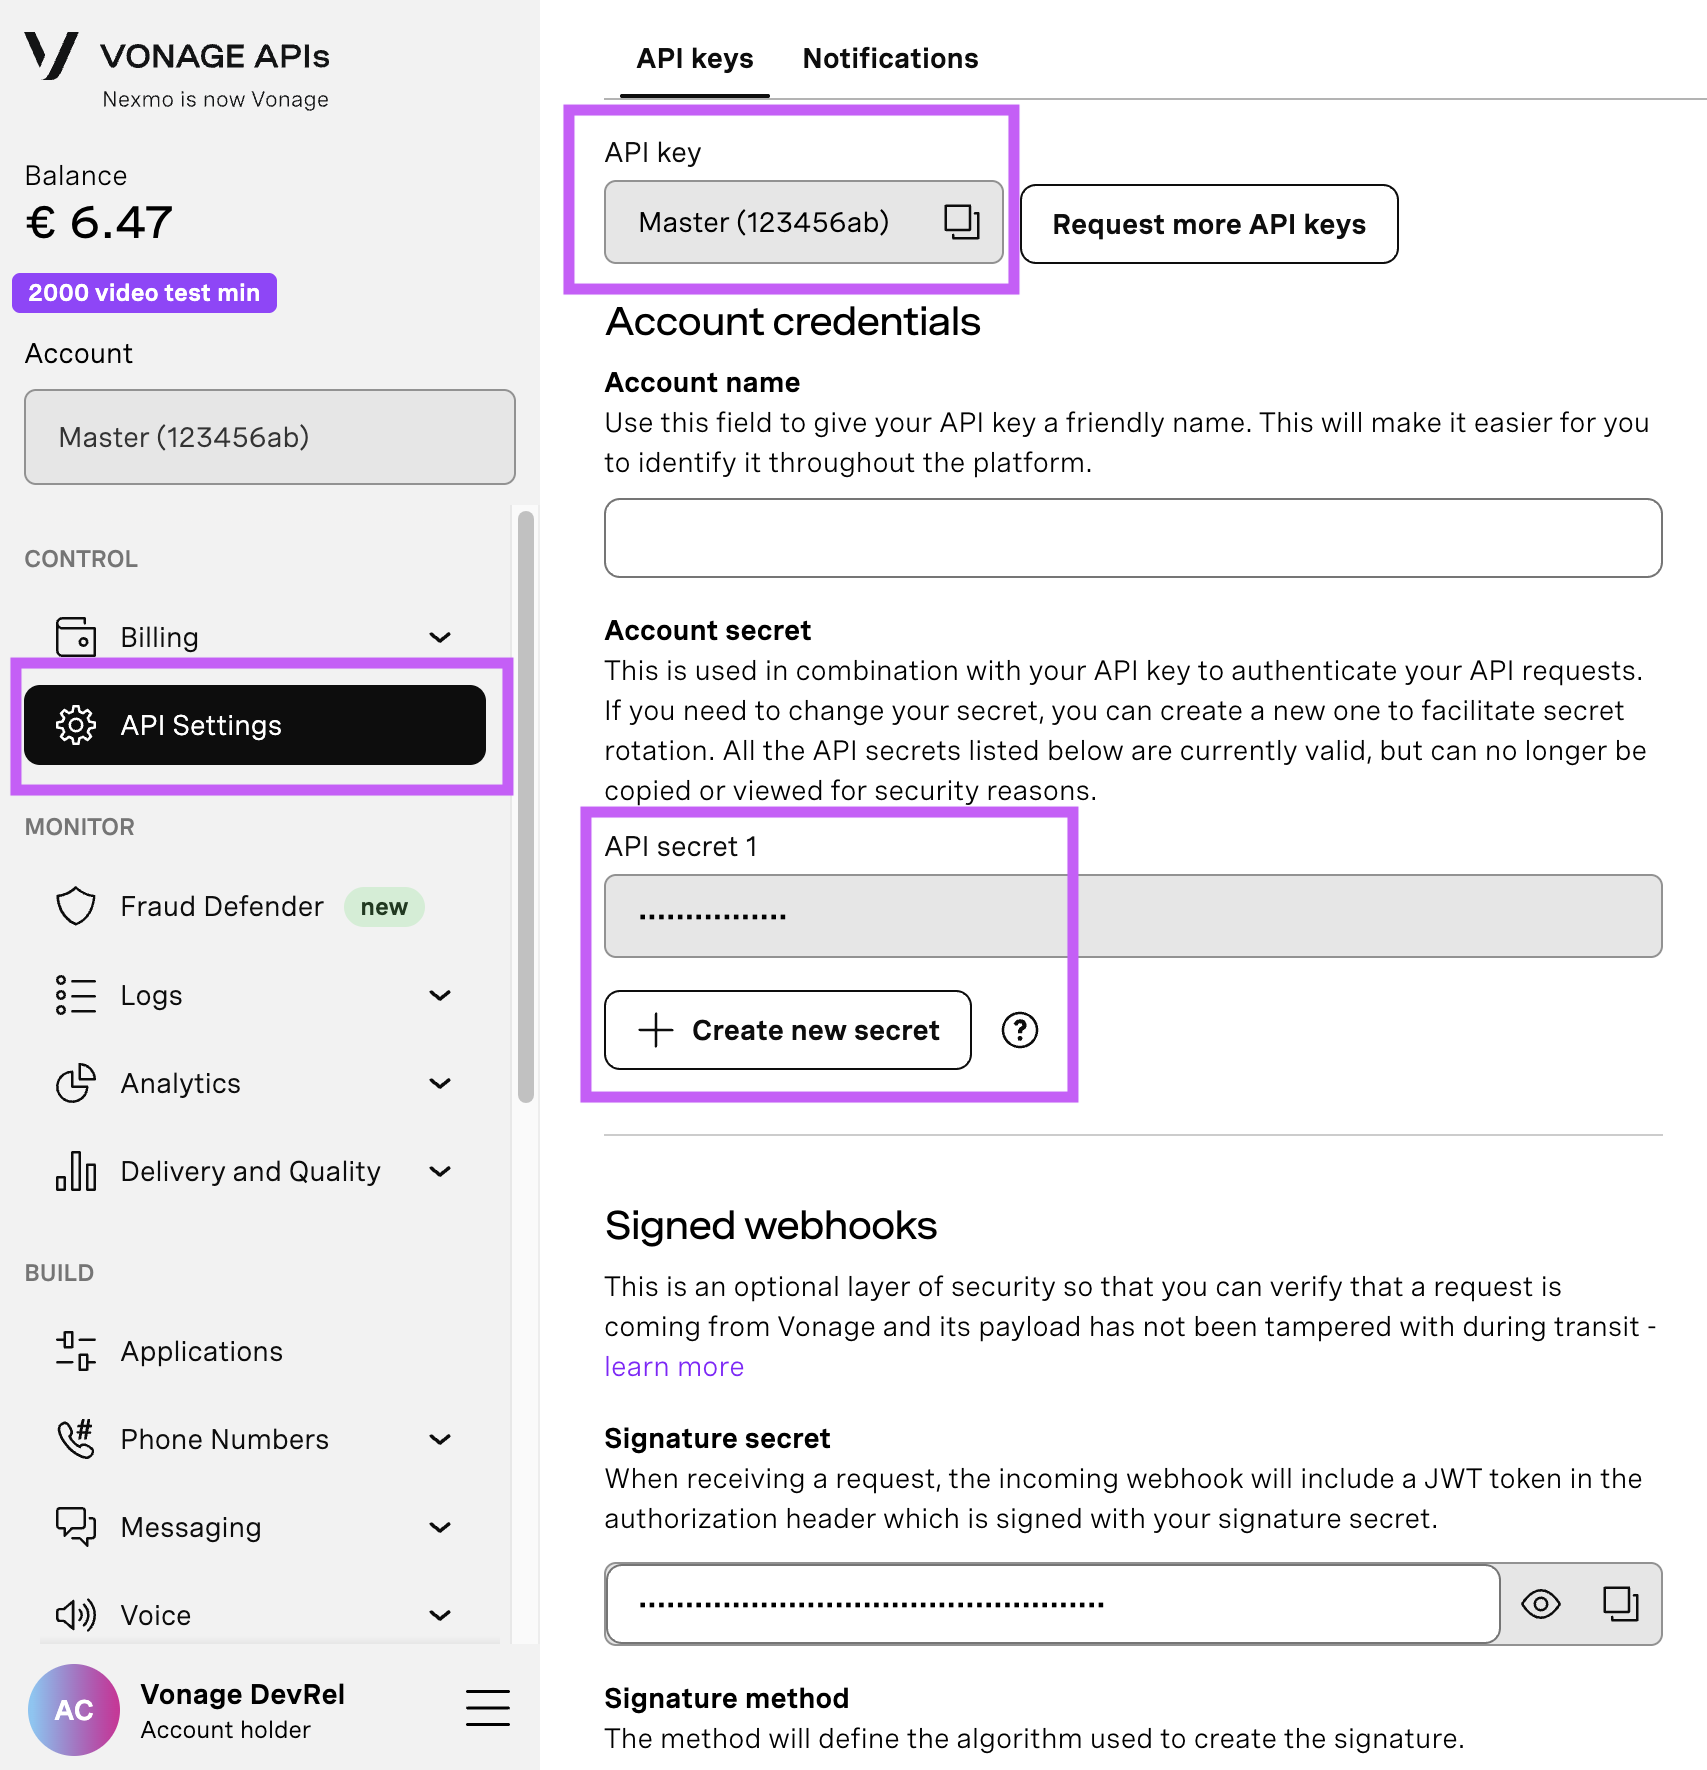
}API設定ページを開く API設定ページを開き、Vonage API KeyとSecretにアクセスしてください。両者は以下のスクリーンショットのように表示されます。APIキーはページの上部にあり、APIシークレットにアクセスするには、"Account secret "サブセクションを参照してください。
注:以前に作成したAPIシークレットを覚えていない場合は、"+ Create new secret "をクリックし、安全に保存してください。
バーチャル電話番号を購入するには APIダッシュボードにアクセスし、以下の手順に従ってください。
 Purchase a phone number
あなたの APIダッシュボード
BUILD & MANAGE > Numbers > Buy Numbersを開きます。
必要な属性を選択し、検索をクリックします。
ご希望の番号の横にある購入ボタンをクリックし、購入を確定する。
バーチャルナンバーを購入したことを確認するには、左側のナビゲーションメニューの「BUILD & MANAGE」から「Numbers」、「Your Numbers」の順にクリックします。
Note:
VONAGE_PRIVATE_KEY64is your private key file base64-encoded. On macOS/Linux, you can generate it withbase64 -i private.key | tr -d '\n'. I wanted to copy it to my clipboard whilst doing this on GitHub Codespaces, and I used the following command:base64 -i private.key | tr -d '\n' > b64_key.txt && code b64_key.txtto copy it to a new txt file, but you can use| pbcopyon macOS to copy it to your clipboard.
Save the file and don’t forget to restart Claude Desktop, so that everything you’ve added is applied. You should see the Vonage tools appear in the Connectors tab of the settings. Make sure to give permission to the “Outbound Voice Message” tool.
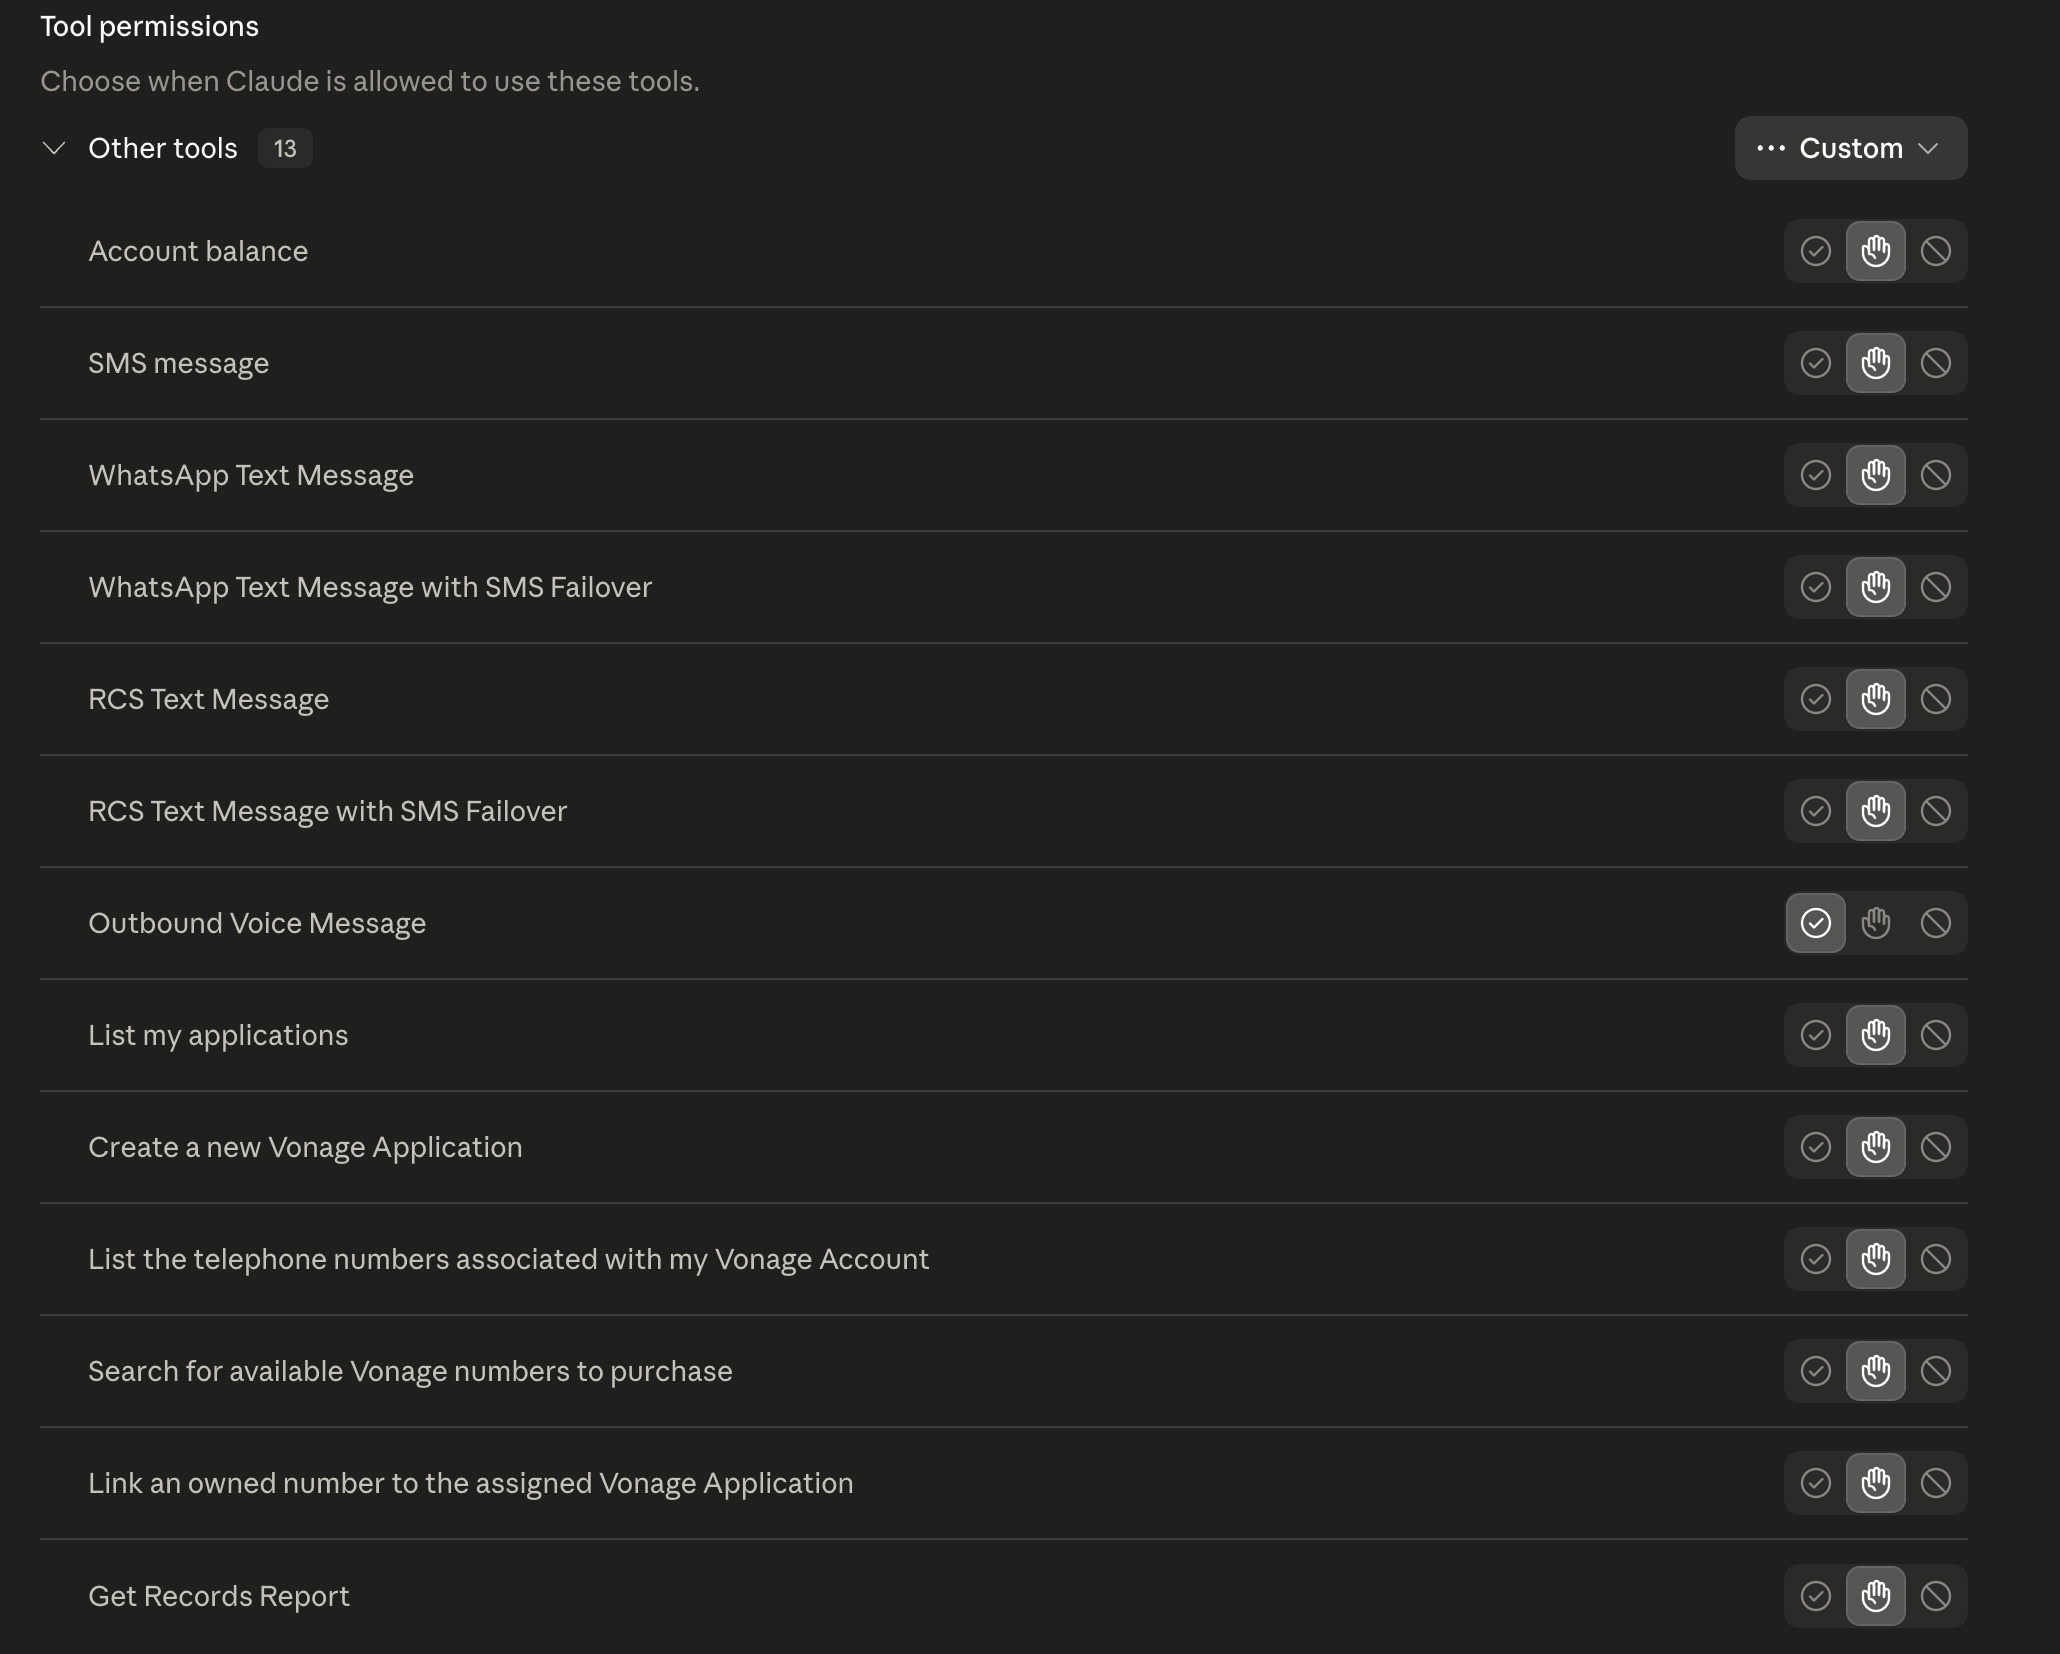 Tools Permissions
Now that the setup is done, open a new conversation in Claude Desktop and type something along the lines of: "Use the Vonage outbound voice message tool to call +44XXXXXXXXX and say: Hello, this is a test call from Claude."
Claude will identify the outbound-voice-message tool from the Vonage Tooling MCP, which maps directly to the Vonage Voice API under the hood. The MCP server handles authentication and the API call; you just described what you wanted in plain English. It confirms the parameters and places the call.
Your phone rings and speaks the message using text-to-speech. You can try writing a different text that you would like to be spoken from the text.
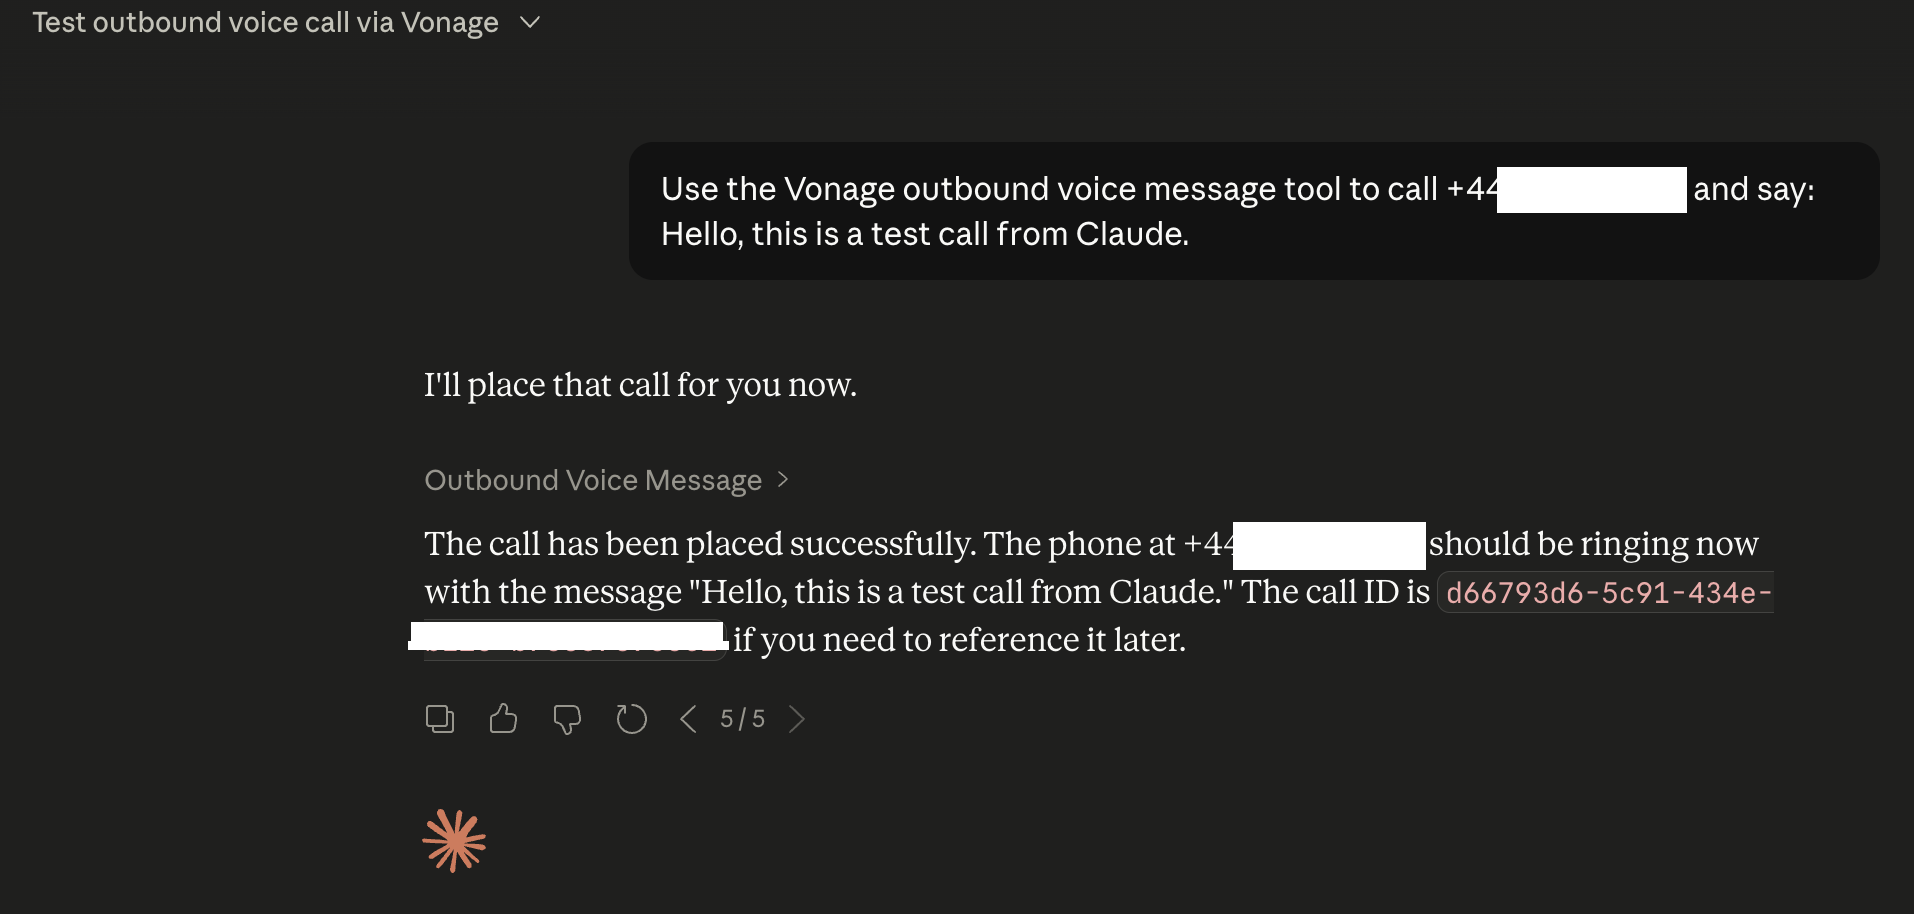 Claude Conversation
Why not try the other Tools with Claude? Check your account balance before placing the call, list your applications and numbers to pick the right one, send an SMS follow-up after the call, all with the same natural language prompting.
It’s pretty cool what we can do with Claude Desktop and the Vonage MCP Servers. In my next blog post, I’ll show how you can interact with the Vonage MCPs using Google Antigravity. Stay tuned.
ご質問がある場合、またはあなたが作っているものを共有したい場合は、こちらをクリックしてください。
登録する 開発者ニュースレター
フォローする X(旧ツイッター)最新情報
Videoの方がいいですか? 当社の YouTubeチャンネルでチュートリアルをご覧ください
LinkedInの LinkedIn の Vonage デベロッパーページ
開発者体験の向上にご協力ください。以下の 「開発者の声」フィードバックにご協力ください
最新の開発者向けニュース、ヒント、イベント情報をお届けします。