SIP Dashboard
Use the SIP Dashboard to set up your SIP trunk for handling incoming and outgoing voice calls through the Session Initiation Protocol.
Explore additional programmable features with Programmable SIP in our guide.
Before You Start
If you're integrating Vonage SIP with an existing telephony system or contact center platform, we provide dedicated setup guides for commonly used platforms:
Genesys — for cloud-based contact centers.
Asterisk — an open-source communications framework used in custom or embedded telephony solutions.
These guides explain how to connect your system to Vonage SIP, using credentials generated from the SIP Dashboard.
If you're using Asterisk, you'll need to complete the general SIP setup steps below first — the SIP Trunking wizard is required to generate your configuration. For Genesys, you can skip the wizard steps and continue directly with the platform-specific guide.
Getting Started
As a new user, the SIP Dashboard guides you through setting up your SIP trunk step by step. To start, go to the developer dashboard, go to the Build category in the left-hand navigation panel, then click Voice > SIP. This will lead you to our SIP Trunking wizard. Next, click Get Started to go through the following steps:
- First, you will be asked what you want to connect. If you want to connect Genesys or Asterisk, please refer to Before You Start to get further instructions. If you choose Something else, follow the steps below.
- Vonage creates a domain, username, and password (digest authentication) for your SIP equipment. You can edit these details on the Trunk Configuration page. Remember to store your username and password for later use.
- If you want to skip this page, you can do so by clicking I'll do it later. Otherwise, clicking Got it creates Domain records, allowing you to make outbound calls using your Vonage number as CLI.
- If you clicked Got it in the previous step, the next page will prompt you to test the domain by making a call from your SIP phone. To test, buy a Vonage number by clicking the Buy more numbers button, and place a call from your SIP equipment using it as the
fromnumber. If everything works, click Got it again to move on. - The following step requires you to input a SIP URI for your SIP Equipment (PBX / contact centre). If you want to skip this page, you can do so by clicking I'll do it later — you'll land on the main trunk configuration page.
- If you decided to input the SIP URI for your SIP Equipment in the previous step, you need to add a Vonage number - you can buy a number here if you don't already have one. If you want to skip this page, you can do so by clicking I'll do it later — you'll land on the main trunk configuration page.
- Once a number is added, try making an inbound call from any mobile number to your SIP infrastructure.
After completing the wizard, you'll land on the main trunk configuration page. Here, you can perform operations on the same trunk, such as adding more numbers, editing SIP URIs, enabling features such as TLS and SRTP, creating more users, and setting up ACL.
Creating a New Trunk
To create a new trunk after following the initial wizard, select SIP from the left-hand menu, then click the + Create new button in the top right of the page. You'll be prompted to enter a domain name, which must be unique, can only contain letters, digits, or dashes, and must be between 5 and 32 characters in length.
After you create a domain, the interface checks if the domain name is available and displays a message accordingly. If you enter a valid domain name and click Create, it sets up a trunk for you. From here, you'll be on the trunk configuration page for the new trunk.
Trunk Configuration Page
After creating a trunk, the table will hold the information of all existing active trunks in your account.
On the same page, you can find two main options: Delete and Settings:
- To delete the trunk, simply click on the Delete button.
- The Settings page allows you to configure Outbound and Inbound Calling and edit your trunk. For editing, click the Edit trunk button in the top right corner. The top of the page displays the trunk name, which matches the domain name, and the type is set as 'trunk' on the top tile. You can change the trunk's name, originally set as the domain name, and you have the option to switch the type from Trunk to Application. This allows you to choose an application (for Voice API call interactions) from the dropdown menu and configure BYOC settings. Optionally, you can provide a description in the designated box, and remember to save the changes.
Further down, there are two types of configuration you can do:
Outbound Calling
This allows you to configure the outbound calling from your SIP equipment, i.e. Customer SIP > Vonage > PSTN.
To set up outbound calling from your SIP equipment through Vonage, you need to configure it. If you don't have a Vonage number, you must purchase one from the Buy Numbers section of the dashboard. This step is essential to use the Vonage number as your outbound Caller ID.
You must also enable authentication with a user key and secret and/or an Access Control List (ACL), enabling you to create user profiles for digest authentication. Additionally, you can whitelist specific IPs or define IP ranges by creating an Access Control List (ACL). When using digest authentication, the password must be 12-64 characters and include at least 1 digit, 1 lower case, and 1 upper case character.
After creating users and ACL, the Authentication ribbon on the trunk page reflects these settings. For instance, if you set up Digest Authentication by creating a username and password, the ribbon will display the user key and secret with a ✔️ sign:

If your trunk is configured correctly and ready to send outbound calls, you'll see the following message:
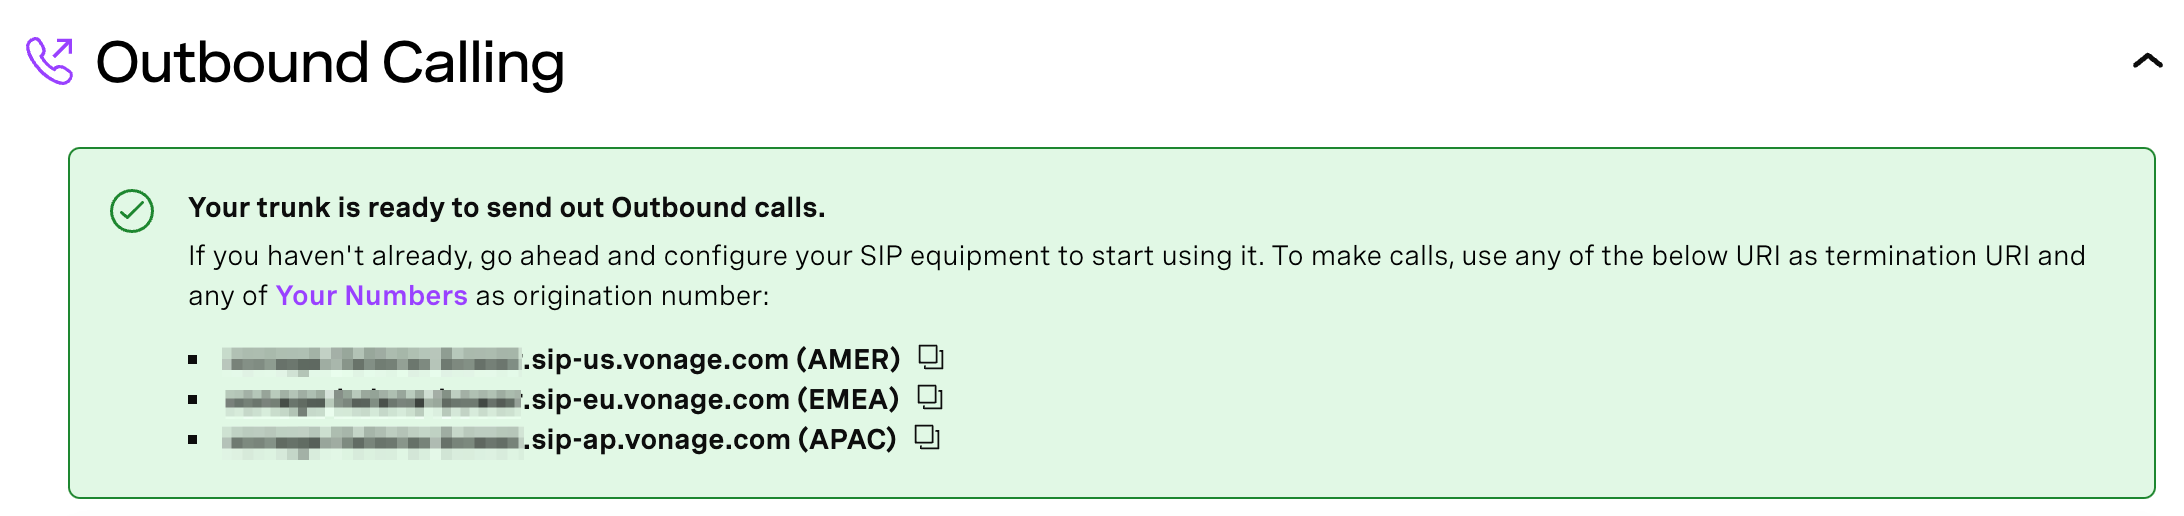
Choose an endpoint from the list based on your region to use as your termination URI and start making outbound calls with Vonage.
Inbound Calling
This allows you to configure the inbound calling to your SIP equipment, i.e. PSTN > Vonage > Customer SIP. In this section, you can add multiple SIP URIs and link additional numbers to the trunk.
SIP Region Selector
The SIP Region Selector specifies the preferred Vonage data center region for handling inbound calls to this trunk. Selecting a region gives you more precise control over call routing and media anchoring for traffic delivered to your SIP infrastructure.
Choose from the available data center locations:
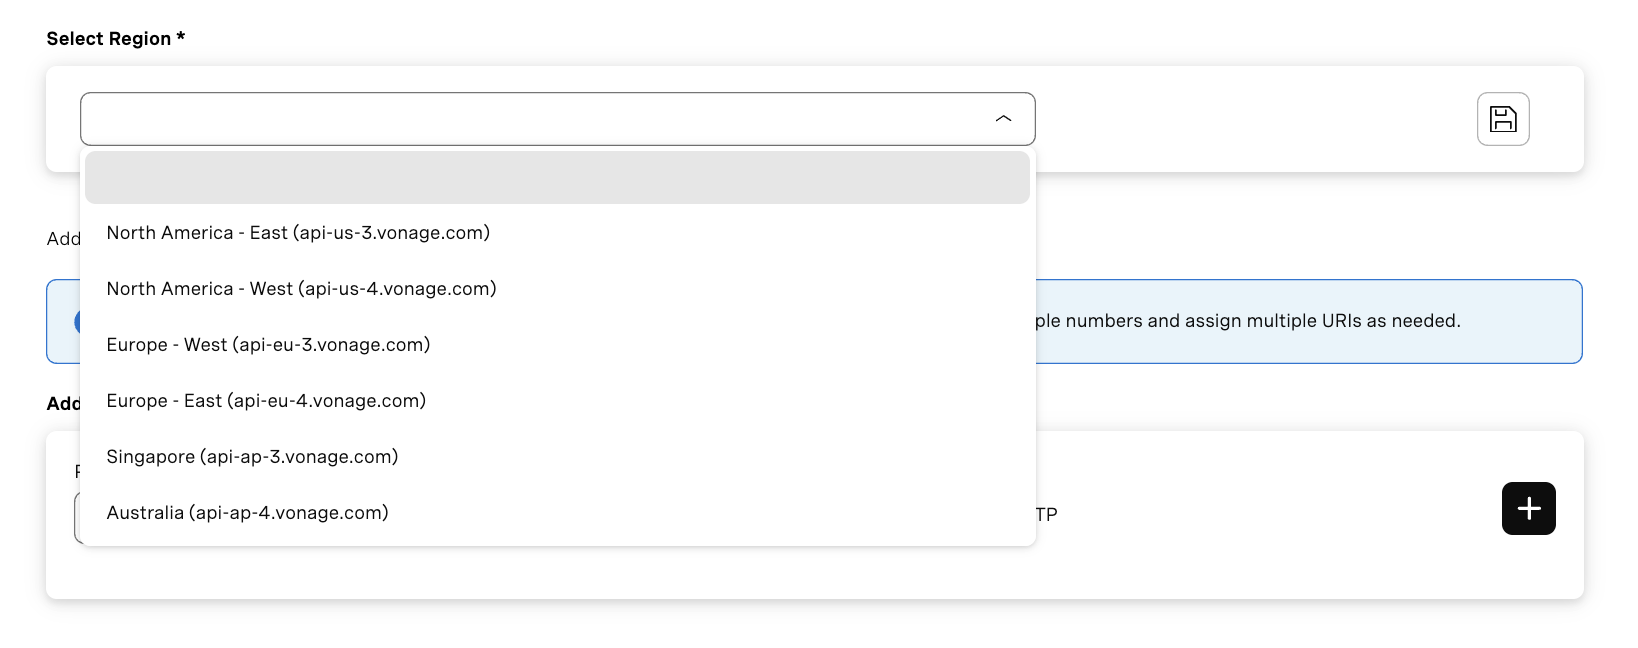
The selection is stored with the trunk and is reflected in the Inbound Calling configuration.
Note: The regional preference applies to inbound calls delivered to SIP URIs on this trunk. You can update this preference at any time; remember to save to apply changes.
Add URIs
You can add several SIP URIs in this section. Vonage supports the following URI formats:
<user>@<domain>.<host>:<port><domain>.<host>:<port><user>@<ip>:<port><ip>:<port>
Here, port is optional and ip does not support IPv6.
Other configurable fields are listed below:
- Priority: Set the priority of the SIP trunk using unique numbers from 0 to 100. Vonage will process calls based on the set priority, with 0 being the highest priority. Keep in mind that if the priority values are not unique, Vonage cannot guarantee the delivery of calls according to the priority.
- Timeout: Set a timeout for the SIP URI in the text box next to it. The accepted values range from 2000 ms to 20000 ms. If no value is entered, Vonage will use a default timeout of 5000 ms.
- Transport: Use the Transport dropdown to define the protocol for SIP signaling between your equipment and Vonage. Selecting TLS secures the SIP signaling traffic; by default, TLS traffic is sent to port
5061and non-TLS traffic to port5060. - SRTP: Vonage will also encrypt media using SRTP if necessary. To do that, check the SRTP box in the SIP URI section.
Link Numbers
Add one or multiple numbers to the domain by clicking the link button in the numbers section. If there are no numbers, you can buy them by clicking the Buy more numbers button. After doing that, you will be redirected to the Your Numbers page that allows you to easily filter, link, and unlink multiple numbers.
Note: If the number is linked to another domain or application, linking it to the current domain will override the configuration and direct calls to the current domain.
BYOC Configuration
You can use your own carrier with Vonage by setting up a SIP trunk through the SIP dashboard.
The steps are as follows:
-
Go to the SIP page on the developer dashboard.
-
Either create a new trunk using the button in the top right, or select the cog icon under Action to edit an existing trunk.
-
Click the Edit trunk button in the top right to edit the trunk. Next, choose Application as the type, select an existing Vonage application from the dropdown, and click Save.
-
Now, you have a domain with a linked application.
-
Share these endpoints with your carrier for call termination:
<Domain>.sip-us.vonage.com(AMER)<Domain>.sip-eu.vonage.com(EMEA)<Domain>.sip-ap.vonage.com(APAC)
-
Manage users and ACL by adding or deleting them as needed.
Note: BYOC is applicable only for Inbound calls.