Network Registry
To use the Vonage Network APIs, you will need to register with Vonage and its CSPs to gain approval for using Network APIs from your applications.
To streamline this process for you, Vonage manages registration with numerous CSPs behind the scenes for all supported Network APIs, in any country made available by Vonage. This process is dependent on each CSPs approval, which may come through to the Vonage Network Registry at different times.
The Process
To start the Vonage Network Registry process, you must have a Vonage account; if you do not already have one, you can register for an account here.
Once you're logged in, go to the Build & Manage section and click Registry -> Network Registry to get started:

There are three main steps to complete your registration for the Network APIs:
- Add a business profile: Finish creating your business profile by telling us a little about your organization.
- Create a Network Application profile: Network Application profiles are used to enable the Network APIs you wish to use, declare the purpose they are used for, and submit to our CSPs for approval.
- Connect your Vonage application: Link your profile to a new or existing Vonage Application.
Add Business Profile
To create a business profile, click the "Add Business Profile" button. This will bring up a screen similar to the one shown below:
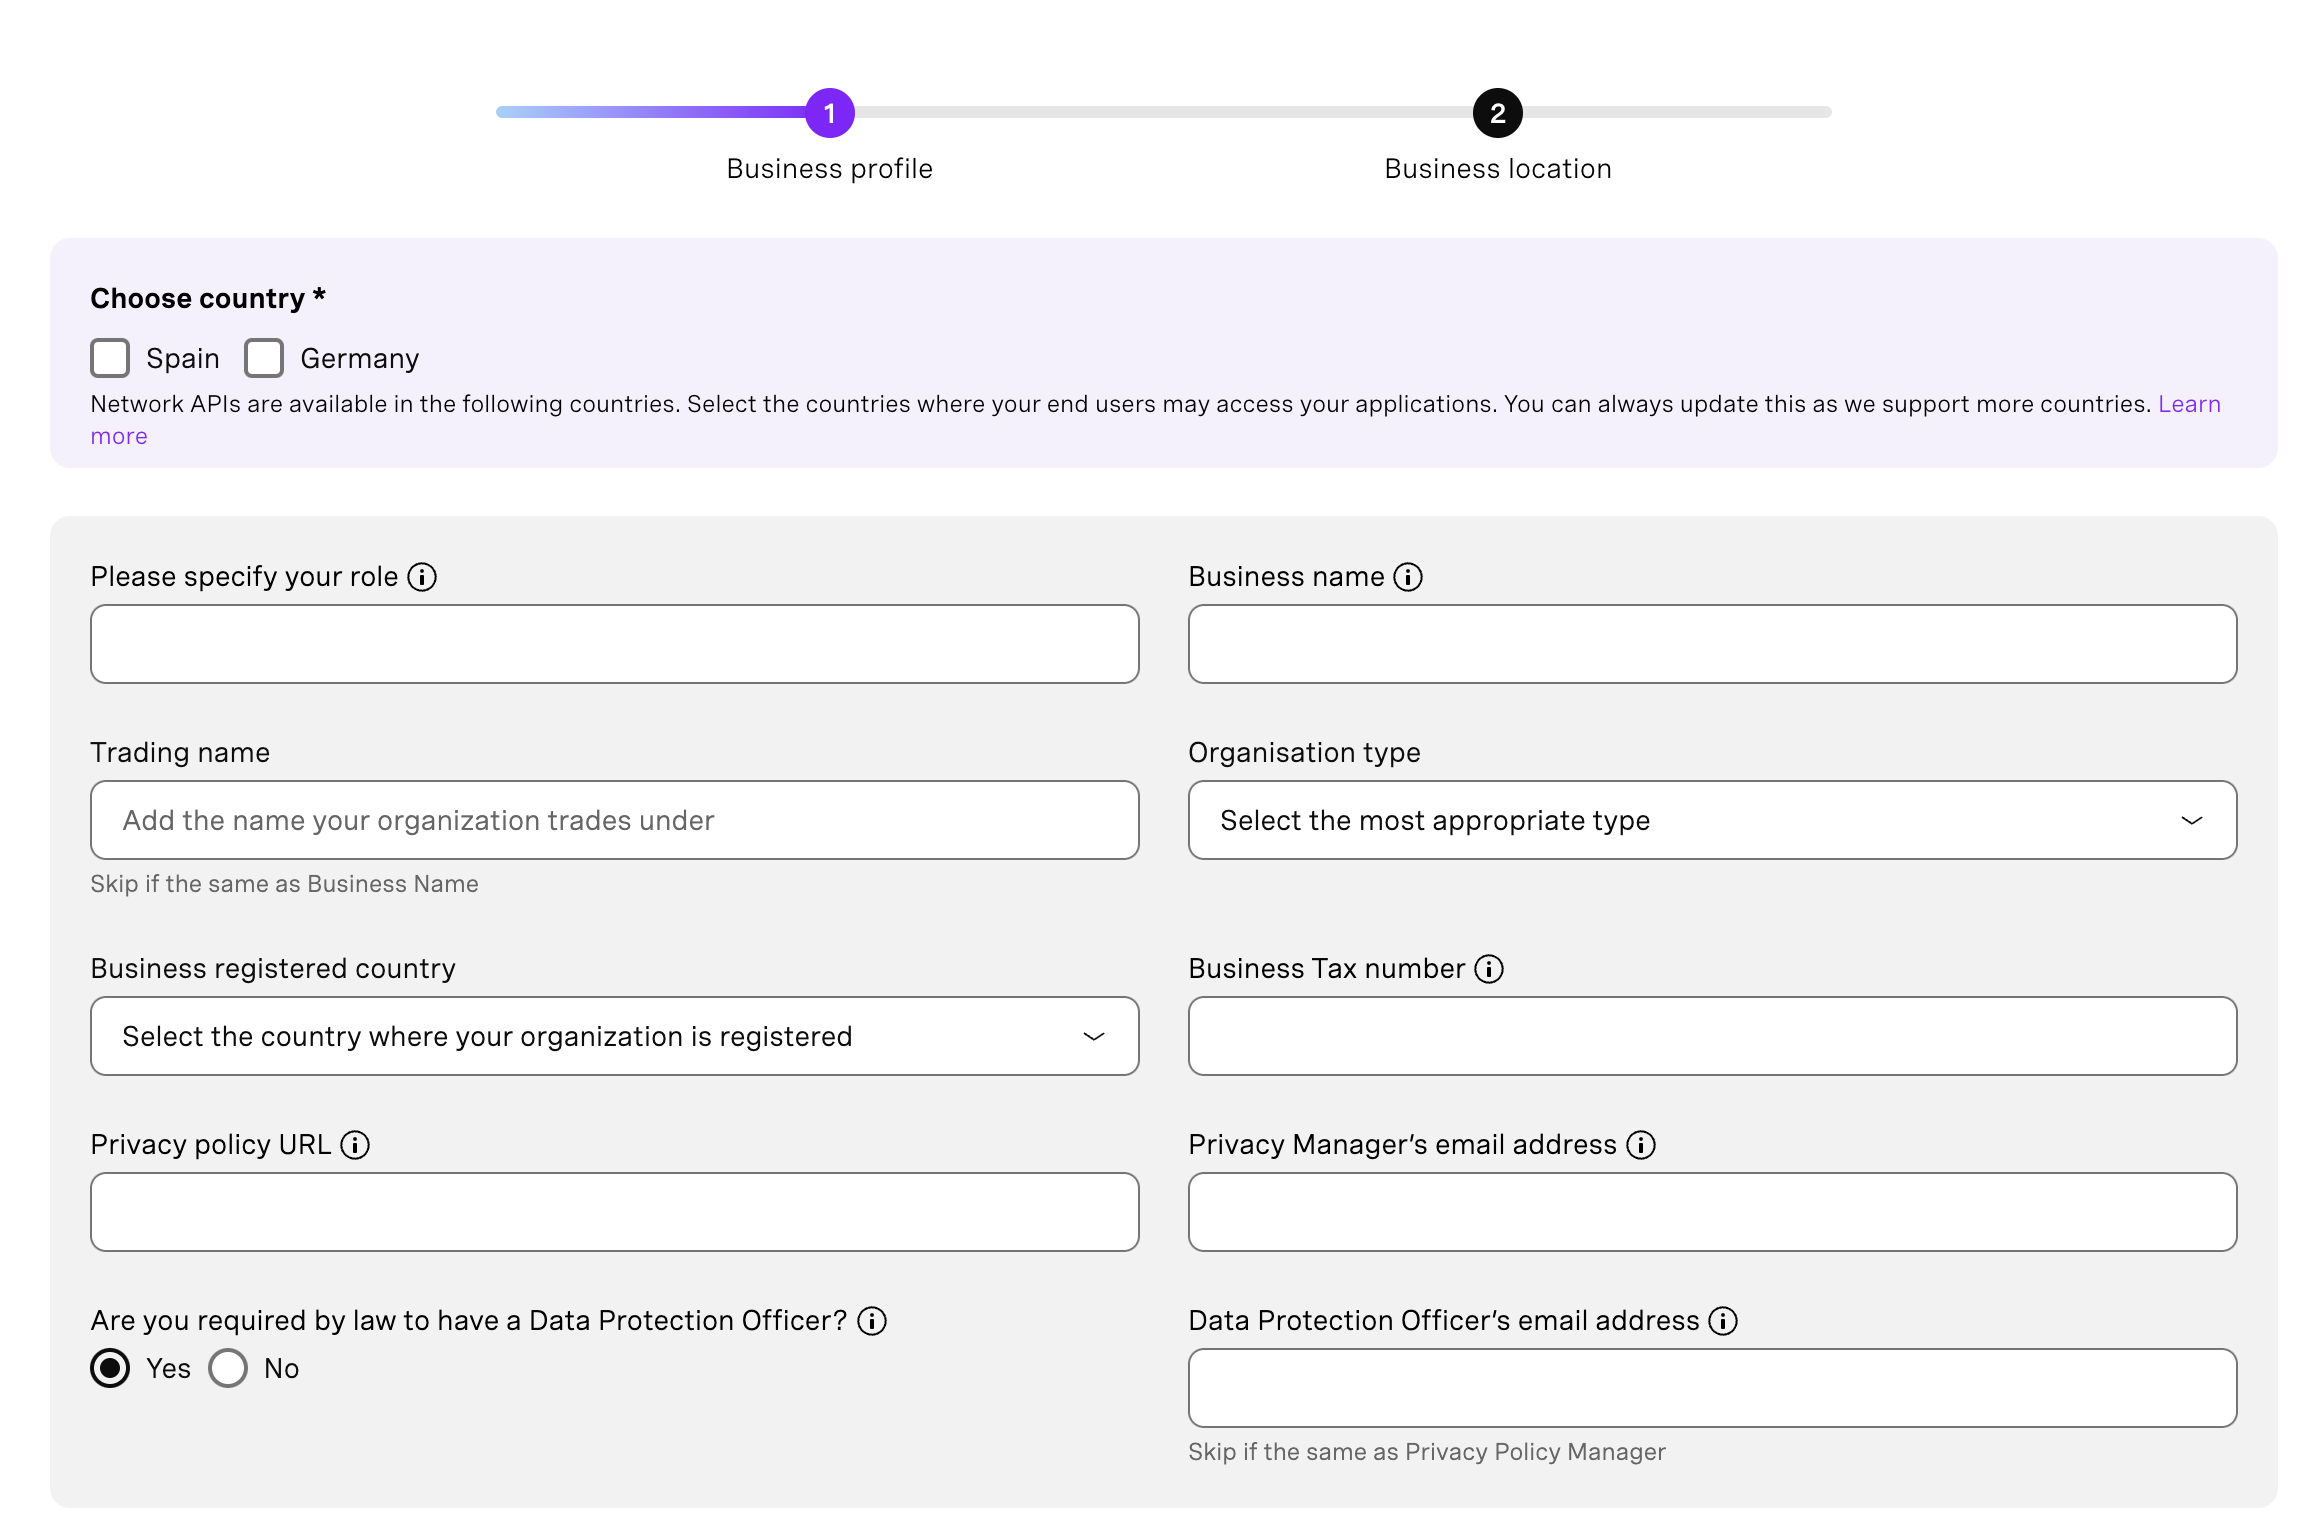
First, you'll need to select the countries where the service is required by ticking the boxes. Selecting a country will automatically submit you for registration with each CSP. Available countries and CSPs are available here.
Next, complete your business profile by providing more information about your organization. When filling out this section, you'll need the following information:
- Role - the functional role you perform for your organization.
- Business Name - the name of the legal entity that owns the applications that will use Vonage Network APIs.
- Organization type - select the most appropriate type from the dropdown list.
- Business registered address / country - the address and country where your organization is registered.
- Business Tax number - the tax reference for your organization in the registered country will be used by Vonage and its CSPs to validate your organization.
- Privacy policy URL - Vonage and its CSPs require that anyone using Network APIs has a privacy policy, publicly available on the Internet - provide the address for your policy.
- Privacy Policy Manager’s email address - include an email address that can be used for any questions relating to your privacy policy.
- Data Protection Officer’s (DPO) email address - include an email contact for your DPO, only if you are required by law to have one, and the address differs from that of the Privacy Policy Manager.
Once submitted you will see a summary of your Business Profile, through which you can view and track the status of your registration. You will receive email notifications when the status of your registration changes; notification settings can be changed here.
Create a Network Application Profile
Application profiles are used to enable one or more Network APIs, declare the purpose they will be used for, and submit to our CSPs for approval. Go to your Business profile and click the "Add application profile" button. This will bring up the following dialog:
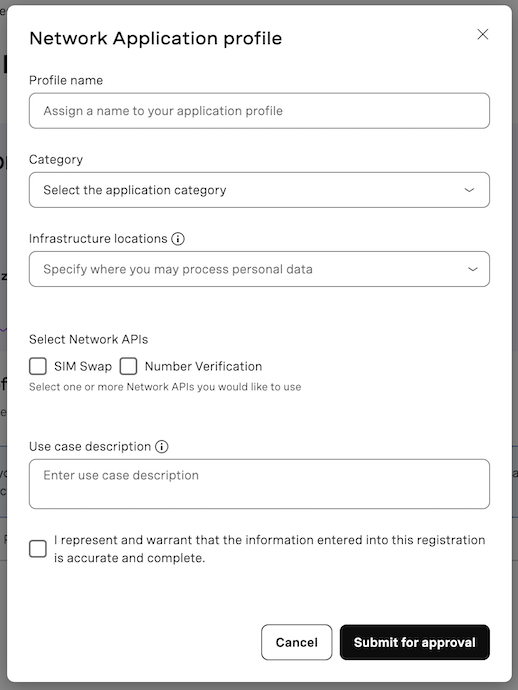
When filling out this section, you'll need the following information:
- Profile name - give your application profile a name to easily identify it.
- Category - select an application category from the drop down list.
- Network APIs - select one or more Network APIs that you may want to use.
- Purpose - for each Network API selected, confirm the purpose from the drop down list, e.g. “Fraud Prevention and Detection”.
- Use case description - describe your application form a consumer's point of view. Include an explanation of how the selected Network APIs will help your application meet the selected purpose.
Once submitted you will see an updated summary, including your Network Application profiles. You will receive email notifications when your application status changes; notification settings can be changed here.
Connect your Vonage Application
Once your registration is approved by Vonage, and at least one of its CSPs, you can link it to one or more Vonage Applications to start using Network APIs. The Vonage application contains the credentials needed to make API calls.
Navigate to the Applications page on the dashboard and click 'Create a new application', then follow these steps:
- Give a name to your application.
- Click on "Generate public and private key" as you’ll need this during the authentication process; a new public key will appear on the text box, while your browser will automatically download the private key.
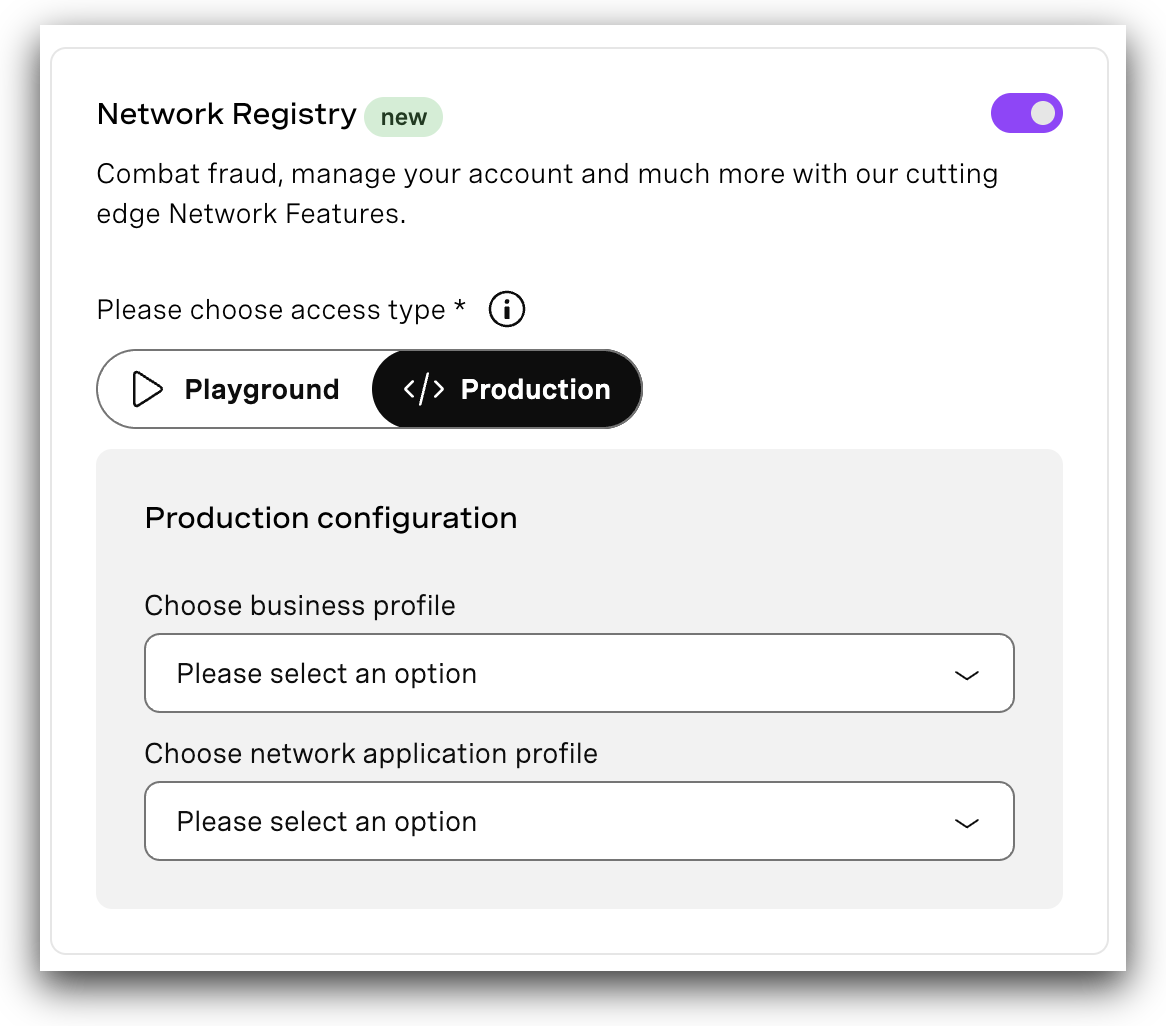
- Under the capabilities section, enable "Network APIs" and select the business profile and the application profile you created in the previous steps.
The Redirect URI field is required only for those APIs using client-based authentication flow.
Managing Your Registrations
Registration Status
To see the status of your Network API Registration, navigate to Vonage API Dashboard→Network Registry.
You can expand each section to show status from each of Vonage’s CSPs in the countries you selected.

There are a number of states that registration components can be in, which can vary between components and between each of Vonage’s CSPs at any given time. Expanded views will include a summary description of each state:
- PENDING: received, pending approval
- REVIEWED: reviewed and validated by Vonage
- NOT-SUBMITTED: not yet submitted to CSP
- READY-FOR-PROVISIONING: ready to be submitted to CSP
- PROVISIONING*: submitted to CSP(s)
- ACCEPTED*: accepted by CSP(s)
- PARTIALLY-ACCEPTED: accepted by some CSPs, rejected by others
- REJECTED: rejected by CSP(s)
- FAILED*: submission to CSP unsuccessful
* Component name may be included as applicable
If your registration has not been accepted by Vonage or any CSPs, for example, the Network API Registration status is ‘Pending’ or “Rejected’, you are not authorized to use or send any Network API requests.
Notifications
When a Network API Registration is first submitted, you will be subscribed to status change notifications. At any time, you can unsubscribe, or change notification settings by navigating to Vonage API Dashboard→API Settings→Notifications
Support
For help with Network APIs, including this registration process, see the API Support Help Center.
Next Steps
Once you've registered and have been approved, you are ready to start using the APIs! To start, you must generate an access token - see Network API Authentication for more information.