Share:
Tamir is a former member of the Vonage Team. iOS Developer with a large interest in software development, hiking, machine learning, and fighting Muay Thai. In love with solving problems, everything in between solving a differential equation to defeating an opponent in a fight.
Make Calls With a Custom Call Button in Your iOS App
Time to read: 3 minutes
In this tutorial, we will review how to easily make calls inside of your iOS application using a custom UI component, NXMCallButton.
As the name suggests, NXMCallButton is a subclass of UIButton and, when pressed, the callee will be called using the Nexmo Client SDK—the callee can be either an in-app user or a PSTN number, depending on how the button is configured.
In this tutorial, the project will be called MyApp and will be located in ~/Documents/MyApp. We'll begin with an empty Single View App template generated by Xcode.
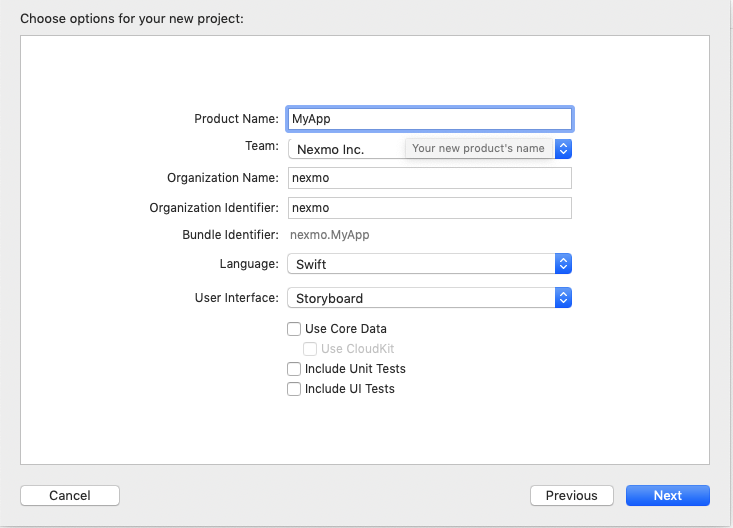
Note for Xcode 11: When choosing options for your new project, make sure you select the Storyboard value for the User Interface field:
Let's begin!
You will need to initiate CocoaPods for your project by executing the following commands:
cd ~/Documents/MyApp
pod initNotice that a file named Podfile was created.
To add the Nexmo Client SDK pod, open the newly created Podfile using Xcode and add NexmoClient to your project target:
target 'MyApp' do
  use_frameworks!
  pod 'NexmoClient'
endClose all Xcode instances and update the CocoaPods dependencies by executing the following in the terminal:
pod updateGoing forward, make sure you're launching the newly created MyApp.xcworkspace rather than the MyApp.xcproject file.
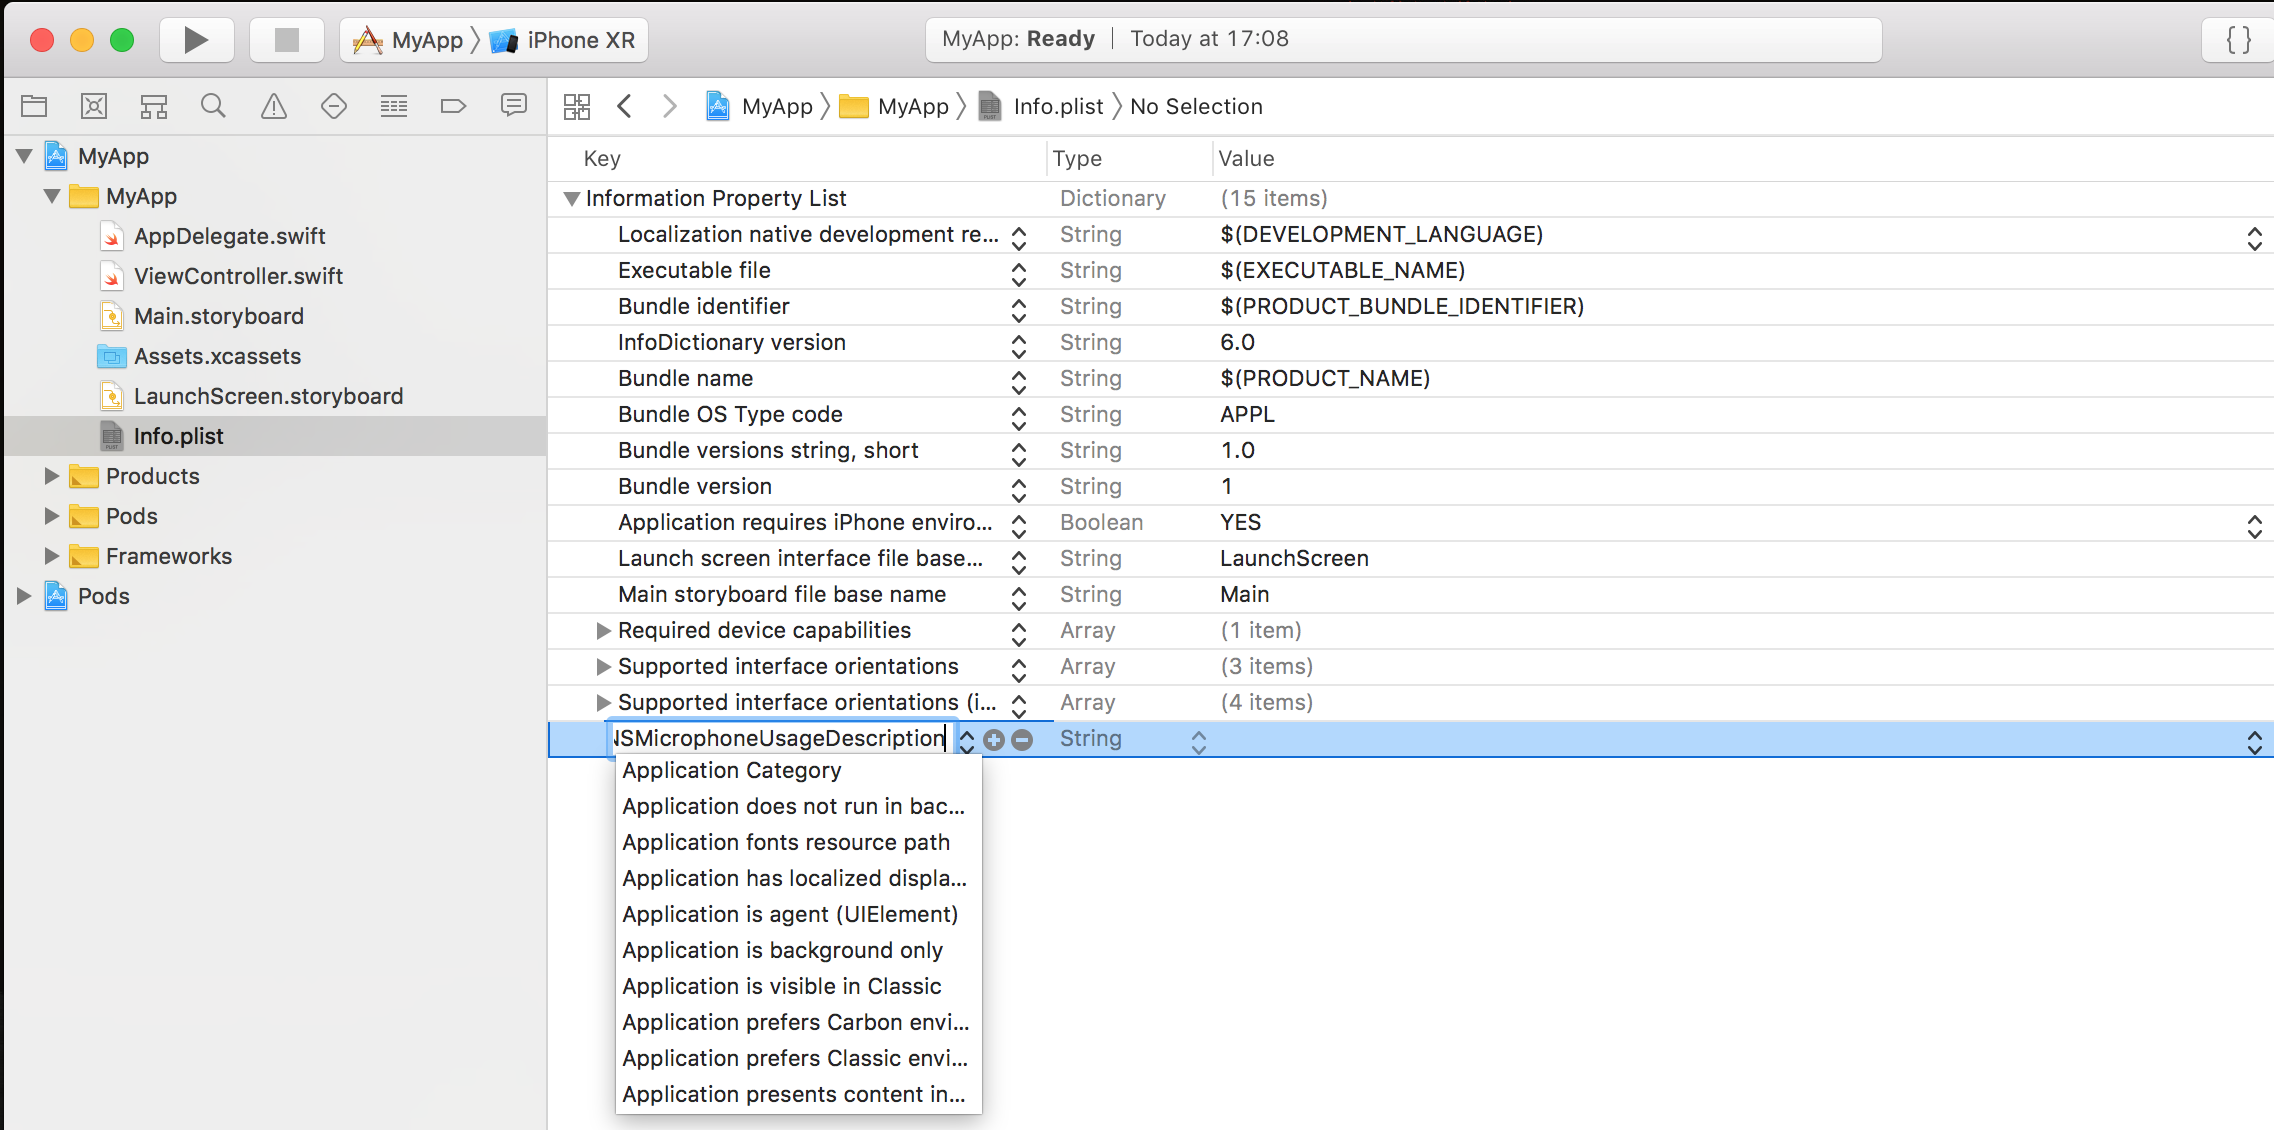
The call button will perform a call, therefore make sure to enable the microphone usage permission. When the call button is pressed, a permission request will be presented to the user requesting access to record audio. This permission request is already implemented by the button.
In addition, you need to state why the microphone permission is necessary. Open Xcode, then open Info.plist. Right-click and choose the Add Row option, then insert NSMicrophoneUsageDescription as the key for the row. The row value should be a string describing the reason your app wants to access the microphone (e.g, "Audio Calls").
Now you can go straight ahead to the fun stuff! Let's add the button to the UI.
Create a new empty Swift file named NXMCallButton.swift in your project and copy the contents of the following GitHub Gist: https://raw.githubusercontent.com/nexmo-community/client-sdk-call-button/master/NXMCallButton.swift
You can now add the NXMCallButton component to the user interface in one of two ways: using the storyboard or adding the button programmatically.
Open
Main.storyboard.Select a
Buttonobject from the object library and add it to the interface: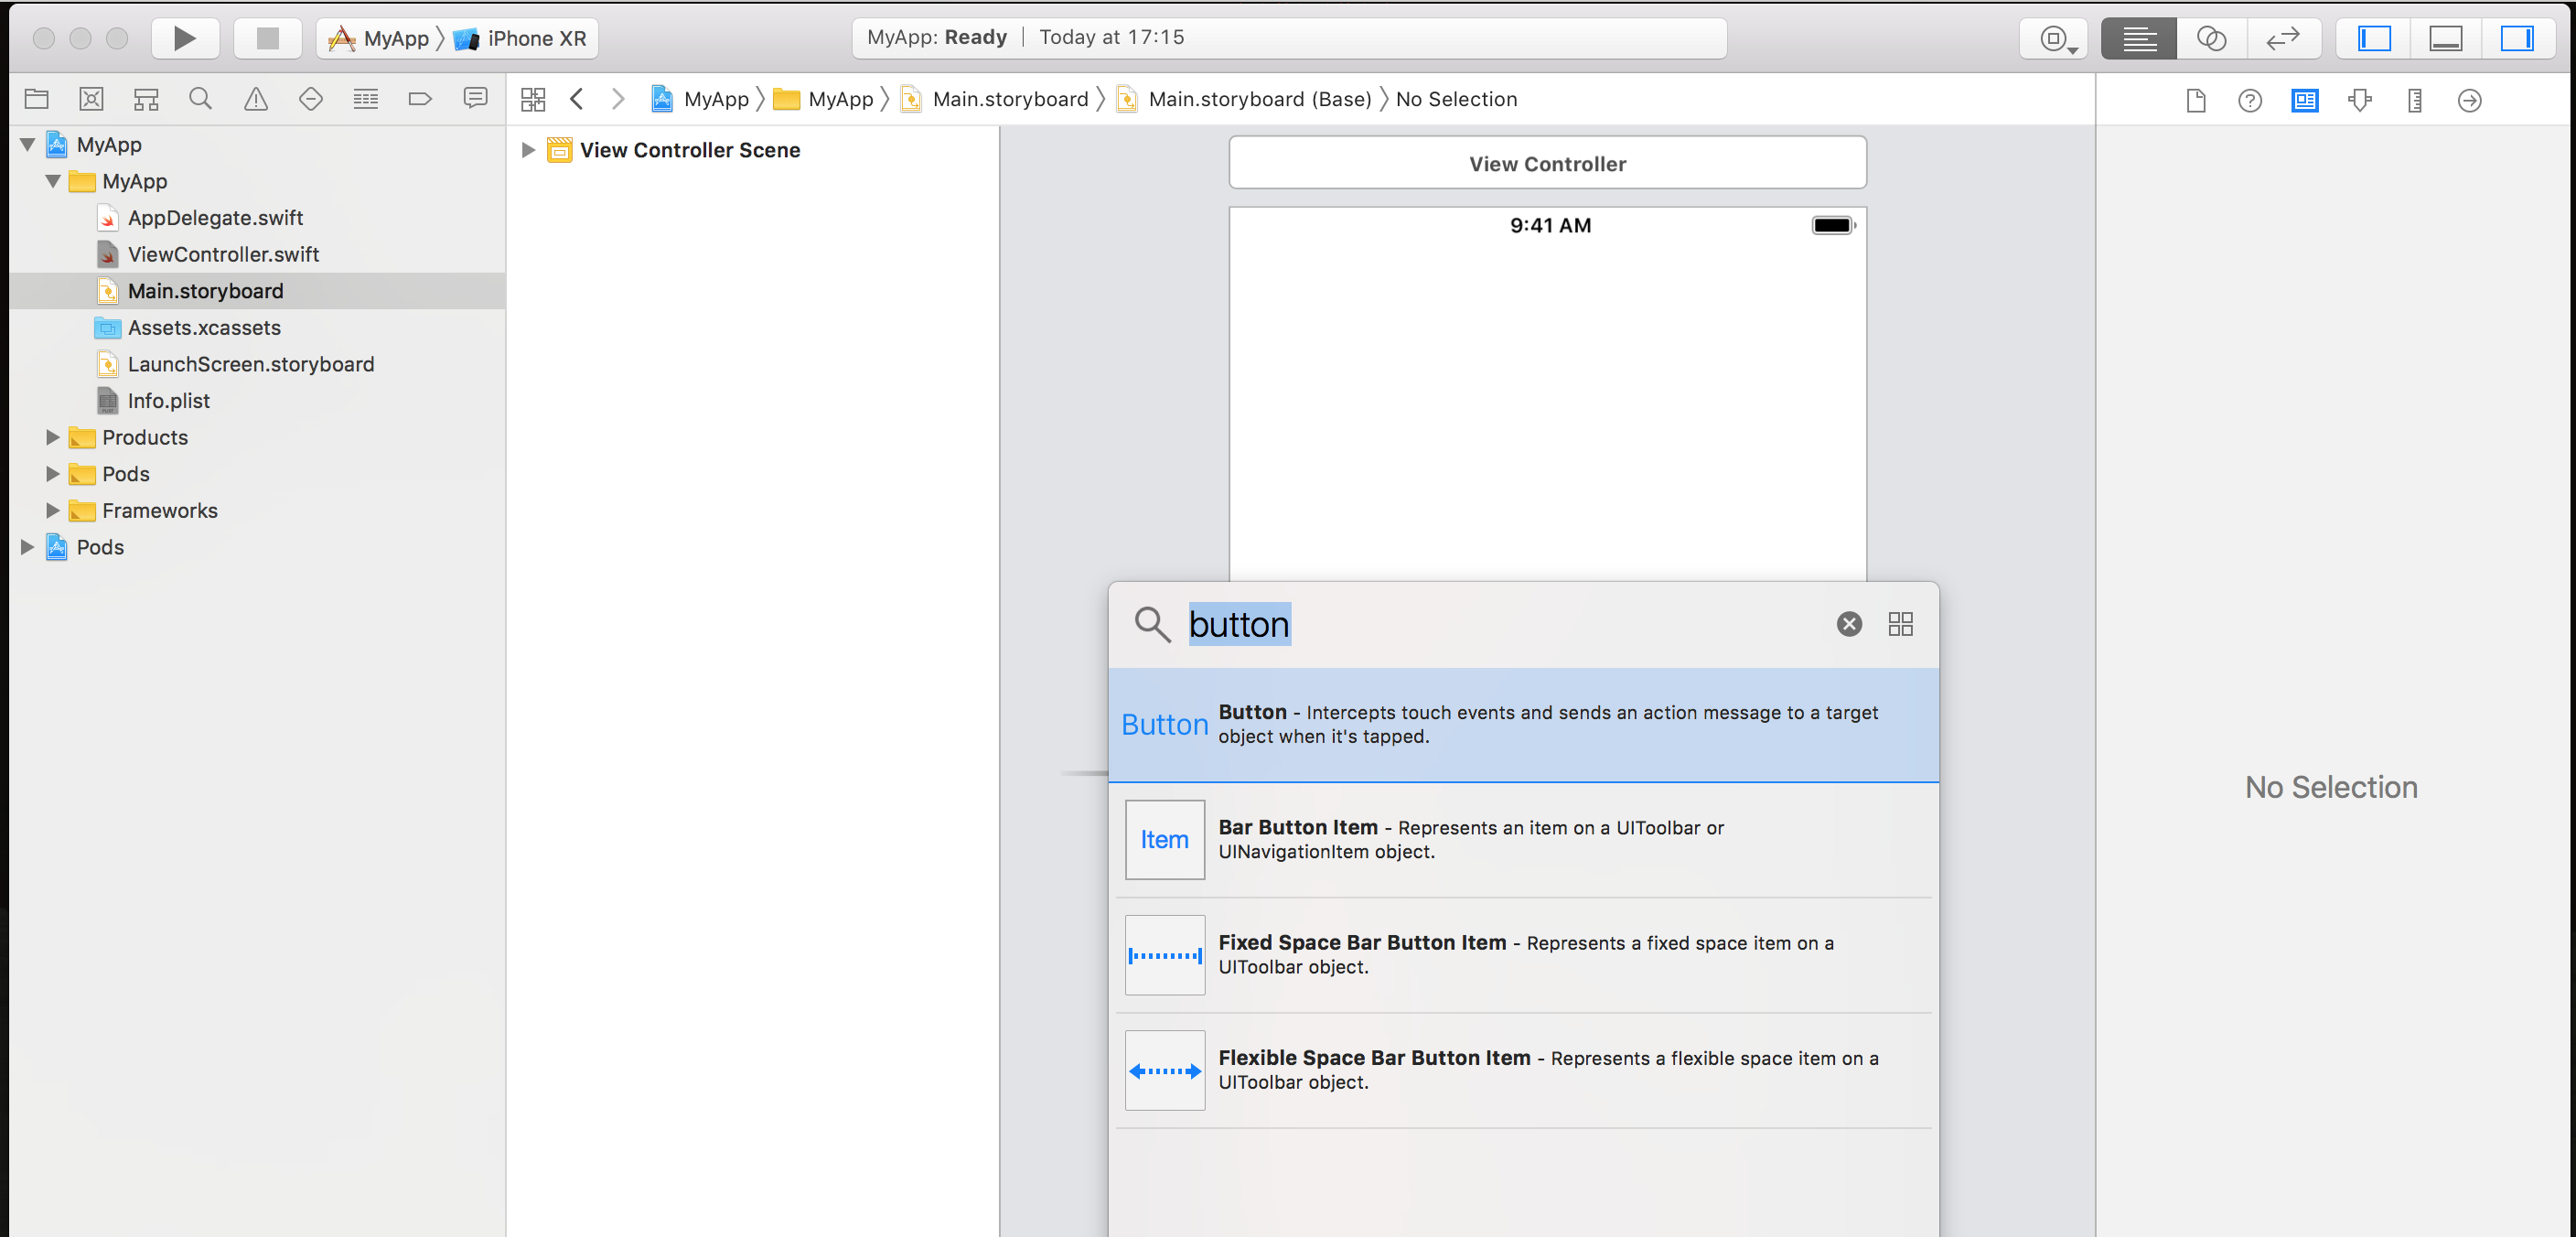
Change the custom class of the UIButton to
NXMCallButton: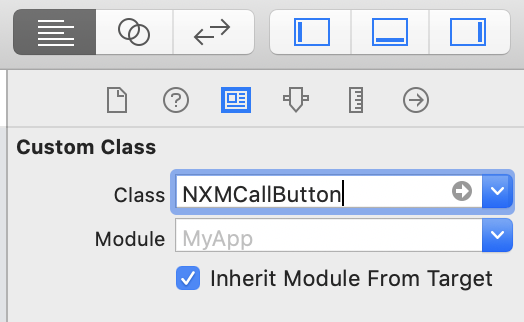
Configure the inspectable parameters of the button:
Nexmo Tokenshould be a valid JWT Token you use to authenticate your Nexmo Client instance.Calleeshould be a PSTN phone number or a username of a user in your app that will be called when the button is pressed.
Note: If you want to change the Nexmo Token and Callee parameters dynamically, you can follow the steps in the next section.
Adding the call button programmatically allows you to change its properties, such as callee and nexmoToken, dynamically. In addition to calling the desired destination, more actions can be added for when the button is pressed—for example, switching to a different view.
To add the button programmatically to a view controller, you need to do the following steps:
Create a new instance of
NXMCallButton.Set values for its
titleandcalleeproperties.Authenticate your Nexmo Client instance by using the
login(withAuthToken:)method ofNXMClient.shared.Optionally, perform any additional UI setup you wish, such as configuring a background color and constraints. As
NXMCallButtoninherits fromUIButton, allUIButton's properties are available for you to use.If desired, add additional actions to the button—for example, trigger a segue to a different view when the button is pressed.
Add the call button to your view.
Here is how it looks inside a UIViewController:
import UIKit
import NexmoClient
class ViewController: UIViewController {
	override func viewDidLoad() {
	  super.viewDidLoad()

	  // new instance of NXMCallButton
	  let callButton = NXMCallButton()

	  // set values for the button's title and callee
	  callButton.setTitle("Call", for: .normal)
	  callButton.callee = "15555551234" // Phone Number or username

	  // Authentication
	  NexmoClient.shared.login(withAuthToken: "YOUR_JWT_TOKEN")

	  // Optional UI Setup
	  callButton.backgroundColor = .lightGray

	  // A target which performs a call when the button is pressed is already added
	  // callButton.addTarget(self, action: #selector(callButtonAction), for: .touchUpInside)
	  // Add button to UI
	  callButton.translatesAutoresizingMaskIntoConstraints = false
	  self.view.addSubview(callButton)

	  // Add your desired layout constrains, for example:
	  NSLayoutConstraint.activate([
	            callButton.leadingAnchor.constraint(equalTo: self.view.safeAreaLayoutGuide.leadingAnchor),
	            callButton.trailingAnchor.constraint(equalTo: self.view.safeAreaLayoutGuide.trailingAnchor),
	            callButton.topAnchor.constraint(equalTo: self.view.safeAreaLayoutGuide.bottomAnchor,constant: -30),
	            callButton.bottomAnchor.constraint(equalTo: self.view.safeAreaLayoutGuide.bottomAnchor),
	            ])
	}
	@objc func callButtonAction(sender: UIButton!) {
	  print("Button tapped")
	}
}It is also possible to execute a completion handler after a call has been started. It is a good practice to present a message to the user that a call has started or to display a different screen.
let myCallCompletionHandler = { (error: Error?, call: NXMCall?) in
	if (error != nil) {
		// Handle error
	} else {
		// Handle success
		// For example: switch to a different view presenting a call session
	}
}
callButton.callCompletionHandler = myCallCompletionHandler
In this tutorial, we have reviewed the process of integrating calls to an app by using a custom NXMCallButton component. We have walked through two ways to do this: via the interface builder without a single line of code, and programmatically, having the freedom to modify and configure it dynamically.
If you want to see the magic happen before your eyes, set the callee to your phone number, run the app, and click the dial button. A quick reminder that an answer webhook is required to enable calling—see this tutorial as an example.
Share:
Tamir is a former member of the Vonage Team. iOS Developer with a large interest in software development, hiking, machine learning, and fighting Muay Thai. In love with solving problems, everything in between solving a differential equation to defeating an opponent in a fight.