
Share:
Abdul is a Developer Advocate for Vonage. He has a background working in consumer products as an iOS Engineer. In his spare time, he enjoys biking, listening to music and mentoring those who are just beginning their journey in tech
How to Make Phone Calls With SwiftUI
Time to read: 15 minutes
In this tutorial, you will create a SwiftUI application that can make calls to a specified phone number using the Vonage Client SDK for iOS. SwiftUI is a UI framework released by Apple in 2019, which helps build apps across all of Apple's platforms with less code than its predecessors. As you will see, SwiftUI has a declarative syntax which allows you to state what the user interface should do, which makes the application easier to read.
A Vonage API account. If you don't have one already, you can sign up today.
Xcode 12 and Swift 5 or greater.
Cocoapods to install the Vonage Client SDK for iOS.
The Vonage CLI. If you do not have it already, it can be installed with
npm install -g @vonage/cli.
This project has 3 parts, the Vonage application, the webhook server, and the iOS application. The Vonage application is how you can use the Vonage products, in this case, the Voice API. The Vonage application you will make requires 2 URLs, an answer_url and an event_url. The answer_url needs to return a Call Control Object, which will tell Vonage how to handle the call. The server part of the project will return a Call Control Object based on the number that is specified in the iOS application.
As mentioned earlier, you need to create a webhook server that exposes two URLs, with one returning a Call Control Object. It will contain a connect action that will forward the call to the PSTN phone number. You do this by extracting the destination number from the to query parameter and returning it in your response.
Create a new project directory in a destination of your choice and change into it:
Inside the folder, initialize a new Node.js project by running this command:
You will need a Vonage number. You can purchase a number using the Vonage CLI. The following command purchases an available number in the US. Specify an alternate two-character country code to purchase a number in another country.
Inside your project folder, create a file named server.js and add the code as shown below - please make sure to replace NUMBER with your Vonage number (in E.164 format), as well as SUBDOMAIN with a unique value. The value used will become part of the URLs you will set as webhooks in the next step.
In this step, you will create a Vonage Application capable of in-app voice communication use cases.
Create a Vonage application by copying and pasting the command below into the terminal. Make sure to change the values of --voice_answer_url and --voice_event_url arguments by replacing SUBDOMAIN with the actual value used in the previous step:
A file named vonage_app.json is created in your project directory and contains the newly created Vonage Application ID and the private key. A private key file named SwiftUICall.key is also created. Now that your application is created, link your Vonage number to your application:
The Vonage Conversation API has the concept of users. A user represents a unique user of your application and therefore has a unique ID. This is how your iOS application will authenticate with and be identified by the Vonage servers. You can use the CLI to create a user:
This will add a user, with the username Alice, to your application and output their unique ID.
The Vonage Client SDKs use JSON Web Tokens (JWTs) for authentication. JWTs are a method for representing claims securely between two parties. You can read more about JWTs on JWT.io or the claims that the Conversation API supports. We will be using the private key, application ID, and username from the earlier sections to create the JWT needed for your iOS application. Again, this is done via the CLI. Replace the APPLICATION_ID variable with the id of your application and PRIVATE_KEY with the name of your private key file.
This will output the JWT for the user Alice that has been signed using your private key. Keep a hold of this, as you will need it later.
Now that the server and Vonage application are set up, it is time to build the iOS application.
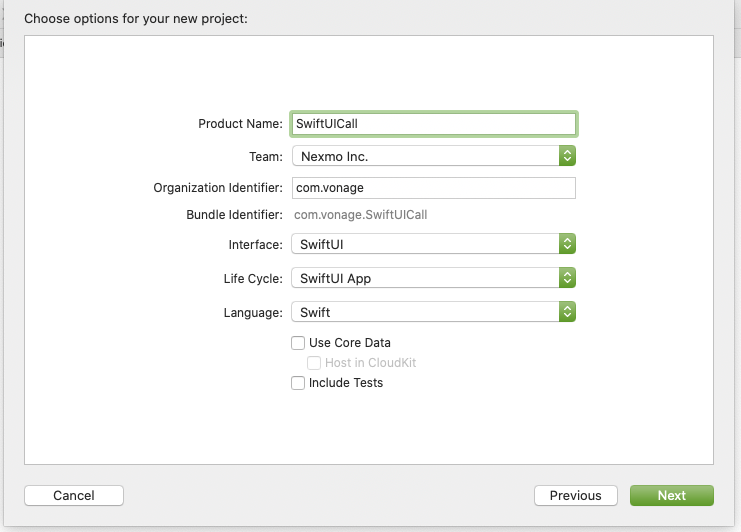
To get started, open Xcode and create a new project by going to File > New > Project. Select an App template and give it a name. Select, SwiftUI for the interface, SwiftUI App for the life cycle, and Swift for the language—finally, a location to save your project.
Now that the project is created, you can add the Vonage Client SDK as a dependency. Navigate to the location where you saved the project in your terminal and run the following commands.
Run the
pod initcommand to create a new Podfile for your project.Open the Podfile in Xcode using
open -a Xcode Podfile.Update the Podfile to have
VonageClientSDKVoiceas a dependency.
# Uncomment the next line to define a global platform for your project
# platform :ios, '9.0'

target 'SwiftUICall' do
    # Comment the next line if you don't want to use dynamic frameworks
    use_frameworks!

    # Pods for SwiftUICall
    pod 'VonageClientSDKVoice'

endInstall the SDK using
pod install.Open the new xcworkspace file in Xcode using
open SwiftUICall.xcworkspace.
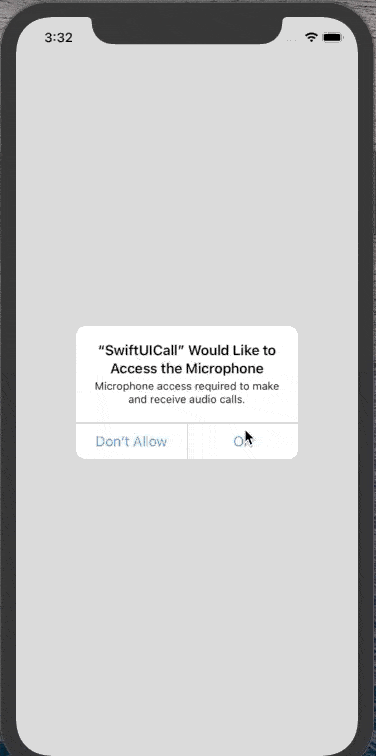
Since the application will use the microphone to place calls, you need to explicitly ask permission to do so. The first step is to edit the Info.plist file. This is a file that contains all the metadata required for the application. Add a new entry to the file by hovering your mouse over the last entry in the list and clicking the little + button that appears. Pick Privacy - Microphone Usage Description from the dropdown list and add Microphone access required to make and receive audio calls. for its value. You will do the second step for requesting microphone permissions later in the tutorial.
Before you start building the app's user interface (UI), you will build a model class first. This class is used to separate the logic of the app from the view code. In this case, the model class will handle the delegate calls from the Client SDK and when the call button should show. At the top of the ContentView.swift file, import the Client SDK and AVFoundation.
import SwiftUI
import AVFoundation
import VonageClientSDKVoiceThen at the bottom of the file, create a new class called CallModel:
final class CallModel: NSObject, ObservableObject, VGVoiceClientDelegate {

}Within this class, define the properties and helper functions needed:
final class CallModel: NSObject, ObservableObject, VGVoiceClientDelegate {
    @Published var status: String = ""
    @Published var isCalling: Bool = false
    let client = VGVoiceClient()
    var number: String = ""

    private var callId: String?
    private let audioSession = AVAudioSession.sharedInstance()

    func updateStatus(_ text: String) {
        DispatchQueue.main.async {
            self.status = text
        }
    }

    func resetState() {
        DispatchQueue.main.async {
            self.callId = nil
            self.isCalling = false
            self.number = ""
        }
    }
}The @Published property wrapper is how the UI will know when to react to changes from the model class. This is all handled for you as the class conforms to the ObservedObject protocol. The client property is for the Vonage Voice Client, which will allow you to make calls. callId is used to store the call object, and audioSession is used to request the microphone permissions. Configure the Client SDK:
func initializeClient() {
    let config = VGClientConfig(region: .US)
    client.setConfig(config)
    client.delegate = self
}To complete requesting microphone permissions for the app add the following function to the CallModel class:
func requestPermissionsIfNeeded() {
    if audioSession.recordPermission != .granted {
        audioSession.requestRecordPermission { (isGranted) in
            print("Microphone permissions \(isGranted)")
        }
    }
}This will first check if the permissions have already been granted; if not it will request them and print out the outcome to the console. Next, you need to log in as the Alice user with the Client SDK. To do so, add the next function to the CallModel class, replacing ALICE_JWT with the JWT from earlier:
func loginIfNeeded() {
    guard status != "Connected" else { return }
    VGVoiceClient.isUsingCallKit = false
    client.createSession("ALICE_JWT") { error, sessionId in
        if let error {
            self.updateStatus(error.localizedDescription)
        } else {
            self.updateStatus("Connected")
        }
    }
}This function checks if the client is already logged in; if not, it will use the JWT you generated earlier to log in and set the delegate for the client to this class. The VGVoiceClientDelegate is how the Client SDK communicates changes with the Vonage servers back to your application. Next, implement the required delegate functions.
func voiceClient(_ client: VGVoiceClient, didReceiveHangupForCall callId: VGCallId, withQuality callQuality: VGRTCQuality, reason: VGHangupReason) {
    self.resetState()
}

func client(_ client: VGBaseClient, didReceiveSessionErrorWith reason: VGSessionErrorReason) {
    let reasonString: String!

    switch reason {
    case .tokenExpired:
        reasonString = "Expired Token"
    case .pingTimeout, .transportClosed:
        reasonString = "Network Error"
    default:
        reasonString = "Unknown"
    }

    status = reasonString
}

func voiceClient(_ client: VGVoiceClient, didReceiveInviteForCall callId: VGCallId, from caller: String, with type: VGVoiceChannelType) {}
func voiceClient(_ client: VGVoiceClient, didReceiveInviteCancelForCall callId: VGCallId, with reason: VGVoiceInviteCancelReason) {}When there is a session error the status property is updated and if the call ends, the model's state gets reset. The following two functions you need to add will allow your application to make and end calls. Add the following functions.
func startCall() {
    self.isCalling = true
    client.serverCall(["to": number]) { error, callId in
        if error == nil {
            self.callId = callId
        }
    }
}

func endCall() {
    client.hangup(callId!) { error in
        if error == nil {
            self.resetState()
        }
    }
}The callNumber function uses the Client SDK to make a call to the number from the number property. This uses the answer_url from earlier on in the tutorial. Vonage will then make an HTTP call to your answer_url with the number from the iOS application, which will return a Call Control Object with instructions for Vonage to connect your app to the number. If this all succeeds, the Client SDK returns a call ID which is stored on the class. The endCall function hangs up the call, sets the callId property to nil, and sets the published isCalling boolean back to false so the UI can update.
The final function that you need to add to the CallModel calls initializeClient, requestPermissionsIfNeeded, and loginIfNeeded functions.
func setup() {
    initializeClient()
    requestPermissionsIfNeeded()
    loginIfNeeded()
}
The UI will consist of a Text object to display the status, a TextField object for the number entry, and a pair of Button objects to start and end calls. Add a property for the CallModel class you created earlier to the ContentView struct and use it to display the status of the Client SDK.
struct ContentView: View {
    @StateObject var callModel = CallModel()

    var body: some View {
        VStack {
            Text(callModel.status)
        }
        .animation(.default)
        .onAppear(perform: self.callModel.setup)
    }
}When the view appears, it will call the setup function on the model class; this will request the microphone permissions and log the client in. Doing so will update the status property on the model class, and the change in its value will prompt the ContentView to update!
Now that the client is logged in, you can use the rest of the published properties on the model class to build the rest of the UI. Add the following block of code to the VStack.
if self.callModel.status == "Connected" {
    TextField("Enter a phone number", text: $callModel.number)
        .textFieldStyle(RoundedBorderTextFieldStyle())
        .multilineTextAlignment(.center)
        .keyboardType(.numberPad)
        .disabled(self.callModel.isCalling)
        .padding(20)

    if !self.callModel.isCalling {
        Button(action: { self.callModel.startCall() }) {
            HStack(spacing: 10) {
                Image(systemName: "phone")
                Text("Call")
            }
        }
    }

    if self.callModel.isCalling {
        Button(action: { self.callModel.endCall() }) {
            HStack(spacing: 10) {
                Image(systemName: "phone")
                Text("End Call")
            }
            .foregroundColor(Color.red)
        }
    }
}The TextField will animate onto the view if the client is connected. The value of the TextField is bound to the number property of the model class. This is done by using the $ sign. Once a valid length of number has been entered, the conditions for showing the call button will be met, and once a call has started, the conditions will no longer be met, but the conditions for the end call button will be. So only one button shows at a time, and all the updating of the UI will be handled for you!
If you run the project (CMD + R), you will first be prompted to allow microphone permissions. You will be able to enter a number and call it! The format of numbers should be in the E.164 format.
You can find the completed project on GitHub. You can do a lot more with the Client SDK. Learn more on developer.vonage.com.