
Share:
The author goes by the pen name 'Python Code Nemesis'. She is a software engineer who loves writing technical articles with Python and its newest frameworks. You can find her latest articles on her medium account @dpythoncodenemesis.
Drinking Water Reminder App With Node, React, and Vonage Messages API
Time to read: 9 minutes
In this article, we will build a web application with Node, React, and the Vonage Messages API to allow users to subscribe to the service and choose a certain frequency for reminders. All subscribers will receive reminders to drink water at regular intervals based on their chosen frequency.
Drinking water is important because it helps to keep the body hydrated, which is essential for proper functioning. Proper hydration can help to improve energy levels, boost immune system functioning, and even help to prevent certain illnesses.
You are welcome to clone the GitHub repository for this tutorial.
In this tutorial, you will learn how to:
Create a backend server with Node.js
Add message sender in Express and Node with the Vonage Messages API
Add frequency handler with node-scheduler
Create a frontend UI with React.js
Connect the backend and the frontend
Test the application
A Vonage account and phone number
Node and npm installed
Time to get started with the backend for the application.
Create a main app directory Vonage_Drinking_App.
Go to your terminal and type in mkdir Vonage_Drinking_App.
Enter this directory by typing cd Vonage_Drinking_App in the terminal.
Create a directory inside this directory called backend.
Next, we will use the Vonage Messages API to send SMS to subscribers.
Vonage is a global cloud communications platform that enables users to make and receive phone calls, send and receive text messages, and more. It offers a range of services, including voice-over-IP (VoIP) and unified communications, as well as messaging, video chat, and other features. Vonage also provides a range of APIs and SDKs that allow developers to integrate their applications with the Vonage platform. You can create a Vonage account from the dashboard.
Enter your details and verify your email ID:
 Vonage homepage
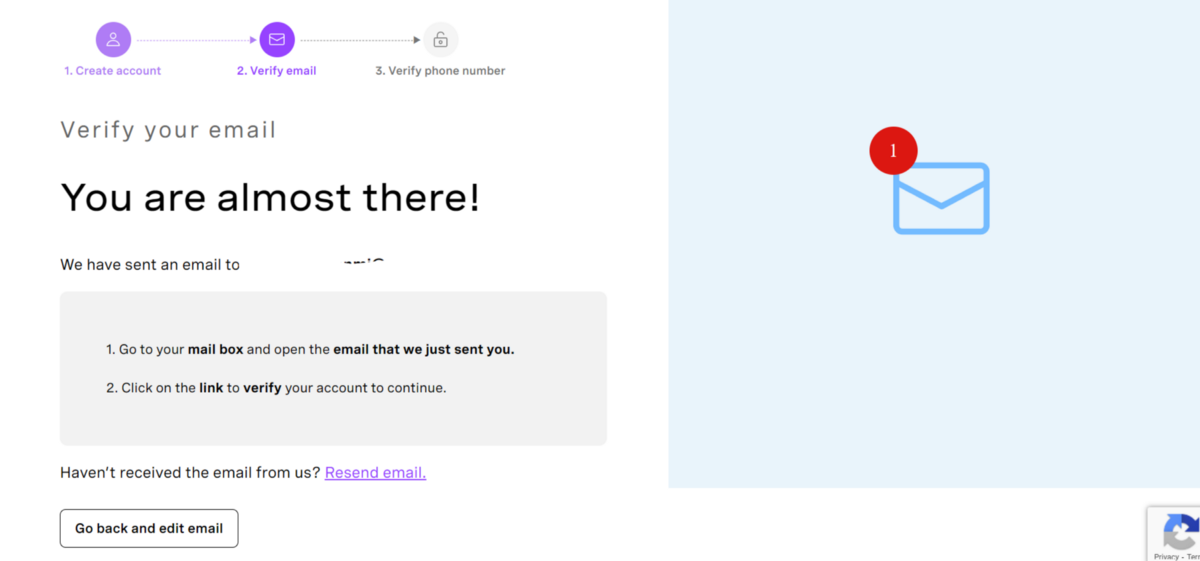 Sign up
Next, you will be able to view the below screen, where you choose if you are a developer. Select the Vonage products you plan to use. For this tutorial, we will select SMS.
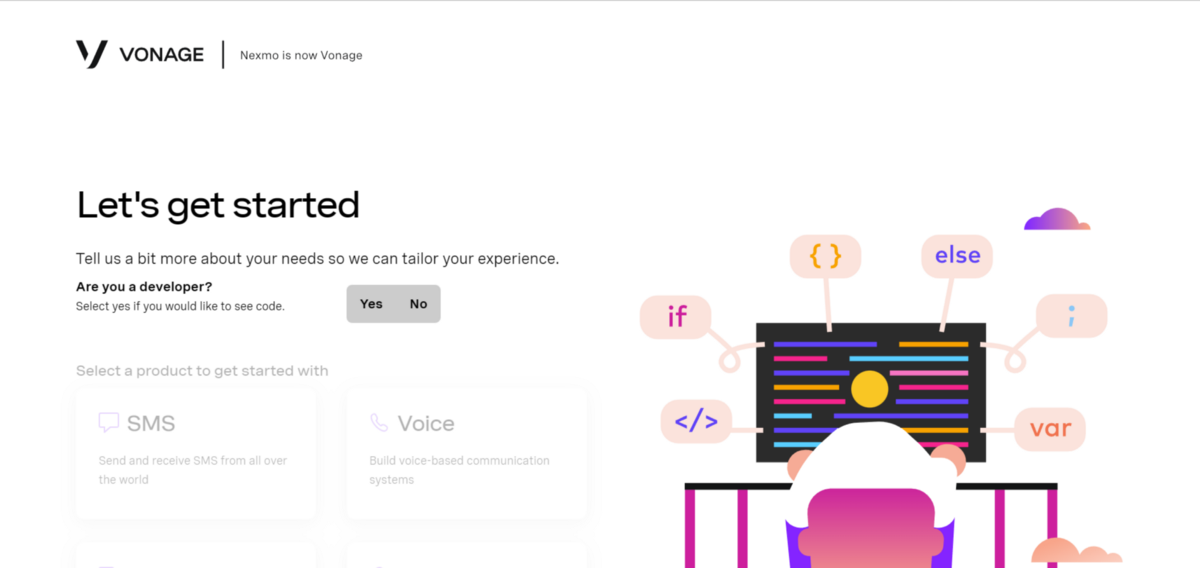 Let's get started page
Your account comes with a 2€ credit, which you can use for a trial, which is perfect for this use case. Go to the dashboard to use the Messages API:
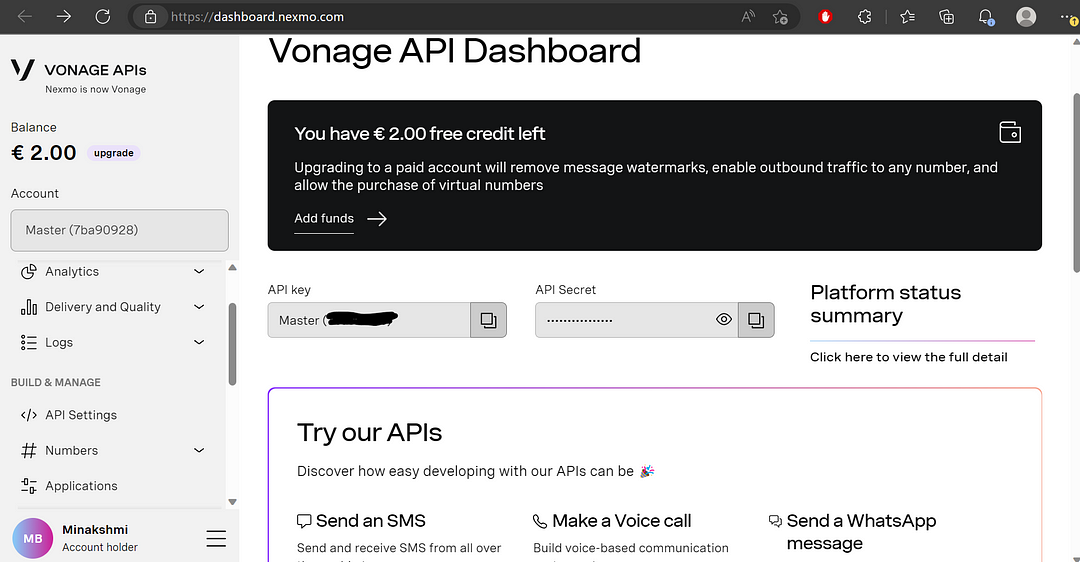 Vonage API Dashboard page
Copy your API key and API secret for later use. Time to create a new application. Go to applications or the Applications tab in the left sidebar:
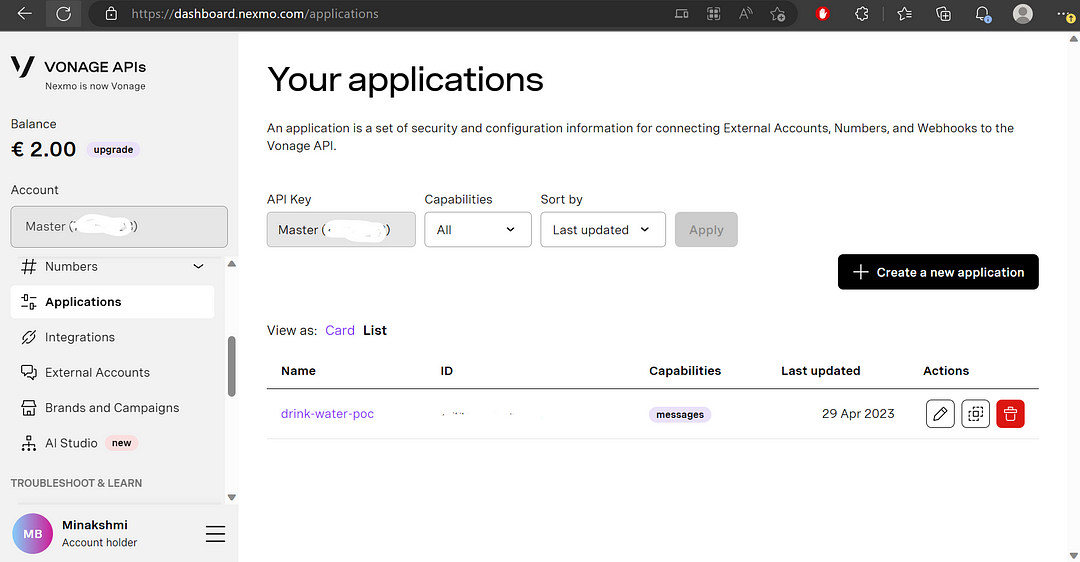 Vonage applications page
Click on Create a new application" to create a new application:
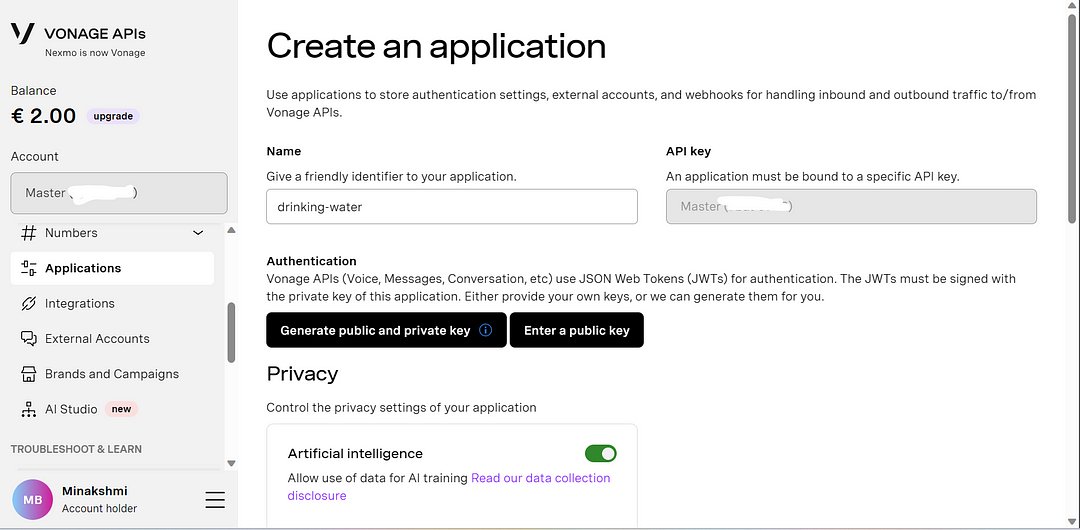 Create a new Vonage application page
Select Messages in the capabilities. Add the inbound and status URL as https://www.google.com/. At this step, you can generate your private key. It will be downloaded and saved locally.
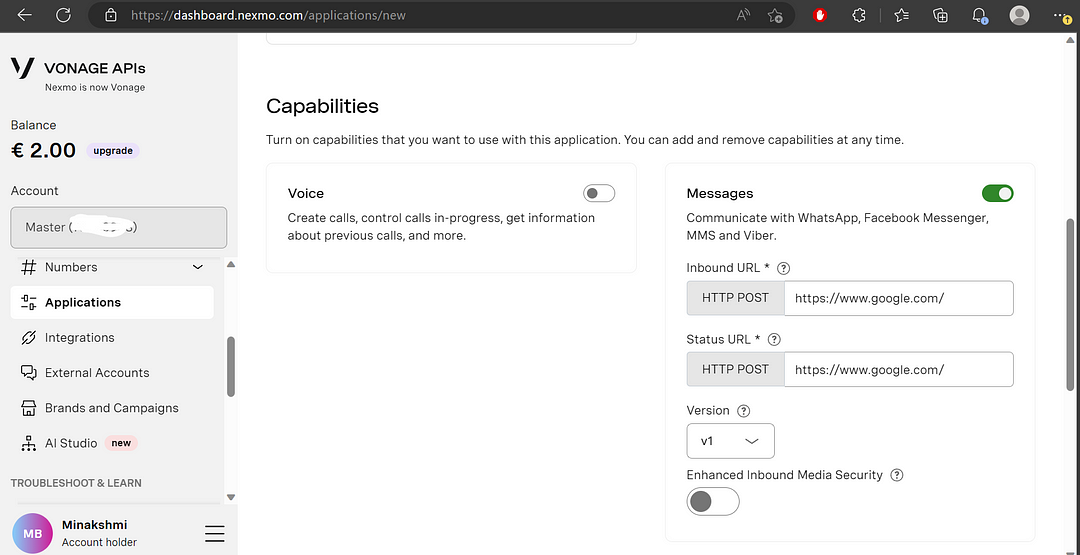 Choose application specifications page
Click on the Generate new application button:
 Choose application specifications page scrolled down
You will be able to view this application page:
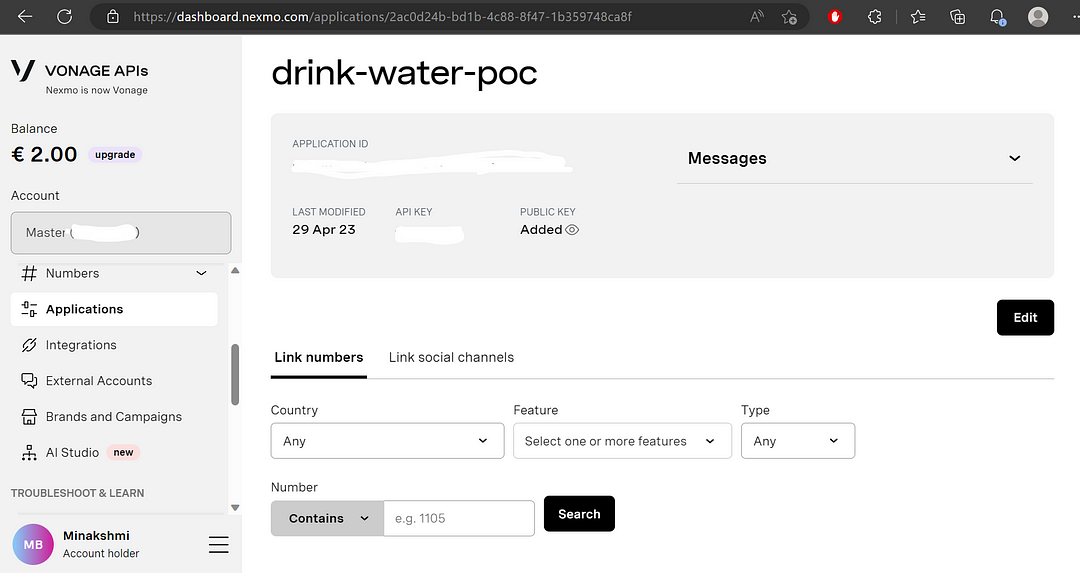 Drink water POC application page
Save the Application ID and the generated private key. You can also purchase a number and link your Vonage number here.
Next, you need to install some dependencies. Type the following in your terminal:
npm install cors@2.8.5 cypress@12.11.0 express@4.18.2 node-schedule@2.1.1 react-dom@18.2.0 react@18.2.0 webpack@5.81.0This is the sample code from the Vonage Messages SDK for Node.js GitHub repository which we will use to test if we can send sms using the Vonage Messages API:
const { Auth } = require("@vonage/auth");
const { Messages } = require("@vonage/messages");
const { SMS } = require("@vonage/messages");

PRIVATE_KEY_PATH = "private.key";
const messagesClient = new Messages(
 new Auth({
   apiKey: API_KEY,
   apiSecret: API_SECRET,
   applicationId: APPLICATION_ID,
   privateKey: PRIVATE_KEY_PATH,
 })
 // options
);
messagesClient
 .send(
   new SMS({
     to: "TO NUMBER",
     from: "Vonage APIs",
     text: "Hi from Python Code Nemesis",
   })
 )
 .then((resp) => console.log(resp))
 .catch((err) => console.error(err));
This is the test_sms.js file in the GitHub repository. This code uses the Vonage Messages API to send an SMS message to a phone number. To run this file, type node test_sms.js in your terminal.
Here’s an explanation of the test_sms.js code. The first three lines import three modules from the @vonage library: Auth, Messages, and SMS. Auth is used to authenticate with the Vonage API, Messages is used to send SMS messages, and SMS is a subclass of Messages used to construct SMS messages.
Next, the code defines a constant PRIVATE_KEY_PATH with the path to a private key file. After that, an instance of Messages is created with the new keyword, passing in an Auth object as an argument with the apiKey, apiSecret, applicationId, and privateKey properties set. This instance of Messages is stored in a constant called messagesClient.
Finally, the send() method is called on messagesClient to send an SMS message. The send() method takes an instance of SMS as an argument, with the to, from, and text properties set to the recipient phone number, the sender name or number, and the message text respectively. The then() method is called on the returned Promise to log the response from the Vonage API, and the catch() method is called to log any errors that occur during the sending process.
Once this runs successfully, we can create our backend application using this code.
The next step is sending an SMS to the number entered in the frontend in the sign-up endpoint. We will schedule reminders for each subscriber based on the frequency they select from the UI.
Create a file app.js in the backend folder and add the following code:
const express = require("express");
const app = express();
const cors = require("cors");
const { SMS } = require("@vonage/messages");
const schedule = require("node-schedule");
const { Auth } = require("@vonage/auth");
const { Messages } = require("@vonage/messages");

PRIVATE_KEY_PATH = "private.key";

// A list to store phone numbers and frequency of reminders

const subscribers = [];

const messagesClient = new Messages(
 new Auth({
   apiKey: API_KEY,
   apiSecret: API_SECRET,
   applicationId: APPLICATION_ID,
   privateKey: PRIVATE_KEY_PATH,
 })
 // options
);

function sendReminders(phoneNumber) {
 const from = "Reminder App";
 const to = phoneNumber;
 const text = "This is your reminder to have a glass of water!";

 messagesClient
   .send(
     new SMS({
       to: to,
       from: from,
       text: text,
     })
   )
   .then((resp) => console.log(resp))
   .catch((err) => console.error(err));
}

app.use(cors());
app.use(express.urlencoded({extended: true}));
app.use(express.json())

app.post("/sign-up", (req, res) => {
 const phoneNumber = req.body.phoneNumber;
 const frequency = req.body.frequency;

 // Add the phone number and frequency to the subscriber's list
 subscribers.push({ phone_number: phoneNumber, frequency: frequency });

 const from = "Reminder App";
 const to = phoneNumber;
 const text = "Welcome to the Drinking Water Reminder App! You will receive reminders as per your selected frequency.";

 messagesClient
   .send(
     new SMS({
       to: phoneNumber,
       from: from,
       text: text,
     })
   )
   .then((resp) => console.log(resp))
   .catch((err) => console.error(err));

 schedule.scheduleJob(`*/${frequency} * * * *`, () => {
   sendReminders(phoneNumber);
 });

 console.log(
   `Send message to ${phoneNumber} with frequency ${frequency} minute`
 );

 res.status(200).json({ status: "ok" });
});

app.listen(5000, () => {
 console.log("Server started on port 5000");
});
This is a Node.js server-side application that uses the Express framework to create a web server. It also integrates with the Vonage Messages API to send reminders to subscribers.
The code starts by importing the required modules: express, body-parser, cors, @vonage/messages, node-schedule, and @vonage/auth. Then it defines a constant variable PRIVATE_KEY_PATH with the path to the private key for the Vonage API. After that, it creates a list called subscribers to store phone numbers and the frequency of reminders. Next, it creates a new instance of the Messages class from the @vonage/messages module, which is used to send SMS messages via the Vonage API. It sets the required API key, API secret, application ID, and private key using an instance of the Auth class.
The sendReminders function is defined to send reminders to a specific phone number. It takes the phone number as an argument, sets the from and text variables for the SMS message, and then sends the message via the messagesClient using the send method.
The code then creates a new instance of the express application and sets up middleware for handling JSON requests and enabling cross-origin resource sharing (CORS) for web applications.
The server sets up a route for the POST request to /sign-up. When a client sends a request to this endpoint with a phone number and frequency in the request body, the server adds the phone number and frequency to the subscribers list. It then sends a welcome message to the subscriber's phone number via the messagesClient and schedules reminders at the specified frequency using the node-schedule module.
Finally, the server returns a JSON response indicating the request succeeded.
CORS (Cross-Origin Resource Sharing) is a mechanism that allows resources (such as scripts, images, or styles) to be requested from a different domain than the one that served the web page.
CORS errors occur when a web page attempts to make a request (for example, via JavaScript) to a different domain from the one that served the web page, and the server hosting the requested resource does not return the appropriate CORS headers.
The purpose of CORS is to prevent a malicious web page from making unauthorized requests to another domain. Browsers enforce CORS restrictions by checking for the presence of specific HTTP headers in the response from the server, such as Access-Control-Allow-Origin.
Run this file with node app.js. You will be able to see the Server started on port 5000" once the server is running:
 Console log
The server starts listening on port 5000, and a message is printed to the console indicating that the server has started. When you pass some input in the application's frontend, the logs will be printed on the console with the message UUIDs.
Great! The backend is done, and it is up and running. Now it’s time to add the frontend code.
The frontend of this app will use the React.js framework.
A few prerequisites are you must have Node.js and npm installed on your system. Make sure you are using the most suitable version.
nvm install <version>
nvm use <version>If required, you can also update Node. Inside the project's root directory, create a folder called frontend. Inside this folder, change into the frontend directory and initialize a new React project:
npx create-react-app .
Run the React app:
npm start
Verify the app is running by visiting http://localhost:3000 in your browser. You should see the default React app.
Create a new component DrinkingWaterForm in the frontend/src directory with the following code to allow users to sign up for reminders:
import React, { useState } from "react";
import { Form, Button } from "react-bootstrap";
import { responsivePropType } from "react-bootstrap/esm/createUtilityClasses";
import drinkwater from './drinkwater.jpg';

const DrinkingWaterForm = () => {
 const [phoneNumber, setPhoneNumber] = useState("");
 const [frequency, setFrequency] = useState("");

 const handleSubmit = async (event) => {
   event.preventDefault();

   console.log(
     JSON.stringify({
       phoneNumber: phoneNumber,
       frequency: frequency,
     })
   );

   let res;

   try {
     res = await fetch("http://127.0.0.1:5000/sign-up", {
       method: "POST",
       headers: {
         Accept: "application/json",
         "Content-Type": "application/json",
       },
       body: JSON.stringify({
         phoneNumber: phoneNumber,
         frequency: frequency,
       }),
     });
   } catch (error) {
     console.log(error);
   }

   if (res.ok) {
     await res.json();
   } else {
     window.alert(res.status());
   }
 };

 return (
   <div style={containerStyle}>
     <img src={drinkwater} alt="this is a car image" width={"400px"} height={"220px"}/>
     <h1 style={titleStyle}>Drinking Water Reminder Service</h1>
     <Form onSubmit={handleSubmit} style={formStyle}>
       <Form.Group>
         <Form.Label style={formLabelStyle}>Phone Number</Form.Label>
         <Form.Control
           type="tel"
           value={phoneNumber}
           onChange={(event) => setPhoneNumber(event.target.value)}
           required
           style={formControlStyle}
         />
       </Form.Group>
       <Form.Group>
         <Form.Label style={formLabelStyle}>Frequency (mins)</Form.Label>
         <Form.Control
           type="number"
           value={frequency}
           onChange={(event) => setFrequency(event.target.value)}
           required
           style={formControlStyle}
         />
       </Form.Group>
       <Button type="submit" style={submitButtonStyle}>
         Sign Up
       </Button>
     </Form>
   </div>
 );
};

const containerStyle = {
 display: "flex",
 flexDirection: "column",
 alignItems: "center",
 padding: "50px",
 backgroundColor: "#7DCE82",
};

const imageStyle = {
 width: "150px",
 marginBottom: "25px",
};

const titleStyle = {
 marginBottom: "25px",
 color: "#FFFFFF",
};

const formStyle = {
 width: "50%",
 marginTop: "25px",
};

const formLabelStyle = {
 color: "#FFFFFF",
};

const formControlStyle = {
 backgroundColor: "#FFFFFF",
};

const submitButtonStyle = {
 backgroundColor: "#048C03",
 color: "#FFFFFF",
};

export default DrinkingWaterForm;This React component represents a form for users to sign up for a drinking water reminder service. The form allows the user to enter their phone number and the frequency at which they want to receive reminders to drink water.
The component imports the necessary modules, including React Bootstrap components for form elements and an image for display. It defines several styles for the container, image, title, form, form labels, form controls, and submit button.
The component uses the useState hook to manage the state of the phoneNumber and frequency form fields. It defines a handleSubmit function that is called when the user submits the form. The function logs the form data to the console, then makes a POST request to the backend API endpoint /sign-up with the form data.
If the request is successful, the function returns the JSON response. Otherwise, it displays an alert window with the response status code.
The component renders the form with the Form and Button components from React Bootstrap. The form includes two input fields for phone number and frequency and a submit button.
When the user enters data into the input fields and clicks the submit button, the handleSubmit function is called to submit the form data to the backend API endpoint. The component also displays an image and a title for the form and applies the styles defined earlier to the various elements of the form.
Add any image to the directory you want to display on the UI and replace the path of the image with the correct path.
Update the frontend/src/App.js file to include the DrinkingWaterForm component:
import React from "react";
import DrinkingWaterForm from "./DrinkingWaterForm";
function App() {
 return (
   <div>
     <h1>Drinking Water Reminder Service</h1>
     <DrinkingWaterForm />
   </div>
 );
}
export default App;
Time to run both the frontend and backend together.
Navigate to a terminal and enter the backend directory from the project's root.
Type node app.js to get the backend running. Next, in a separate terminal, cd into frontend and type:
npm startGreat, you got both the frontend and the backend running simultaneously! Open http://localhost:3000 in your web browser to see the Drinking Water Reminder app.
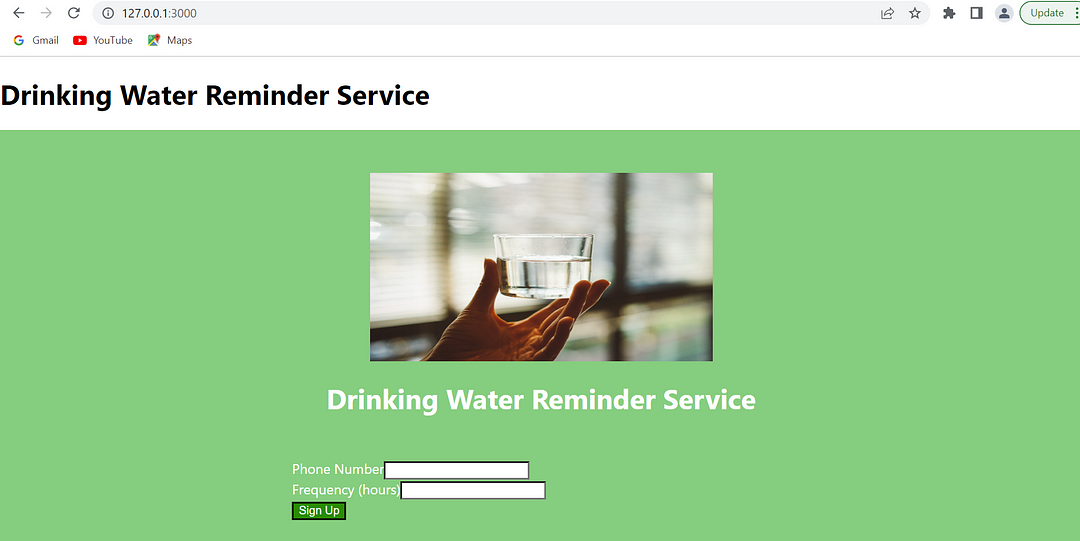 Drinking water Reminder Service home page
Perfect! You created a drinking water reminder app with Node, Vonage, and React! Now you can test it with your desired input.
First, you need to add it to test numbers, as on trial accounts in the Vonage Dashboard you can only use pre-verified test numbers, which you can do by going to your numbers and verifying them. Learn more about phone numbers here.
Navigate to localhost:3000 and enter your phone number in the format [COUNTRYCODE] for instance if it is a number from Great Britain it would be 44xxxxxxxxxx, and the frequency you want to be reminded of as a subscriber. Here, for the input 1 and a certain number, initially, a message is sent on that number. From this point, every 1 minute, a message reminder will go via SMS to drink water!
This article showed how to build a subscription-based Drinking Water Reminder web application using Node, React, and the Vonage Messages API. This tutorial has introduced you to using Vonage APIs in your projects.
If you're interested in learning more about Vonage APIs and what they can do, check out the Vonage API Developer Portal. You can find documentation, code samples, and tutorials for a wide range of APIs, including SMS, voice, video, and more.
You can also stay updated on the latest news and updates from Vonage by following them on Twitter (@VonageDev) and joining their Slack community. These channels are great places to connect with other developers, ask questions, and learn more about Vonage and its APIs.
We encourage you to keep exploring different APIs and frameworks with Vonage. There are many possibilities for creating innovative and useful applications. Cheers!