Share:
Naomi Pentrel is a Software Engineer with a passion for organizing and attending hackathons. She has worked at companies such as Google, Microsoft, and Palantir. In her free time, she occasionally blogs about her side projects.
Build a Babel Fish with Nexmo, and the Microsoft Translator Speech API
Time to read: 12 minutes
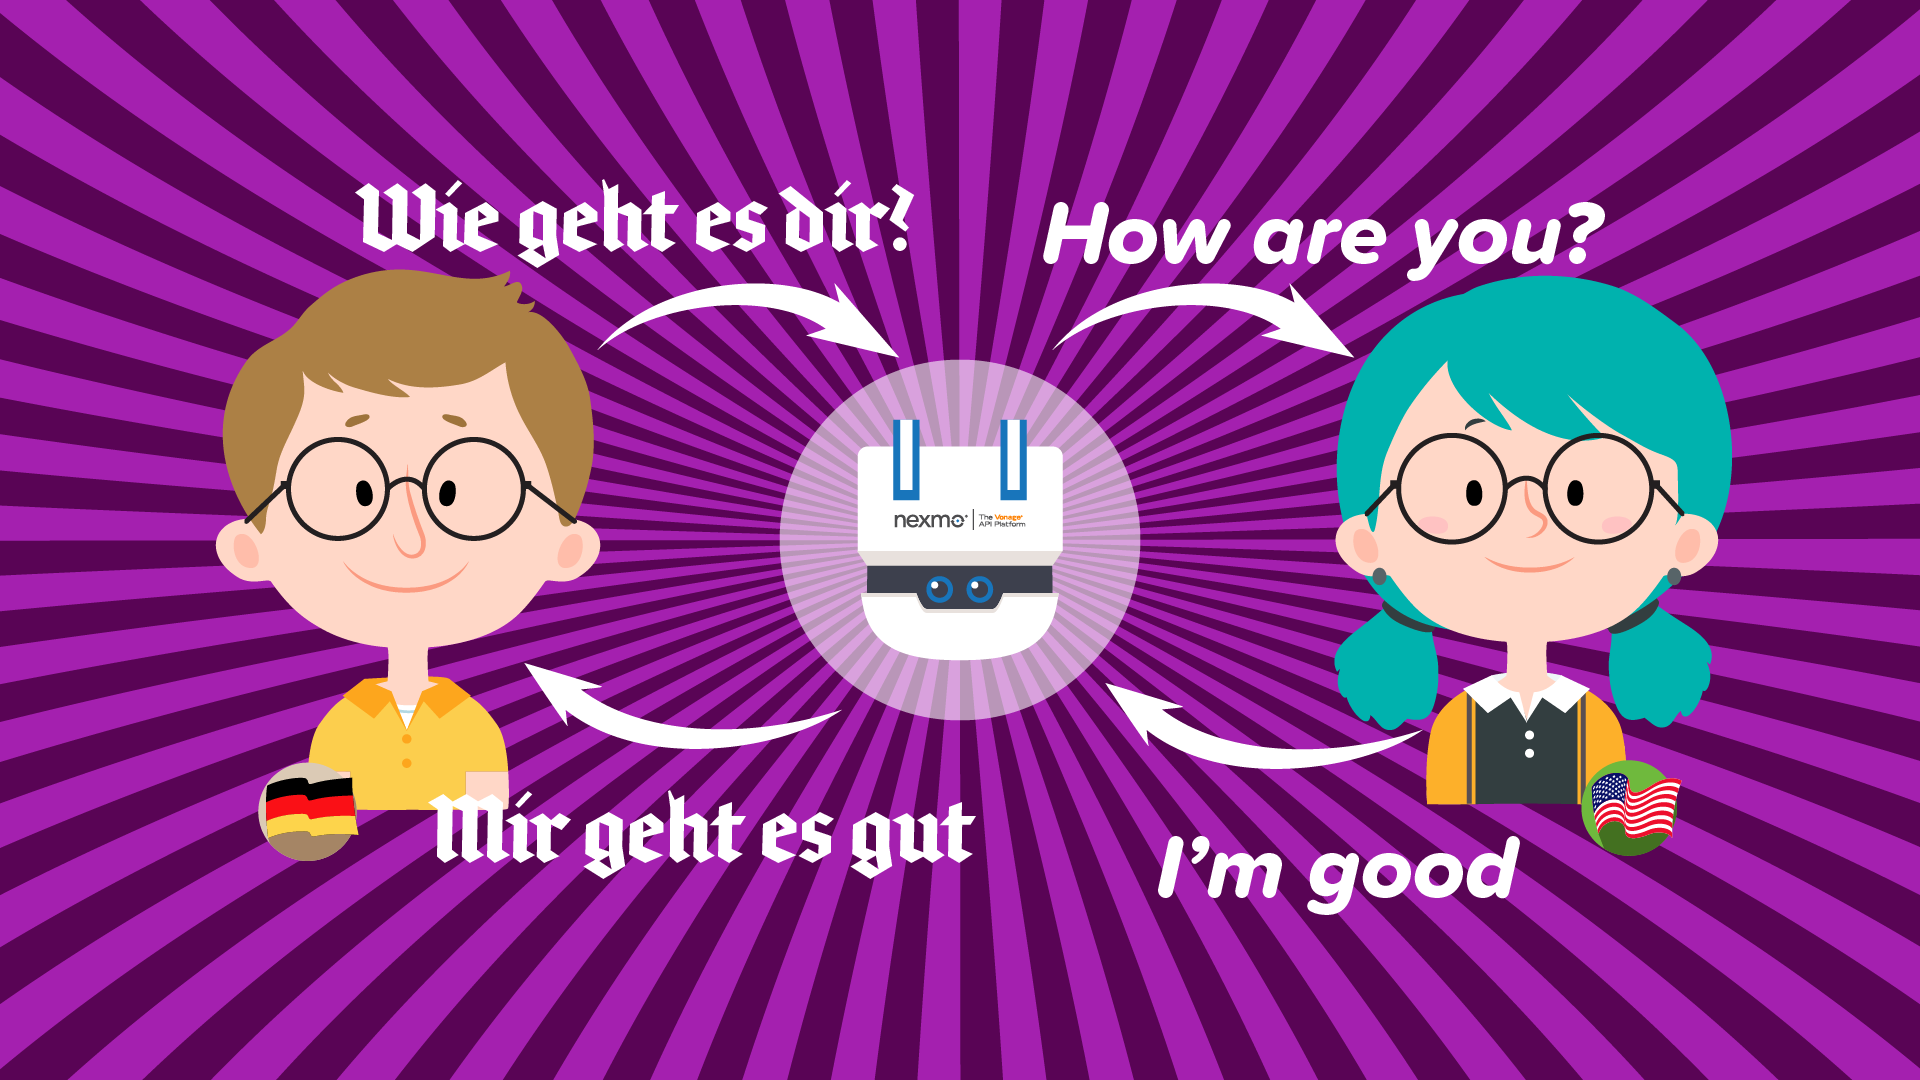
If you were on the internet in these past few months chances are you saw Google's real-time translation Pixel Buds. A technology quite like the Babel fish in The Hitchhiker’s Guide to the Galaxy that can translate any sentient speech for its wearer thus enabling them to communicate with virtually every being. The Google Pixel Buds come at a price of course - so why not build our own?! That’s what Danielle and I thought at the latest hackference. We went on to create a Nexmo Babel fish that lets two people talk on the phone with either party hearing a translated version of what the respective other party says.
 Babelfish
In this blogpost, we will go over how this Babel fish system works step by step starting with the required setup and configuration. Then, we will set up a Nexmo number for handling incoming calls. Following this, we will implement a Python server which will receive speech via a WebSocket and route the incoming speech from the Nexmo number to the Microsoft Translator Speech API. We will use the Translator Speech API to handle the transcription and translation. On top of this, we will implement logic to manage a bi-directional dialogue and to instruct the Nexmo number to speak the translations. For ease of implementation, both parties will have to call our service's Nexmo number. Below, you can see a high-level system diagram of how an instance of speech from either side gets processed. Note that throughout this tutorial I will use the example of a German/British English conversation.

If you would prefer to just see the code, it is available on GitHub here.
You will need to have both Python 2.x or 3.x and the HTTP tunnelling software ngrok installed to be able to follow along. We will list all the commands you need to install everything else as you follow along.
Let’s get started with our DIY Babel fish solution by setting up a virtual environment for this project using Virtualenv. Virtualenv allows us to isolate the dependencies of this project from our other projects. Go ahead and create a directory for this project and copy the following list of dependencies into a file in your project directory named requirements.txt:
nexmo
tornado>=4.4.2
requests>=2.12.4
To create and activate your virtual environment, run the following commands in your terminal:
virtualenv venv  # sets up the environment
source venv/bin/activate  # activates the environment
pip install -r requirement.txt  # installs our dependencies

# if you are running python3 please run the following instead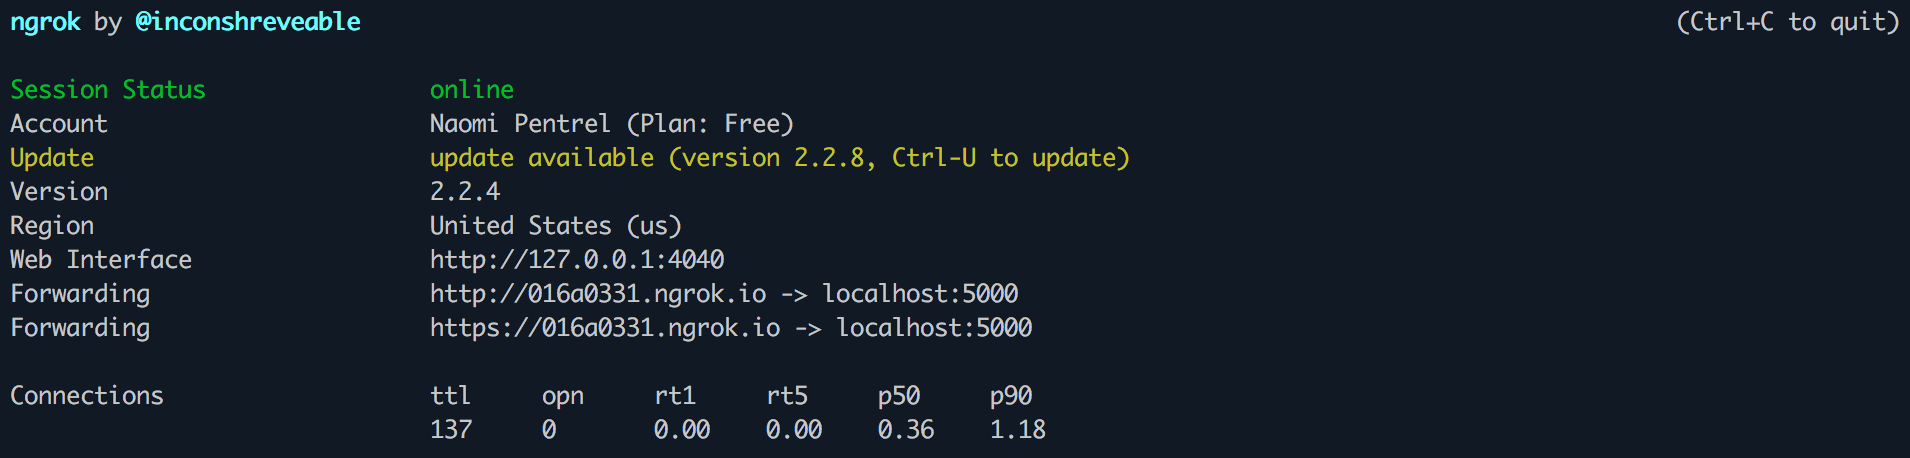
pip3 install -r requirement.txtAt this point, please start ngrok in a separate terminal window by running the command below. ngrok will allow us to expose our localhost at port 5000 to incoming requests. You will need to keep ngrok running in the background for this to work. You can read more about connecting ngrok with Nexmo here.
ngrok http 5000Once you run the above command, your terminal should look similar to the screenshot below. You will need the forwarding URL when configuring your Nexmo application and number in the next steps.
To complete this tutorial, you will need a Vonage API account. If you don’t have one already, you can sign up today and start building with free credit. Once you have an account, you can find your API Key and API Secret at the top of the Vonage API Dashboard.
This tutorial also uses a virtual phone number. To purchase one, go to Numbers > Buy Numbers and search for one that meets your needs.

Go to your applications and add a new application. Use the Ngrok forwarding URL for both the Event URL and the Answer URL adding /event as the path for the Event URL (e.g. http://016a0331.ngrok.io/event) and /ncco for the Answer URL (e.g. http://016a0331.ngrok.io/ncco). We will set these endpoints up later. Generate a public/private key pair via the user interface and store the key on your computer.
The last step for our number setup is to link the number you purchased earlier to your application. Use the application dashboard to link the number.
The other service we are going to need to set up is Microsoft’s Translator Speech API. Sign up for a free Microsoft Azure account at azure.com and afterwards go to portal.azure.com and create a Translator Speech API resource. You will need the key it generates for the next step.
Now that we have our Nexmo number and our Translator Speech API key, all we need to do is set up a secrets and a config file with all these important details so that we don't have to keep writing them and can keep them separately managed. Store the below in secrets.py in your project folder and replace the placeholder values with your values.
# Replace the below values with your values
# Your API key and secret can be found here ${CUSTOMER_DASHBOARD_URL}/getting-started-guide
NEXMO_API_KEY = "<your-api-key>"
NEXMO_API_SECRET = "<your-api-secret>"
# Your nexmo number
NEXMO_NUMBER = "+447512345678"
# This is found on your Nexmo application’s dashboard
NEXMO_APPLICATION_ID = "<nexmo-application-id>"
# This is the private key you downloaded when setting up your application
NEXMO_PRIVATE_KEY = '''-----BEGIN PRIVATE KEY-----
<your-private-key>
cobranding_allowed: false
-----END PRIVATE KEY-----'''

# You will have to sign up for a free Microsoft account to use the Microsoft Translator Speech API: http://docs.microsofttranslator.com/speech-translate.html
MICROSOFT_TRANSLATION_SPEECH_CLIENT_SECRET = "<your-api-key>"
Afterwards store the below in config.py in your project folder and again replace the placeholder values with your values. Note that you can choose other languages than the ones below. You can also alter these at any point later.
HOSTNAME = '<your-value>.ngrok.io'

# Replace the variable assignment with your number in the same format
CALLER = '447812345678'

# Replace the variable assignment with your languages
LANGUAGE1 = 'de-DE'


# Replace the variable assignments with the respective name for your language. They can be found here:
# https://developer.nexmo.com/api/voice/ncco#voice-names
VOICE1 = 'Marlene'

# the other person's language and voice
LANGUAGE2 = 'en-US'
VOICE2 = 'Kimberly'
Below we will first go through how to authenticate with the Translator Speech API. Then we will set up our Tornado Web server using a supplied template. Following this, we will implement the CallHandler, the EventHandler, and the WSHandler. The CallHandler will handle incoming calls to the Nexmo number for us. On top of that, the EventHandler will be used to handle events that Nexmo sends, such as a call starting or completing. With each event, Nexmo sends information about the actor who started or completed the call. We will use this information to store who is in a specific call. The WSHandler will meanwhile be used to open the WebSocket through which Nexmo and our Python server will communicate. The Python server will create snippets of audio and send them to the Translator Speech API. The handler will use the information that the EventHandler gathers to route messages correctly. Each section below will explain these concepts further and show the respective implementation.
To use the Translator Speech API we need to get a token which we name the MICROSOFT_TRANSLATION_SPEECH_CLIENT_SECRET. Luckily Microsoft provides a Python AzureAuthClient which we will use without change. Please copy the below and save it in a file called azure_auth_client.py in your project directory.
"""
Code example for getting a A from the Azure Platform.
Visit http://docs.microsofttranslator.com/oauth-token.html to view the API reference
for Microsoft Azure Cognitive Services authentication service.
"""

from datetime import timedelta
from datetime import datetime

import requests

class AzureAuthClient(object):
    """
    Provides a client for obtaining an OAuth token from the authentication service
    for Microsoft Translator in Azure Cognitive Services.
    """

    def __init__(self, client_secret):
        """
        :param client_secret: Client secret.
        """

        self.client_secret = client_secret
        # token field is used to store the last token obtained from the token service
        # the cached token is re-used until the time specified in reuse_token_until.
        self.token = None
        self.reuse_token_until = None

    def get_access_token(self):
        '''
        Returns an access token for the specified subscription.
        This method uses a cache to limit the number of requests to the token service.
        A fresh token can be re-used during its lifetime of 10 minutes. After a successful
        request to the token service, this method caches the access token. Subsequent
        invocations of the method return the cached token for the next 5 minutes. After
        5 minutes, a new token is fetched from the token service and the cache is updated.
        '''

        if (self.token is None) or (datetime.utcnow() > self.reuse_token_until):

            token_service_url = 'https://api.cognitive.microsoft.com/sts/v1.0/issueToken'

            request_headers = {'Ocp-Apim-Subscription-Key': self.client_secret}

            response = requests.post(token_service_url, headers=request_headers)
            response.raise_for_status()

            self.token = response.content
            self.reuse_token_until = datetime.utcnow() + timedelta(minutes=5)

        return self.token
The computer communications protocol WebSockets allows us to have a two-way communication channel over a single TCP connection. Nexmo’s Voice API lets you connect phone calls to such WebSocket endpoints. We will use the Tornado Web server web framework as it implements the WebSocket protocol for us.
If you have been following along and named all the files as described, you can start with the below Tornado Web server setup. This code handles all our imports, sets up the Nexmo client and the azure auth client, and starts a server on port 5000. Note that this server does not do anything useful yet. It has three endpoints: ncco, event, and socket which call the CallHandler, EventHandler, and WSHandler respectively. We will implement the handlers in the following sections.
Create a file named main.py in your project directory and copy this code into it.
from string import Template
import json
import os
import requests
import struct
import StringIO

from tornado import httpserver, httpclient, ioloop, web, websocket, gen
from xml.etree import ElementTree
import nexmo

from azure_auth_client import AzureAuthClient
from config import HOSTNAME, CALLER, LANGUAGE1, VOICE1, LANGUAGE2, VOICE2
from secrets import NEXMO_APPLICATION_ID, NEXMO_PRIVATE_KEY, MICROSOFT_TRANSLATION_SPEECH_CLIENT_SECRET, NEXMO_NUMBER


nexmo_client = nexmo.Client(application_id=NEXMO_APPLICATION_ID, private_key=NEXMO_PRIVATE_KEY)
azure_auth_client = AzureAuthClient(MICROSOFT_TRANSLATION_SPEECH_CLIENT_SECRET)

conversation_id_by_phone_number = {}
call_id_by_conversation_id = {}


class CallHandler(web.RequestHandler):
    @web.asynchronous
    def get(self):
        self.write("Hello world")


class EventHandler(web.RequestHandler):
    @web.asynchronous
    def post(self):
        self.write("Hello world")


class WSHandler(websocket.WebSocketHandler):
    def open(self):
        print("WebSocket opened")

    def on_message(self, message):
        self.write_message(u"You said: " + message)

    def on_close(self):
        print("WebSocket closed")


def main():
    application = web.Application([
        (r"/event", EventHandler),
        (r"/ncco", CallHandler),
        (r"/socket", WSHandler),
    ])

    http_server = httpserver.HTTPServer(application)
    port = int(os.environ.get("PORT", 5000))
    http_server.listen(port)
    print("Running on port: " + str(port))

    ioloop.IOLoop.instance().start()


if __name__ == "__main__":
    main()
To connect phone calls to WebSocket endpoints, Nexmo’s Voice API uses a Nexmo Call Control Object (NCCO) or an API call. When someone calls your Nexmo number, Nexmo will issue a get request to the Answer URL you provided when setting up your Nexmo Voice Application. We pointed our application to our server which now needs to answer this request by returning an NCCO. This NCCO should instruct Nexmo to give a short welcome message to the caller and then connect the caller to the WebSocket.
 Diagram that shows the interactions between a user, Nexmo, and the web server. When the user calls the Nexmo number, Nexmo sends a GET request to the web server's /ncco endpoint. The web server responds with an NCCO that instructs Nexmo to open a socket with the web server.
Go ahead and save the following NCCO into a file called ncco.json within your project directory. It contains a template that will perform the required actions. However, it includes some placeholder variables ($hostname, $whoami, and $cid) which we will need to replace later when we use it.
[
  {
    "action": "talk",
    "text": "Please wait while we connect you."
  },
  {
    "action": "connect",
    "eventUrl": [
      "http://$hostname/event"
    ],
    "from": "12345",
    "endpoint": [
      {
        "type": "websocket",
        "uri" : "ws://$hostname/socket",
        "content-type": "audio/l16;rate=16000",
        "headers": {
          "whoami": "$whoami",
          "cid": "$cid"
        }
      }
    ]
  }
]In the template for the server the section reproduced below sets up the mapping between the /ncco endpoint and the CallHandler. This mapping ensures that when the /ncco endpoint receives a GET request, the CallHandler's get method is executed by the server.
application = web.Application([
    (r"/event", EventHandler),
    (r"/ncco", CallHandler),
    (r"/socket", WSHandler),
])When the server executes the method, it returns an assembled NCCO using the code below. To begin with, we gather data from the query (i.e. the GET request) in a data variable. We also store the conversation_uuid for later use. In this case, there is a print statement so that you can see the conversation_uuid when you are testing your server. In the next step, the code loads the NCCO from the ncco.json file we created. To complete the loaded NCCO, we substitute the placeholder variables ($hostname, $cid, and $whoami) with the gathered values from the data variable. After the substitution, we are ready to send it back to Nexmo.
Replace the CallHandler from the template above with this code:
class CallHandler(web.RequestHandler):
    @web.asynchronous
    def get(self):
        data={}
        data['hostname'] = HOSTNAME
        data['whoami'] = self.get_query_argument('from')
        data['cid'] = self.get_query_argument('conversation_uuid')
        conversation_id_by_phone_number[self.get_query_argument('from')] = self.get_query_argument('conversation_uuid')
        print(conversation_id_by_phone_number)
        filein = open('ncco.json')
        src = Template(filein.read())
        filein.close()
        ncco = json.loads(src.substitute(data))
        self.write(json.dumps(ncco))
        self.set_header("Content-Type", 'application/json; charset="utf-8"')
self.finish()Whenever someone now calls the Nexmo number, Nexmo will send a GET request to our /ncco endpoint and the CallHandler will assemble and send the NCCO. Nexmo will then perform the actions as laid out in the NCCO. In this case, that means the caller will hear “Please wait while we connect you.". Afterwards, Nexmo will attempt to connect the call to the provided socket endpoint. It also provides Nexmo with the event endpoint to be used. If you start your server now by running python main.py in your terminal window, you will find that you will hear the message but the call will end after it. This is because we haven’t implemented the EventHandler or the WSHandler. Let’s do that now!
The EventHandler handles events that Nexmo sends. We are interested in any incoming calls and therefore check any incoming request to see whether its body contains a direction and whether that direction is incoming. If it is, we will want to store the uuid and finish the request context. The call_id_by_conversation_id dictionary will be used for routing messages between the callers in the WSHandler.
Replace the EventHandler from the template with this code:
class EventHandler(web.RequestHandler):
    @web.asynchronous
    def post(self):
        body = json.loads(self.request.body)
        if 'direction' in body and body['direction'] == 'inbound':
            if 'uuid' in body and 'conversation_uuid' in body:
                call_id_by_conversation_id[body['conversation_uuid']] = body['uuid']
        self.content_type = 'text/plain'
        self.write('ok')
        self.finish()
The CallHandler and the EventHandler have allowed our application to set up the call. The WSHandler will now take care of the audio stream of the call. The speech on the primary caller's side will be transcribed and translated by the Translator Speech API, and the resulting text will be spoken by a Nexmo voice on the other end of the line. The second person can thus hear the caller in a language they understand and afterwards respond. The Translator Speech API will translate the response in turn so that the first person hears it in their language. This workflow is the bit we will now implement.
When the Nexmo Voice API connects to a WebSocket, Nexmo sends an initial HTTP GET request to the endpoint. Our server responds with a HTTP 101 to switch protocols, and the server will subsequently connect to Nexmo using TCP. This connection upgrade is handled for us by Tornado. Whenever someone makes a call to our Nexmo number, Nexmo will open a WebSocket for the duration of the call. When a WebSocket is opened and finally closed, the Tornado framework will call the open and close methods below. We do not need to do anything in either case, but we will print messages so that we can follow what is going on when we run the server.
Now that we have an open connection, Nexmo will send messages that we handle in the on_message method. The first message we will receive from Nexmo will be plain text with metadata. Upon receiving this message, we will set the whoami property of the WSHandler to be able to identify the speaker. Afterwards, we will create a wave header that we will send to the Translator Speech API. To send messages to the Translator Speech API, we will create a translator_future. Depending on the caller, i.e. the person who the message comes from, we will create the translator_future with the respective language variables so that the API knows from which language to translate into which other language.
A translator_future is another WebSocket that connects to the Speech Translator API. We use it to pass on the messages we receive from the Nexmo Voice API. After its creation, the translator_future is stored in the variable ws and used to send the wave header we created before. Each subsequent message from Nexmo will be a binary message. These binary messages are passed to the Translator Speech API using the translator_future which processes the audio and returns the transcribed translation.
When we initialize the translator_future, we state that when the Translator Speech API has processed our message it should call the method speech_to_translation_completed. This method will, upon receiving a message, check that the message is not empty and then speak the message in the language voice of the receiver of the message. It will only speak the message for the other caller, not for the person who initially spoke. Additionally, we will print the translation to the terminal.
Replace the WSHandler from the template with this code:
class WSHandler(websocket.WebSocketHandler):
    whoami = None

    def open(self):
        print("Websocket Call Connected")

    def translator_future(self, translate_from, translate_to):
        uri = "wss://dev.microsofttranslator.com/speech/translate?from={0}&to={1}&api-version=1.0".format(translate_from[:2], translate_to)
        request = httpclient.HTTPRequest(uri, headers={
            'Authorization': 'Bearer ' + azure_auth_client.get_access_token(),
        })
        return websocket.websocket_connect(request, on_message_callback=self.speech_to_translation_completed)

    def speech_to_translation_completed(self, new_message):
        if new_message == None:
            print("Got None Message")
            return
        msg = json.loads(new_message)
        if msg['translation'] != '':
            print("Translated: " + "'" + msg['recognition'] + "' -> '" + msg['translation'] + "'")
            for key, value in conversation_id_by_phone_number.iteritems():
                if key != self.whoami and value != None:
                    if self.whoami == CALLER:
                        speak(call_id_by_conversation_id[value], msg['translation'], VOICE2)
                    else:
                        speak(call_id_by_conversation_id[value], msg['translation'], VOICE1)

    @gen.coroutine
    def on_message(self, message):
        if type(message) == str:
            ws = yield self.ws_future
            ws.write_message(message, binary=True)
        else:
            message = json.loads(message)
            self.whoami = message['whoami']
            print("Sending wav header")
            header = make_wave_header(16000)

            if self.whoami == CALLER:
                self.ws_future = self.translator_future(LANGUAGE1, LANGUAGE2)
            else:
                self.ws_future = self.translator_future(LANGUAGE2, LANGUAGE1)

            ws = yield self.ws_future
            ws.write_message(header, binary=True)

    @gen.coroutine
    def on_close(self):
        print("Websocket Call Disconnected")
In the above we use a function called make_wave_header to create the header that the Translator Speech API expects. The code used to create a WAV header was copied from the Python-Speech-Translate project and is reproduced below.
Copy the make_wave_header function to the end of your main.py file:
def make_wave_header(frame_rate):
    """
    Generate WAV header that precedes actual audio data sent to the speech translation service.
    :param frame_rate: Sampling frequency (8000 for 8kHz or 16000 for 16kHz).
    :return: binary string
    """

    if frame_rate not in [8000, 16000]:
        raise ValueError("Sampling frequency, frame_rate, should be 8000 or 16000.")

    nchannels = 1
    bytes_per_sample = 2

    output = StringIO.StringIO()
    output.write('RIFF')
    output.write(struct.pack('<L', 0))
    output.write('WAVE')
    output.write('fmt ')
    output.write(struct.pack('<L', 18))
    output.write(struct.pack('<H', 0x0001))
    output.write(struct.pack('<H', nchannels))
    output.write(struct.pack('<L', frame_rate))
    output.write(struct.pack('<L', frame_rate * nchannels * bytes_per_sample))
    output.write(struct.pack('<H', nchannels * bytes_per_sample))
    output.write(struct.pack('<H', bytes_per_sample * 8))
    output.write(struct.pack('<H', 0))
    output.write('data')
    output.write(struct.pack('<L', 0))

    data = output.getvalue()
    output.close()

    return data
Lastly, the speak function used above is a simple wrapper around the nexmo_client method send_speech. As you can see below, it will print some information that may be useful to you when running the code and then use the Nexmo API to instruct Nexmo to speak a given text with a given voice_name. Copy the speak function below to the end of your main.py file.
def speak(uuid, text, vn):
    print("speaking to: " + uuid  + " " + text)
    response = nexmo_client.send_speech(uuid, text=text, voice_name=vn)
    print(response)
If you followed along, you have now successfully built your own Babel fish! If you haven’t followed along you can find the final code here. Run it by typing python main.py into your terminal. Now team up with a fellow human (or use two phones) and call your Nexmo number from two lines. You should hear your welcome message and then be able to talk to each other in your two chosen languages. Let us recap: We began by setting up our environment, as well as our Nexmo Application and the Microsoft Translator Speech API. Then, we built our Tornado WebServer which allowed us to use WebSockets to handle voice calls and pass the speech of the voice call on to the Translator Speech API. The API then translates and transcribes the speech for us. Upon receiving the result, we spoke the message in the new language. Our service handles bi-directional calls due to our routing logic which means that our service will, after connecting two callers, translate either person’s speech before relaying it, thus enabling them to communicate in their chosen languages. And there we have it! Our working Babel fish! I'm afraid our DIY babel fish does not look quite as endearing as the one from the movie but it is a working alternative. If you have any questions, please reach out on @naomi_pen or find me on naomi.codes.
If you’re interested in exploring this further why not implement logic that allows users to choose languages at the beginning of the call. Such logic might also remove the necessity for hard coding our primary phone number. For a fun project you could also explore making this work for conference calls and creating transcripts for each call. Lastly, I would expect that you might want to work on the security of your service and not let random people call your service. You could achieve this by only letting a certain number (or multiple) use your service and having logic to initiate a second leg of the call from within the call to allow you to invite other users without giving them the privilege of using your Babel fish service. I would love to hear what you build on Twitter @naomi_pen!