Share:
Mark was nominally responsible for Nexmo's client libraries (although he only writes the Python and Java libraries). He was originally a Java developer, has been a Python developer for 18 years, and is increasingly dabbling with Go and Rust. He likes pushing programming languages to the limit and then teaching these techniques to other programmers. He has a Viking hat, but he isn't a Viking, and he's Judy2k on Twitter for reasons he won't discuss.
Getting Out of a Bad Date (with Fitbit and Nexmo)
Time to read: 11 minutes
So, you've been set up for a blind date by your friends Bob and Carol, who it turns out are fantastically bad judges of character. Your date is rude, has terrible table manners and to be honest, smells funny.
You need to get out of this date, fast.
You've got two choices. The first is a tried-and-tested classic. You point at something over their shoulder and shout "Look at that!" While they're distracted you kick over your chair and run for the door. Don't forget to pick up your phone first.
Of course, this kind of behaviour tends to hurt people's feelings. What you need is a phone call from a friend who needs urgent help, right now. And you know who's your friend? Nexmo is your friend. Wouldn't it be great if you could trigger a phone call by just fiddling with your watch? I'm going to show you how to do just that, with the Fitbit Ionic smartwatch and the Nexmo Voice API.
Thanks to @aaronbassett for this idea!
I was recently given a Fitbit Ionic to play with. Like all the Fitbit devices, it's great for tracking your health—counting your steps, tracking your sleep, etc. The thing that sets the Ionic apart is that you can program it easily using JavaScript, CSS and SVG. It's got a bunch of sensors to play with, including an accelerometer, barometer, gyroscope, heart-rate monitor, and an orientation sensor. It's also got APIs for building and connecting to companion apps that run on your phone.
Now, I suspect Fitbit expects you to write useful Ionic apps for tracking your snowboarding, kayaking or surfing. I wanted to build something that was a little bit less tiring to test.
The Nexmo Voice API allows you to create apps that can make or receive phone calls. It contains features that enable you to build complete voice menu systems. But we're just going to use it to make an outbound call (from Nexmo) to your phone, triggered by an app running on the Ionic. Creating this application requires various components, so let's talk about the different parts we need to build.
We're going to build an app called Bail Out! for getting out of bad dates. All the source code is on GitHub if you want to see how it looks when it's all put together.
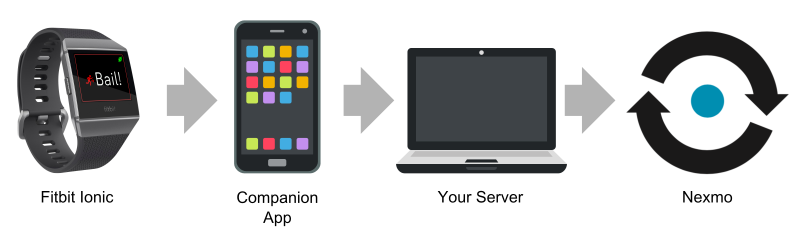
The basic idea seems pretty straightforward. We have a button on the Ionic. When you press it, Nexmo makes a call to your phone. In practice, it's a little more complex. The Ionic can't make HTTP requests. To get internet connectivity, you need to write a companion app that runs inside the Fitbit app on your phone. So the Ionic connects to the companion app, and the companion app makes the HTTP request.
Now a common mistake people make when they first build mobile apps for Nexmo is to embed their Nexmo secret key inside their app! Don't do this! It would be too easy for people who have downloaded your app to take it apart, extract your secret key, and then spend all the money in your Nexmo account!
Instead, you need to write a small service (or serverless function!) that runs on your server. It listens for requests from your companion app and makes the calls to Nexmo. You should include some authentication, but the main advantage is that even if someone can make calls to your service, they are limited to the specific range of functionality your service exposes. In this case, just the ability to call someone and play a pre-recorded message.
So we actually have three things to write:
A Fitbit Ionic app with a big button.
A companion app that listens to requests from the Ionic app and makes an HTTP request to our server.
A small server, which takes a request from the companion app and asks Nexmo to call your phone.
This is going to be fun! Let's get started...
The first thing you're going to want to do is log into studio.fitbit.com—this is the online IDE Fitbit have developed to help you build apps for the Ionic. Once you're logged in, press the New Project button, select Starter and hit Create.
You should see something an online IDE that looks like this:
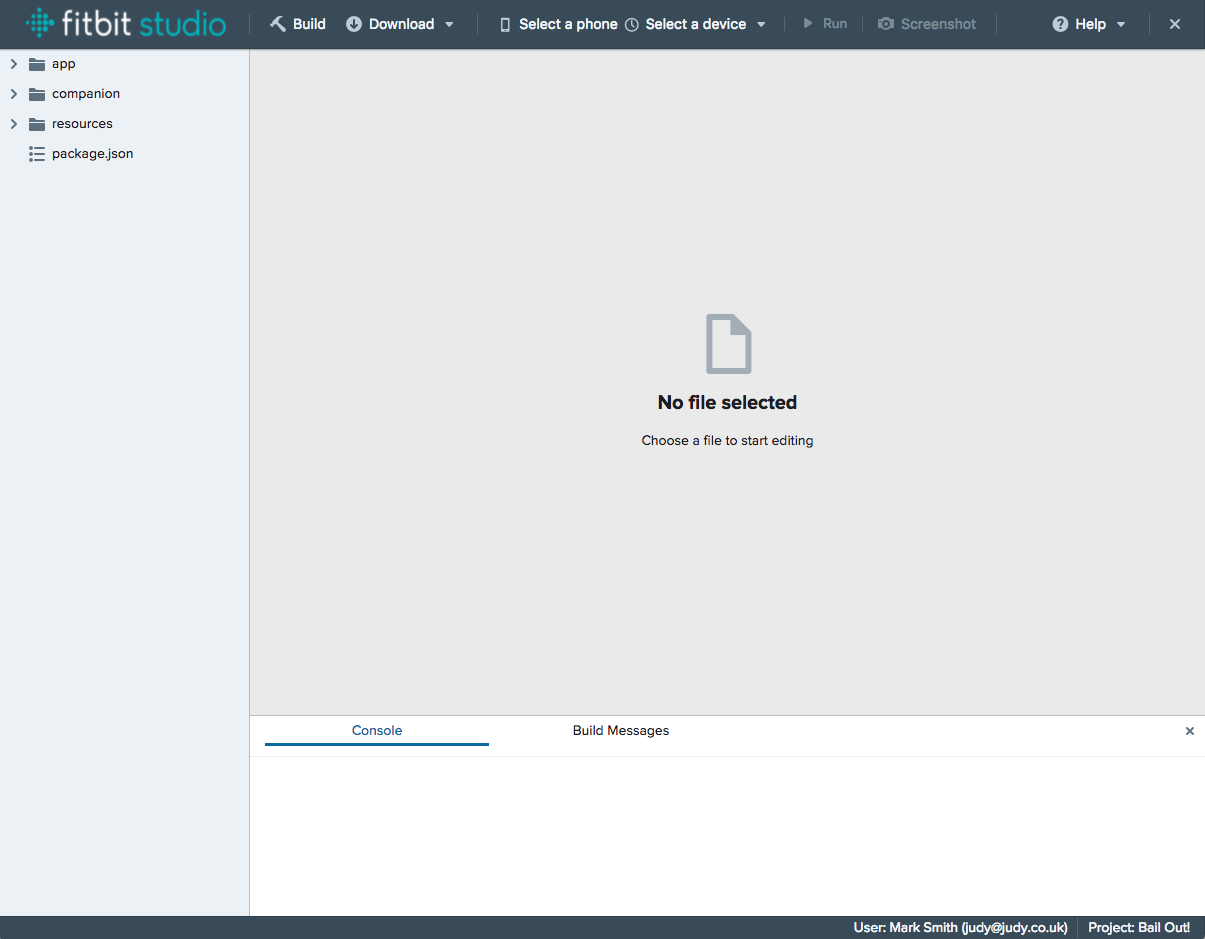
It's worth getting this sample Ionic and companion app installed on your phone, just to make sure everything's working.
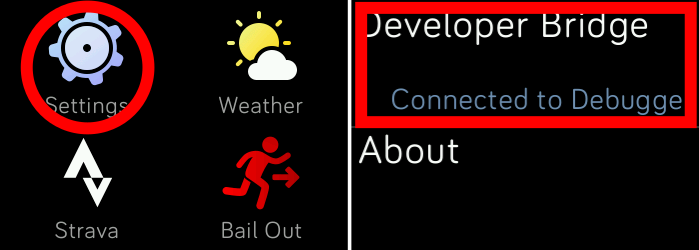
Connecting your Ionic can be a little fiddly. You need to select Settings on your Ionic and scroll down to the bottom, where you should see Developer Bridge. When you press this, it should connect to the IDE. It can take a little while, and once it has connected, you'll probably need to hit Refresh under the Select a device menu in Fitbit Studio. Hopefully, you should now see Ionic in the menu, and if you select it, it should say "Connected". The Ionic does disconnect after a short while, so you'll need to follow these steps again from time-to-time.
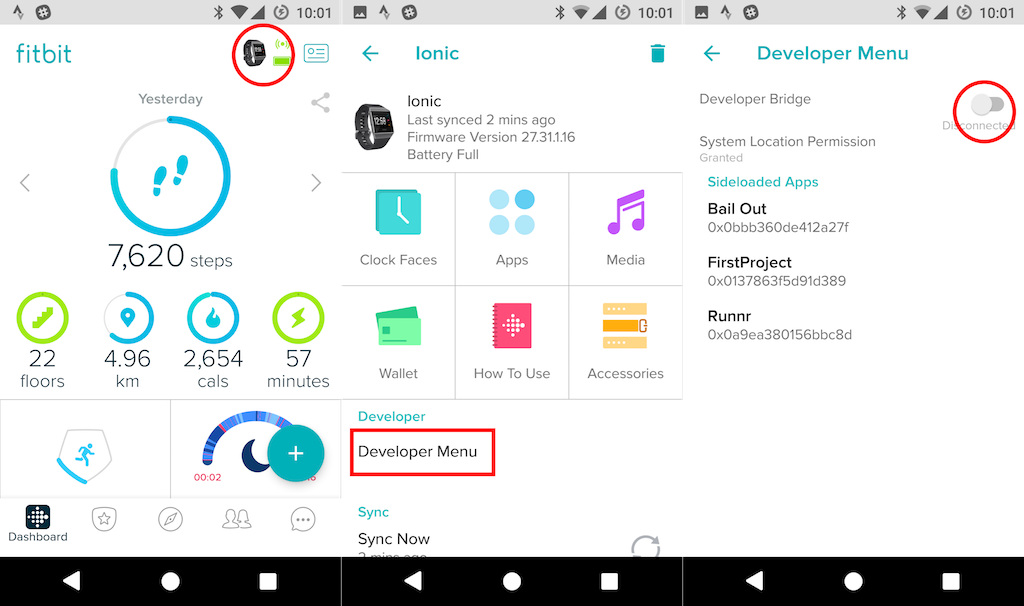
You connect your phone in a similar way.
Open the app on your phone (I'm on Android)
open your account page
click on your configured **Ionic** device
open the **Developer Menu**, and
toggle the **Developer Bridge** switch.
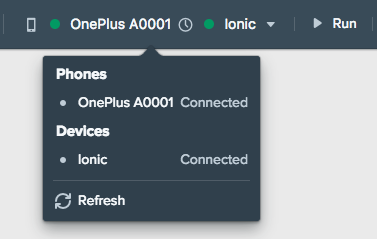
Connecting can take a while. Once it's connected, select **Refresh** in Fitbit Studio, and you should see your phone listed. Click it to connect it to Fitbit Studio.
Now let's install the sample app to the phone and Ionic, to check that everything's working. Press the Run button at the top of the screen.
First, let's build a UI. It won't do anything until we've written some code, but it'll give us something to see. Our GUI description is in resources/index.gui, and it's a subset of SVG:
<svg>
  <image id="connectivityicon" href="disconnected.png" x="100%-50" y="10" width="40" height="40"/>
  <use id="bailoutbutton" href="#square-button-icon" y="0" width="100%" height="100%" fill="fb-red">
    <set href="#text" attributeName="text-buffer" to="Bail!" />
    <set href="#text" attributeName="font-size" to="100" />
    <set href="#image" attributeName="href" to="icon.png" />
    <set href="#image" attributeName="height" to="60" />
    <set href="#image" attributeName="width" to="60" />
  </use>
</svg>
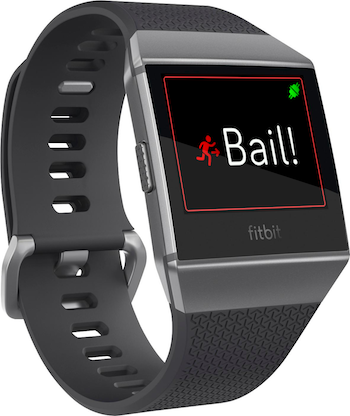
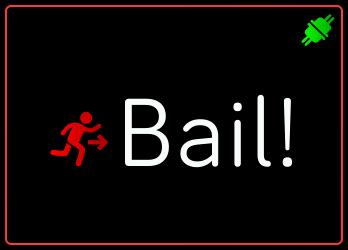
Note that almost all of this is configuration for the big button, which is a "square button with an icon." We'll also need icons for the big button, and "connected" and "disconnected" images for the connectivity icon. You can find these in the GitHub repo: button_icon.png, connected.png, and disconnected.png. They all go in the resources folder. While you're there, you should also grab icon.png, which will replace the application's default Fitbit logo icon on the watch with a cool exit logo!
You'll also need to update widgets.gui so that it looks like this:
<svg>
  <defs>
    <link rel="stylesheet" href="styles.css" />
    <link rel="import" href="/mnt/sysassets/widgets_common.gui" />
    <link rel="import" href="/mnt/sysassets/widgets/square_button_widget.gui" />
  </defs>
</svg>
This just makes the "square button widget" available to our app.
If you want to, you can hit Run again to see the UI on the watch. It won't do anything yet. Let's fix that...
Your Ionic app code should go into a single index.js file inside of the app directory. This JavaScript file gets executed when the watch app is started up. I've put all the behaviour inside a BailOutUI class to avoid having lots of global variables and functions. Everything's kicked off in the constructor, which looks up the UI elements (a big button, and a small icon to indicate that the Ionic is connected to the phone). It then starts off a one-second timer for updating the connectivity icon.
import document from "document";
import * as messaging from "messaging";

const CONNECTED_ICON = "connected.png";
const DISCONNECTED_ICON = "disconnected.png";

class BailOutUI {
  constructor() {
    // Look up our two UI elements:
    this.bailOutButton = document.getElementById("bailoutbutton");
    this.connectivityIcon = document.getElementById("connectivityicon");

    // These two methods are callbacks, so we need to bind them to this instance:
    this.bailOutActivate = this.bailOutActivate.bind(this);
    this.connectivityCheck = this.connectivityCheck.bind(this);

    this.bailOutButton.onactivate = this.bailOutActivate;

    // Once a second, we see if we're connected to the companion app:
    setInterval(this.connectivityCheck, 1000);
  }

  // Send a message to the companion app, telling it to trigger a "bail out".
  bailOutActivate() {
    messaging.peerSocket.send({
      'type': 'event',
      'event': 'bailout',
    })
  };

  // Check if we have a connection to the companion app, and update the UI accordingly.
  connectivityCheck() {
    this.updateConnectivity(messaging.peerSocket.readyState == messaging.peerSocket.OPEN);
  }

  // Update the UI to indicate if we're connected to the companion app or not.
  updateConnectivity(connected) {
    this.connectivityIcon.href = connected ? CONNECTED_ICON : DISCONNECTED_ICON;
  }
}

var ui = new BailOutUI();
Okay! So we've written the Ionic app, and it knows how to send a message to the companion app (in the bailOutActivate method). But the companion app doesn't currently do anything with the message. So, let's write the companion app in companion/index.js.
import { me } from "companion";
import { settingsStorage } from "settings";
import * as messaging from "messaging";

// CHANGE THIS to your phone number:
const MY_PHONE_NUMBER = "447700900655";
// CHANGE THIS to your BailOut server URL:
const BAILOUT_ENDPOINT = "https://myngrokurl.ngrok.io/bail";

if (!me.permissions.granted("access_internet")) {
  console.log("We're not allowed to access the internet :-(");
}

// Listen for the onmessage event
messaging.peerSocket.onmessage = function(evt) {
  if (evt.data.type == "event") {
    if (evt.data.event == "bailout") {
      // Get the phone number from the settings screen:
      fetch(BAILOUT_ENDPOINT, {
        method: "POST",
        body: JSON.stringify({ number: MY_PHONE_NUMBER }),
        headers: {
          "Content-Type": "application/json"
        }
      });
    }
  }
};

// Listen for the onerror event
messaging.peerSocket.onerror = function(err) {
  // Handle any errors
  console.log("Connection error: " + err.code + " - " + err.message);
};You'll want to change MY_PHONE_NUMBER to your cell phone, and change the BAILOUT_ENDPOINT to the URL of your server (which we'll write in a moment). You'll also need to open package.json and make sure Internet is checked in the Requested Permissions section - that will allow the companion app to make calls to your server. So now we need a server.
If I'm being honest, I'm a Python person, but seeing as everything here is already in JavaScript, I'm going to write the server using Node and ExpressJS. If you prefer a different language, feel free to port it—there are Nexmo client libraries for JavaScript, Java, Python, PHP, Ruby, and DotNet! It's pretty short—it waits for a POST request from the companion app, and forwards it on to the Nexmo Voice API:
require("dotenv").config();

const express = require("express");
const Nexmo = require("nexmo");

const nexmo = new Nexmo({
  apiKey: process.env.NEXMO_API_KEY,
  apiSecret: process.env.NEXMO_API_SECRET,
  applicationId: process.env.NEXMO_APPLICATION_ID,
  privateKey: process.env.NEXMO_APPLICATION_PRIVATE_KEY_PATH
});

// Construct an absolute URL given a request object and the desired path.
function absoluteURL(req, path) {
  return (
    (req.get("x-forwarded-proto") || req.protocol) +
    "://" +
    req.get("host") +
    path
  );
}

const app = express();

// Post {number: 'your phone number'} to schedule a bail-out call.
app.post("/bail", express.json(), (req, res) => {
  nexmo.calls.create({
    to: [
      {
        type: "phone",
        number: req.body.number
      }
    ],
    from: {
      type: "phone",
      number: process.env.NEXMO_NUMBER
    },
    answer_url: [absoluteURL(req, "/bail/emergency-message")]
  });
  res.json({ status: "ok" });
});

// This is called by Nexmo when the call is picked up.
// It tells Nexmo to read out a message, but it could do lots of things!
// Check out /api/voice/ncco to see what you could do!
app.get("/bail/emergency-message", (req, res) => {
  res.json([
    {
      action: "talk",
      voiceName: "Russell",
      text: "Help! I've been arrested and I need you to bail me out!"
    }
  ]);
});

app.listen(3000, () => {
  console.log("BailOut Server on port 3000");
});
While you're developing, you can run the server locally, and use ngrok to make the server publicly available on the internet, so your phone can reach it. We have a tutorial on how to do that!
You'll need a Nexmo Number (which is the number Nexmo will call you from when calling your phone). You can get one from the Nexmo Dashboard. You'll also need to set up a Nexmo Application to be able to make calls. It's easiest to do this using our CLI tool:
Don't worry about the "example.com" URLs—you won't need to change them for this app. Check out nexmo --help to see all the things this great tool can help you out with!
Create a file called .env and configure it with your details. It should look a bit like this:
Change the file to contain your Nexmo credentials, the details of the application you just created, and the Nexmo virtual number you bought in the Dashboard.
Now you have a server and a Nexmo Number, cd to the directory containing your .env file and you can start up your server like this:
Make sure you're running ngrok at the same time in another window!
Deploy your Ionic and companion apps from Fitbit Studio, wait for the connection icon to turn green, and then press the big button in the middle of the screen. Your phone should ring!
If you dig into the GitHub repo for this project, you'll see that I've added a Settings screen for the user to enter their phone number, instead of hard-coding it into the companion app. I've also delayed the bail-out call for 30 seconds, so it doesn't happen the second you tap your watch! You'll see there's also extra logging to help diagnose the cause of any errors you see. There are a few places (such as in the companion app code) where some error-handling would be a good idea. I'll leave that to you! You can also try changing the message that's read to you, or changing the voice.
The power of JavaScript along with the Fitbit Studio can make getting started building apps for the Ionic really quick. There's a lot to learn about how to develop for the Ionic and the phone though, but the documentation is getting better all the time.
If you enjoyed this post, you should follow our Nexmo Developer Twitter account. It's my favourite source of interesting technical posts!
You may also be interested in:
Share:
Mark was nominally responsible for Nexmo's client libraries (although he only writes the Python and Java libraries). He was originally a Java developer, has been a Python developer for 18 years, and is increasingly dabbling with Go and Rust. He likes pushing programming languages to the limit and then teaching these techniques to other programmers. He has a Viking hat, but he isn't a Viking, and he's Judy2k on Twitter for reasons he won't discuss.