Executar o servidor Flask
Antes de iniciar o servidor, você precisará definir a configuração em um .env arquivo. Comece com o texto a seguir e preencha seus dados:
Copiar
# Do not use this in production:
FLASK_DEBUG=true

# Replace the following with any random value you like:
FLASK_SECRET_KEY=RANDOM-STRING_CHANGE-THIS-Ea359

# Get from ${CUSTOMER_DASHBOARD_URL}/your-numbers
NEXMO_NUMBER=447700900025

# Get the following from ${CUSTOMER_DASHBOARD_URL}/settings
NEXMO_API_KEY=abcd1234
NEXMO_API_SECRET=abcdef12345678
Agora, inicie seu aplicativo com:
Copiar
# You may need to change the path below if your Flask app is in a different Python file:
$ FLASK_APP=smsweb/server.py flask run
* Serving Flask app "smsweb.server"
* Running on http://127.0.0.1:5000/ (Press CTRL+C to quit)
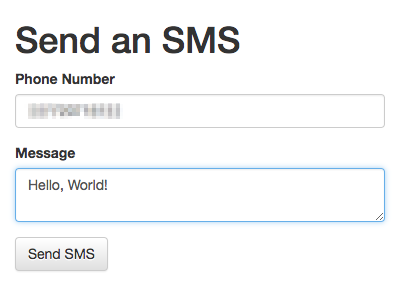
Agora, se você carregar http://localhost:5000/, você deverá ver algo assim:
Como enviar mensagens SMS com Python, Flask e Nexmo
Este tutorial apresenta como enviar SMS com Python, utilizando a biblioteca Nexmo para Python. Ele começa mostrando como enviar SMS a partir do REPL e, em seguida, ensina como criar um aplicativo Flask simples com recursos de SMS.
Etapas
1
Introdução a este tutorial2
Prerequisites3
Instale o SDK do servidor Python da Vonage4
Enviar um SMS a partir do REPL do Python5
Configurar um aplicativo Flask para envio de SMS6
Adicionar uma tela “Enviar SMS”7
Executar o servidor Flask8
Processar o envio do formulário9
E agora?