Vonage Video API でビデオチャットにテキスト機能を追加する
所要時間:2 分
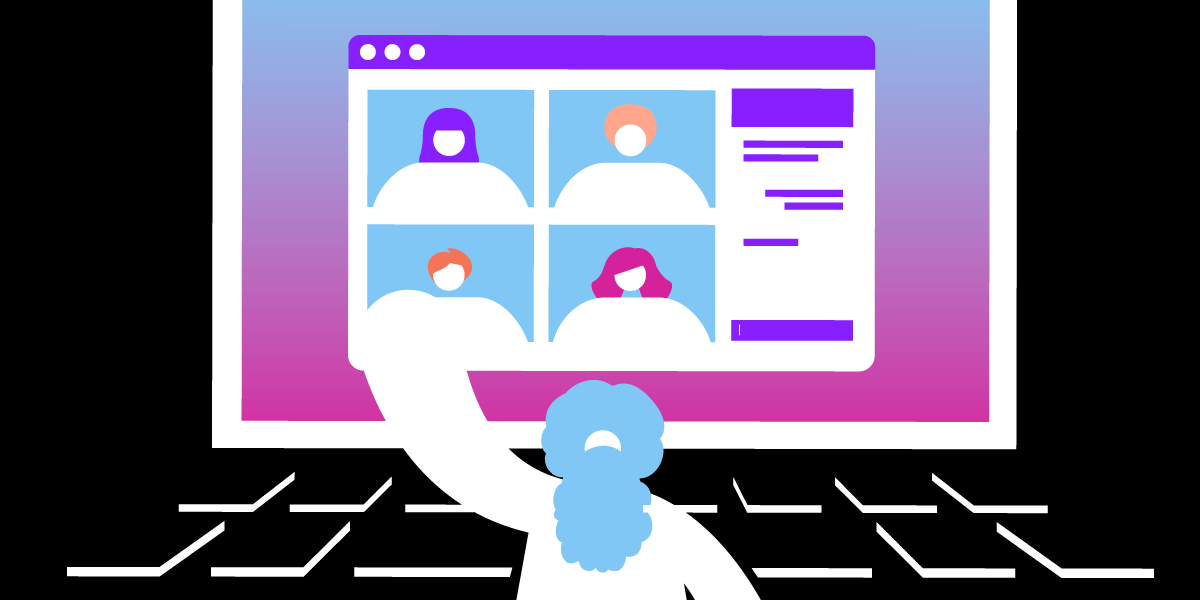
このチュートリアルシリーズでは Vonage Video API (旧TokBox OpenTok)を紹介します。Video API は非常に堅牢でカスタマイズ性が高く、各記事では API を使って特定の機能を実装する方法を紹介します。今回は、基本的な音声ビデオチャットにテキストを追加する方法を紹介します。
このアプリケーションにはサーバーサイドのコードが必要なので、ここでは Glitchを使います。また、このGlitchプロジェクトからコードをダウンロードし、自分のサーバーやホスティング・プラットフォームにデプロイすることもできます(プラットフォームの要件に応じて、いくつかの設定を調整する必要があるかもしれません)。
このシリーズでは、Video API 自体に焦点を当てるため、フロントエンドのフレームワークは使用せず、Vanilla Javascript だけを使用します。このチュートリアルの最後には、テキストチャットの機能を持つVideoアプリケーションを作成できるようになっているはずです。テキスト・チャットは シグナリング API.
 Screenshot of video chat with text chat
最終コード 最終コードこのアプリケーションの最終的なコードは GitHub リポジトリまたは Glitchでリミックス.
始める前に、Vonage Video APIアカウントが必要です。 こちら.また Node.jsがインストールされている必要があります(Glitchを使用していない場合)。
このチュートリアルは、シリーズの最初の紹介記事を基に構成されています: 基本的なビデオチャットの構築.Video API を初めて使用する場合は、以下の基本的なセットアップをカバーしているので、この記事を参照することを強くお勧めします:
Video APIプロジェクトの作成
グリッチでのセットアップ
プロジェクトの基本構造
セッションの初期化
セッションへの接続、購読、公開
ビデオチャットの基本的なレイアウトスタイル
Video APIでテキスト・チャットを実装するには、次のようにする。 シグナリング API.このシグナリングの仕組みにより、セッションに接続されたクライアント同士がテキストやデータを送信できるようになる。ここでは、テキストのみに焦点を当てます。
Video API Client SDK は、クライアントがシグナルを受信するとイベントを Dispatch します。接続されているすべてのクライアントにメッセージが表示される基本的なテキストチャットの場合、Video API Client SDK の signal()メソッドを使用します。 セッションオブジェクトのメソッドを使用します。によってディスパッチされたシグナル イベントをリッスンすることで、参加クライアントはそのシグナルを受け取ります。 セッションオブジェクトによってディスパッチされるシグナルイベントをリッスンすることで、そのシグナルを受け取ります。
を介してアクセスできる内容を詳しく見るには、以下のリンクをクリックしてください。 セッションオブジェクト、そのプロパティ、メソッド、イベントの詳細については SessionオブジェクトのSDKリファレンス.
基本的なビデオチャットの上に構築しているので、まず、前のチュートリアルで構築した基本的なビデオチャットのプロジェクトをリミックスすることから始めます。下の大きなRemixボタンをクリックしてください。👇
フォルダー構造は次のようになっているはずだ:
 Folder structure of the project
冒頭で述べたように、TokBox OpenTokはVonage Video APIになりました。パッケージ名に変更はありませんので、コードの中でOpenTokを参照することに変わりはありません。
グリッチ・プロジェクトをリミックスした場合、あなたの server.jsファイルはすでにこのようになっているはずだ:
const express = require("express");
const app = express();
const OpenTok = require("opentok");
const OT = new OpenTok(process.env.API_KEY, process.env.API_SECRET);

let sessions = {};

app.use(express.static("public"));

app.get("/", (request, response) => {
  response.sendFile(__dirname + "/views/landing.html");
});

app.get("/session/:room", (request, response) => {
  response.sendFile(__dirname + "/views/index.html");
});

app.post("/session/:room", (request, response) => {
  const roomName = request.params.room;
  // Check if the session already exists
  if (sessions[roomName]) {
    // Generate the token
    generateToken(roomName, response);
  } else {
    // If the session does not exist, create one
    OT.createSession((error, session) => {
      if (error) {
        console.log("Error creating session:", error);
      } else {
        // Store the session in the sessions object
        sessions[roomName] = session.sessionId;
        // Generate the token
        generateToken(roomName, response);
      }
    });
  }
});

function generateToken(roomName, response) {
  // Configure token options
  const tokenOptions = {
    role: "publisher",
    data: `roomname=${roomName}`
  };
  // Generate token with the Video API Client SDK
  let token = OT.generateToken(
    sessions[roomName],
    tokenOptions
  );
  // Send the required credentials back to to the client
  // as a response from the fetch request
  response.status(200);
  response.send({
    sessionId: sessions[roomName],
    token: token,
    apiKey: process.env.API_KEY
  });
}

const listener = app.listen(process.env.PORT, () => {
  console.log("Your app is listening on port " + listener.address().port);
});
ビデオチャットを開始するには .envファイルにアクセスし、プロジェクトのAPIキーとシークレットを入力してください。これが完了したら、テキストチャットを動作させるためにクライアント側のコードに取り組みます。 server.jsファイルをもう一度見てみましょう。
私たちのアプリケーションは2つのページから構成されます。2つのテキスト入力があるランディングページ。1つはユーザーがセッションを作成するためのもので、私たちはこれを「ルーム」と呼びます。もう一つのテキスト入力は、ユーザーが自分自身を識別するための表示名を入力するためのものです。
このページには、ユーザーが部屋名とユーザー名を送信するための2つの入力フィールドを持つシンプルなフォーム要素があります。フォームにユーザー名フィールドを追加してみましょう。
<form class="registration" id="registration">
  <label>
    <span>Room</span>
    <input
      type="text"
      name="room-name"
      placeholder="Enter room name"
      required
    />
  </label>

  <!-- Add the user name input field and label -->
  <label>
    <span>User name</span>
    <input
      type="text"
      name="user-name"
      placeholder="Enter your name"
      required
    />
  </label>
  <button>Enter</button>
</form>
また、チャットボックスを index.htmlページに追加する必要があります。ヘッダー、メッセージを表示するエリア、メッセージを入力して送信するための入力エリアを持つチャットウィンドウのマークアップを追加しましょう。スクリーンスペースを最大化するために、チャットウィンドウはデフォルトではオフスクリーンで、ページの右下にあるチャットボタンをクリックした時のみトリガーされます。
 Chat button to trigger chat window
次のセクションで、ボタンを上のデザインのように見せるためのスタイルを追加します。
<button class="btn-chat" id="showChat" aria-label="Show chat">
  <svg viewBox="0 0 512 512">
    <path
      fill="white"
      d="m512 346.5c0-63.535156-36.449219-120.238281-91.039062-147.820312-1.695313 121.820312-100.460938 220.585937-222.28125 222.28125 27.582031 54.589843 84.285156 91.039062 147.820312 91.039062 29.789062 0 58.757812-7.933594 84.210938-23.007812l80.566406 22.285156-22.285156-80.566406c15.074218-25.453126 23.007812-54.421876 23.007812-84.210938zm0 0"
    />
    <path
      fill="white"
      d="m391 195.5c0-107.800781-87.699219-195.5-195.5-195.5s-195.5 87.699219-195.5 195.5c0 35.132812 9.351562 69.339844 27.109375 99.371094l-26.390625 95.40625 95.410156-26.386719c30.03125 17.757813 64.238282 27.109375 99.371094 27.109375 107.800781 0 195.5-87.699219 195.5-195.5zm-225.5-45.5h-30c0-33.085938 26.914062-60 60-60s60 26.914062 60 60c0 16.792969-7.109375 32.933594-19.511719 44.277344l-25.488281 23.328125v23.394531h-30v-36.605469l35.234375-32.25c6.296875-5.761719 9.765625-13.625 9.765625-22.144531 0-16.542969-13.457031-30-30-30s-30 13.457031-30 30zm15 121h30v30h-30zm0 0"
    />
  </svg>
</button>
また、チャット・ウィンドウのマークアップを index.htmlファイルに追加したい。
 Bare bones chat window which will slide in from the right
<aside id="chatWindow">
  <header class="chat-header">
    <h1><span id="roomName"></span>Chat</h1>
    <button class="btn-close" id="closeChat" aria-label="Close chat">
      <svg viewBox="0 0 47.971 47.971" role="img">
        <path
          d="M28.228 23.986L47.092 5.122a2.998 2.998 0 000-4.242 2.998 2.998 0 00-4.242 0L23.986 19.744 5.121.88a2.998 2.998 0 00-4.242 0 2.998 2.998 0 000 4.242l18.865 18.864L.879 42.85a2.998 2.998 0 104.242 4.241l18.865-18.864L42.85 47.091c.586.586 1.354.879 2.121.879s1.535-.293 2.121-.879a2.998 2.998 0 000-4.242L28.228 23.986z"
        />
      </svg>
    </button>
  </header>

  <section id="messageArea" class="messages"></section>

  <form class="chat-form" id="chatForm">
    <input id="chatInput" type="text" />
    <input type="submit" value="Send" />
  </form>
</aside>
このアプリケーションの主な機能はビデオチャットであるため、私たちのチャットインターフェースは、必要なときまで見えないようになっています。チャットインターフェースを切り替えるには、ページの右下にあるチャットボタンをクリックします。このボタンにはチャットをトリガーすることを示すSVGアイコンがあります。
.btn-chat {
  height: 3.5em;
  width: 3.5em;
  background-color: black;
  border-radius: 50%;
  box-shadow: 0 3px 6px 0 rgba(0, 0, 0, 0.2), 0 3px 6px 0 rgba(0, 0, 0, 0.19);
  position: fixed;
  right: 1em;
  bottom: 1em;
}

.btn-chat svg {
  height: 1.5em;
  width: 1.5em;
}デフォルトでは、ビューポートの外にチャットウィンドウを変換するために CSS を使用しています。誰かがチャットアイコンをクリックすると、CSS クラスが切り替わります。 translateX値を変更する CSS クラスをトグルします。
aside {
  position: fixed;
  top: 0;
  right: 0;
  transform: translateX(100%);
  display: flex;
  flex-direction: column;
  min-width: 20em;
  width: 25%;
  height: 100%;
  box-shadow: 0 1px 5px rgba(0, 0, 0, 0.12), 0 1px 3px rgba(0, 0, 0, 0.24);
  transition: transform 0.5s ease;
}

aside.active {
  transform: translateX(0);
}ヘッダー、メッセージエリア、メッセージ入力フォームにもスタイルを追加してみよう。
.chat-header {
  background-color: white;
  box-shadow: 0 1px 5px rgba(0, 0, 0, 0.12), 0 1px 3px rgba(0, 0, 0, 0.24);
  display: flex;
  align-items: center;
}

.btn-close {
  margin-left: auto;
  height: 2em;
  width: 2em;
  background: transparent;
  border: none;
  cursor: pointer;
}

.btn-close svg {
  height: 1em;
  width: 1em;
}

.messages {
  flex: 1;
  display: flex;
  flex-direction: column;
  overflow-y: scroll;
  padding: 0.5em;
  box-shadow: 0 1px 5px rgba(0, 0, 0, 0.12), 0 1px 3px rgba(0, 0, 0, 0.24);
  background-color: rgba(255, 255, 255, 0.75);
}

.messages p {
  margin-bottom: 0.5em;
  display: flex;
  word-break: break-word;
}

.chat-form {
  padding: 0.5em;
  background-color: white;
  display: flex;
  align-items: center;
}

.chat-form input[type="text"] {
  flex: 1;
}

.chat-form input[type="submit"] {
  margin-left: 0.5em;
  align-self: stretch;
}これらのスタイルでは、入室後、ファイルの右下にチャットアイコンが表示されます。 index.htmlアイコンが表示されるはずです。しかし、それをクリックしても、まだ何もできません。
ファイルに、チャットウィンドウをスライド表示するCSSクラスをトグルするイベントハンドラを追加してみましょう。 client.jsファイルに追加しましょう。同様に、チャットウィンドウのクローズアイコンにイベントハンドラを追加します。
const showChatBtn = document.getElementById("showChat");
showChatBtn.addEventListener(
  "click",
  event => {
    const chatWindow = document.getElementById("chatWindow");
    chatWindow.classList.toggle("active");
  },
  false
);

const closeChatBtn = document.getElementById("closeChat");
closeChatBtn.addEventListener(
  "click",
  event => {
    const chatWindow = document.getElementById("chatWindow");
    chatWindow.classList.remove("active");
  },
  false
);
チャットインターフェースのスタイルはこれだけではありません。
ベース・プロジェクトにもう少し手を加えて、最も基本的なテキスト・チャットを使えるようにしてみよう。
変数を session変数を initializeSessionファイルの先頭でグローバルに宣言します。 client.jsファイルの先頭でグローバルに宣言します。
let session;

function initializeSession(apiKey, sessionId, token) {
  // Create a session object with the sessionId
  session = OT.initSession(apiKey, sessionId);

  // All the rest of the code
}チャットフォームにイベントリスナーを追加し、フォームが送信されたときにセッションに接続しているすべてのクライアントにシグナルを送信します。
const chat = document.getElementById("chatForm");
const msgTxt = document.getElementById("chatInput");
chat.addEventListener(
  "submit",
  event => {
    event.preventDefault();
    session.signal(
      {
        type: "msg",
        data: `${msgTxt.value}`
      },
      () => {
        msgTxt.value = "";
      }
    );
  },
  false
);
また、Sessionオブジェクトからディスパッチされるイベントをリッスンすることで、そのメッセージを受け取るための別のイベントリスナーも必要です。 signalイベントリスナーが必要です。そのイベントからのデータペイロードは、チャットウィンドウのメッセージエリアにメッセージを表示するために使用されます。
function initializeSession(apiKey, sessionId, token) {
  // Create a session object with the sessionId
  session = OT.initSession(apiKey, sessionId);

  // All the rest of the code

  // Event listener for the msg signal
  session.on("signal:msg", event => {
    const content = event.data;
    updateChat(content);
  });
}

function updateChat(content) {
  const msgHistory = document.getElementById("messageArea");
  const msg = document.createElement("p");
  msg.textContent = content;
  msgHistory.appendChild(msg);
  msgHistory.scroll({
    top: msgHistory.scrollHeight,
    behavior: "smooth"
  });
}
これが Video API を使ったテキスト・チャットの基本的な仕組みだ。チャット・ウィンドウに何か入力して送信すると、画面に表示されるはずです。
しかし、チャットをよりユーザーフレンドリーにするために、誰がチャットで何を言ったかを識別する手段も追加したいと思います。その情報を得るために、ランディングページのユーザー名の入力を利用し、URL のクエリー文字列としてサーバーに渡します。
ページ上の以下のスクリプトは landing.htmlページに入力されたルーム名とユーザー名を index.htmlページに渡します。
const form = document.getElementById("registration");
form.addEventListener("submit", event => {
  event.preventDefault();
  location.href = `/session/${form.elements["room-name"].value}?username=${form.elements["user-name"].value}`;
});
ページがロードされると index.htmlページがロードされると POSTリクエストを session/:nameルートへのリクエストをトリガーし、URLから送信されたユーザー名を抽出してサーバーに渡します。
const url = new URL(window.location.href);
const roomName = url.pathname.split("/")[2];
const userName = url.searchParams.get("username");

fetch(location.pathname, {
  method: "POST",
  headers: { "Content-Type": "application/json" },
  body: JSON.stringify({ username: userName })
})
  .then(res => {
    return res.json();
  })
  .then(res => {
    const apiKey = res.apiKey;
    const sessionId = res.sessionId;
    const token = res.token;
    const streamName = res.streamName;
    initializeSession(apiKey, sessionId, token, streamName);
  })
  .catch(handleCallback);
では、そのルートを server.jsファイルでそのルートを修正し、部屋名とユーザー名を処理して initializeSession関数に必要な情報を返すようにします。また、リクエストのペイロードを処理するミドルウェアを含める必要があります。
// Middleware to read the body of the request
app.use(express.json());

app.post("/session/:room", (request, response) => {
  const roomName = request.params.room;
  const streamName = request.body.username;
  // Check if the session already exists
  if (sessions[roomName]) {
    // Generate the token
    generateToken(roomName, streamName, response);
  } else {
    // If the session does not exist, create one
    OT.createSession((error, session) => {
      if (error) {
        console.log("Error creating session:", error);
      } else {
        // Store the session in the sessions object
        sessions[roomName] = session.sessionId;
        // Generate the token
        generateToken(roomName, streamName, response);
      }
    });
  }
});

function generateToken(roomName, streamName, response) {
  // Configure token options
  const tokenOptions = {
    role: "publisher",
    data: `roomname=${roomName}?streamname=${streamName}`
  };
  // Generate token with the Video API Client SDK
  let token = OT.generateToken(sessions[roomName], tokenOptions);
  // Send the required credentials back to to the client
  // as a response from the fetch request
  response.status(200);
  response.send({
    sessionId: sessions[roomName],
    token: token,
    apiKey: process.env.API_KEY
  });
}
で、メッセージを入力した参加者のユーザー名を表示することができます。 client.jsのプロパティを変更することで、メッセージを入力した参加者のユーザー名を表示することができます。 dataメソッドの session.signal()メソッドのプロパティを変更することで、メッセージを入力した参加者のユーザー名を表示できるようになりました。
session.signal(
  {
    type: "msg",
    data: `${session.connection.data.split("=")[2]}: ${msgTxt.value}`
  },
  () => {
    msgTxt.value = "";
  }
);
これで、テキストメッセージを送信する際、入室時に使用したユーザー名が先頭に付加されます。
しかし、ページを更新すると、以前のチャットメッセージはすべて消えてしまいます。これは、メッセージを保存しておらず、単に画面に表示しているだけだからです。メッセージを保存する何らかのデータストアを導入しよう。
私たちは PouchDBを使いますが、これを好きなデータストアに置き換えてもかまいません。
インストール pouchdb-nodeを以下のコマンドでインストールする。 pnpmはGlitchのものであることに注意):
 pouchdb-node installation on Glitch
期待通りに動いていることを確認しよう。
const PouchDB = require("pouchdb-node");
const sessionDb = new PouchDB("sessionDb");

sessionDb.info().then(info => console.log(info));
グリッチログに以下のように表示されるはずです。
 Database information printed to console
PouchDBは完全な非同期APIを提供していますが、ユーザーがコールバック形式かプロミス形式かを選択するオプションも含まれています。このチュートリアルではpromise形式を使用し、コードにもそれを反映させます。
セッション情報をオブジェクト変数に格納する代わりに、新しいデータベースに格納します。次の行を server.jsファイルから次の行を削除する。
// We no longer need this object
let sessions = {};ルートにもっと手を加えよう。 /session/:nameルートにさらに手を加えましょう。セッションが存在する場合は、関連する情報を取得し、そこからトークンを生成します。セッションが存在しない場合は、新しいセッションを作成し、それをデータベースに保存し、それに応じてトークンを生成します。
app.post("/session/:room", (request, response) => {
  const roomName = request.params.room;
  const streamName = request.body.username;
  const isExistingSession = checkSession(roomName);

  isExistingSession.then(sessionExists => {
    if (sessionExists) {
      sessionDb
        .get(roomName)
        .then(sessionInfo => {
          generateToken(roomName, streamName, sessionInfo, response);
        })
        .catch(error => error);
    } else {
      OT.createSession((error, session) => {
        if (error) {
          console.log("Error creating session:", error);
        } else {
          const sessionInfo = {
            _id: roomName,
            sessionId: session.sessionId,
            messages: []
          };
          sessionDb.put(sessionInfo);
          generateToken(roomName, streamName, sessionInfo, response);
        }
      });
    }
  });
});

function checkSession(roomName) {
  return sessionDb
    .get(roomName)
    .then(() => {
      console.log(roomName + "exists");
      return Promise.resolve(true);
    })
    .catch(() => {
      console.log("Room does not exist");
      return Promise.resolve(false);
    });
}

function generateToken(roomName, streamName, sessionInfo, response) {
  const tokenOptions = {
    role: "publisher",
    data: `roomname=${roomName}?streamname=${streamName}`
  };
  let token = OT.generateToken(sessionInfo.sessionId, tokenOptions);
  response.status(200);
  response.send({
    sessionId: sessionInfo.sessionId,
    token: token,
    apiKey: process.env.API_KEY,
    streamName: streamName
  });
}
参加者が各参加者のビデオストリームにカーソルを合わせると名前が表示されるように、応答でストリーム名を使用してストリームにラベルを付けることができます。メソッドと initPublisher()メソッドと subscribe()メソッドは、オプションの properties引数を受け取ります。これにより、ストリームのカスタマイズ オプションを渡すことができます。
function initializeSession(apiKey, sessionId, token, streamName) {
  // Create a session object with the sessionId
  session = OT.initSession(apiKey, sessionId);

  // Create a publisher
  const publisher = OT.initPublisher(
    "publisher",
    {
      insertMode: "append",
      width: "100%",
      height: "100%",
      name: streamName
    },
    handleCallback
  );

  // Subscribe to a newly created stream
  session.on("streamCreated", event => {
    session.subscribe(
      event.stream,
      "subscriber",
      {
        insertMode: "append",
        width: "100%",
        height: "100%",
        name: event.stream.name
      },
      handleCallback
    );
  });
}
 Hover over a video stream to see the stream name
参加者がテキストメッセージを送信すると、それをサーバにPOSTしてデータベースに保存したい。そのための saveMessage()関数を作りましょう。
function saveMessage(content) {
  const message = {
    _id: Date.now().toString(),
    content: content,
    roomname: name,
    user: username
  };

  fetch("/message", {
    method: "POST",
    headers: { "Content-Type": "application/json" },
    body: JSON.stringify(message)
  }).catch(handleCallback);
}チャットフォームのイベントリスナーを変更し、参加者がテキストメッセージを送信するたびにこの関数をトリガーするようにします。
chat.addEventListener(
  "submit",
  event => {
    event.preventDefault();
    session.signal(
      {
        type: "msg",
        data: `${session.connection.data.split("=")[2]}: ${msgTxt.value}`
      },
      () => {
        saveMessage(msgTxt.value);
        msgTxt.value = "";
      }
    );
  },
  false
);
ファイル上に server.jsファイルに、この POSTリクエストのハンドラも追加する必要がある。
app.post("/message", (request, response) => {
  const roomName = request.body.roomName;
  const message = {
    timeStamp: request.body._id,
    content: request.body.content,
    user: request.body.user
  };
  sessionDb
    .get(roomName)
    .then(result => {
      result.messages = [...result.messages, message];
      return sessionDb.put(result);
    })
    .then(() => {
      return sessionDb.get(roomName);
    })
    .then(result => {
      response.status(200);
      response.send({
        latestMessage: result.messages[result.messages.length - 1]
      });
    })
    .catch(error => console.log(error));
});
メッセージが保存されたので、ページがロードされるたびにメッセージを表示したい。クライアント側に getChatHistory()関数を追加します。 GETリクエストをトリガーする関数を追加します。
function getChatHistory() {
  fetch(`/messages/${roomName}`)
    .then(res => {
      return res.json();
    })
    .then(res => {
      const messageArea = document.getElementById("messageArea");
      res.messagesArray.forEach(message => {
        const msg = document.createElement("p");
        msg.textContent = `${message.user}: ${message.content}`;
        messageArea.appendChild(msg);
      });
      messageArea.scroll({
        top: messageArea.scrollHeight,
        behavior: "smooth"
      });
    })
    .catch(handleCallback);
}
そして、サーバー側の対応するルートは、メッセージを配列としてクライアントに渡す。
app.get("/messages/:room", (request, response) => {
  const roomName = request.params.room;
  sessionDb
    .get(roomName)
    .then(result => {
      response.status(200);
      response.send({
        messagesArray: result.messages
      });
    })
    .catch(error => console.log(error));
});
そのため、セッション中にページを更新しても、メッセージはそのまま残ります。また、チャット履歴が保存されている過去のセッションと同じルーム名を入力すると、そのチャット履歴が表示されます。
最終コード グリッチと GitHubにある最終的なコードには、このかなり長い投稿で取り上げたことがすべて含まれているが、コードがよりすっきりして保守しやすくなるように再構成されている。コードをリミックスしたりクローンしたりして、自由に遊んでみてほしい。
Vonage Video APIで構築できる機能は他にもあり、今後のチュートリアルで紹介する予定です。 総合ドキュメントサイト.何か問題が発生したり、質問がある場合は、私たちの コミュニティ・スラック.お読みいただきありがとうございました!