
Vonage Video APIでビデオチャットをストリーミングする
所要時間:1 分
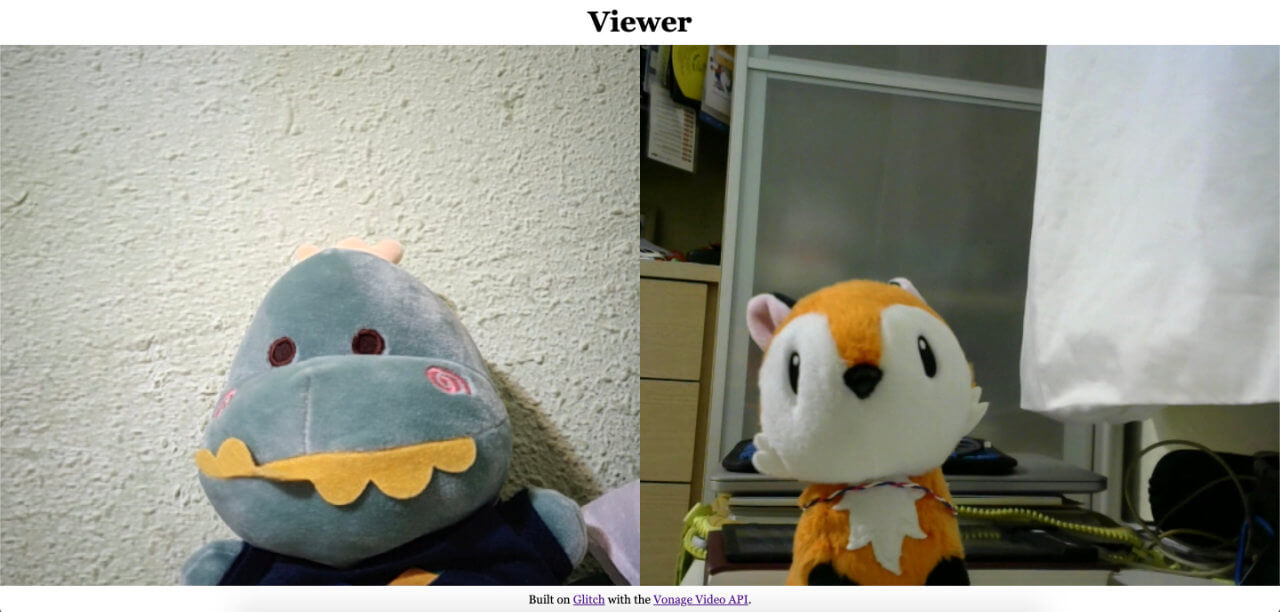
このチュートリアルシリーズでは Vonage Video API (旧TokBox OpenTok)を紹介します。Video API は非常に堅牢でカスタマイズ性が高く、各記事では API を使用して特定の機能を実装する方法を紹介します。今回は、チャットに参加していない聴衆に Video チャットをストリーミングする方法を紹介します。
このアプリケーションにはサーバーサイドのコードが必要なので、ここでは Glitchを使います。また、このGlitchプロジェクトからコードをダウンロードし、お好みのサーバーやホスティング・プラットフォームにデプロイすることもできます(プラットフォームの要件に応じて、いくつかの設定を調整する必要があるかもしれません)。
このシリーズでは、Video API 自体に焦点を当てるため、フロントエンドのフレームワークは使用せず、バニラ Javascript だけを使用します。このチュートリアルの最後では、あなたのビデオチャットアプリケーションは、単にビデオチャットのストリームを見るオプションを提供する必要があります。
最終コード 最終コードこのアプリケーションの最終的なコードは GitHub リポジトリまたは Glitchでリミックス.
始める前に、Vonage Video APIアカウントが必要です。 こちら.また Node.jsがインストールされている必要があります(Glitchを使用していない場合)。
このチュートリアルは、シリーズの最初の紹介記事を基に構成されています: 基本的なビデオチャットの構築.Video API を初めて使用する場合は、以下の基本的なセットアップをカバーしているので、この記事を参照することを強くお勧めします:
Video APIプロジェクトの作成
グリッチでのセットアップ
プロジェクトの基本構造
セッションの初期化
セッションへの接続、購読、公開
ビデオチャットの基本的なレイアウトスタイル
セッションに接続するすべてのユーザーは、トークンで認証される必要がある。各トークンにはロールが割り当てられ、接続時にクライアントができることを決定する。利用可能なロールは3つあります、 サブスクライバ, パブリッシャーそして モデレーター.このチュートリアルでは、最初の2つのみを使用します。
パブリッシャーはセッションに接続し、オーディオ・ビデオストリームをセッションにパブリッシュし、他のクライアントのセッションをサブスクライブすることができる。サブスクライバーはセッションに接続し、他のクライアントのセッションをサブスクライブすることはできるが、次のことはできない。 パブリッシュはできない。
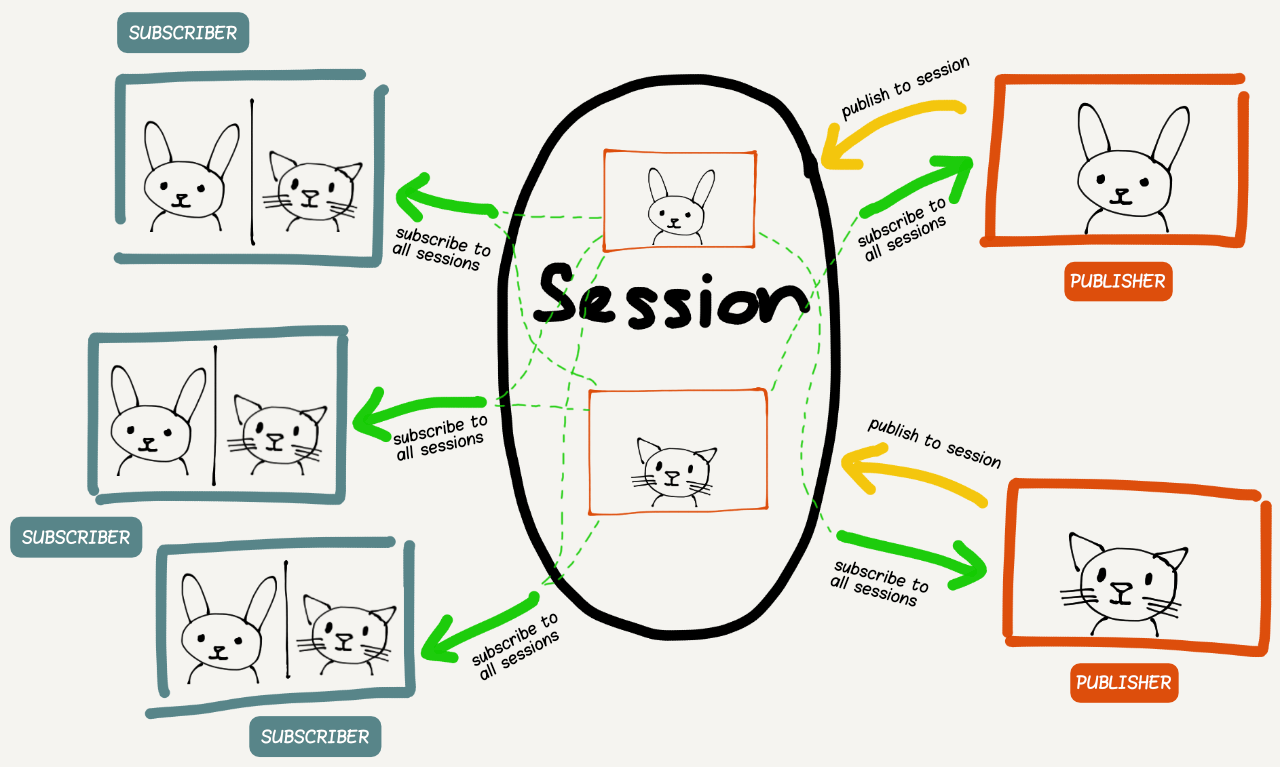
このチュートリアルでは、参加者にはパブリッシャートークンを、視聴者にはサブスクライバートークンを提供します。
トークンについての詳細は ドキュメント.
基本的なビデオチャットの上に構築しているので、まず、前のチュートリアルで構築した基本的なビデオチャットのプロジェクトをリミックスすることから始めます。下の大きなRemixボタンをクリックしてください。👇
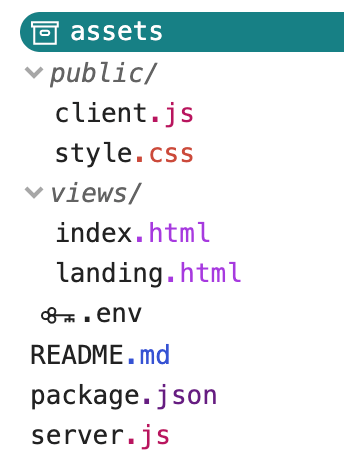
フォルダー構造は次のようになっているはずだ:
冒頭で述べたように、TokBox OpenTokはVonage Video APIになりました。パッケージ名に変更はありませんので、コードの中でOpenTokを参照することに変わりはありません。
グリッチ・プロジェクトをリミックスした場合、あなたの server.jsファイルはすでにこのようになっているはずだ:
const express = require("express");
const app = express();
const OpenTok = require("opentok");
const OT = new OpenTok(process.env.API_KEY, process.env.API_SECRET);

let sessions = {};

app.use(express.static("public"));

app.get("/", (request, response) => {
  response.sendFile(__dirname + "/views/landing.html");
});

app.get("/session/:room", (request, response) => {
  response.sendFile(__dirname + "/views/index.html");
});

app.post("/session/:room", (request, response) => {
  const roomName = request.params.room;
  // Check if the session already exists
  if (sessions[roomName]) {
    // Generate the token
    generateToken(roomName, response);
  } else {
    // If the session does not exist, create one
    OT.createSession((error, session) => {
      if (error) {
        console.log("Error creating session:", error);
      } else {
        // Store the session in the sessions object
        sessions[roomName] = session.sessionId;
        // Generate the token
        generateToken(roomName, response);
      }
    });
  }
});

function generateToken(roomName, response) {
  // Configure token options
  const tokenOptions = {
    role: "publisher",
    data: `roomname=${roomName}`
  };
  // Generate token with the Video API Client SDK
  let token = OT.generateToken(
    sessions[roomName],
    tokenOptions
  );
  // Send the required credentials back to to the client
  // as a response from the fetch request
  response.status(200);
  response.send({
    sessionId: sessions[roomName],
    token: token,
    apiKey: process.env.API_KEY
  });
}

const listener = app.listen(process.env.PORT, () => {
  console.log("Your app is listening on port " + listener.address().port);
});
ビデオチャットを開始するには .envファイルにアクセスし、プロジェクトのAPIキーとシークレットを入力します。それが完了したら、視聴者のためのインターフェースを提供するために、プロジェクトにいくつかの追加を行います。
私たちのアプリケーションは、ユーザーがセッションを作成したり参加したりするためのランディングページと、視聴者になるか参加者になるかを選択するためのページ、そしてそれぞれの役割のための2つのビデオチャットページの3つのページから構成されます。
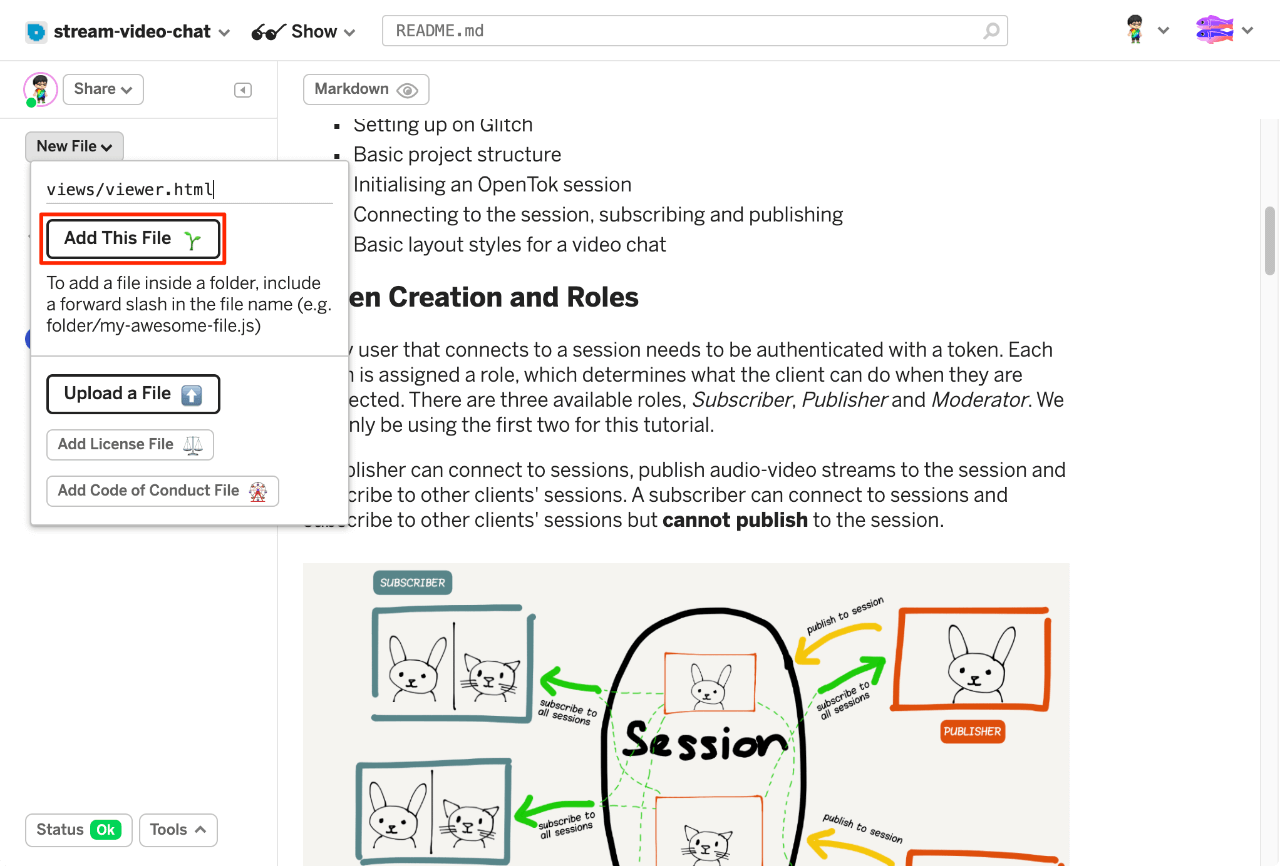
視聴者用の追加ページを作成する必要があります。ビューア用の viewer.htmlファイルを viewsフォルダに 新規ファイルボタンをクリックして、ファイルをフォルダに追加しましょう。ファイル名を views/viewer.htmlと名付け、次のマークアップをページに貼り付けます。このページは index.htmlファイルとほとんど同じです。 divがないことを除いては、ファイルとほとんど同じです。
<!DOCTYPE html>
<html lang="en">
  <head>
    <title>Stream your video chat</title>
    <meta
      name="description"
      content="Stream a basic audio-video chat with Vonage Video API in Node.js"
    />
    <link
      id="favicon"
      rel="icon"
      href="https://tokbox.com/developer/favicon.ico"
      type="image/x-icon"
    />
    <meta charset="utf-8" />
    <meta http-equiv="X-UA-Compatible" content="IE=edge" />
    <meta name="viewport" content="width=device-width, initial-scale=1" />

    <link rel="stylesheet" href="/style.css" />
  </head>

  <body>
    <header>
      <h1>Viewer</h1>
    </header>

    <main>
      <div id="subscriber" class="subscriber"></div>
    </main>

    <footer>
      <p>
        <small
          >Built on <a href="https://glitch.com">Glitch</a> with the
          <a href="https://tokbox.com/developer/">Vonage Video API</a>.</small
        >
      </p>
    </footer>

    <script src="https://static.opentok.com/v2/js/opentok.min.js"></script>
    <script src="/viewer.js"></script>
  </body>
</html>
その viewer.htmlと index.htmlファイルでは、上のセクションで説明したように、それぞれのトークンの役割によって実装が若干異なるため、異なるスクリプトファイルを使用することになる。
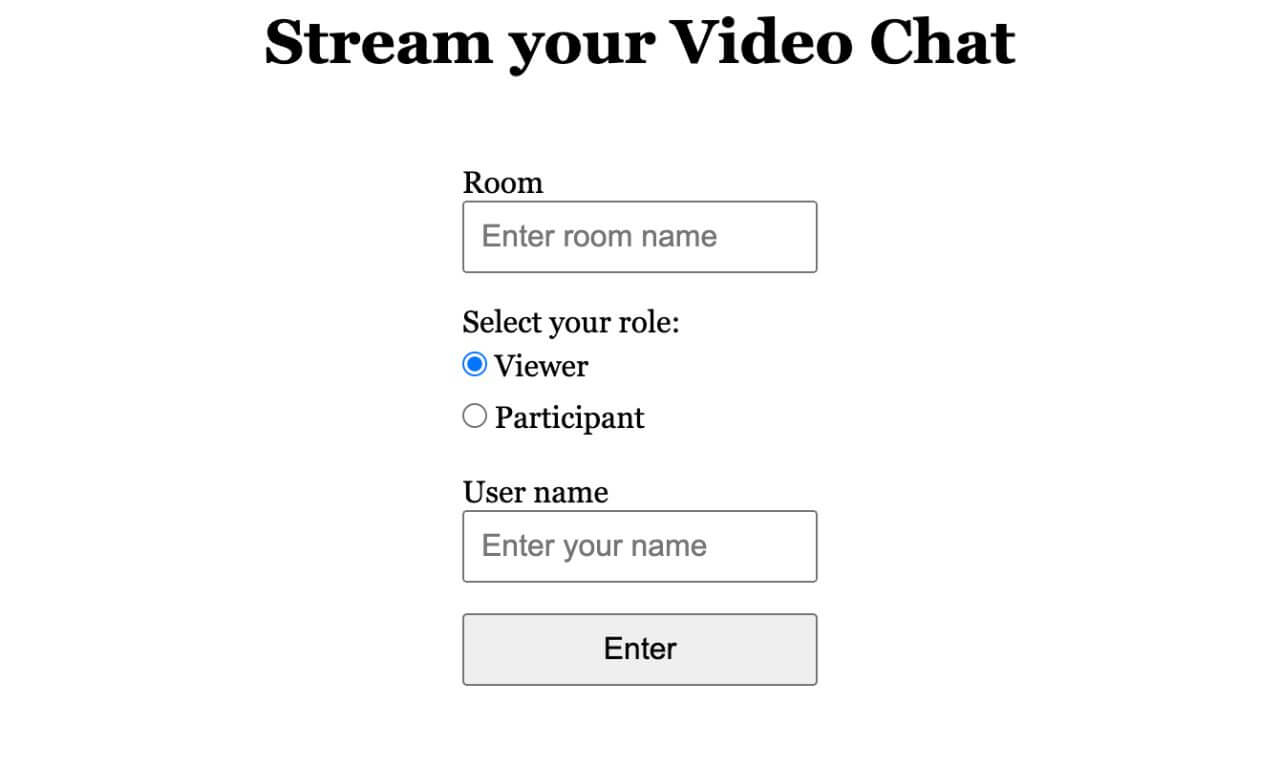
次に、ページのフォームを少し修正します。 landing.htmlページのフォームを修正して、ラジオボタンでロールを選択できるようにします。もし 視聴者を選択すると、ビデオチャットのストリームを表示するページに送られます。もし 参加者を選択した場合、ユーザー名を入力する別のテキスト入力が表示されます。
<form id="registration" class="registration">
  <label>
    <span>Room</span>
    <input
      type="text"
      name="room-name"
      placeholder="Enter room name"
      required
    />
  </label>

  <!-- Add the user type radio buttons -->
  <p>Select your role:</p>
  <fieldset id="userRoles">
    <label>
      <input type="radio" name="user-type" value="viewer" checked />
      <span>Viewer</span>
    </label>

    <label>
      <input type="radio" name="user-type" value="participant" />
      <span>Participant</span>
    </label>
  </fieldset>

  <!-- Add the user name input field and label -->
  <label id="userName" class="hidden">
    <span>User name</span>
    <input type="text" name="user-name" placeholder="Enter your name" />
  </label>

  <button>Enter</button>
</form>
新しいフィールドセットとラジオボタンに対応するために、既存のスタイルを追加しましょう。
fieldset {
  border: 0;
  display: flex;
  justify-content: space-between;
  margin-bottom: 1em;
}

fieldset label {
  padding: 0.25em 0em;
  cursor: pointer;
}

.hidden {
  display: none;
}
まずは landing.htmlページで作業しよう。ユーザー名フィールドの条件付き表示/非表示のために、ラジオボタンの値が選択されているかどうかをチェックするイベントリスナーを追加し、それに応じてスタイルを切り替えることができる。
const userRoles = document.getElementById("userRoles");
const userName = document.getElementById("userName");
const userNameField = document.querySelector('[name="user-name"]');
userRoles.addEventListener(
  "click",
  event => {
    if (event.target.value === "participant") {
      userName.classList.remove("hidden");
      userNameField.required = true;
    } else {
      userName.classList.add("hidden");
      userNameField.required = false;
    }
  },
  false
);
を選んだかどうかに基づいて、ユーザーを正しいページに送るためのロジックも修正する必要がある。 ビューアそれとも 参加者.視聴者は /session/viewer/ROOM_NAMEに送信され、参加者は /session/participant/ROOM_NAME?username=USER_NAME.ユーザー名をサーバーに渡すために、URLのクエリー文字列を利用しています。
const form = document.getElementById("registration");
form.addEventListener("submit", event => {
  event.preventDefault();

  // Check the selected option and redirect accordingly
  const isViewer = form.elements["user-type"].value === "viewer";

  if (isViewer) {
    location.href = `/session/viewer/${form.elements["room-name"].value}`;
  } else {
    location.href = `/session/participant/${form.elements["room-name"].value}?username=${form.elements["user-name"].value}`;
  }
});
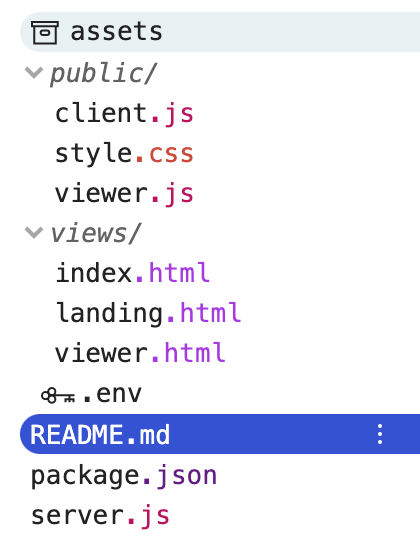
次に viewer.jsファイルを作成します。 viewer.htmlページのファイルを作成します。ページ用のファイルを作成します。 viewer.htmlの時と同じように 新規ファイルをクリックしますが、今度はJavascriptファイルを publicフォルダに追加します。
プロジェクト・フォルダーはこのようになっているはずだ:
ファイルは viewer.jsファイルは client.jsファイルより少し短いです。私たちは POSTにリクエストし /session/viewer/ROOM_NAMEにリクエストを行い、セッションに接続するために必要な レスポンスデータを受け取っています。
fetch(location.pathname, { method: "POST" })
  .then(res => {
    return res.json();
  })
  .then(res => {
    const apiKey = res.apiKey;
    const sessionId = res.sessionId;
    const token = res.token;
    initializeSession(apiKey, sessionId, token);
  })
  .catch(handleCallback);

function initializeSession(apiKey, sessionId, token) {
  // Create a session object with the sessionId
  const session = OT.initSession(apiKey, sessionId);

  // Connect to the session
  session.connect(token, error => handleCallback(error));

  // Subscribe to a newly created stream
  session.on("streamCreated", event => {
    session.subscribe(
      event.stream,
      "subscriber",
      {
        insertMode: "append",
        width: "100%",
        height: "100%",
        name: event.stream.name
      },
      handleCallback
    );
  });
}

// Callback handler
function handleCallback(error) {
  if (error) {
    console.log("error: " + error.message);
  } else {
    console.log("callback success");
  }
}
ファイルに少し手を加える必要があります。 client.jsファイルにも少し手を加える必要があります。各参加者のストリームに、ランディングページで入力したユーザー名をラベル付けしたいからです。
fetch(location.pathname, { method: "POST" })
  .then(res => {
    return res.json();
  })
  .then(res => {
    const apiKey = res.apiKey;
    const sessionId = res.sessionId;
    const token = res.token;
    // Declare the stream name and pass it to the initializeSession() function
    const streamName = res.streamName;
    initializeSession(apiKey, sessionId, token, streamName);
  })
  .catch(handleCallback);
この initializeSession()関数は streamNameメソッドと initPublisher()メソッドと subscribe()メソッドで使用されます。どちらのメソッドもオプションの properties 引数を受け取り、ストリームのカスタマイズ・オプションを渡すことができます。
// Create a publisher
const publisher = OT.initPublisher(
  "publisher",
  {
    insertMode: "append",
    width: "100%",
    height: "100%",
    name: streamName
  },
  handleCallback
);

// Subscribe to a newly created stream
session.on("streamCreated", event => {
  session.subscribe(
    event.stream,
    "subscriber",
    {
      insertMode: "append",
      width: "100%",
      height: "100%",
      name: event.stream.name
    },
    handleCallback
  );
});
最終的な client.jsファイルは次のようになる:
fetch(location.pathname, { method: "POST" })
  .then(res => {
    return res.json();
  })
  .then(res => {
    const apiKey = res.apiKey;
    const sessionId = res.sessionId;
    const token = res.token;
    const streamName = res.streamName;
    initializeSession(apiKey, sessionId, token, streamName);
  })
  .catch(handleCallback);

function initializeSession(apiKey, sessionId, token, streamName) {
  // Create a session object with the sessionId
  const session = OT.initSession(apiKey, sessionId);

  // Create a publisher
  const publisher = OT.initPublisher(
    "publisher",
    {
      insertMode: "append",
      width: "100%",
      height: "100%",
      name: streamName
    },
    handleCallback
  );

  // Connect to the session
  session.connect(token, error => {
    // If the connection is successful, initialize the publisher and publish to the session
    if (error) {
      handleCallback(error);
    } else {
      session.publish(publisher, handleCallback);
    }
  });

  // Subscribe to a newly created stream
  session.on("streamCreated", event => {
    session.subscribe(
      event.stream,
      "subscriber",
      {
        insertMode: "append",
        width: "100%",
        height: "100%",
        name: event.stream.name
      },
      handleCallback
    );
  });
}

// Callback handler
function handleCallback(error) {
  if (error) {
    console.log("error: " + error.message);
  } else {
    console.log("callback success");
  }
}
すべてがまとまる前の最後の部分は server.jsファイルで、ここでルートが定義される。私たちは ビューアページ(viewer.html)と 参加者ページ(index.html)をご覧ください。
app.get("/session/participant/:room", (request, response) => {
  response.sendFile(__dirname + "/views/index.html");
});

app.get("/session/viewer/:room", (request, response) => {
  response.sendFile(__dirname + "/views/viewer.html");
});
リミックスされた generateToken()関数の代わりに、2つの役割に2つの異なる関数を使うことにする。
function generatePublisherToken(roomName, streamName, response) {
  // Configure token options
  const tokenOptions = {
    role: "publisher",
    data: `roomname=${roomName}?streamname=${streamName}`
  };
  // Generate token with the OpenTok SDK
  let token = OT.generateToken(
    sessions[roomName],
    tokenOptions
  );
  // Send the required credentials back to to the client
  // as a response from the fetch request
  response.status(200);
  response.send({
    sessionId: sessions[roomName],
    token: token,
    apiKey: process.env.API_KEY,
    streamName: streamName
  });
}

function generateSubscriberToken(roomName, response) {
  // Configure token options
  const tokenOptions = {
    role: "subscriber",
    data: `roomname=${roomName}`
  };
  // Generate token with the OpenTok SDK
  let token = OT.generateToken(
    sessions[roomName],
    tokenOptions
  );
  // Send the required credentials back to to the client
  // as a response from the fetch request
  response.status(200);
  response.send({
    sessionId: sessions[roomName],
    token: token,
    apiKey: process.env.API_KEY
  });
}ビューアーの場合、ビューアーページがロードされると、ルーム名は POSTリクエストでサーバーに送信されます。これは以下のルートで処理されます:
app.post("/session/viewer/:room", (request, response) => {
  const roomName = request.params.room;
  // Check if the session already exists
  if (sessions[roomName]) {
    // Generate the token
    generateSubscriberToken(roomName, response);
  } else {
    // If the session does not exist, create one
    OT.createSession((error, session) => {
      if (error) {
        console.log("Error creating session:", error);
      } else {
        // Store the session in the sessions object
        sessions[roomName] = session.sessionId;
        // Generate the token
        generateSubscriberToken(roomName, response);
      }
    });
  }
});
同様に、参加者の場合、参加者ページがロードされると、ルーム名とユーザー名がリクエストによってサーバーに送られ、その対応するルートは次のように処理される。 POSTリクエストでサーバーに送られ、対応するルートは次のように処理されます:
// Middleware to read the body of the request
app.use(express.json());

app.post("/session/participant/:room", (request, response) => {
  const roomName = request.params.room;
  const streamName = request.body.username;
  // Check if the session already exists
  if (sessions[roomName]) {
    // Generate the token
    generatePublisherToken(roomName, streamName, response);
  } else {
    // If the session does not exist, create one
    OT.createSession((error, session) => {
      if (error) {
        console.log("Error creating session:", error);
      } else {
        // Store the session in the sessions object
        sessions[roomName] = session.sessionId;
        // Generate the token
        generatePublisherToken(roomName, streamName, response);
      }
    });
  }
});
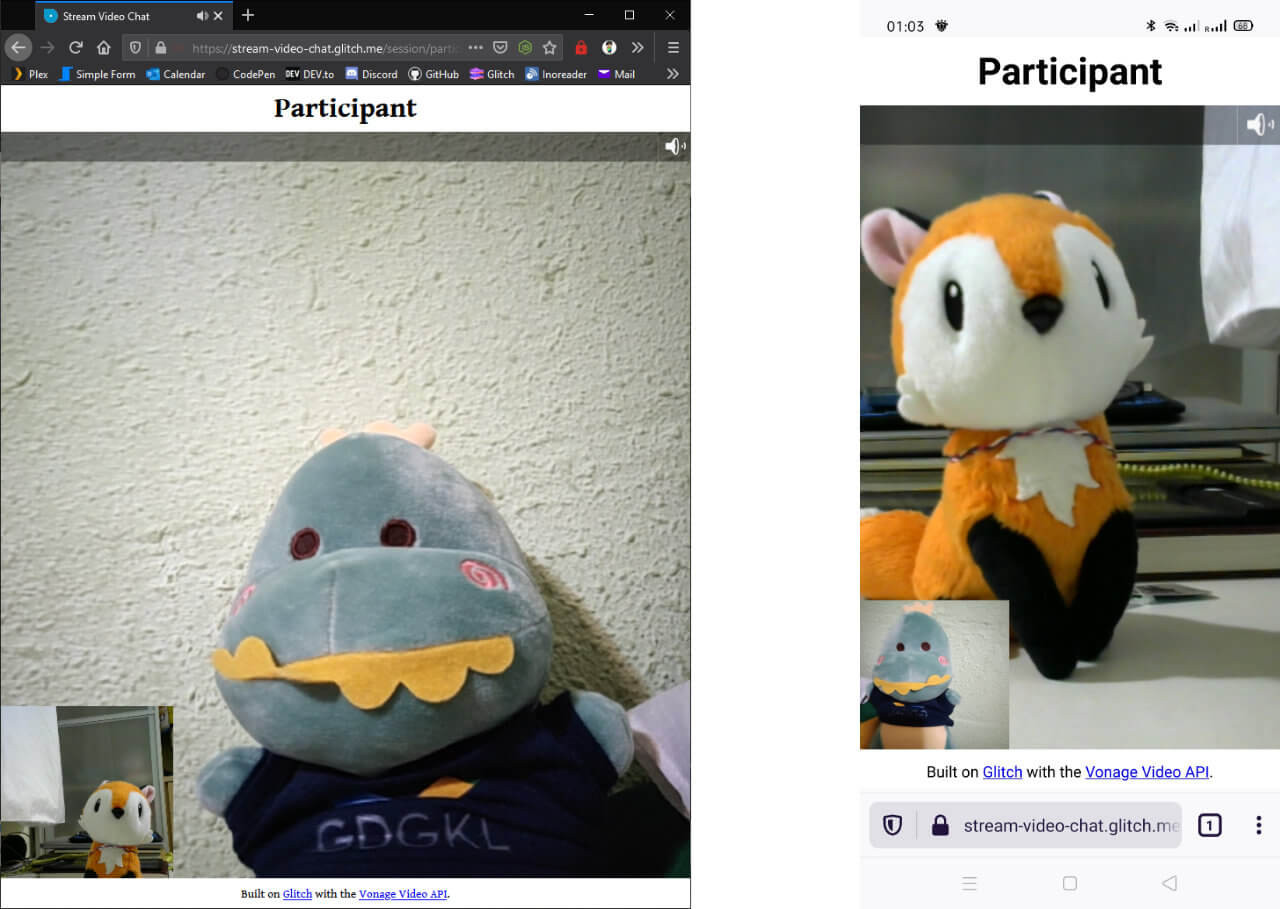
これにより、視聴者は1つのページで参加者のストリームを見ることができ、参加者同士はビデオチャットを楽しむことができる。
最終的なコードは グリッチまたは GitHubにある最終的なコードをチェックし、自由にコードをリミックスしたりクローンしたりして、自分で遊んでみてほしい。
Vonage Video APIで構築できる機能は他にもあり、今後のチュートリアルで紹介する予定です。 総合ドキュメントサイト.何か問題が発生したり、質問がある場合は、私たちの コミュニティ・スラック.お読みいただきありがとうございました!