Vonage Video APIで画面を共有する
所要時間:1 分
このチュートリアルシリーズでは Vonage Video API (旧TokBox OpenTok)を紹介します。Video API は非常に堅牢でカスタマイズ性が高く、各記事では API を使って特定の機能を実装する方法を紹介します。今回は、基本的な音声ビデオチャットに画面共有を追加する方法を紹介します。
このアプリケーションにはサーバーサイドのコードが必要なので、ここでは Glitchを使います。また、このGlitchプロジェクトからコードをダウンロードし、お好みのサーバーやホスティング・プラットフォームにデプロイすることもできます(プラットフォームの要件に応じて、いくつかの設定を調整する必要があるかもしれません)。
このシリーズでは Video API 自体に焦点を当てるため、フロントエンドのフレームワークは一切使用せず、バニラ Javascript だけを使用します。このチュートリアルの最後には、ビデオチャットの相手と画面を共有できるようになっているはずです。
このアプリケーションの最終的なコードは、この GitHub リポジトリまたは Glitchでリミックス.
始める前に、Vonage Video APIアカウントが必要です。 こちら.また Node.jsがインストールされている必要があります(Glitchを使用していない場合)。
このチュートリアルは、シリーズの最初の紹介記事を基に構成されています: 基本的なビデオチャットの構築.Video API を初めて使用する場合は、以下の基本的なセットアップをカバーしているので、この記事を参照することを強くお勧めします:
Video APIプロジェクトの作成
グリッチでのセットアップ
プロジェクトの基本構造
OpenTok セッションを初期化する
セッションへの接続、購読、公開
ビデオチャットの基本的なレイアウトスタイル
以前のアプリケーションでは、ブラウザがセッションに接続し、1つのストリーム(あなたのカメラ)を公開していました。しかし、画面共有が追加されたことで、同じセッションで2つのストリームを公開することができるようになりました。これに対応するには public/client.jsで sessionをグローバル変数に移動します。
以前はね:
function initializeSession(apiKey, sessionId, token) {
  const session = OT.initSession(apiKey, sessionId);
  // more code below
}その後だ:
let session;
function initializeSession(apiKey, sessionId, token) {
  session = OT.initSession(apiKey, sessionId);
  // more code below
}この場合 views/index.htmlには、画面共有ビデオを表示するプレースホルダ要素と、共有をトリガするボタンを用意する必要があります。また、後で使用する画面共有を停止するボタンも作成します:
<main>
  <!-- This element is new -->
  <div id="screen" class="screen"></div>

  <!-- These two elements already exist from the first tutorial -->
  <div id="subscriber" class="subscriber"></div>
  <div id="publisher" class="publisher"></div>

  <!-- These are both new too -->
  <button id="startScreenShare" class="screen-share">Share Screen</button>
  <button id="stopScreenShare" class="screen-share hidden">Stop Sharing Screen</button>
</main>
共有ボタンが押されたら、アプリケーションはまず画面を共有できるかどうかをチェックする。以下のコードを client.js:
const startShareBtn = document.getElementById("startScreenShare");
startShareBtn.addEventListener("click", event => {
  OT.checkScreenSharingCapability(response => {
    if (!response.supported || response.extensionRegistered === false) {
      alert("Screen sharing not supported");
    } else if (response.extensionInstalled === false) {
      alert("Browser requires extension");
    } else {
      // Share screen code
    }
  });
});
この OT.checkScreenSharingCapability()メソッドは、現在のブラウザの機能に関する情報を返します。これに基づいて、ブラウザがサポートしていないか、古いブラウザでは拡張機能が必要か、ネイティブAPIを使って共有できるかを判断できます。
Chrome 71以前、Firefox 51以前、Opera 58以前では、画面を共有するために拡張機能をインストールする必要があります。この記事ではエクステンションは扱いませんが、詳しくは ドキュメント.
上記の elseステートメント・ブロックに以下のコードを追加する:
const screenSharePublisher = OT.initPublisher(
  "screen",
  {
    insertMode: "append",
    width: "100%",
    height: "100%",
    videoSource: "screen",
    publishAudio: true
  },
  handleCallback
);
session.publish(screenSharePublisher, handleCallback);最初のパラメータは idで、パブリッシャービデオが入力する HTML 要素です。画面の共有は、最近のブラウザではカメラの共有とよく似ています。パブリッシャーオプションに videoSource: "screen"をパブリッシャーオプションに追加することで、ブラウザがあなたに代わって適切な許可を要求します。 publishAudioはオプションです。
新しいパブリッシャーを作成したら、それをセッションに公開することができます。
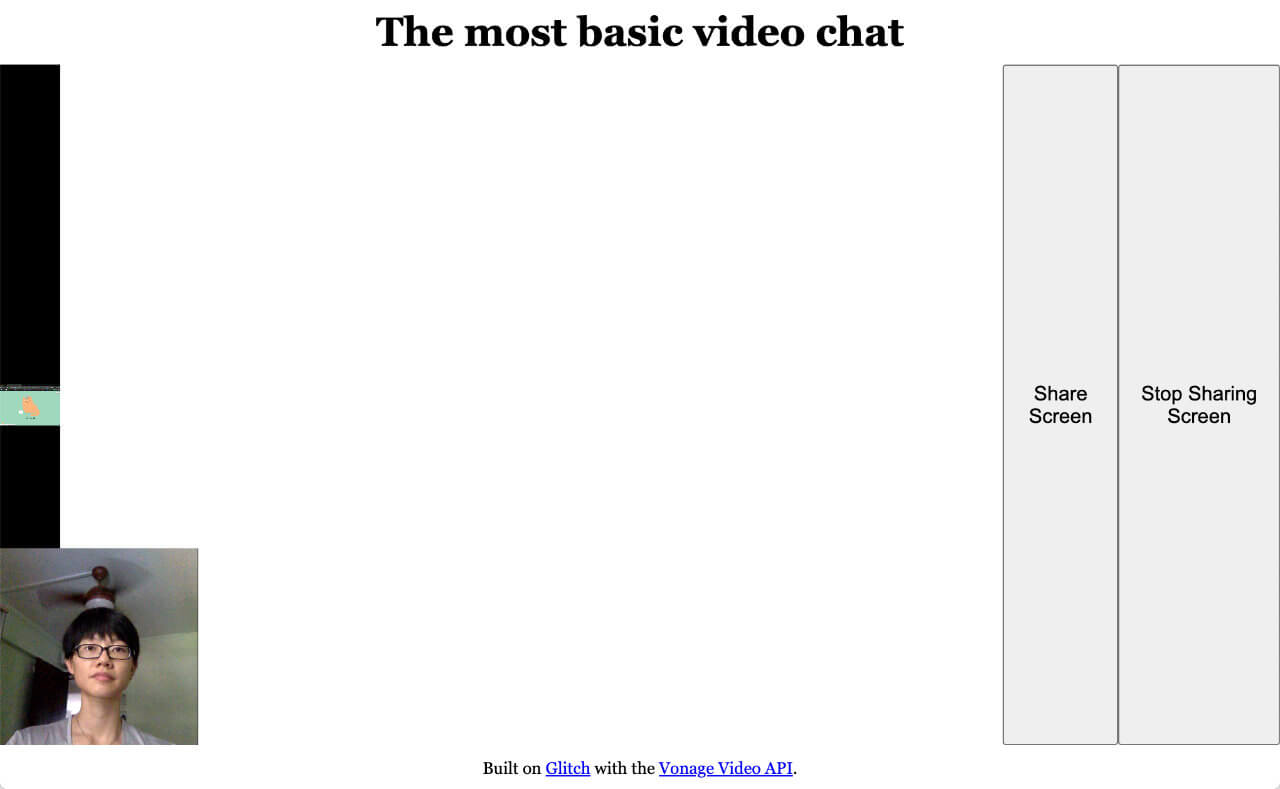
動作はしますが、お気づきかもしれませんが、画面共有ビデオがウィンドウの横に押しやられ、ボタンが変なところにあります。以下を public/style.cssファイルに追加してください:
.screen {
  width: 100%;
  height: 100%;
  display: flex;
}
.screen-share {
  position: absolute;
  bottom: 0;
  right: 0;
}
.hidden {
  display: none;
}
公開されているストリームの共有を停止するには、そのストリームが割り当てられている変数にアクセスする必要があります。イベントリスナーの上に空の screenSharePublisher変数を作成します:
let screenSharePublisher;イベント・リスナーで OT.initPublisher(...)を新しい変数に代入する。 constキーワードを削除して、新しい変数に代入する。
の下部に client.jsの下部に、共有停止ボタンのイベントリスナーを追加します:
const stopShareBtn = document.getElementById("stopScreenShare");
stopShareBtn.addEventListener("click", event => {
  screenSharePublisher.destroy();
});
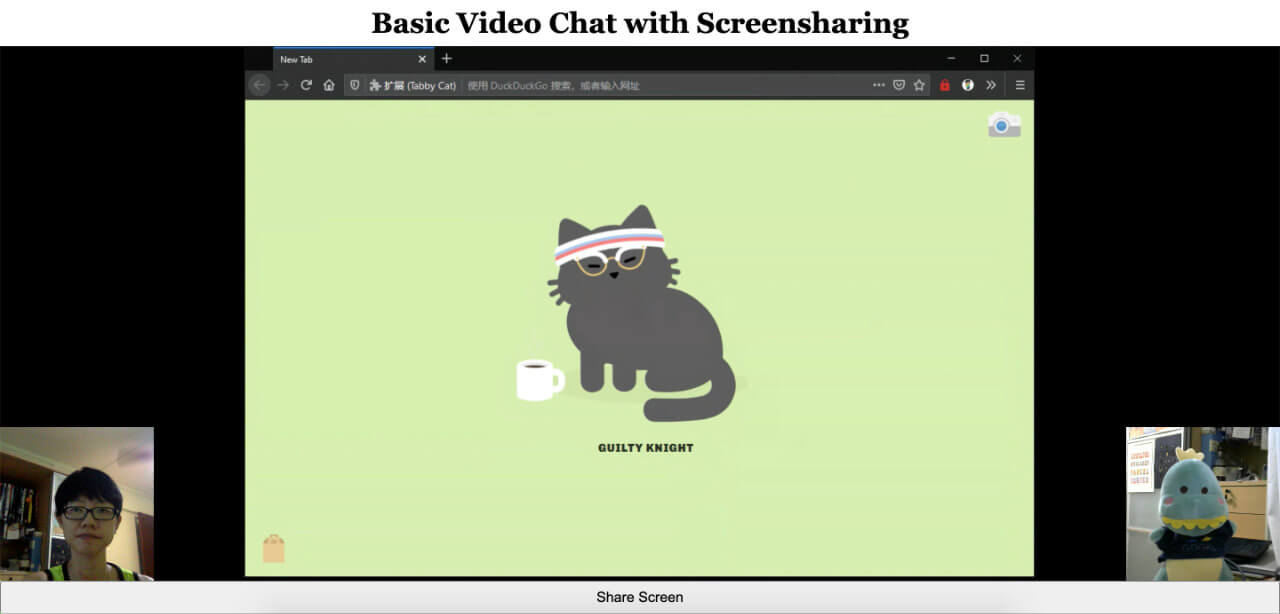
ここまでで、あなたのアプリケーションは次のようになる:
最初よりは少し良くなったが、まだ壊れているように見える。CSSとJavascript(必要なCSSクラスを切り替える)を使って修正してみましょう。
オリジナルの .screenのスタイルを削除してみよう。 style.css:
/* We don't need these any more */
.screen {
  width: 100%;
  height: 100%;
  display: flex;
}を修正する。 .subscriberクラスのスタイルを style.cssを以下のように修正する:
.subscriber,
.screen.pub-active,
.screen.sub-active {
  width: 100%;
  height: 100%;
  display: flex;
}
.screen.sub-active ~ .subscriber,
.screen.pub-active ~ .subscriber {
  position: absolute;
  width: 25vmin;
  height: 25vmin;
  min-width: 8em;
  min-height: 8em;
  align-self: flex-end;
  right: 0;
}ここでやっていることは、アクティブなときに画面共有ストリームを収容する要素をビューポートの全領域を占めるようにし、一方、カメラフィードのストリームをビューポートの右下隅に収まるようにすることです。
次に、画面共有の開始時に、適切な要素に適切なクラスが追加されていることを確認する必要があります:
screenSharePublisher = OT.initPublisher(
  "screen",
  {
    insertMode: "append",
    width: "100%",
    height: "100%",
    videoSource: "screen",
    publishAudio: true
  },
  handleCallback
);
session.publish(screenSharePublisher, handleCallback);
// CSS classes when screen-sharing starts
startShareBtn.classList.toggle("hidden");
stopShareBtn.classList.toggle("hidden");
document.getElementById("screen").classList.add("pub-active");画面共有がなくなれば、その逆が起こる必要がある:
stopShareBtn.addEventListener("click", event => {
  screenSharePublisher.destroy();

  // CSS classes when screen-sharing stops
  startShareBtn.classList.toggle("hidden");
  stopShareBtn.classList.toggle("hidden");
  document.getElementById("screen").classList.remove("pub-active");
});
画面共有を開始すると、物事はすべて正しく見える。しかし、通話の反対側にいる相手にとっては、レイアウトが崩れたままです。
これを修正するために streamCreatedイベント・リスナーを変更しましょう。作成されたストリームがカメラ・ストリームか画面共有ストリームかをチェックします。作成されたストリームがカメラ・ストリームか画面共有ストリームかをチェックします。 sub-activeCSSクラスを追加します。
以前はね:
session.connect(token, error => {
  // Other code not included for brevity
  // Subscribe to a newly created stream
  session.on("streamCreated", event => {
    session.subscribe(
      event.stream,
      "subscriber",
      {
        insertMode: "append",
        width: "100%",
        height: "100%"
      },
      handleCallback
    );
  });
});
その後だ:
// Subscribe to a newly created stream
session.on("streamCreated", event => {
  const streamContainer =
    event.stream.videoType === "screen" ? "screen" : "subscriber";
  session.subscribe(
    event.stream,
    streamContainer,
    {
      insertMode: "append",
      width: "100%",
      height: "100%"
    },
    handleScreenShare(event.stream.videoType)
  );
});
// Function to handle screen share layout
function handleScreenShare(streamType, error) {
  if (error) {
    console.log("error: " + error.message);
  } else {
    if (streamType === "screen") {
      document.getElementById("screen").classList.add("sub-active");
    }
  }
}
また、画面共有が停止したときのイベント・リスナーも追加する必要がある:
session.on("streamDestroyed", event => {
  document.getElementById("screen").classList.remove("sub-active");
});
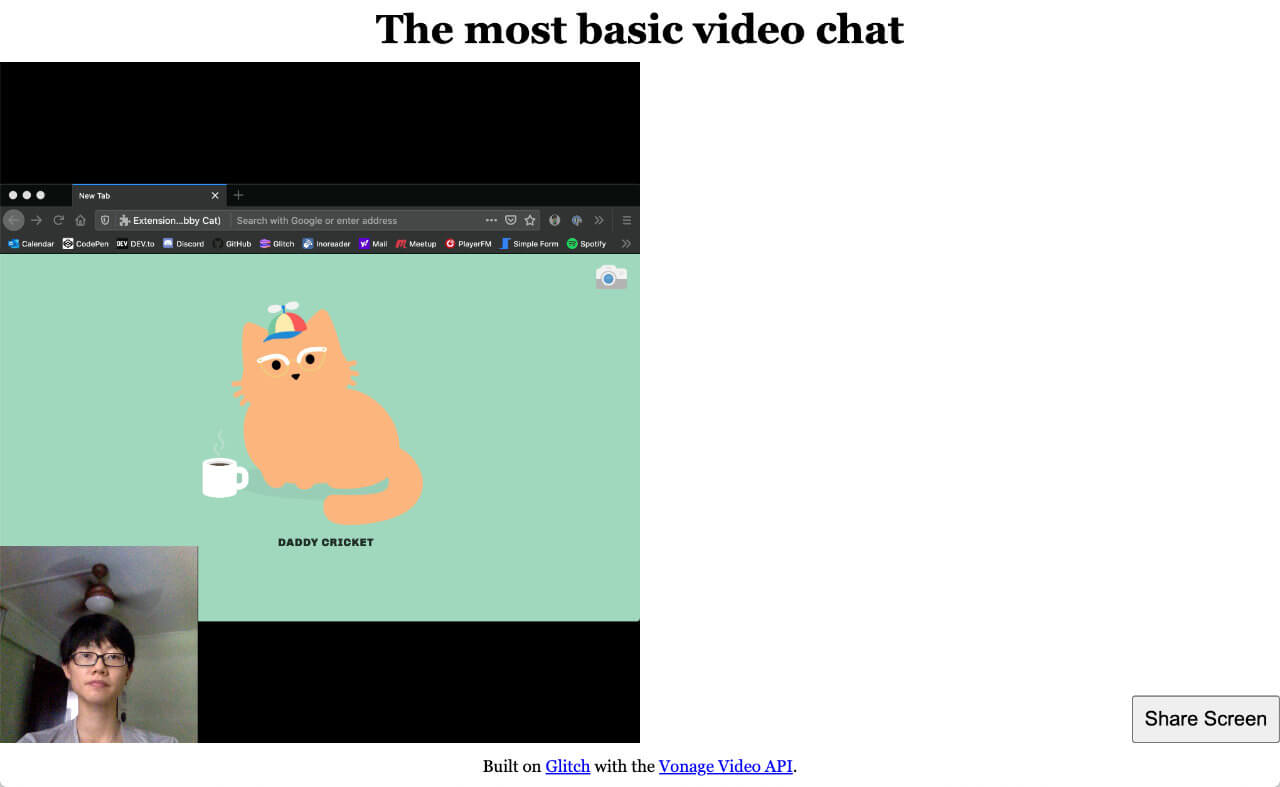
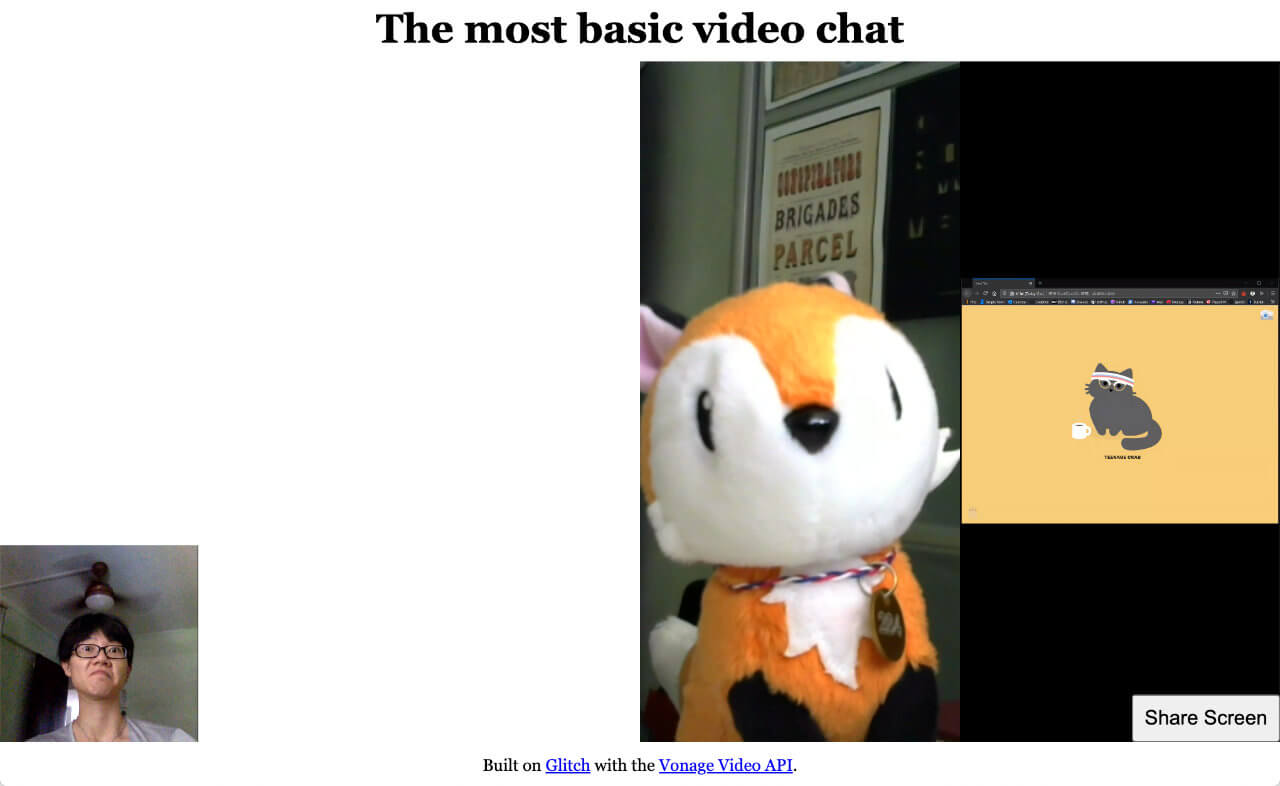
画面共有を受ける側には、最終的にこのようなものができるはずだ:

そうすると client.jsファイルは次のようになる:
let session;
fetch(location.pathname, { method: "POST" })
  .then(res => {
    return res.json();
  })
  .then(res => {
    const apiKey = res.apiKey;
    const sessionId = res.sessionId;
    const token = res.token;
    initializeSession(apiKey, sessionId, token);
  })
  .catch(handleCallback);
function initializeSession(apiKey, sessionId, token) {
  // Create a session object with the sessionId
  session = OT.initSession(apiKey, sessionId);
  // Create a publisher
  const publisher = OT.initPublisher(
    "publisher",
    {
      insertMode: "append",
      width: "100%",
      height: "100%"
    },
    handleCallback
  );
  // Connect to the session
  session.connect(token, error => {
    // If the connection is successful, initialize the publisher and publish to the session
    if (error) {
      handleCallback(error);
    } else {
      session.publish(publisher, handleCallback);
    }
  });
  // Subscribe to a newly created stream
  session.on("streamCreated", event => {
    const streamContainer =
      event.stream.videoType === "screen" ? "screen" : "subscriber";
    session.subscribe(
      event.stream,
      streamContainer,
      {
        insertMode: "append",
        width: "100%",
        height: "100%"
      },
      handleScreenShare(event.stream.videoType)
    );
  });
  session.on("streamDestroyed", event => {
    document.getElementById("screen").classList.remove("sub-active");
  });
}
// Function to handle screenshare layout
function handleScreenShare(streamType, error) {
  if (error) {
    console.log("error: " + error.message);
  } else {
    if (streamType === "screen") {
      document.getElementById("screen").classList.add("sub-active");
    }
  }
}
// Callback handler
function handleCallback(error) {
  if (error) {
    console.log("error: " + error.message);
  } else {
    console.log("callback success");
  }
}
let screenSharePublisher;
const startShareBtn = document.getElementById("startScreenShare");
startShareBtn.addEventListener("click", event => {
  OT.checkScreenSharingCapability(response => {
    if (!response.supported || response.extensionRegistered === false) {
      alert("Screen sharing not supported");
    } else if (response.extensionInstalled === false) {
      alert("Browser requires extension");
    } else {
      screenSharePublisher = OT.initPublisher(
        "screen",
        {
          insertMode: "append",
          width: "100%",
          height: "100%",
          videoSource: "screen",
          publishAudio: true
        },
        handleCallback
      );
      session.publish(screenSharePublisher, handleCallback);
      startShareBtn.classList.toggle("hidden");
      stopShareBtn.classList.toggle("hidden");
      document.getElementById("screen").classList.add("pub-active");
    }
  });
});
const stopShareBtn = document.getElementById("stopScreenShare");
stopShareBtn.addEventListener("click", event => {
  screenSharePublisher.destroy();
  startShareBtn.classList.toggle("hidden");
  stopShareBtn.classList.toggle("hidden");
  document.getElementById("screen").classList.remove("pub-active");
});
最終コード グリッチと GitHubにある最終的なコードには、このかなり長い投稿で説明したことがすべて含まれているが、再整理されているので、コードはよりすっきりし、保守しやすくなっている。コードをリミックスしたりクローンしたりして、自由に遊んでみてほしい。
Vonage Video APIで構築できる機能は他にもあり、今後のチュートリアルで紹介する予定です。 総合ドキュメントサイト.何か問題が発生したり、質問がある場合は、私たちの コミュニティ・スラック.お読みいただきありがとうございました!