iOSアプリケーションに電話認証と生体認証を追加する
所要時間:3 分
二要素認証(2FA)は、機密情報にアクセスするユーザーのセキュリティをさらに強化します。2FAには、次のような複数の種類があります:
知っていること(ユーザー名、パスワード)
あなたが持っているもの(あなたの携帯電話/SIM)
あなたが何者であるか(バイオメトリック指紋または網膜スキャン)
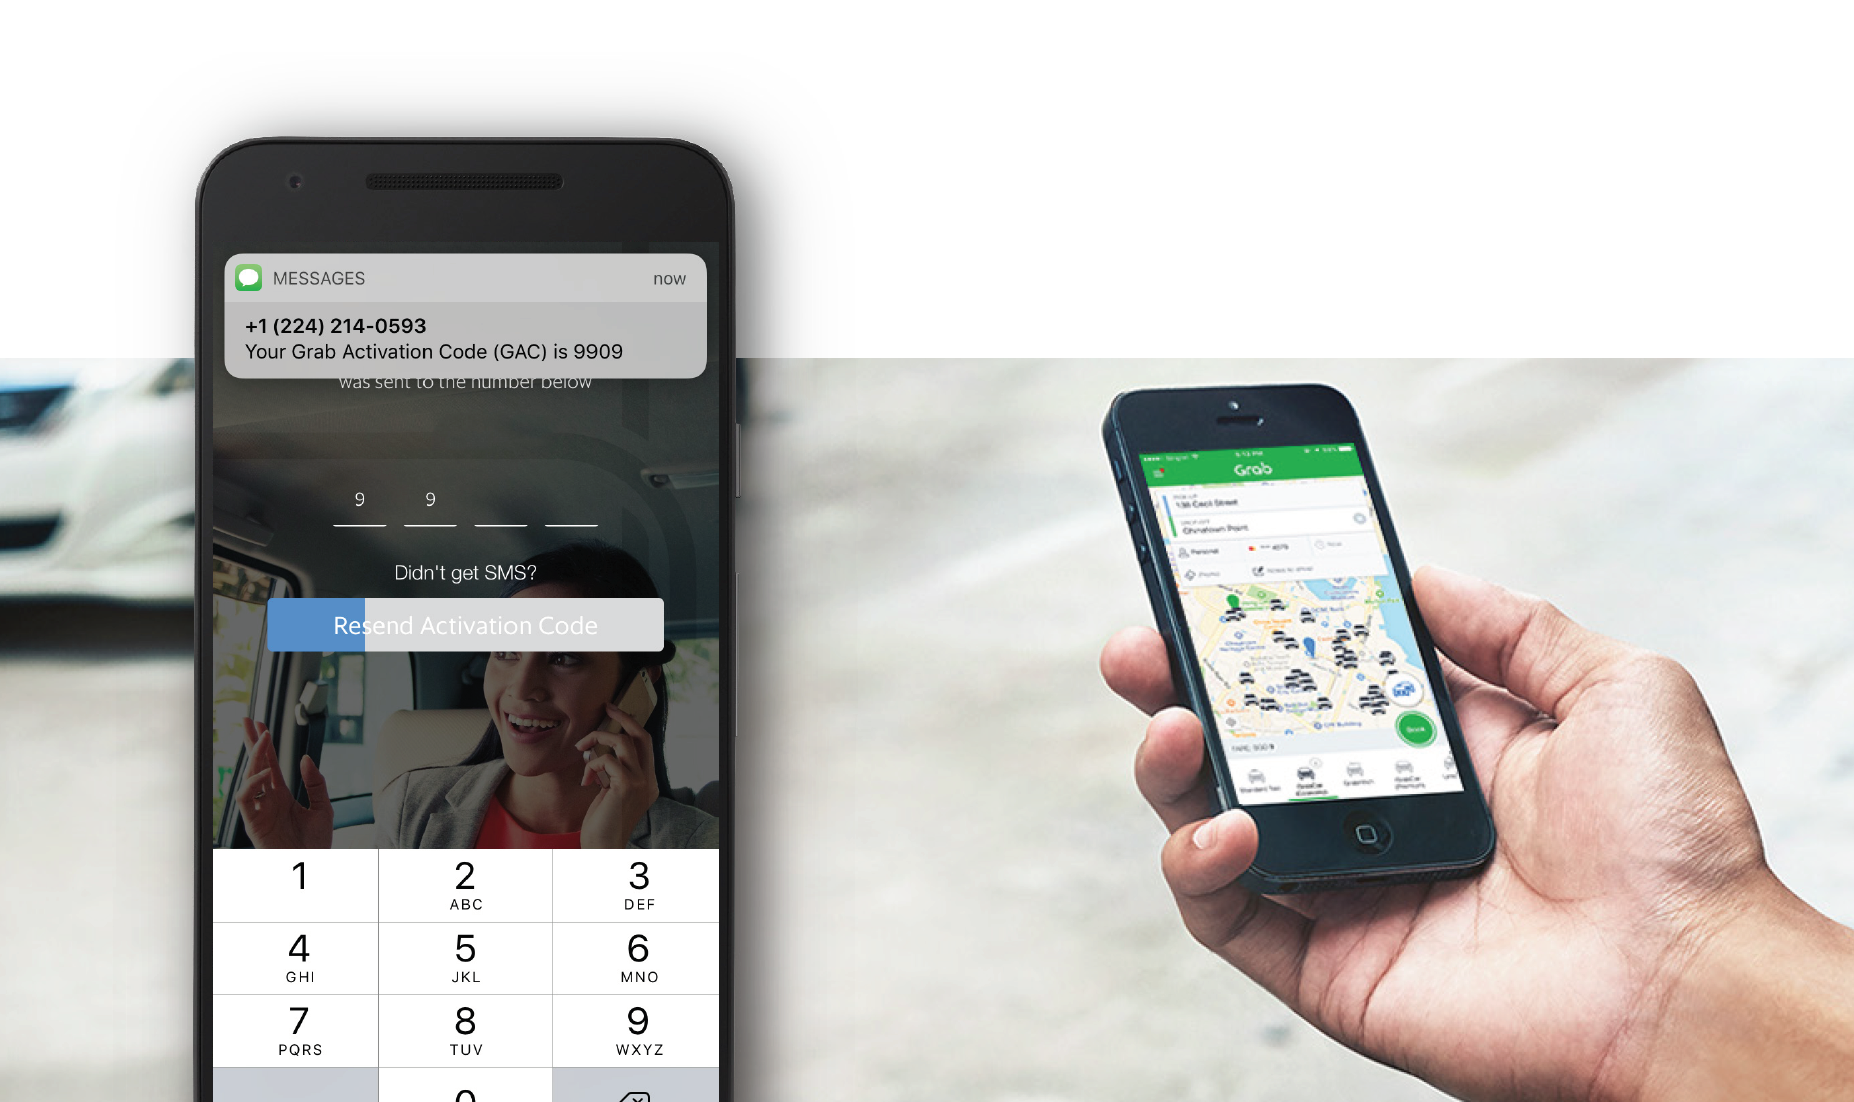
このチュートリアルでは、以下の3つをiOSアプリケーションに追加する方法を説明します。 Nexmo Verify SDKを使用して、iOSアプリケーションにこれら3つの機能を追加する方法を説明します。.
To complete this tutorial, you will need a Vonage API account. If you don’t have one already, you can sign up today and start building with free credit. Once you have an account, you can find your API Key and API Secret at the top of the Vonage API Dashboard.
This tutorial also uses a virtual phone number. To purchase one, go to Numbers > Buy Numbers and search for one that meets your needs.

SDKを使用すると、セキュリティのレイヤーを追加することができます。デバイスIDとSMS/TTS PINコードをキャプチャすることで、ユーザーが特定の物理的なデバイスに結びついていることを確認できます。ユーザーが前回のログイン試行と同じデバイスからログインしていることを証明することで、スパムや不正行為を減らすことができます。
を使用するスターターアプリ(Swift 3)を使用します。 スターターアプリ(Swift 3)を使います。を使用するスターターアプリ(Swift 3)を使用します。SMSとTTSによる2FAソリューションにはVerify SDKを使用し、生体認証にはAppleのTouch IDを使用します。
Back{4}Appは、Parseアプリのビルドとホスティングを可能にするバックエンドです(Parseが閉鎖したため、便利になりました)。既存のBack{4}Appアカウントをお持ちでない場合は、サインアップしてアプリケーションを作成してください。

アプリが作成されたら、'Core Settings'セクション内の'server'ボタンをクリックします。新しいアプリケーションの認証情報が表示されます。アプリケーションIDとクライアントキーをメモしたら、「戻る」ボタンをクリックし、「コア設定」セクション内の「ダッシュボード」に移動します。ダッシュボードにリダイレクトされたら、'Core'セクションに移動し、'Edit'(右上隅にあります)を押して、'User'クラスに以下のカラムを追加します:
チェック」(番号)
セービング(番号)
sitekey' (ファイル - ユーザー用イメージ)
電話番号 (文字列)
'smsVerification' (ブール値 - ログイン時にSMS認証を有効にする)

Back{4}アプリがセットアップされたので、スターター・アプリケーションを準備しよう。
まずはGitHubからスターターアプリを入手しよう。ターミナルで以下を実行する:
このリポジトリには、以下のチュートリアルに従うための getting-started (pre-2FA) ブランチと、このチュートリアルの最終版を含む master ブランチがあります。
XCodeで NexmoBankingApp.xcprojを開きます。NexmoBankingApp "を選択してアプリの設定を開き、プロジェクトの "Bundle Identifier "をAppleのデベロッパーポータルに登録されている有効な識別子とアプリ名に更新します。にBack4AppアプリケーションIDとクライアントキーを追加します。 AppDelegate.swift.
let configuration = ParseClientConfiguration {
$0.applicationId = "BACK4APP_APP_ID"
$0.clientKey = "BACK4APP_CLIENT_KEY"
$0.server = "https://parseapi.back4app.com"
}
Parse.initializeWithConfiguration(configuration)入力が終わったら、「ViewController.swift」に移動し、「ViewController.swift」の「viewDidLoad()」メソッド内の「signUpDemoAccount()」関数呼び出しのコメントを解除して、データベースにダミーユーザーを追加します:
override func viewDidLoad() {
super.viewDidLoad()
self.onlineID.delegate = self
signUpDemoAccount() //Uncomment to create dummy user
}signUpDemoAccount()'関数で、PFUserのユーザ名、パスワード、メールアドレス、電話番号フィールドを更新します。
func signUpDemoAccount() {
var user = PFUser()
user.username = "ENTERUSERNAME"
user.password = "ENTERPASSWORD"
user.email = "ENTEREMAILADDRESS@DEMO.NET"
user["phoneNumber"] = "ENTER-YOUR-PHONE-HERE"
user["smsVerification"] = false
user["checking"] = 5000
user["saving"] = 10000
let sitekeyImage = UIImage(named: "nexmo.png")
let imageData = UIImagePNGRepresentation(sitekeyImage!)
let imageFile = PFFile(name:"nexmo.png", data:imageData!)
user["sitekey"] = imageFile
user.signUpInBackground {
(success, error) -> Void in
if !success {
print(error.debugDescription)
} else {
print("User signed up.")
}
}
}
アプリを実行します。PFUser が作成され、Back4App のダッシュボードに表示されます。アプリを再度起動したときに別のユーザーが作成されないように、アプリを最初に実行した後、'viewDidLoad()'メソッド内の'signUpDemoAccount()'関数コールをコメントアウトしてください。

アプリをもう一度実行してください。新しく作成したユーザーの認証情報を入力することで、そのユーザーのアカウント情報にアクセスできるようになります。
それでは、2FAを追加してアプリのセキュリティを強化しよう。
Nexmoアカウントにサインアップし、顧客ダッシュボードに移動します。Verifyタブをクリックし、「Your Apps」の下に新しいアプリケーションを追加します。アプリの名前、Instantのアイドル時間(ユーザーがVerifyされた状態を維持できる最大時間、この場合、ユーザーはすぐに失効します)、PINコードの長さを設定します。

次に、Nexmo Verify SDKを追加しましょう。Verify SDKはCocoapodsを使って簡単にプロジェクトに追加できます。プロジェクト・ディレクトリにPodfileを作成し、その中に'NexmoVerify'ポッドを追加して、ターミナル経由でポッドをインストールします。(Podが見つからない場合は、Pod Updateを実行してCocoapodsを更新してください)。
Inside Podfile
# Uncomment this line to define a global platform for your project
# platform :ios, '9.0'
target 'NexmoBankingApp' do
# Comment this line if you're not using Swift and don't want to use dynamic frameworks
use_frameworks!
# Pods for NexmoBankingApp
pod ‘NexmoVerify’
endPodのインストールが完了したら、Xcodeを終了し、新しい'xcworkspace'プロジェクトファイルを開きます。これでコードに飛び込む準備ができました!
もし NexmoVerifyポッドについてもっと知りたければ Github.
これで依存関係が整い、Nexmoアプリの認証情報が取得できたので、次はそれらを「AppDelegate」ファイルに追加する番だ。
AppDelegate.swift:
import NexmoVerify //Add to top of the file

fileprivate var appID = "YOUR_NEXMO_APP_ID"
fileprivate var sharedSecret = "YOUR_NEXMO_SHARED_SECRET"
AppDelegate'ファイルの'didFinishLaunchingWithOptions'関数内でNexmoクライアントを初期化する。
func application(_ application: UIApplication, didFinishLaunchingWithOptions launchOptions: [UIApplicationLaunchOptionsKey: Any]?) -> Bool {
let configuration = ParseClientConfiguration {
$0.applicationId = "BACK4APP_APP_ID"
$0.clientKey = "BACK4APP_CLIENT_KEY"
$0.server = "https://parseapi.back4app.com"
}
Parse.initializeWithConfiguration(configuration)
NexmoClient.start(applicationId: appID, sharedSecretKey: sharedSecret)
return true
}
ログインに成功すると、ユーザー名とパスワードの組み合わせをBack4Appsに提供したため、2つ目の画面では、生体認証のTouch ID認証を追加するsitekey認証に進みます。
AppleのLocalAuthentication APIを使ってTouch ID認証を促し、ユーザーがサインインボタンを押すのを処理しよう。デバイスがTouch IDに対応していない(指紋リーダーがない)場合、ユーザーは生体認証をスキップする。セグエ('signInStopped')を追加し、ユーザーがTouch ID認証を正常に通過できない場合、ログアウトしてログインページに戻るようにします。ユーザーの SMS 認証優先設定に基づき、continue ワークフロー機能は、PIN 認証画面(次に作成します)にセグエした後に認証要求をトリガーするか、ユーザーの Account ページを表示します。
import LocalAuthentication

@IBAction func signInButton(_ sender: AnyObject) {
initialWorkFlow()
}
func initialWorkFlow() {
let context = LAContext()
var error: NSError?
if context.canEvaluatePolicy(.deviceOwnerAuthenticationWithBiometrics, error: &error) {
let reason = "Authenticate with Touch ID"
context.evaluatePolicy(.deviceOwnerAuthenticationWithBiometrics, localizedReason: reason, reply:
{(success, error) in
if success {
self.continueWorkflow()
}
else {
let alert = UIAlertController(title: "Failed Identification", message: "Touch ID Authentication Failed. Sign In process stopped.", preferredStyle: .alert)
let defaultAction = UIAlertAction(title: "Continue", style: .default) {
UIAlertAction in
PFUser.logOut()
self.performSegue(withIdentifier: "signInStopped", sender: self)
}

alert.addAction(defaultAction)
self.present(alert, animated: true, completion: nil)
}
})
}
else {
print("Touch ID not available")
self.continueWorkflow()
}
}
func continueWorkflow() {
if (PFUser.current()?["smsVerification"] as! Bool) {
self.performSegue(withIdentifier: "verifyPin", sender: self)
}
else {
self.performSegue(withIdentifier: "showAccount", sender: self)
}
}

プロジェクトに新しいファイル('VerifyPinViewController')を追加し、インターフェースビルダーを使ってストーリーボードにビューコントローラーを作成します。Interface Builderの右上にあるボタンをクリックして、'Utilities'メニューを開きます。Identity Inspector'ボタンをクリックし、IBにあるView Controllerをファイルにリンクした後、新しいクラスの名前を入力します。次に、テキストボックス('pinCode' - IBOutlet)とピンコードを送信するボタン('verifyPin' - IBAction)を追加します。SitekeyViewController' と新しく作成したビューコントローラに接続するセグエ ('verifyPin') を作成します。
新しく追加したビュー・コントローラーの'viewDidAppear'メソッド内で、以下の関数を呼び出す。
import Foundation
import UIKit
import Parse
import NexmoVerify

class VerifyViewController : UIViewController {
@IBOutlet weak var pinCode: UITextField!
@IBAction func verifyButton(_ sender: Any) {
}

override func viewDidLoad() {
super.viewDidLoad()
}

override func viewDidAppear(_ animated: Bool) {
super.viewDidAppear(true)
let alert = UIAlertController( title: "User Phone Verification", message: "Your identity is being verified.", preferredStyle: .alert)
let defaultAction = UIAlertAction(title: "Continue", style: .default) {
UIAlertAction in
self.verifyUser()
}
alert.addAction(defaultAction)
present(alert, animated: true, completion: nil)
}
Back4Apps データベースからユーザーの電話番号を取得し、getVerifiedUser() メソッドを使用して検証リクエストをトリガーする。VerifyPinController' から 'StatementViewController' に接続するセグエ ('pinVerified') を作成する。
func verifyUser() {
VerifyClient.getVerifiedUser(countryCode: "US", phoneNumber: PFUser.current()?["phoneNumber"] as! String,
onVerifyInProgress: {
},
onUserVerified: {
self.performSegue(withIdentifier:"pinVerified", sender: self)
},
onError: { verifyError in
switch (verifyError) {
case .invalidPinCode:
UIAlertView(title: "Wrong Pin Code", message: "The pin code you entered is invalid.", delegate: nil, cancelButtonTitle: "Try again!").show()
case .invalidCodeTooManyTimes:
let alert = UIAlertController(title: "Unsucessful Identification", message: "Logging out. Goodbye.", preferredStyle: .alert)
let defaultAction = UIAlertAction(title: "Goodbye", style: .default) {
UIAlertAction in

VerifyClient.cancelVerification() { error in
if let error = error {
// something wen't wrong whilst attempting to cancel the current verification request
return
}
}
self.performSegue(withIdentifier: "logout", sender: self)
}
alert.addAction(defaultAction)
self.present(alert, animated: true, completion: nil)
default:
print(verifyError.rawValue)
break
}
})
}また checkPinCodeメソッドを呼び出す。
@IBAction func verifyButton(sender: AnyObject) {
if pinCode.text!.isEmpty {
let alert = UIAlertController(title: "Enter Pin Code", message: "Please check your phone and enter the pin code send via SMS.", preferredStyle: .alert)
let defaultAction = UIAlertAction(title: "Back", style: .default, handler: nil)
alert.addAction(defaultAction)
present(alert, animated: true, completion: nil)
}
else {
VerifyClient.checkPinCode(pinCode.text!)
}
}
次に、ユーザーが SMS 認証を有効にするためのロジックを追加します。StatementViewController' に IBOutlet として switch UI 要素を追加します。また、switch の値を保持する Boolean 変数を追加します。スイッチの値は、ユーザーのログアウト時にデータベースに保存される。スイッチがオンになっていれば、次回のログイン時に SMS 検証がトリガーされる。ビューが表示されたら、当座預金口座と普通預金口座の値がゼロでないことを確認してください。
@IBOutlet weak var switch2FA: UISwitch!
var switchBoolValue:Bool!
func logout() {
if switchBoolValue == true {
let alert = UIAlertController(title: "SMS Verification", message: "Perform SMS verification on login?", preferredStyle: .alert)
let defaultAction = UIAlertAction(title: "Continue", style: .default) {
UIAlertAction in
PFUser.current()?["smsVerification"] = true
PFUser.current()?.saveInBackground()
self.performSegue(withIdentifier: "logoutUser", sender: self)
}
let cancelAction = UIAlertAction(title: "Cancel", style: .cancel, handler: nil)
alert.addAction(defaultAction)
alert.addAction(cancelAction)
self.present(alert, animated: true, completion: nil)
}
else {
print("SMS FALSE successful logout")
PFUser.current()?["smsVerification"] = false
PFUser.current()?.saveInBackground()
self.performSegue(withIdentifier: "logoutUser", sender: self)
}
}

override func viewDidAppear(_ animated: Bool) {
super.viewDidAppear(true)
if (PFUser.current()?["saving"] == nil || PFUser.current()?["checking"] == nil) {
PFUser.logOut()
self.performSegue(withIdentifier: "logout", sender: self)
}
else {
switch2FA.addTarget(self, action: #selector(StatementViewController.switchMoved), for: UIControlEvents.valueChanged)
switchBoolValue = true
}
}

func switchMoved() { // stores value for the switch
if switch2FA.isOn {
switchBoolValue = true
print("switch on")
}
else {
switchBoolValue = false
print("switch off")
}
}


ユーザーがある Account から別の Account に資金を移動するような、より安全なトランザクションの場合、ユーザー要求アクションを確認するために検証要求をトリガーすることができます。
テキストフィールド('pinCode' - IBOutlet)とボタン('verifyButton' - IBAction)を持つ新しいコントローラ('TransferPinViewController')をストーリーボードファイルに追加します。TransferViewController' から新しく作成したビューコントローラにセグエ('verifyTransfer')を作成します。
小切手、貯金、振込金額、振込元、振込後の合計がセグエと一緒に送信されます。送金関数('checkingToSaving'と'savingToChecking')を更新して、送金可能残高を確認した後にユーザーを'TransferPinViewController'に送る。
func checkingToSaving() {
print("checkingToSaving")
if checkingAmount - transferAmt > 0 {
print("NEWTOTAL: \(checkingAmount - transferAmt)")
transferSource = "checkingToSaving"
afterTransferTotal = checkingAmount - transferAmt
self.performSegue(withIdentifier: "verifyTransfer", sender: self)
}

else {
print("ERROR")
let alert = UIAlertController(title: "Transfer Error", message: "You do not have the requested transfer amount in your Checking Account. Please try again.", preferredStyle: .alert)
let defaultAction = UIAlertAction(title: "Back", style: .default, handler: nil)
alert.addAction(defaultAction)
self.present(alert, animated: true, completion: nil)

}
}
func savingToChecking() {
if savingAmount - transferAmt > 0 {
transferSource = "savingToChecking"
afterTransferTotal = savingAmount - transferAmt
self.performSegue(withIdentifier: "verifyTransfer", sender: self)
}
else {
print("ERROR")
let alert = UIAlertController(title: "Transfer Error", message: "You do not have the requested transfer amount in your Savings Account. Please try again.", preferredStyle: .alert)
let defaultAction = UIAlertAction(title: "Back", style: .default, handler: nil)
alert.addAction(defaultAction)
self.present(alert, animated: true, completion: nil)
}
}
override func prepare(for segue: UIStoryboardSegue, sender: Any!) {
if (segue.identifier == "verifyTransfer") {
let verifyTransferVC = segue.destination as! TransferPinViewController;
verifyTransferVC.checkingAmount = checkingAmount
verifyTransferVC.savingAmount = savingAmount
verifyTransferVC.transferAmt = transferAmt
verifyTransferVC.transferSource = transferSource
verifyTransferVC.afterTransferTotal = afterTransferTotal
}
}
getVerifiedUser'メソッドを呼び出してユーザ認証を開始する関数を作成します。この関数は、ビューがロードされたときに呼び出されます。
import NexmoVerify //Add to top of the file

override func viewDidLoad() {
super.viewDidLoad()
verify()
}
func verify() {
VerifyClient.getVerifiedUser(countryCode: "US", phoneNumber: PFUser.current()?["phoneNumber"] as! String,
onVerifyInProgress: {
},
onUserVerified: {
self.performTransfer()
},
onError: { verifyError in
switch (verifyError) {
case .invalidPinCode:
UIAlertView(title: "Wrong Pin Code", message: "The pin code you entered is invalid.", delegate: nil, cancelButtonTitle: "Try again!").show()
case .invalidCodeTooManyTimes:
let alert = UIAlertController(title: "Unsucessful Identification", message: "Logging out. Goodbye.", preferredStyle: .alert)
let defaultAction = UIAlertAction(title: "Goodbye", style: .default) {
UIAlertAction in
VerifyClient.cancelVerification() { error in
if let error = error {
// something wen't wrong whilst attempting to cancel the current verification request
return
}
}
self.performSegue(withIdentifier: "logout", sender: self)
}
alert.addAction(defaultAction)
self.present(alert, animated: true, completion: nil)
default:
print(verifyError.rawValue)
break
}
})
}上記のように、'onUserVerified' コールバックメソッド内で関数 'performTransfer' を呼び出します。前の検証ビューコントローラで行ったように、IBActionボタン内で'checkPinCode'メソッドを呼び出し、ユーザーから提供されたPINをチェックします。最後に、'VerifyPinViewController' から 'StatementViewController' へのセグエ ('sucessfulTransfer') を作成し、転送に成功したユーザーをステートメント画面に戻します。
@IBOutlet weak var pincode: UITextField!
@IBAction func checkPin(sender: AnyObject) {
VerifyClient.checkPinCode(pincode.text!)
}
func performTransfer() {
if transferSource == "checkingToSaving" {
checkingAmount = checkingAmount - transferAmt
savingAmount = savingAmount + transferAmt
PFUser.current()?["checking"] = checkingAmount
PFUser.current()?["saving"] = savingAmount
PFUser.current()?.saveInBackground()
OperationQueue.main.addOperation {
self.performSegue(withIdentifier: "successfulTransfer", sender: self)
}
}
else if transferSource == "savingToChecking"{
savingAmount = savingAmount - transferAmt
checkingAmount = checkingAmount + transferAmt
PFUser.current()?["saving"] = savingAmount
PFUser.current()?.saveInBackground()
PFUser.current()?["checking"] = checkingAmount
PFUser.current()?.saveInBackground()
OperationQueue.main.addOperation {
self.performSegue(withIdentifier: "successfulTransfer", sender: self)
}
}
}NexmoのVerify SDKを使ってiOSアプリで二要素認証を有効にするために必要なことは以上です。
今日、2FAを有効にすることは、機密情報へのアクセスを管理し、適切なユーザー識別を保証するために必須です。このチュートリアルでは、3つの認証方法すべてを使ってデモアプリケーションを保護しました。ユーザーのユーザー名とパスワードのコンボを使用して、ユーザーが知っているもの(ログイン認証情報)を確保しました。NexmoのVerify iOS SDKを実装することで、ユーザーが持っているもの(ユーザーのデバイスIDとIPアドレスをキャプチャすることで、携帯電話へのアクセス)を確認しました。AppleのTouch IDを追加することで、生体認証を使用することでユーザー自身であることを確認しました。
Verify SDKとAppleのLocal Authentication APIを使えば、2FAを追加するプロセスは簡単で、ユーザーの機密情報を保護するセキュリティのレイヤーが追加されます。
ご意見、ご質問はTwitterまでお気軽にお寄せください。 @sidsharma_27.